Cheyenne Tunic Sew Along Day 1: Interfacing and Placket
Cheyenne Tunic Sew Along Day 2: Pockets and Yoke
Cheyenne Tunic Sew Along Day 3: Neckbands and Sleeve Tabs
Cheyenne Tunic Sew Along Day 4: Sleeve Binding and Sleeves
Cheyenne Tunic Sew Along Day 5: Hem and Cuffs
Cheyenne Tunic Sew Along Day 6: View A and Long Sleeves
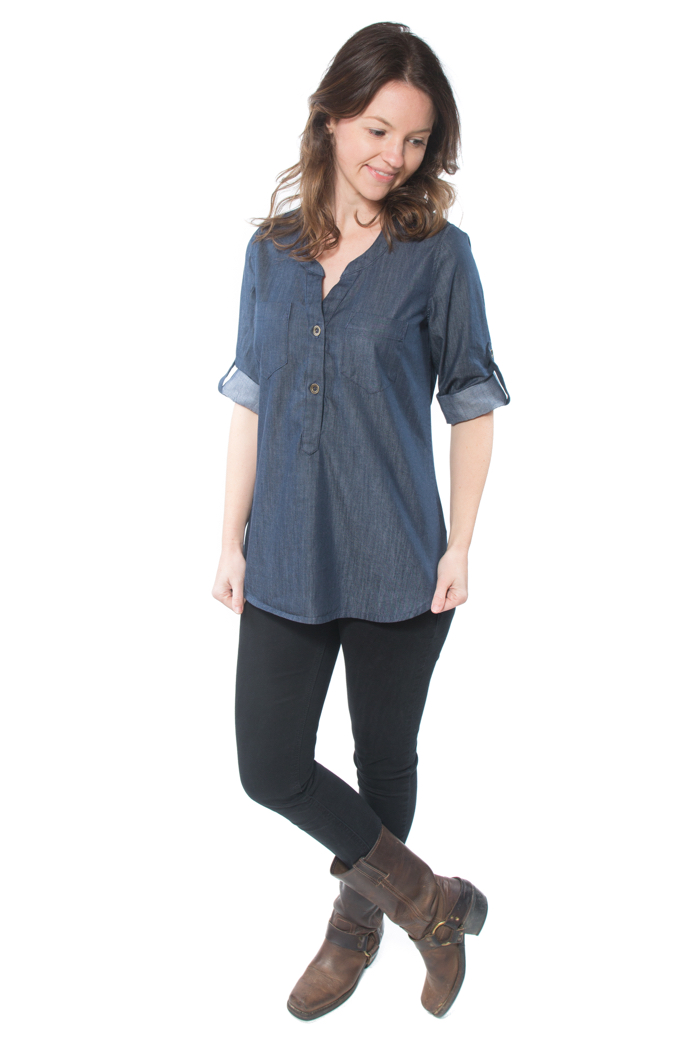
Hi and welcome to the first day of the Cheyenne Tunic sew along! We’ll be sewing up View B (the shirt from the pattern cover), and after the sew along I’ll add a few pictures to show you the more tricky steps from View A. But I promise if you can make View B, View A will be no problem! So let’s get started!
Your first step is obviously going to be printing the pattern. I highly recommend using the layers feature, as described on page 3. There are a few pattern pieces that are small enough that all the different size lines get a bit confusing. If you plan on grading out at the hips, you can also print just the two or three sizes that you plan to use. Make sure you print just the first page of the pattern first (40) to check the scale. Then continue to print the pages that you’ll need for the view you’re making (that list is also on page 3).
As you’re taping the pattern together, remember that the triangles in the margins are there to help you align the pages and to indicate that that edge will need to be taped. The pattern is laid out so that you don’t need to connect pages for the bigger pattern pieces, such as the back, fronts, or sleeve. That will help keep the taped portions manageable in size so you can fit them on your cutting table.
Review the alterations options on page 5 if you are petite or tall, or if you think you may need to allow extra ease for your bust. This pattern was designed to fit busts up to a D cup and for a person of average height (~5′ 6″). The sleeve is designed to be longer in nature than an average button-down to give the pattern an easy fit, so I recommend holding the sleeve pattern up to your body before you cut it to see where it will fall. Just remember that you’ll be removing about an inch in length for seam allowances and adding 2″ for a cuff. For this style of garment, it’s better to have sleeves that are slightly too long than too short.
Cut out your pattern according to the cutting layouts and instructions on pages 6-9 depending on your fabrics’ width and the view you’re making. Smaller sizes may not need extra fabric for matching strips and patterns or cutting some of the pattern pieces on the bias, but I recommend sizes L and above adding a small amount to accommodate these features, if applicable.
On to interfacing! Interfacing is a vital part of this pattern, so don’t skip it! I recommend a lightweight interfacing such as Pellon 906 Fusible Sheer-weight. It is important that your interfacing be lighter than your fabric otherwise you’ll end up with a very starched and stiff shirt, like a mens dress shirt. The pattern calls for fusible interfacing, which is great for most applications, but you are welcome to use sew-in interfacing as well. Always interface the wrong side of the fabric.
Interface one of the button placket pairs. They should be mirror images of one another. If you’re using a print, these are the plackets that will show on the outside of the garment, so choose your favorite ones. The right placket will eventually lay on top. The cutting instructions had you cut 1 piece of interfacing from the cuff piece, so now you can cut that piece of interfacing in half, lengthwise. Interface the upper portions of each cuff. This will also be the part of the cuff that shows on the outside of the garment, and the top of the interfaced portion will be the top of the cuff, so be sure that any prints are facing the right direction. Interface two of the sleeve tabs, if you’re using them.
Interface one back neckband and one pair of front neckbands. These will also be the ones that show on the right side of the garment. Interface the pockets above the line indicated on the pattern piece.
Now on to marking! I love this Clover brand liner for making any kind of line or notch marking. It uses a metal wheel to transfer a chalk-like powder to your fabric and comes off easily by brushing the garment. It comes off so easily, in fact, that I would just mention that you might have to redo these markings if you’re handling the pieces a lot before using the markings. For markings that are simple points I use a quilters water soluble marking pencil.
Transfer all the markings mentioned on page 10. On the front, this will be the pockets and the placket points, as well as the line marked “cut to here for placket”. Cut small notches into the fabric where indicated as well.
Mark button holes on the interfaced sleeve tabs, the interfaced tops of the cuffs (remember that they are a mirrored pair, so the buttonholes will be on opposite sides of each cuff, as shown), and the interfaced right placket only. Cut notches in the rest of the pattern pieces as described on page 10.
Ok, pattern prep is finished and it’s finally time to sew!
Sew each pair of button plackets right sides together along the outer edge with a 1/4″ seam allowance. You will be sewing an interfaced placket to a non-interfaced placket and end up with a mirrored pair.
On the inner edge of the interfaced sides of the plackets, sew a basting stitch using a 3/8″ seam allowance.
Press the plackets to the wrong side along the basting stitch.
Turn the plackets right side out and press very well. Make sure to maintain the pressed edge from the last step. The seam on the outer edge may have a tendency to buckle, so make sure it is pushed all the way out as you press and steam to make a perfect crisp edge.
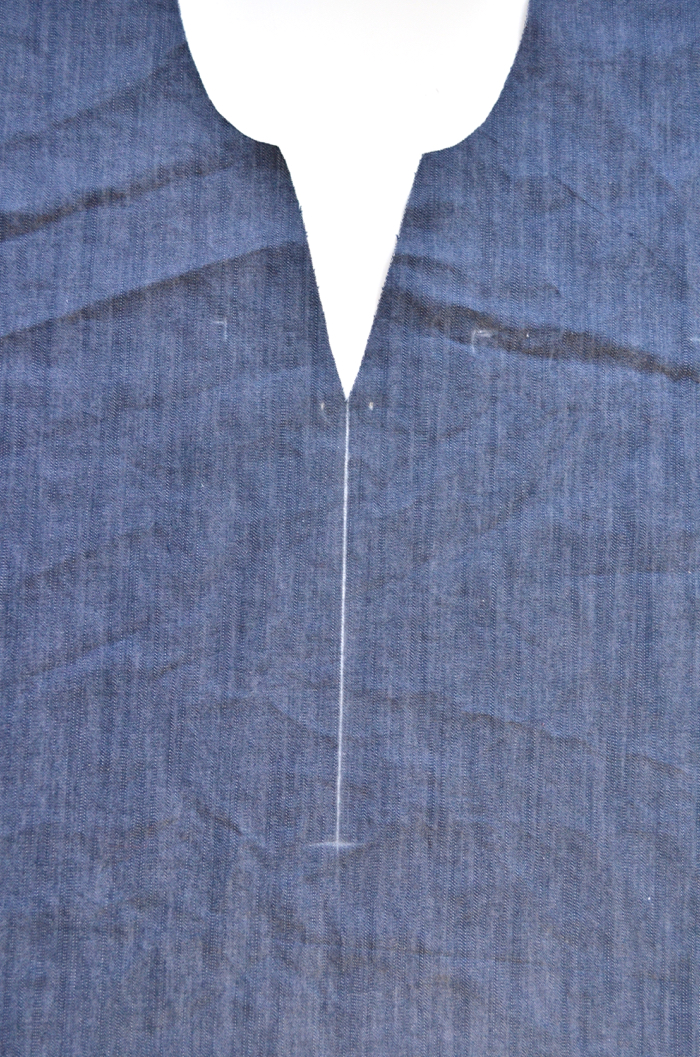
On the front of the shirt, use a ruler and a marking tool to draw a line straight down from the “v” opening to the marked “cut to” line.
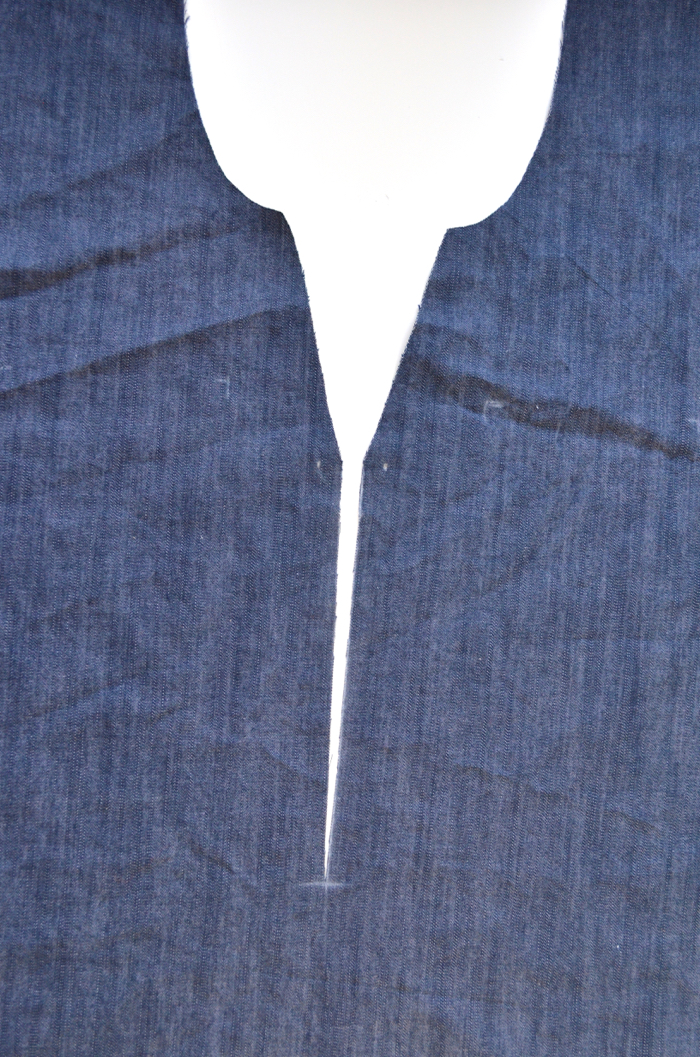
Cut the front open along the line.
On the WRONG side of the shirt, begin pinning the placket to the V opening. You will be pinning ONLY the non-interfaced side of the placket so it is laying right side down on the wrong side of the shirt. These pictures show the left placket on the left side of the shirt (as worn). At the very top, you’ll be aligning the stitch lines of the placket and shirt, not the edge of the seam allowance. As you see, the placket will rise up at an angle a bit above the shirt. Continue pinning down to the placket point, which will correspond with the bottom of the “v” opening in the shirt. Leave the rest of the placket unpinned.
Begin sewing the placket to the shirt using a 1/2″ seam allowance. When you get to the marked placket point stop with your needle in the down position.
With your needle down, pivot the rest of the placket so it aligns with the cut edge of the shirt. Continue sewing down until you reach the bottom of the cut opening in the shirt.
When you get to the end of the cut opening, take 3-4 more stitches and lock them in place.
Repeat this process to sew the right placket to the right side of the shirt.
When both plackets are sewn to the shirt, sew a short horizontal line between the ends of both stitch lines to connect them.
Cut into the corners of the rectangle you made. Cut as close to the stitch line as possible without cutting through.
Flip your plackets completely to the right side of the shirt. There should be no portion of the placket that remains on the wrong side of the shirt.
At this point, because you already sewed and pressed the plackets so well, they should basically fall into place. First we’ll sew the left placket (as worn – pictured here on the right).
Pin the folded edge of the placket to the shirt so it just covers the seam line. Place a pin horizontally at the end of the cut opening in the shirt.
Edge stitch the placket to the shirt along the fold. Shown here is the amazing edge stitching foot. If you have one, I highly recommend dusting it off and using it! If you don’t have one, it’s a great and generally small investment for perfectly even edge stitching! The metal guide on the front of the foot follows right along the fold ensuring everything stays perfectly even and straight. I’m not sure if it’s just my foot or if it applies to all of them, but I believe mine is also meant to be used for stitching in the ditch. As you can see, just below the needle there is a divot in the metal where the needle would go if you wanted to stitch directly on the line of the metal guide. Because I wanted to edge stitch, I moved my needle over 2-3 positions to the left to make sure I caught the placket in my seam.
And look at that! Beautifully even edge stitching with no effort! Sew down to the horizontal pin and then lock your stitches.
Trim the bottom of the placket just below your locked stitches. You’re only trimming the left placket that you just sewed – NOT both of them!
My fabric was pretty heavy so I ended up trimming even more to help everything lay flat in the next couple steps. If you choose to trim, cut diagonally from your locked stitches down into the non-interfaced portion of the other placket. DO NOT cut on or even near the interfaced right placket. I stopped about 1/4″ away. I would also recommend not trimming quite as much as I did on the left placket, as it made the inside of my placket not completely tucked in and beautiful.
Fold the right placket over in the same way you did the left placket, so the fold is just covering the stitch line. The right placket should fully cover the left placket at this time. At the bottom of the placket, fold the edges up to form a triangular point. This part is admittedly finicky and can take several tries to get it just perfect. I do this step at my ironing board and use lots of steam. As you can see, mine is pressed so thoroughly that I don’t even need to use pins to keep it in place. This is how you want to form your triangle if possible, because pins can distort the shape. Mark a horizontal line directly above the bottom of the cut opening in the shirt.
For perfect stitching, start edge stitching down the left side of the placket for a couple stitches before you turn and sew across the placket directly on the marked line. As you sew around the triangle and come back up the placket, you’ll sew over those stitches and lock them in place. This way you don’t have to reverse to lock your stitches and everything will stay nice and neat (see the second picture for clarification). Alternatively, you could just begin sewing directly across the marked line but leave long thread tails. Then use a needle to bring the thread tails to the inside of the garment and tie them off.
And there you have it – a perfectly and beautifully sewn placket! That wasn’t so hard, was it?
Trim the excess seam allowances at the neckline.
Now for the buttonholes. If you have a front-loading bobbin, remember to always bring your thread through that little hole at the end of the bobbin arm to ensure beautiful tension on your buttonholes every time.
Pretty buttonholes! Remember to adjust your buttonholer to accommodate the size of button you plan to use. The length of the buttonholes on the pattern are just a guide for 1/2″ buttons.
(side note: see that tiny smudge of reddish brown below the bottom buttonhole on the left? That’s blood. I put my actual blood into this garment 🙂 But really, plackets take a lot of finagling and there are several pins involved, so be careful!)
Before you cut open your buttonholes, you may want to put a drop of Fray Check on the wrong side. This can help keep the button hole looking nice and tidy without too many stray threads.
And that’s it! Your button placket is finished! (Almost any fabric will work better for plackets than this denim, so yours probably looks even better than the one pictured here!) Pat yourself on the back, grab yourself a celebratory beverage of choice, throw a shot of that beautiful placket up on social media, and force your friends and relatives to admire it!
Come back tomorrow and we’ll tackle the pockets and attaching the front and back of the shirt. I promise after the placket is finished it’s all downhill from here. The hardest part is over!


Hi there!!! I’m challeging myself to sew this Cheyenne Tunic 🙂 Day 1, first trouble though!!! I’d like to try view B, however, I’m not sure about the long or 3/4 sleeve version??? Which one is the version you used for this sew along??? Does the 3/4 version’s sleeves roll up or it is only for the long sleeve version?? Too many questions, sorry… and thank you!!! 🙂
This is the 3/4 version, day 6 shows the long sleeves!
Your pictures and steps are a lifesaver! It’s taken me three days to complete day 1 but I’m soldiering on. Just wanted to add a quick note for those of us who are sewing buttonholes for the first time: triple check to make sure you are adding buttonholes to the correct placket side. I added them to the wrong side but was able to rip them out with a seam ripper…very carefully…
I’m really excited to start on this pattern, but I want to make a collared pop-over. I mashed the front of view A and B together, which basically ended up being the front of the button-up, with 1″ cut off from the middle, and cut on the fold, but I’m doubting myself, because I would think the piece should be wider since it had to account for the button band. Have you tried this? Am I making any sense?? Thank you!
J’aimerais avoir accès à mon compte pour télécharger le patron commandé hier
ça commence à etre vraiment pénible de chercher partout pour avoir accès a son compte pour imprimer
quoi
Merci de prendre en compte ma demande
Love this tutorial. My issue is that on both my muslin and main garment, there’s a pucker on the front left bottom button placket corner when I try to line up the plackets on top of each other. If I gently pull the fabric so the pucker is gone, then the left and right placket miss overlapping perfectly up by about 1/4”. Any thoughts on how to avoid this? Thanks!
Hi! When you topstitch the right placket over the left, are you catching the left placket underneath or keeping it out of the way. Thanks!
When you are sewing the folded triangle bit at the bottom you are catching both plackets, but the edgestitch down the right placket should not catch that (unless you want to sew the shirt closed so the buttons are just decorative).