
Welp, an instagram ad got me. I saw this navy jumpsuit that was identical to the Greer in every single way, except it had a center front placket with aged brass snaps and a scoop neckline instead of a V. After a month of seeing that ad regularly, I realized resistance was futile and ordered some yummy navy linen and got to work!

Want to make your own? Let’s do it!

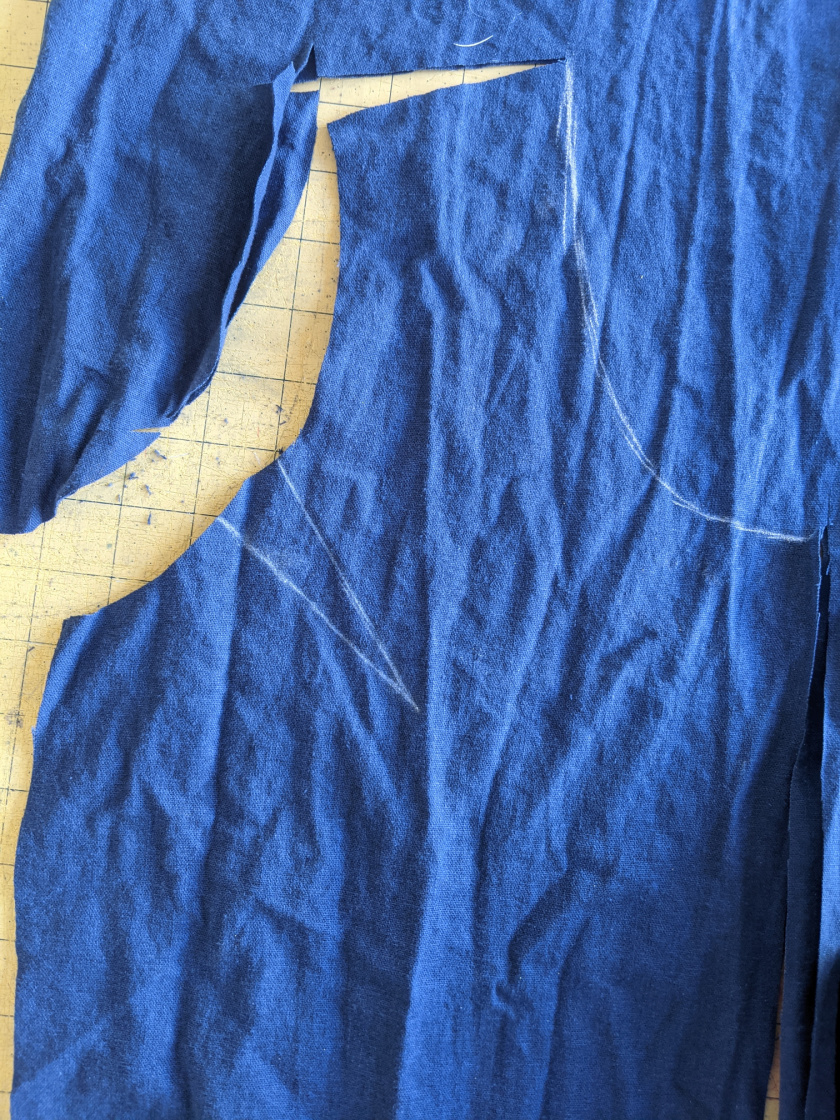
Start by cutting out your Greer Jumpsuit (view A). When you get to the neckline, do not cut the V. Instead, trace a gentle scoop neckline, starting at the inner shoulder and stopping at the center front of the neckline where the lowest point of the V would sit. Make sure you come to the center front at a 90 degree angle. I eyeballed this with my chalk, or you could use the neckline from another pattern as a guide, but really this is a super simple curve – don’t overthink it!
After cutting out all the pattern pieces, determine where you want your placket to stop on the front. I recommend holding the front piece up to your body and marking a point a couple inches down from the pocket reference points. The placket needs to be long enough that it can open at the full circumference of your hips, otherwise it will be hard to shimmy in and out of this garment. For reference, I marked a point 17″ down from the center front neckline, but I am shortwaisted, so yours may be longer.
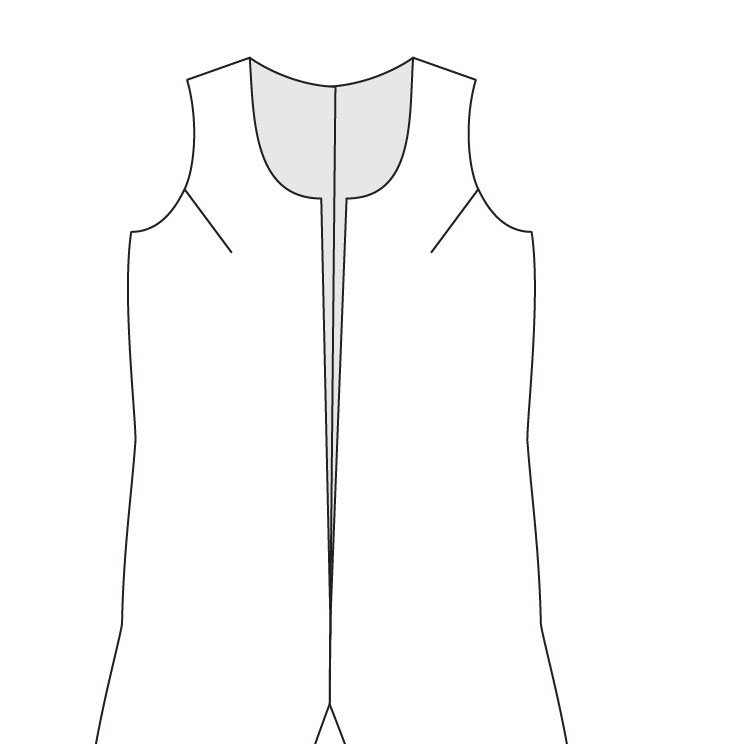
Now sew the Greer as written. At step 13, instead of inserting a zipper, simply sew the backs right sides together from the neckline down and around the crotch and back up to the front side until you hit your marked point. Lock your stitches there.
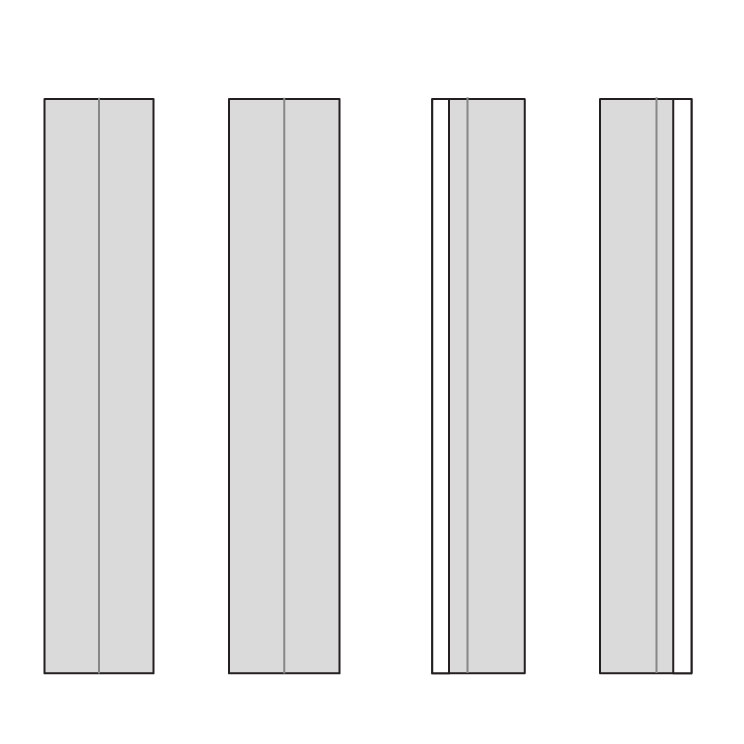
Cut two placket pieces and then interface them fully with fusible interfacing. The plackets should be rectangles 3″ wide. The length will be the length of your center front from neckline to marked point plus 3″. So, my placket pieces were 3″ x 20″.

Press the plackets in half lengthwise, wrong sides together. Open them back up again. This crease will be used as a fold line later in the process. Press one long edge of each placket 3/8″ to the wrong side.
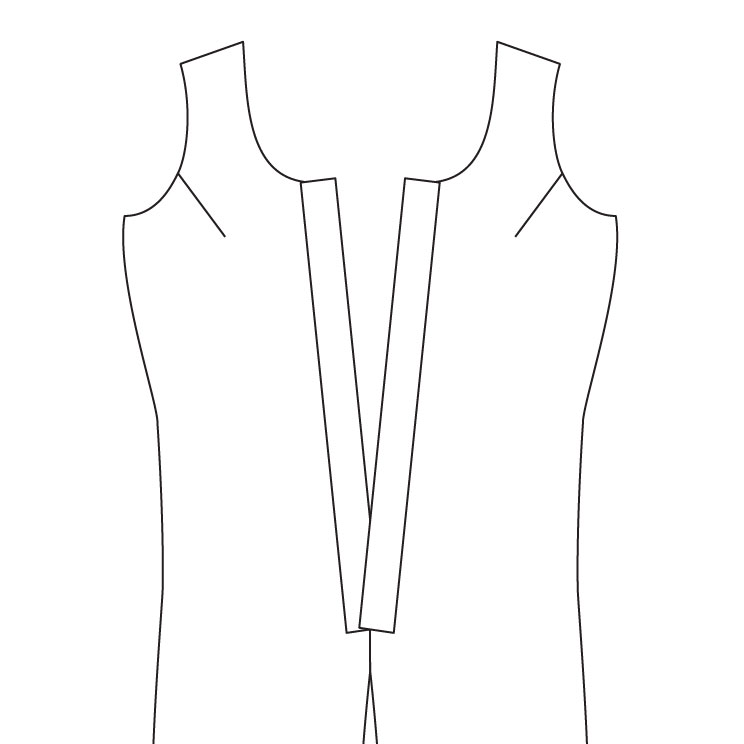
Cut 1/2″ from the center raw edges of the front piece above your stitch line to remove the seam allowance. Make sure the seam allowances below that point are pressed open.
The following instructions show how to insert a placket. If you prefer photos, the sewalong for the Cheyenne Tunic illustrates these steps almost exactly. The main difference is that the placket on the Cheyenne has an angle in it, so it is two pieces instead of one folded placket. But construction is the same. You can find that post here.
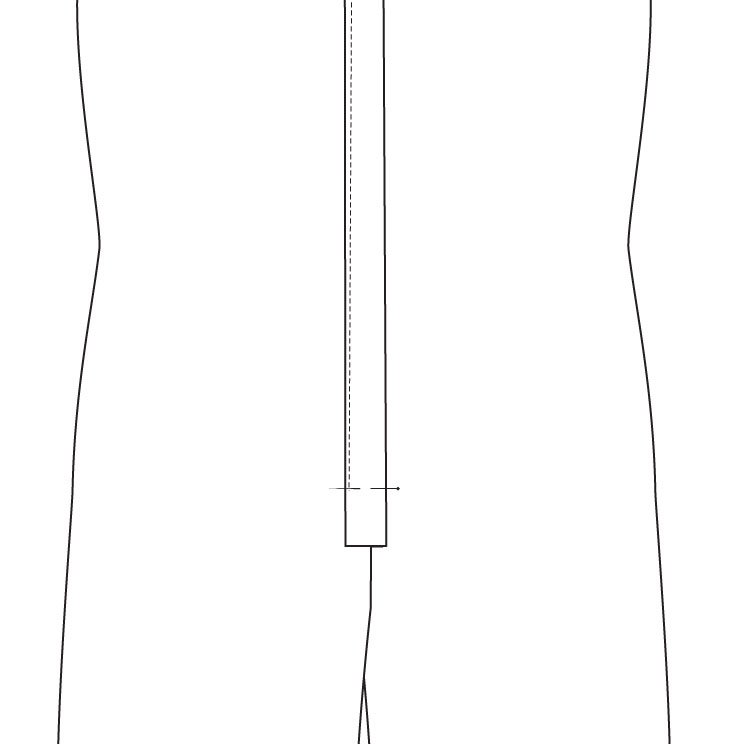
Sew the plackets right side down onto the wrong side of the jumpsuit at the center front using a 1/2″ seam allowance. When you reach the point where the center front is stitched together, sew for another half inch or so and then stop and pivot to sew across the bottom. Then sew back up to the neckline, securing the other placket to the other side of the jumpsuit. You are sewing the edge that is not pressed. Cut a diagonal line into each corner to open up the box at the bottom. (this is shown in the Cheyenne sewalong.)
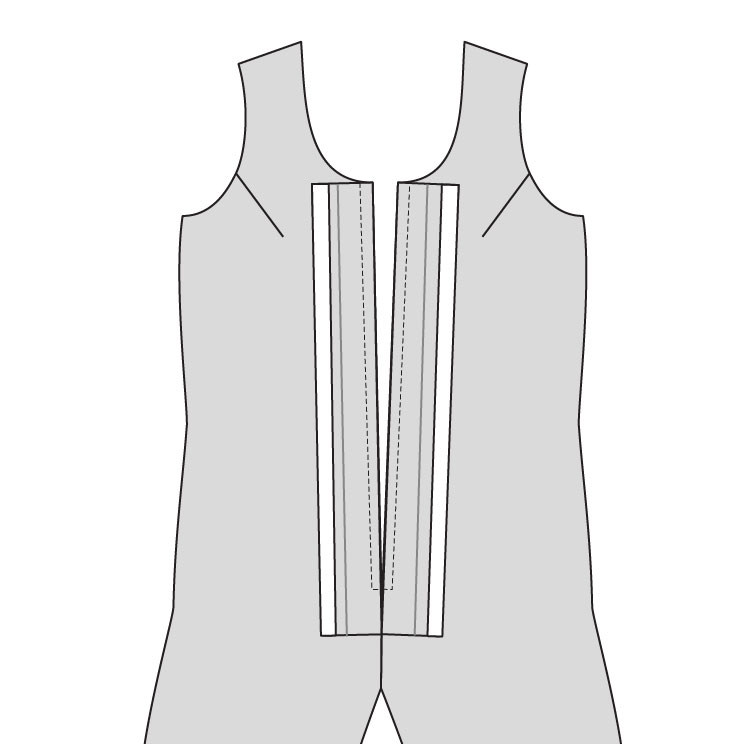
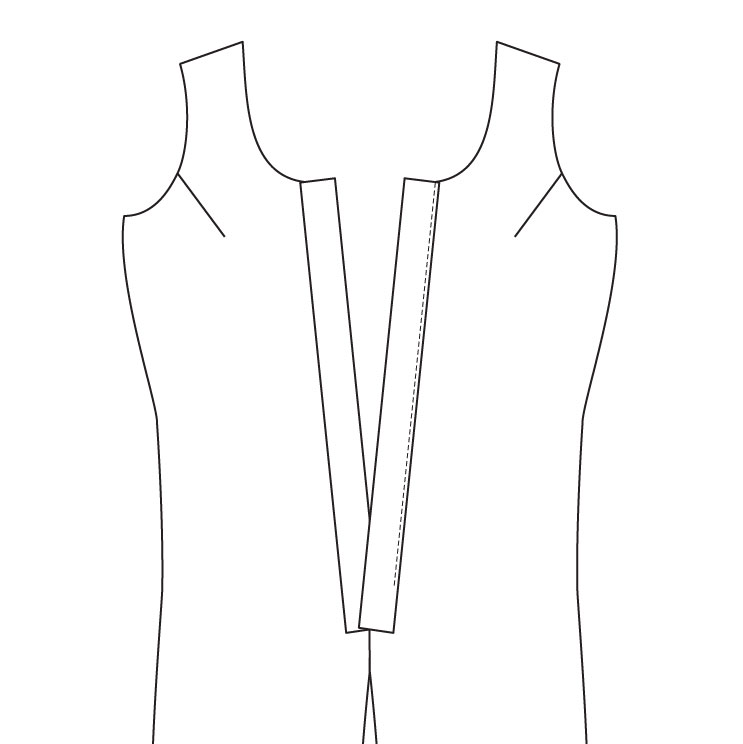
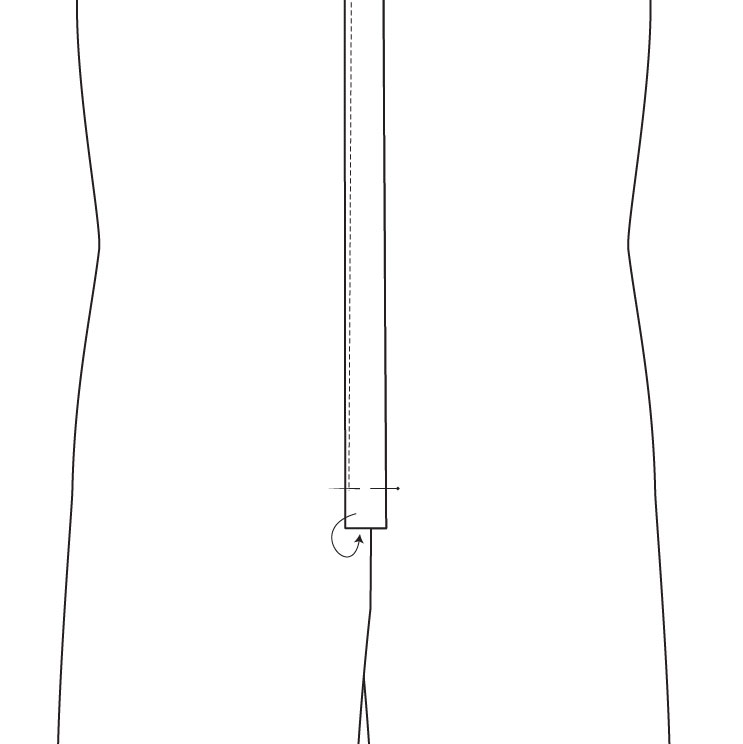
Turn the jumpsuit right side out and turn the plackets to the right side as well. Fold and press them along the first center crease line you created. The pressed edges should still be turned to the wrong side so you have no unfinished edges showing on the long sides of the placket.
Edgestitch to sew the placket on the right (left when worn) to the jumpsuit. Stop sewing when you get to the point where you stitched horizontally across the placket. Lock stitches. If you look at the inside of the garment now, this edgestitching should sit just a tad farther in on the edge of the inner side of the placket.
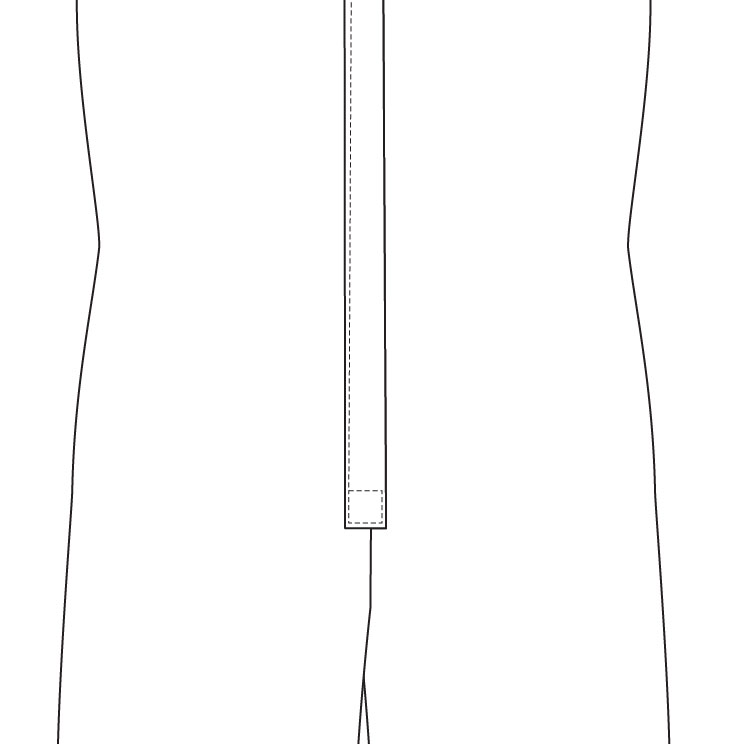
Trim the bottom of the sewn placket so it only extends about half an inch below the cut opening.
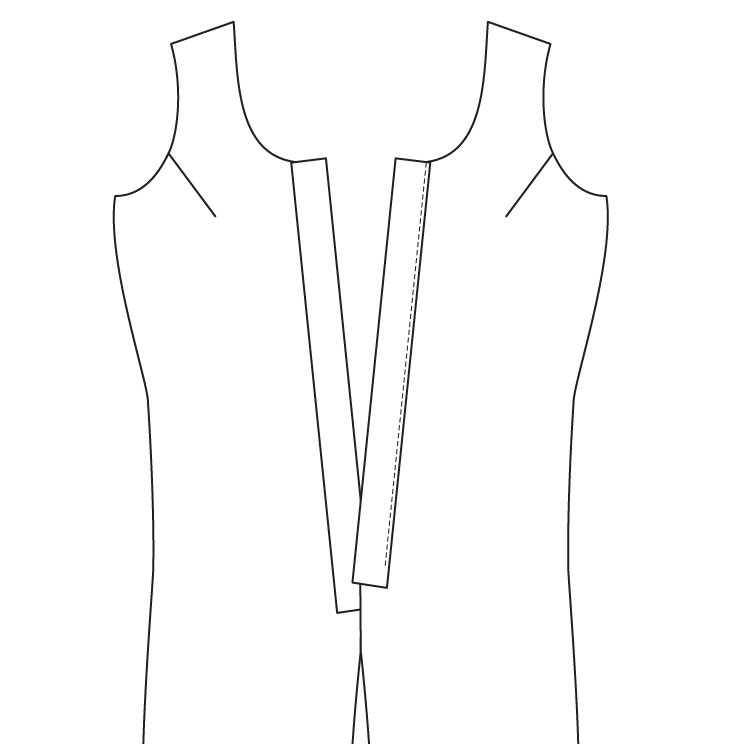
Sew the other placket in place in the same way as the first, stopping again at the cut opening. Do not trim this side.
Align the right (as worn) placket directly over the left placket and press them well. Stick a pin horizontally through the two plackets and the jumpsuit just below the horizontal stitch line.
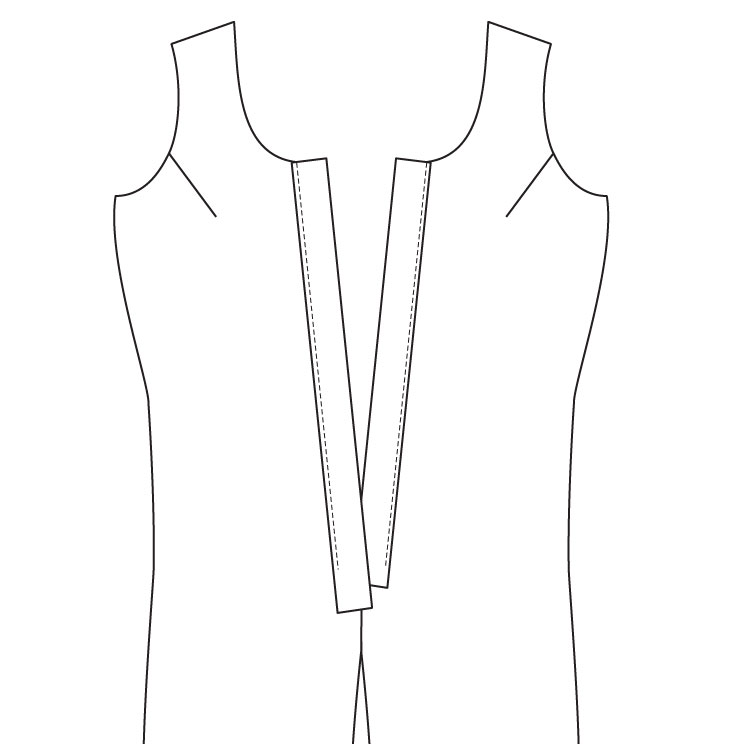
Form the bottom of the placket either by turning the raw edges up and pressing under or forming a triangle. This tutorial and my jumpsuit just have a rectangle, as I feel it suits this style more, but the Cheyenne sewalong shows a triangle if you want to try that style. Whatever way you choose to fold it, make sure to press the folds very well to both keep them in place and reduce the bulk of the fabric at that point.
Starting where the stitches left off, sew across the right placket, catching the left placket and garment underneath. Sew around the lower placket edges, pivoting until you are back where you started. Overlap the vertical stitches for a few stitches and lock stitches in place.
After this step, I suggest finishing the Greer fully. You can use this French bias tape tutorial to finish the neckline. When the neckline is complete, sew the buttonholes and buttons to the placket, or apply snaps. Start at the top so the first snap is just below the bias tape, and then measure down to have a closure every 3″ or so. Use chalk to mark and adjust the position of your fixtures before you apply them until you have an aesthetically pleasing placement. I do not recommend allowing more than 3″ between fixtures though, as you could have gaping.
And you’re finished! This is the perfect summer outfit to throw on and go – no squeezing into hard pants or figuring out separates that match. It also pairs well with a cardigan if you’re going to be indoors or the weather starts to turn. The Greer also makes a fabulous vacation outfit since it is all one piece. If you make it with a linen blend, it will look beautiful with the inherent wrinkles, so you won’t have to deal with that either! Greer makes a fantastic swim cover too.
I love to wear mine as-is with comfy sandals, or sometimes I’ll roll the ankle a couple times for more of a cropped look. Have fun styling your Greer, and be sure to tag us on social media using #HeyJunePatterns and #GreerJumpsuit so we can see your projects too!


Sources
Fabric: Robert Kaufman Brussels Washer Linen in Indigo (may be called navy by some retailers). This fabric can be purchased from numerous online retailers, including independent shops on Etsy. I suggest checking your local quilt shop and then doing some googling.
Snaps: Antique Brass Spring Snaps from Noodlehead. I also got the setting tool from her shop and used her tutorial to set them.
Shoes: Birks
Chaco sunburn: model’s own.
Do you know how excited I am? Very much looking forward to giving this a try. Thank you soooooo much!!!
I really love this!!! Did you use the 1/2” snaps? Or the 5/8” size? Thank you!
1/2!
Super cute and helpful…I like how the sunburn is your own! Ha!
Has anyone turned a Greer into a pinafore?