Up to this point, all Hey June patterns except the Charleston Dress use the French method of applying bias tape. Once I discovered this method, I was sold. It is so much simpler and more intuitive than “regular” bias applications, and has the benefit of only requiring one pressed fold if you’re making your own. This tutorial will walk you through the what, why, and how of applying bias tape using the French method.
What:
Bias tape is just fabric that has been cut on the bias, or the diagonal. If you picture your fabric grain as a north/south line down the fabric, the bias is cut exactly at a 45 degree angle to this line. Bias tape is usually a strip at a width that will work best for your project, but full widths of 1-2″ are the most common. If you buy your bias tape from a store, it will be single or double fold, which means it has been pressed lengthwise to create folds. Those folds are usually used as a sewing guide and will help with the bias application. Those tutorials are numerous, so if you want to see how single or double bias tape can be applied, just google.
Why:
Because it is not cut on grain, the bias is not restricted by the warp and weft threads and can stretch. This allows it to bend around curves, and makes it specifically suited to finishing the edges of necklines and sleeveless armholes. It can also be used to hem circle skirts or even straight edged hems or finish seam allowances. Bias tape is endlessly useful. The only other way to finish curved edges while sewing wovens would be to make a facing (or I suppose a micro hem, but good luck getting that to lay nicely). These two methods are usually interchangeable depending on your preference, but there are certainly times when one works better. For example, a sheer fabric benefits from a bias finishing because a facing would be visible from the right side of the garment. In the end, it’s up to you to decide how you want to finish your curved edges on a garment, and a pattern that calls for a facing can easily be swapped out for bias tape, and vice versa. Just make sure to pay attention to seam allowances so you’re subtracting the same amount from the curved area.
I also believe it’s almost always best to make your own bias tape. This will ensure that the edges don’t pull/shrink/resist shrinking at a different rate than your fashion fabric. It also means that the bias will match perfectly in case anyone catches a glimpse from the outside of the garment. It only takes a small amount of fabric to make a long length of bias tape, especially if you use the continuous bias cutting method, making it much cheaper as well. If you don’t have enough fabric, or you’re using a costly fabric that you don’t want to waste on bias, you can also make your own tape with a similar weight fabric and still have better results than store-bought tape. For example, a Liberty of London lawn garment could be finished with handmade bias made from cheaper lawn or voile fabric and the weights would match, even though the fabrics were slightly different. When the stiff store-bought bias is used on lighter weight fabrics, it often causes the garment to be stiff or even stick out around the curves. Finally, if you’re making your own tape, it can be pretty tricky to accurately press the offset creases needed to make double fold bias tape, even with the little metal bias tape maker gadget. Folding the bias tape in half once for the French method is far easier.
How:
And now to the tutorial! Remember, this is particular to the French method.
1. Cut your bias tape. Most patterns will either have a pattern piece or tell you the full width to cut. I would suggest not cutting anything under 1.75″. 2″ is great for thicker fabrics. Piece the bias tape together using the quilter’s method of joining bias to reduce the bulk of the seam allowances if necessary. Once you have one long length of tape, begin folding it lengthwise, wrong sides together, and pressing it. Even if your fabric doesn’t hold the press well, the crease will be helpful when applying it. Use lots of steam and pull the bias slightly so it stretches out.
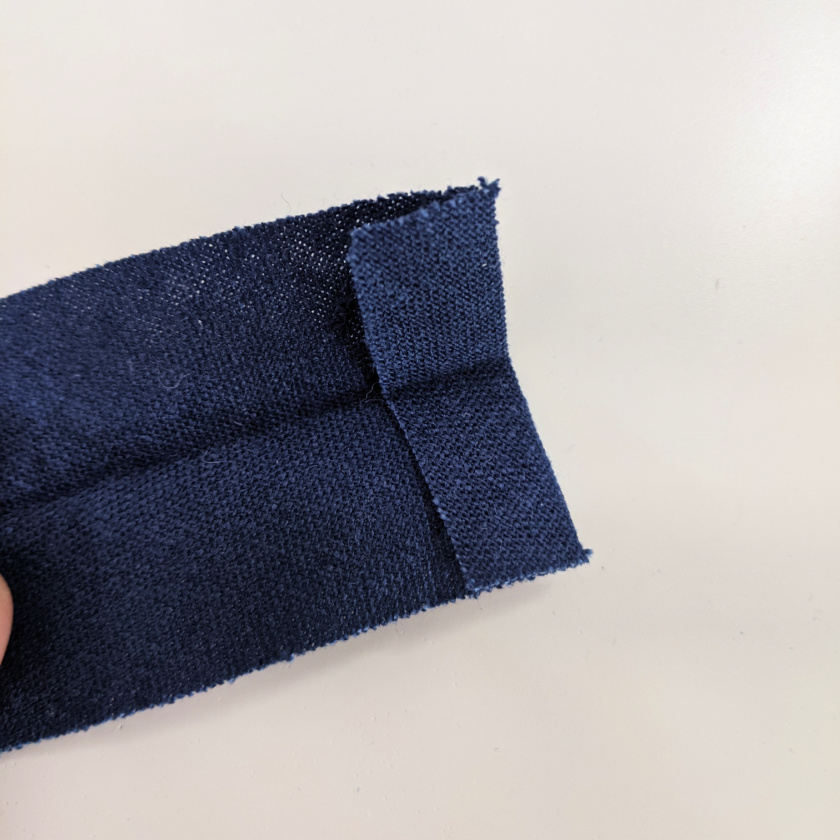
2. If you are not sewing the bias in the round, you will need to close one short side so it doesn’t have raw edges sticking out. Sewing in the round occurs on sleeveless arm holes and necklines with no opening as well as hems, for the most part. If your pattern has a zipper or button placket or another kind of opening, you will need to close one edge first. The picture below illustrates how to do that – simply fold and press the short end to the wrong side of fabric by about 1/2″.
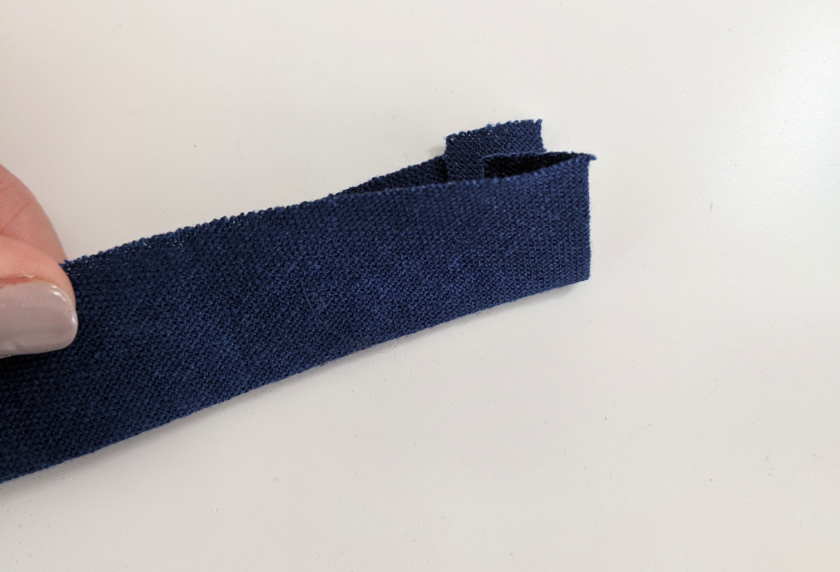
3. After finishing one short edge, refold the bias tape along the original crease and press.
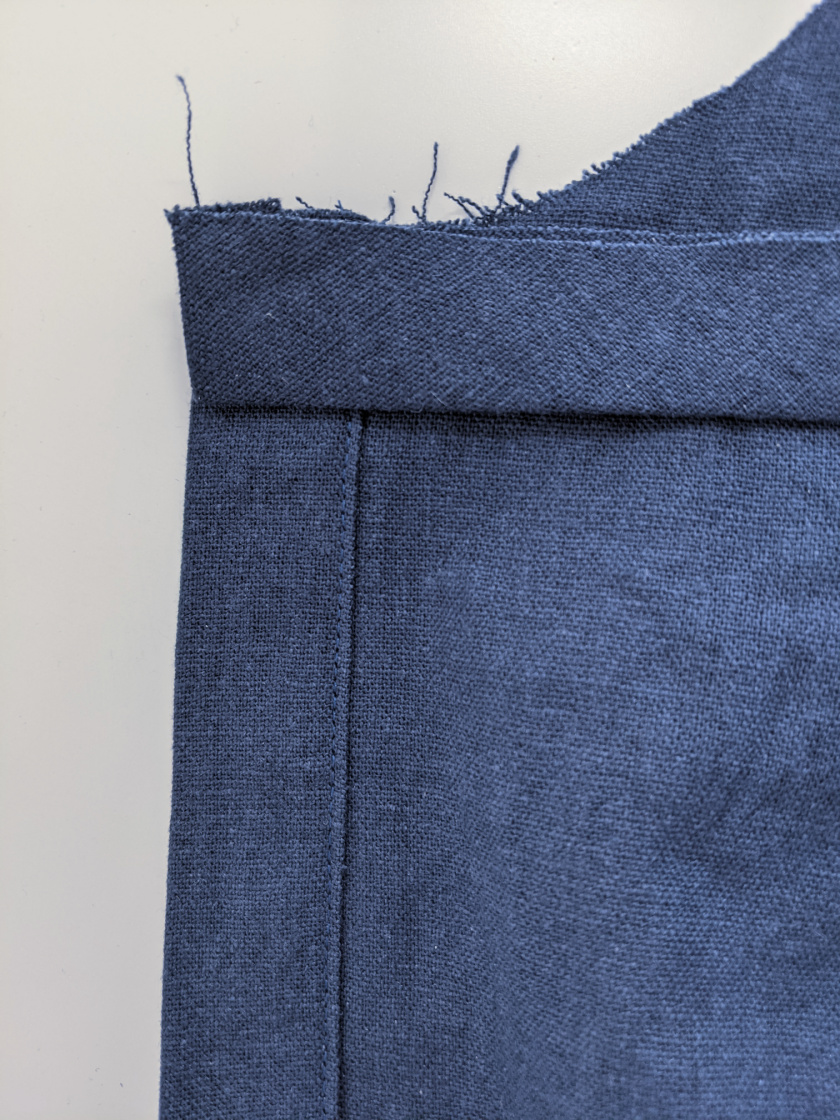
4. Lay the bias tape right sides together with the curved area you wish to finish with bias tape. The two raw edges of the bias tape will align with the raw edge of the garment. If you are sewing in the round, leave at least 4 inches free on one end. All Hey June patterns will illustrate the additional steps necessary for sewing in the round. This neckline has a placket, so I’m butting the folded short end of the bias tape right against the center front edge of the placket.
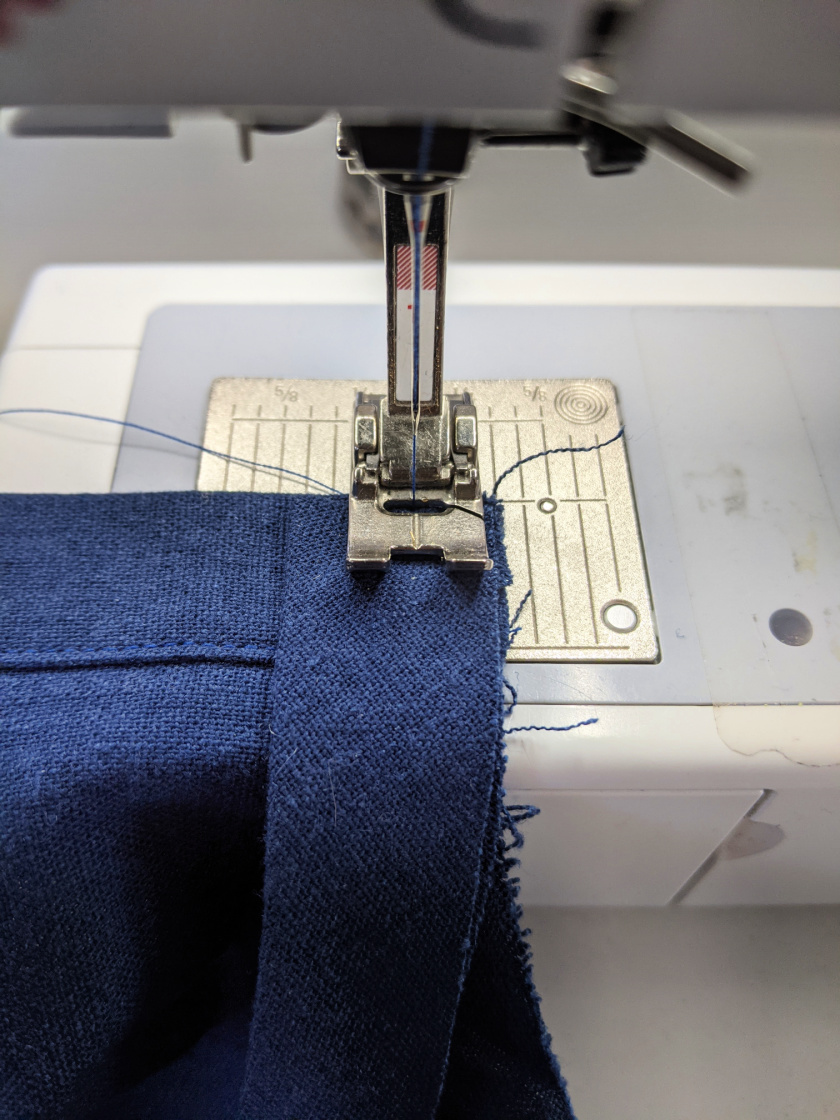
5. Begin sewing the bias tape to the garment using the suggested seam allowance, locking stitches in place. If your bias tape is 1.75 – 2″ wide, I suggest a 3/8″ seam allowance.
6. Continue sewing the bias tape around the curve, holding the end of the tape in your hand so you can maintain a taut tension on the tape. Do not pull the garment. The bias tape does not need to be stretched to its full limit, but pulling gently on it will give it the tension it requires to keep the curve sitting nicely against your body instead of dipping or waving. Because you will need to keep the bias pulled gently as you sew, do not use pins to attach the bias tape before sewing. Simply sew a few inches at a time, using your left hand to maintain tension and your right hand to maintain seam allowances. Go slowly and stop every couple inches to recalibrate.
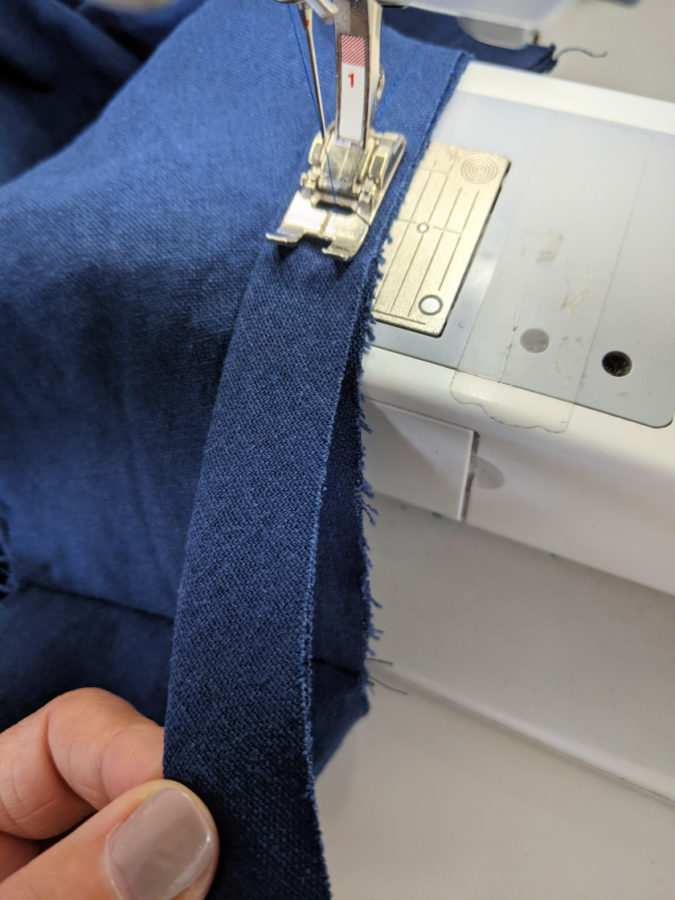
7. If you are not sewing in the round, stop sewing an inch or so before the end of the garment. If you are sewing in the round, you will stop several inches before you reach your starting point and the pattern will walk you through sewing the two tails of bias tape right sides together on the diagonal.
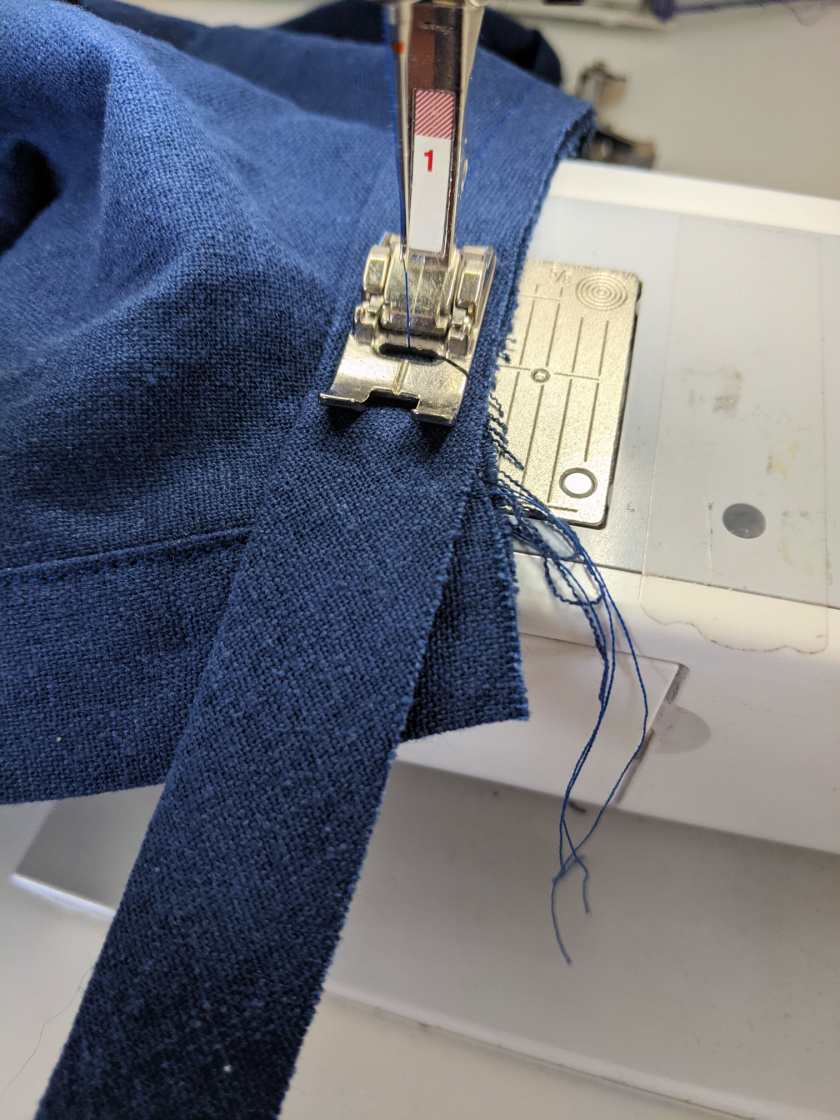
8. Trim the excess tape so it is about 1/2″ longer than the garment.
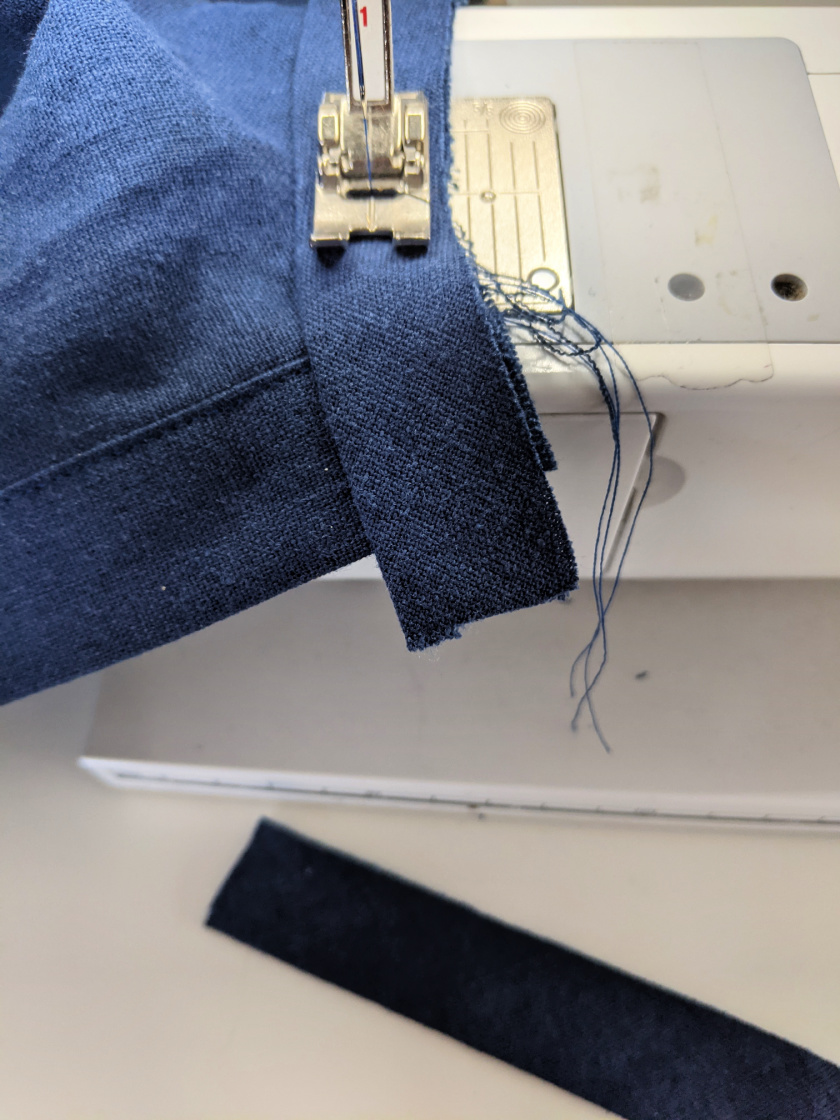
9. Open up the tape and fold the excess in, just like you did at the starting point. Continue sewing to the end of the garment, locking stitches in place.
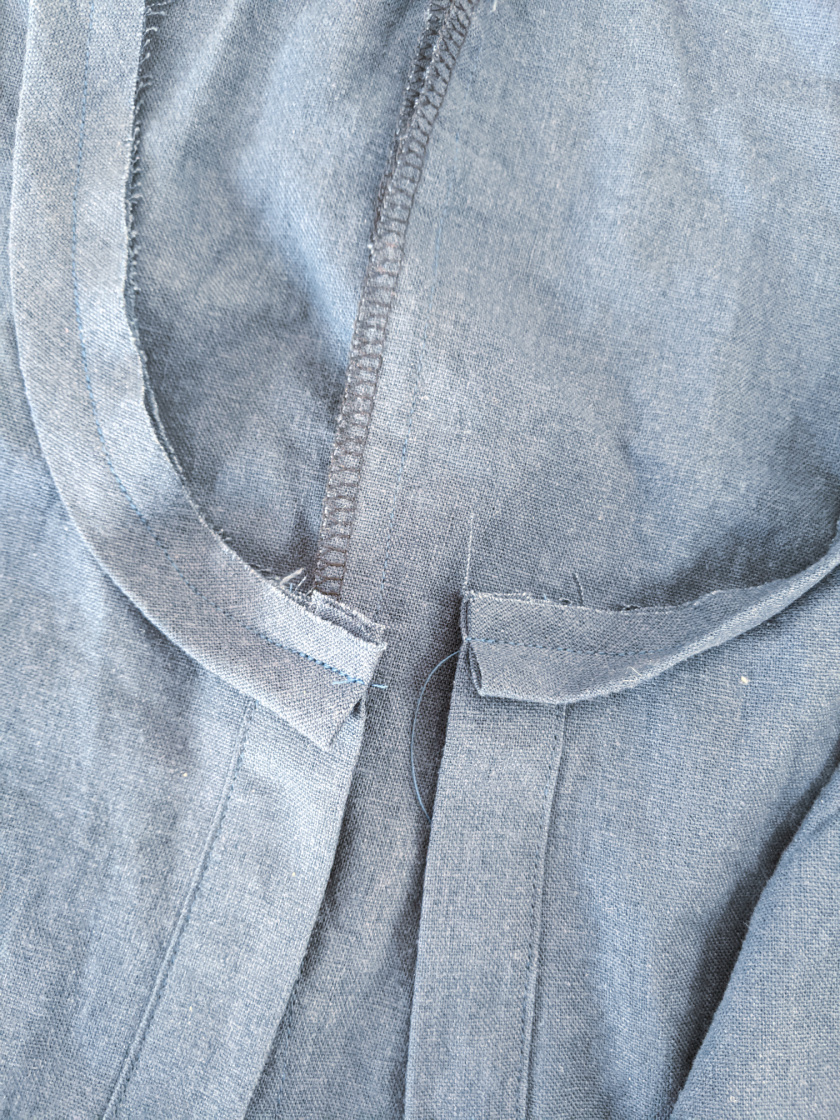
10. Now you will prep the bias tape for understitching. All bias applications benefit from understitching, but it is extremely important for this method because you are flipping two layers of tape to the inside of the garment. First, trim the seam allowances to about 1/8″. Do so very carefully so you don’t cut the garment. I trim a few inches at a time, then stop and shift my garment to make sure I don’t catch it. You are trimming the bias tape and the garment seam allowances in this step.
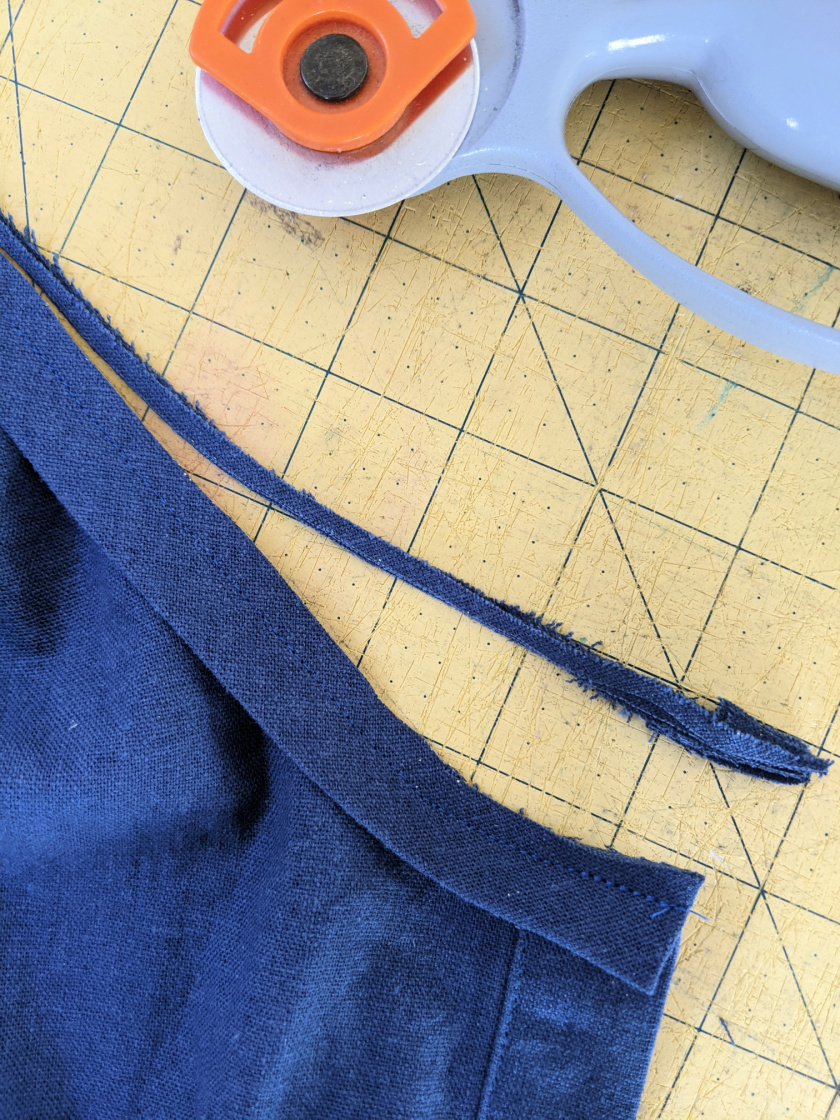
11. Now, press the bias tape up, away from the garment, and press the seam allowances up as well. Press from the right side of fabric, using your iron to push the bias away from the garment. It can have a tendency to “collapse” into the seam, which will result in the bias tape being bulky and non-uniform in width. Here is what the outside will look like:
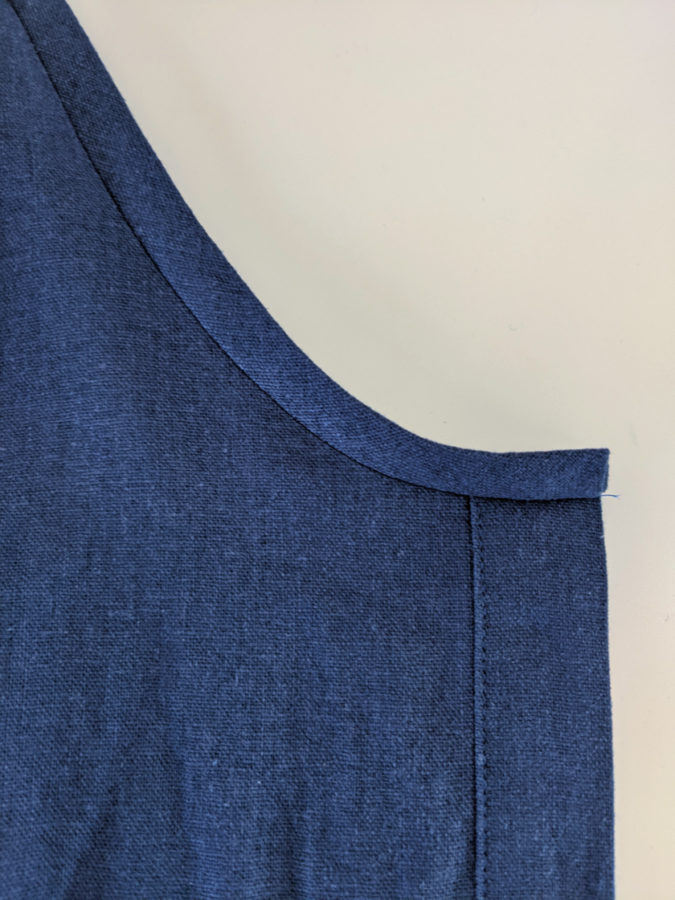
And the inside:
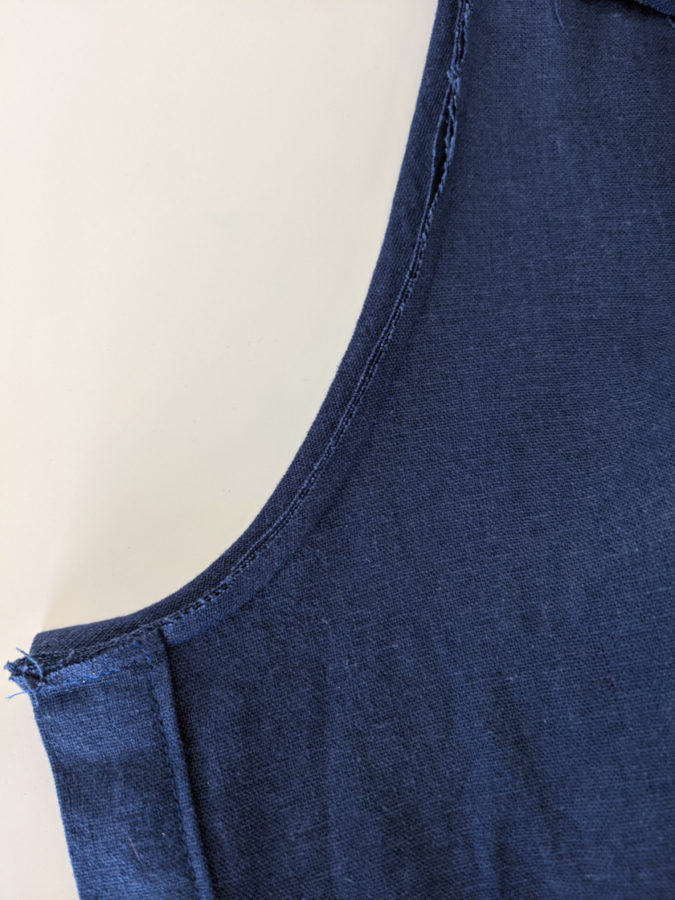
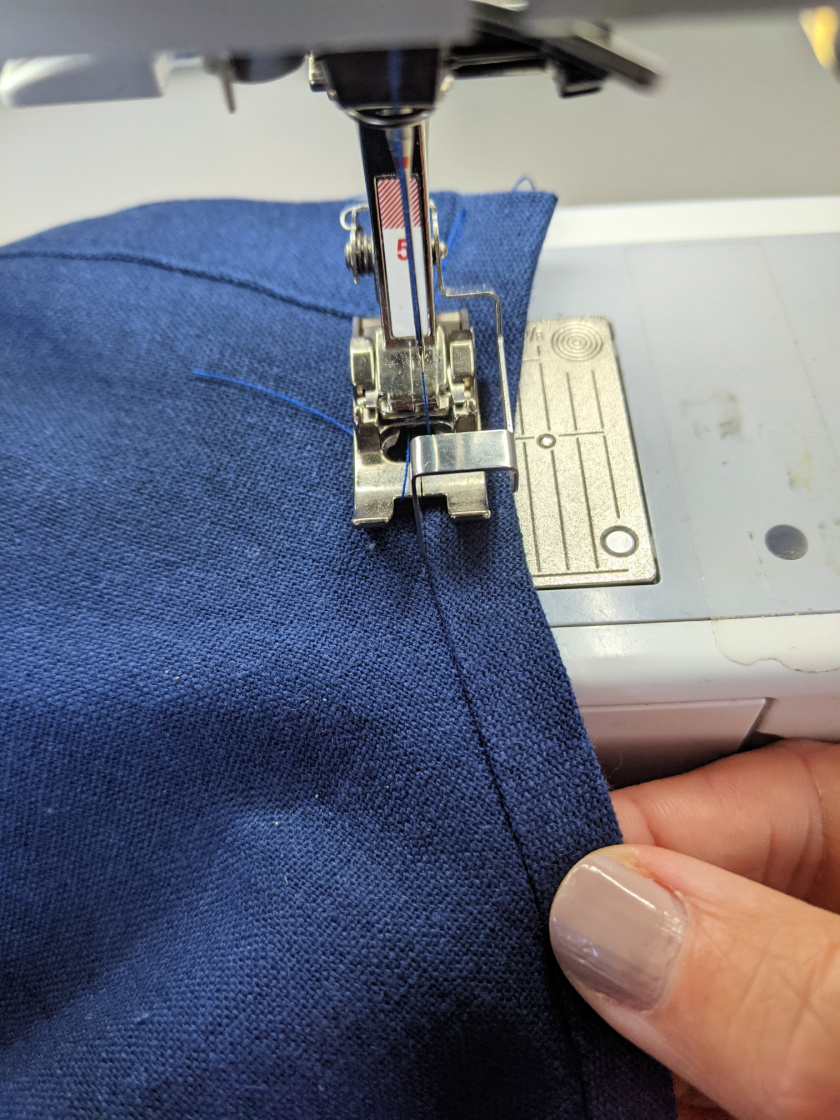
12: Understitch the bias tape. All understitching is done by topstitching on the piece that isn’t the main garment. In this case, it is the bias tape. But understitching can also be done on a facing, as shown in this tutorial. To understitch, simply topstitch very close to the seam on the bias tape, catching the seam allowances underneath. An edgestitch foot is crucial for this step, as it will keep your stitchline perfectly even and save you from having to closely and carefully watch your stitchline. Place the “blade” part of the presser foot into the seam. Move your needle over so it is only on the bias tape. (FYI: If you want to stitch in the ditch, you would leave your needle in the center position and sink the blade into the seam.) If you simply keep that metal blade piece of the foot in the seam as you sew around the curve, the topstitch will remain perfectly even with little effort. This presser foot is my most used one, outside of the regular straight stitch foot, and it is by far my most recommended tool. I use it every single time I top stitch. If you don’t have one, I suggest that it is worth the small investment. Most presser feet are under $20.
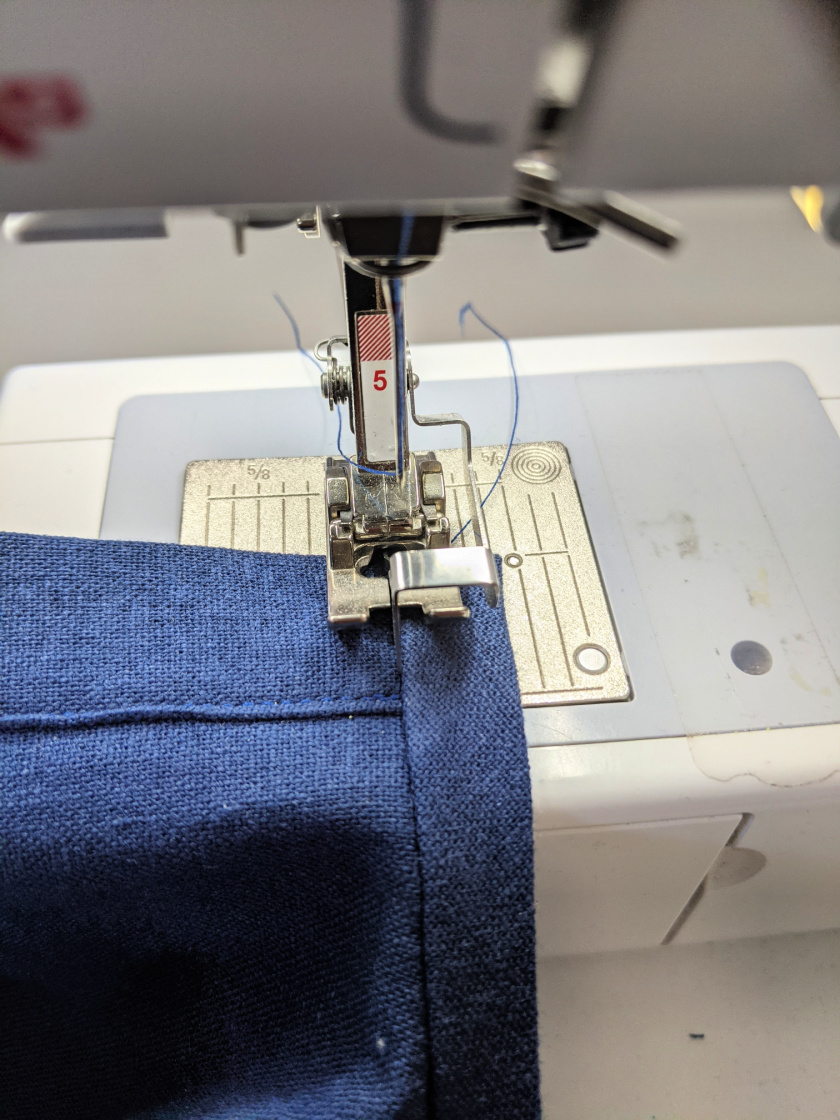
The below picture better shows the needle position, over to the right.
12. After understitching, your bias tape will look like this from the right side:
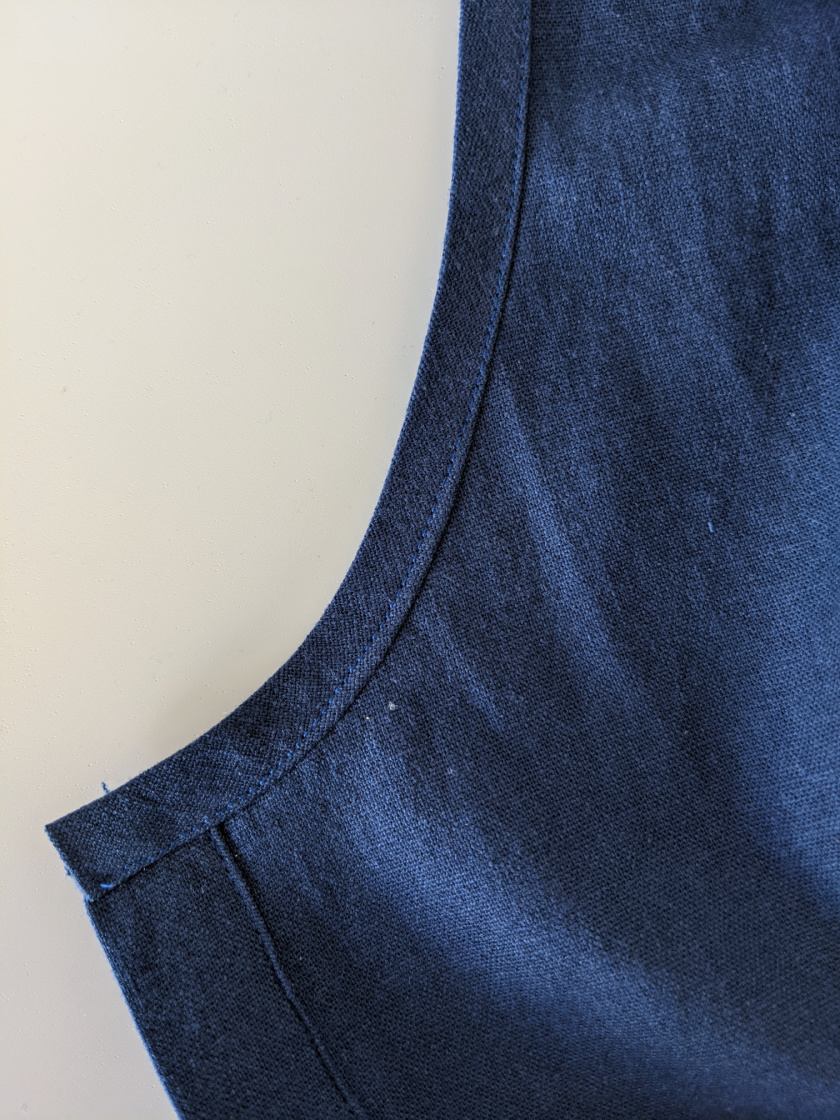
And on the wrong side, you will see that the seam allowances have been caught in the seam. This stitch will help keep the bias tape on the inside of the garment, so it doesn’t peek out around the curves.
This is the point where I see most people stop when sewing the HJ patterns that use the French method. The problem with stopping here, as you can see, is that the inside is unfinished and ugly. It also means that the curve is now 3/8 – 1/2″ wider than it was drafted to be. On a neckline, that may not be a big deal. But if you have a sleeveless pattern, that width is added at the neckline and at the armhole, and now the shoulder seam is 1″ wider than drafted, leading to some real issues. I’ve seen garments that are supposed to be sleeveless look like they have a cap sleeve because of this error. Simply reading the instructions and following them in order will prevent this issue.
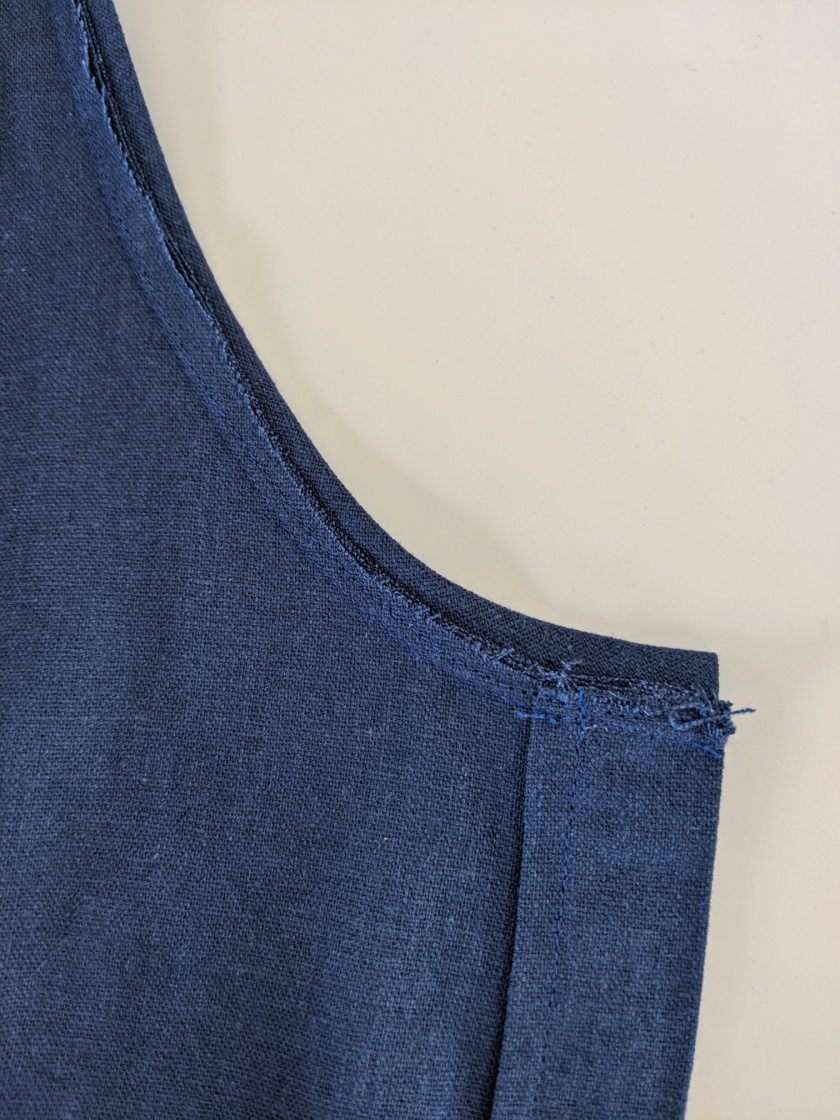
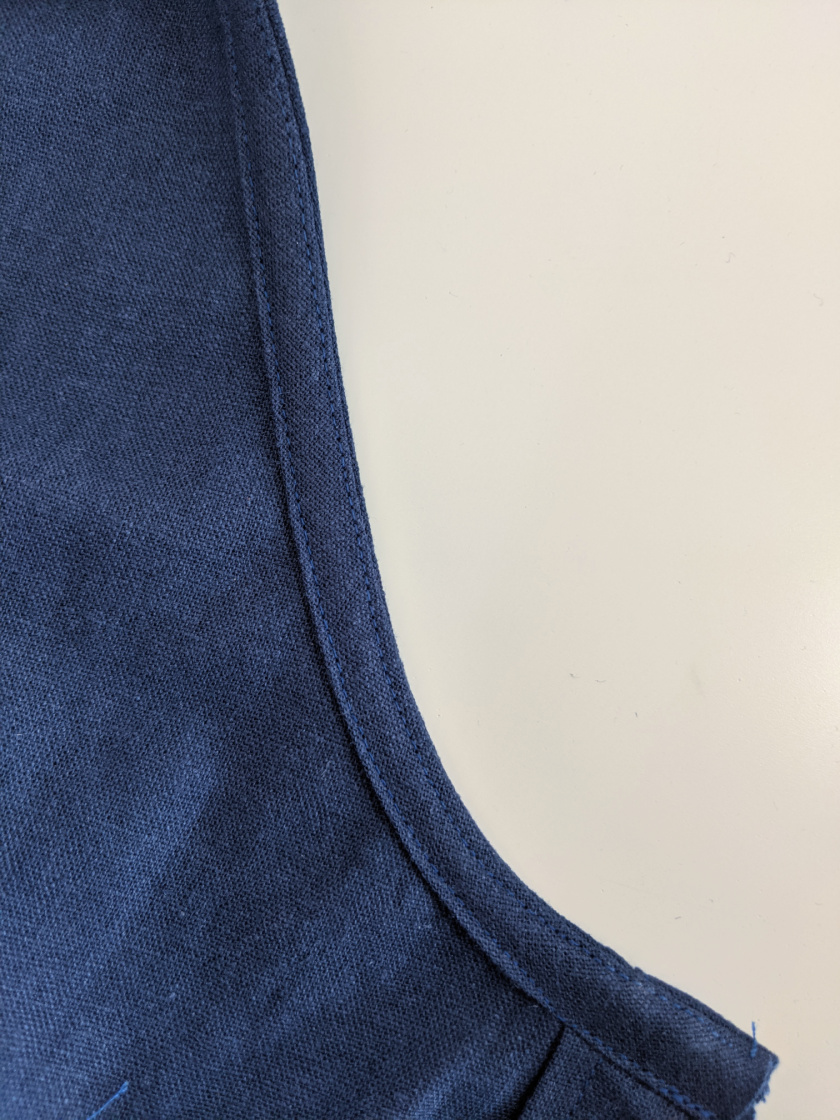
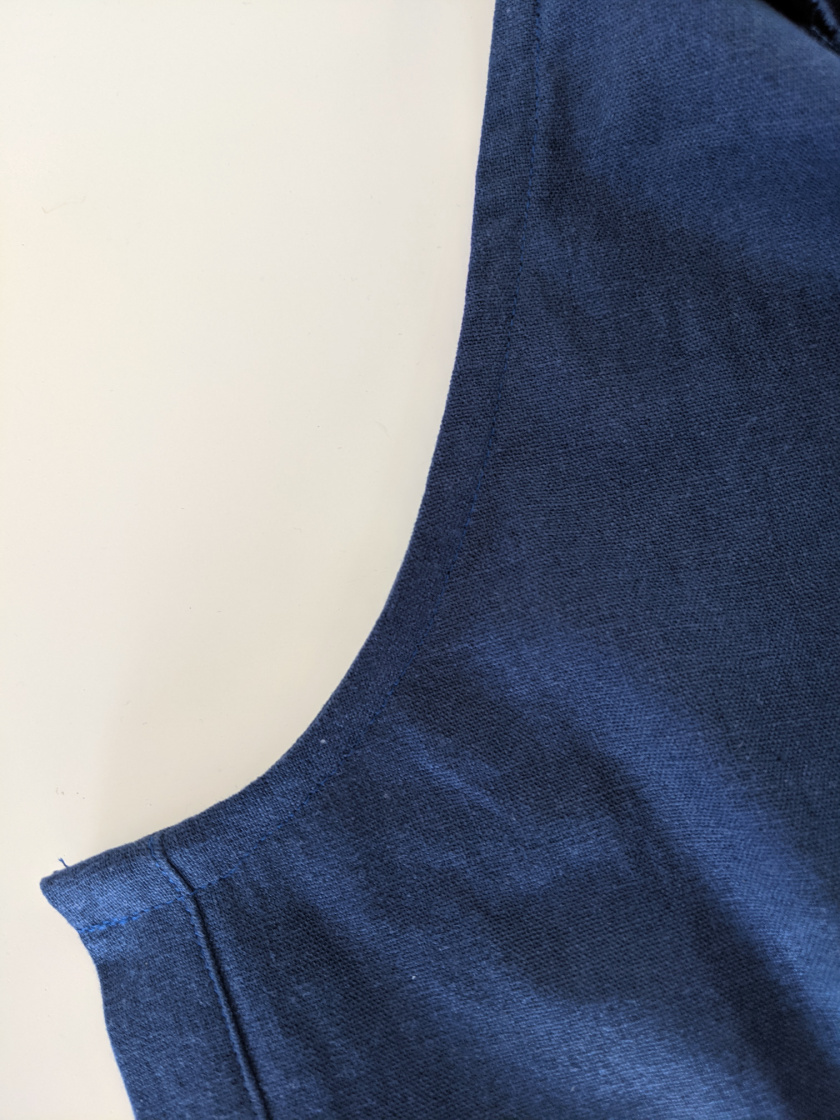
13. But the good news is that you’re almost done! Now simply press the bias tape fully to the wrong side of the garment and repeat the same step as understitching to sew along the fold of the bias tape to secure it (You won’t have to change your foot or move your needle.) For those counting, this is your third pass on the same curve, but all of that sewing will be well worth it!
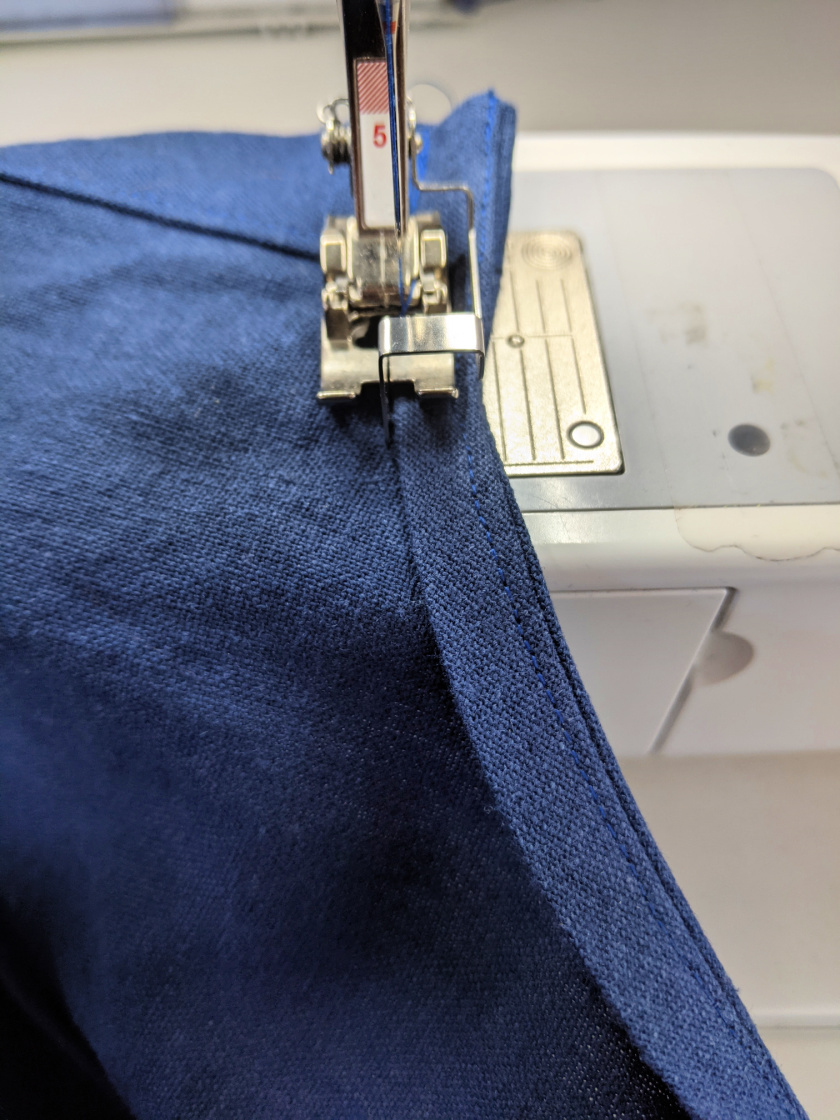
Here is a finished look of the bias tape from the wrong side of the garment:
And from the right:
Give your curved edge a good press and steam to help everything pull back tight and lay nicely and you’re finished! So easy!
Want to see what this garment turned into? Check out the front placket tutorial for the Greer Jumpsuit!

This is so well written. I can’t wait to try this method!
Thank you for this fantastic tutorial! Super helpful!
Excellent tutorial and absolutely agree regarding how useful an edge stitch foot is.
This may be the first tutorial on anything that anticipated the questions I had and answered them. You have a nack for explaining things fully and clearly.
Simply reading the instructions and following them in order ?… that cracked me up. How many do that? I just saw a paid sewalong where the fabric wasn’t pressed prior to cutting. Blew my mind. Wonder if it was washed…
This is a great tutorial – like all your tutorials.I have been using this method for a long long time, as you say, it is simple and intuitive. Thanks so much for the tip re the foot. I don’t have an edge stitch foot and can’t get one because those ? at Bernina have stopped making my 1008 and accessories for it grrrrr, but I tried the blind hem foot and it worked a treat. Nice and even stitching. You’re a star.
The only thing I do differently is I don’t press before understitching. I learnt from my aunt to use my fingers to pull the facing to the side and then press after. Saw it that way in an old Threads I have too. It’s a fiddle with bias but I manage. I’ve tried pressing before but it doesn’t work for me?.
When I do French Bias I stitch it to the WRONG side of the garment first. I don’t understitch at all. Then when pressed to the outside of the garment I’m topstitching with the outside of the garment up and I can be certain to be equidistant from the edge and the garment edge. I just prefer to do any stitching that shows with the right side up.
Yep, that will yield a binding fully visible on the right side of the garment, which is a fun detail if desired. This tutorial has the bias hidden on the wrong side, but if you just do it the opposite way you have visible binding. It’s always a good idea to understitch though, I don’t recommend skipping that step for best results.
I also stitch to the wrong side of the garment first. I grade my seams as well to eliminate and bulky ridge from the seam line that will show up in pressing later. The tape is then pressed to the outside and topstiched, all neat and clean in less steps.
Thanks so much, this is going to be very useful. Great tutorial.👏🏽
Thank you for the tips
This is extremely helpful. Thank you
This is a wonderful tutorial. I know it is easiest to make a tutorial out of something u are already making. A short sample done with contrasting bias & another contrasting thread would make it even easier to see. Thank you for posting this.
This is the first tutorial of this method I have been able to fully understand. Thank you for such clear instructions. It would have been even more clear if you used contrasting colors,
A gorgeous method! So professional looking! Thank you😘.
I just recommended someone to use the French method and went to find them a tutorial. This is outstandingly well written and illustrated. Thank you so much!!
Great tutorial, we’ll written and so explicit! Thanks!