• Account
  • Gift Card
  • Affiliate Program
  • Wholesale Accounts
  • FAQ
  • Nav Social Menu

    • Email
    • Facebook
    • Instagram
    • Pinterest
    • Twitter
  • 0 items$0.00
Hey June Handmade

Hey June Handmade

  • Shop
    • Women’s Patterns
    • Tops
    • Bottoms
    • Dresses And Jumpsuits
    • Juniors Patterns
    • Free Patterns
    • All
    • Gift Card
    • Paper Patterns
  • Blog
    • Women’s Patterns
    • Juniors Patterns
    • Kid’s Patterns
    • Free Patterns
    • Other Sewing
  • Tutorials
  • Sew Alongs

December 11, 2015 ·

Cheyenne Tunic Sew Along Day 5: Hem and Cuffs

Sew Alongs· Women's Patterns

Cheyenne Tunic Sew Along Day 1: Interfacing and Placket

Cheyenne Tunic Sew Along Day 2: Pockets and Yoke

Cheyenne Tunic Sew Along Day 3: Neckbands and Sleeve Tabs

Cheyenne Tunic Sew Along Day 4: Sleeve Binding and Sleeves

Cheyenne Tunic Sew Along Day 5: Hem and Cuffs

Cheyenne Tunic Sew Along Day 6: View A and Long Sleeves

day5

Welcome to the final day of the Cheyenne Tunic Sew Along!  You guys are doing great, and you’re almost finished!  Today will be easy breezy and when you’re done you can give your shirt a final press, strip off your clothes in the middle of your sewing area, put your new shirt on and take a selfie (I know I’m not the only person who does that!)

We left with a completed sleeve, and the next obvious step would be side seams, but we’re going to do it a little bit differently for this pattern.  Since the hem curve is so pronounced, especially on the tunic, it can be cumbersome and even impossible to do a double turned hem.  By sewing the front and back hems before sewing the side seam, we’re eliminating that tough side seam hem curve area.

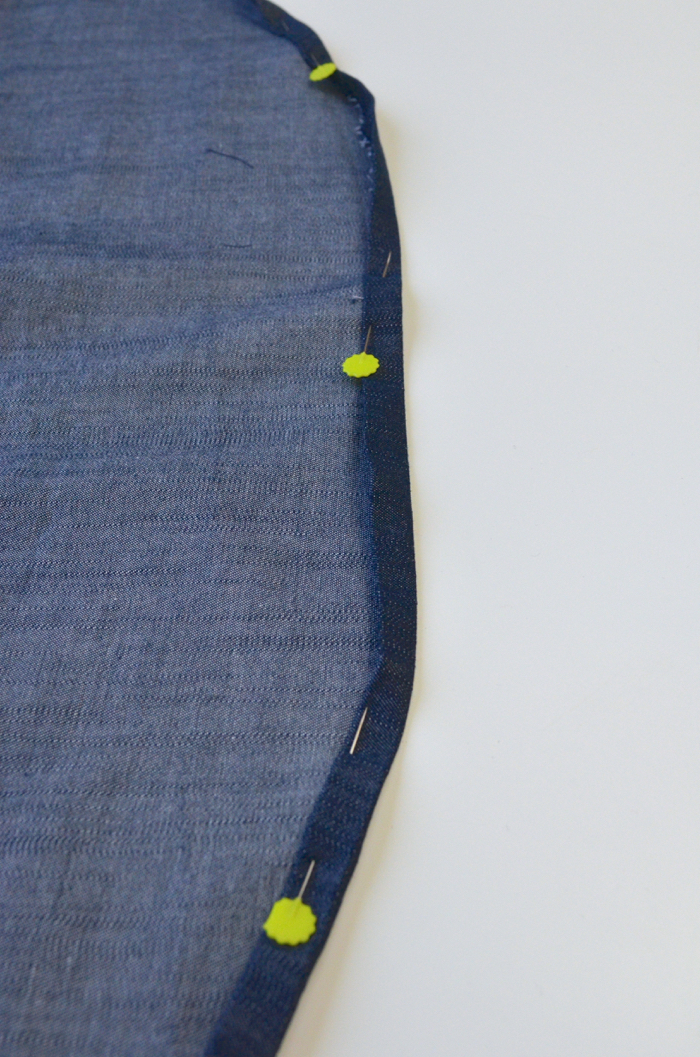
So, first fold the hem up by 1/4″ and press well.  Then turn up another 1/4 and press again, inserting pins as you go.  You’ll be creating a hem on the front and back (or fronts and back for View A).

DSC_0166

Edge stitch the hem in place along the fold.  When you’re finished stitching, give your hem lots of steam and press it well to help it lay nicely.DSC_0167

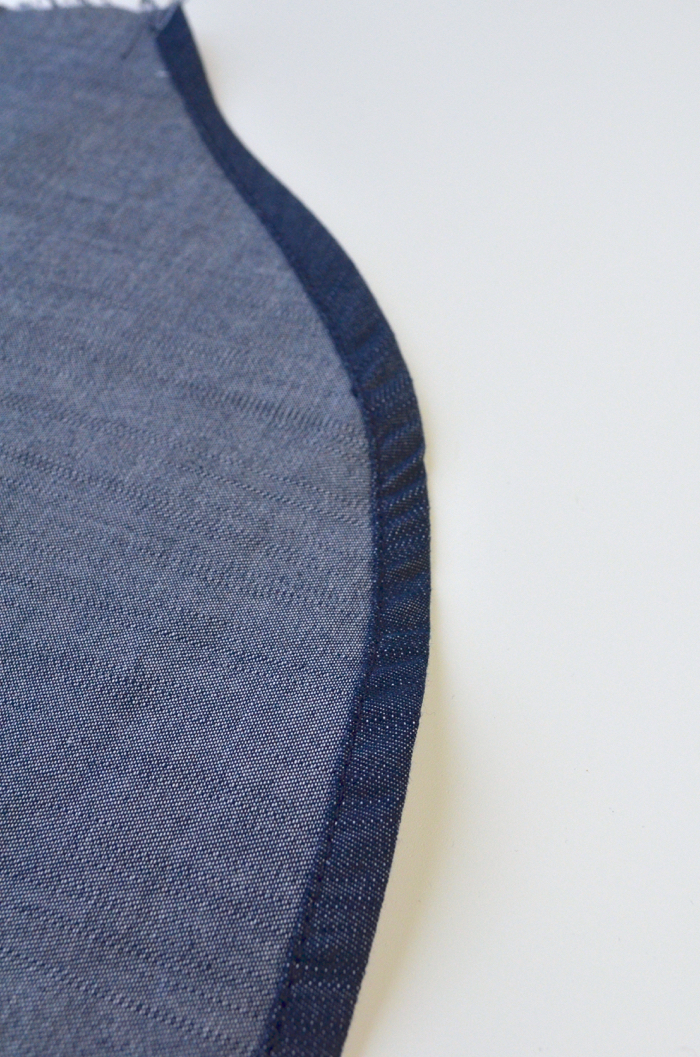
Now that the hems are finished we can move on to the side seams.  Once again, we’ll be constructing French seams for the sleeve and side seam.  If you don’t want a French seam, sew the sleeves and shirt right sides together using a 5/8″ seam allowance.

For the French seam, lay your shirt RIGHT side out and align the raw edges of your sleeve and side seam.  Starting at the wrist hem, sew toward the underarm using a 3/8″ seam allowance.  At the underarm, stop and pivot with the needle down to continue sewing down the side seam.  Just like the sleeve, trim this seam allowance to 1/8″.DSC_0168

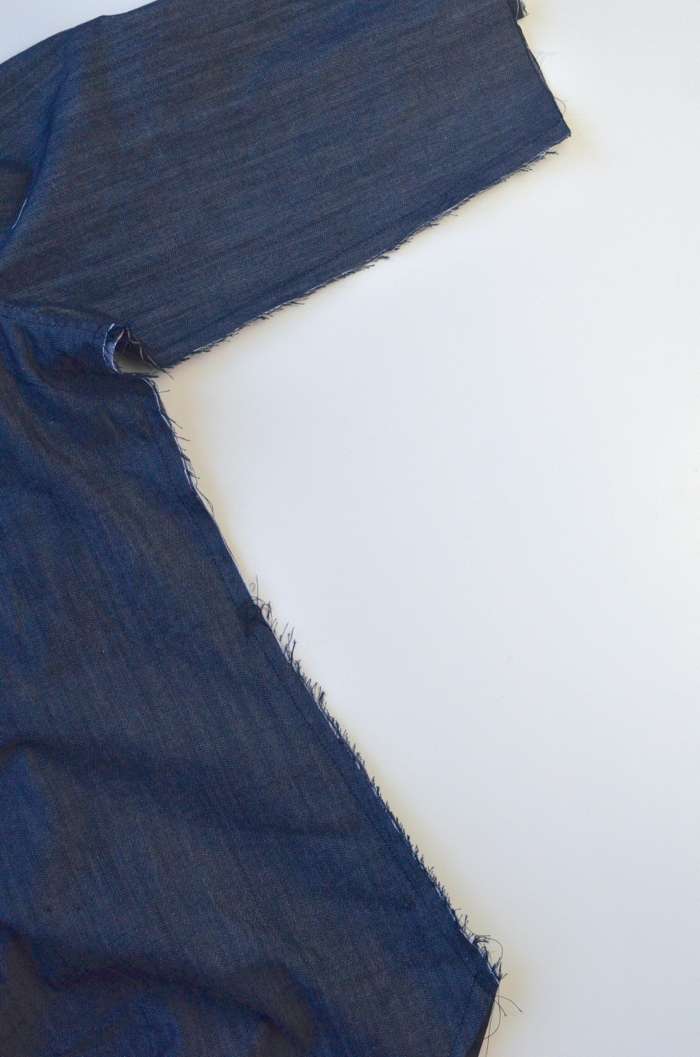
Flip your shirt inside out and press your seam well.  Repeat that same stitch, starting at the wrist, using a 1/4″ seam allowance.  Now all your interior seams are sewn and are completely enclosed!DSC_0170

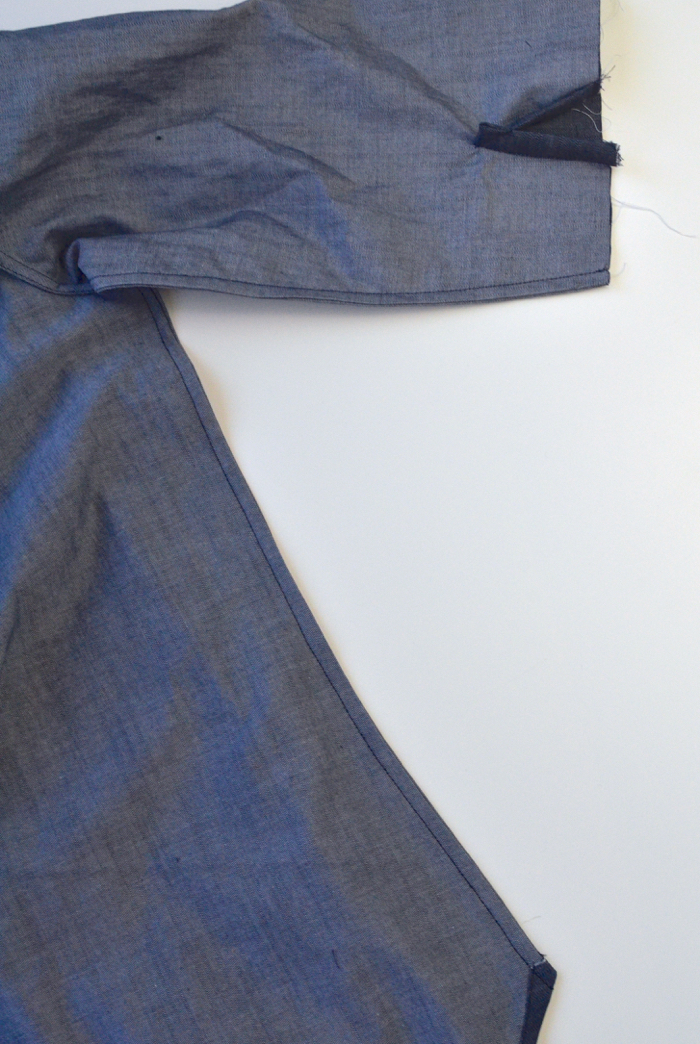
At the hem along the side seam, you may want to tack down the French seam to keep everything flat and neat.  Press the french seam toward the back and sew a short vertical tacking stitch on the right side of the back of the shirt, catching the French seam on the inside.DSC_0172

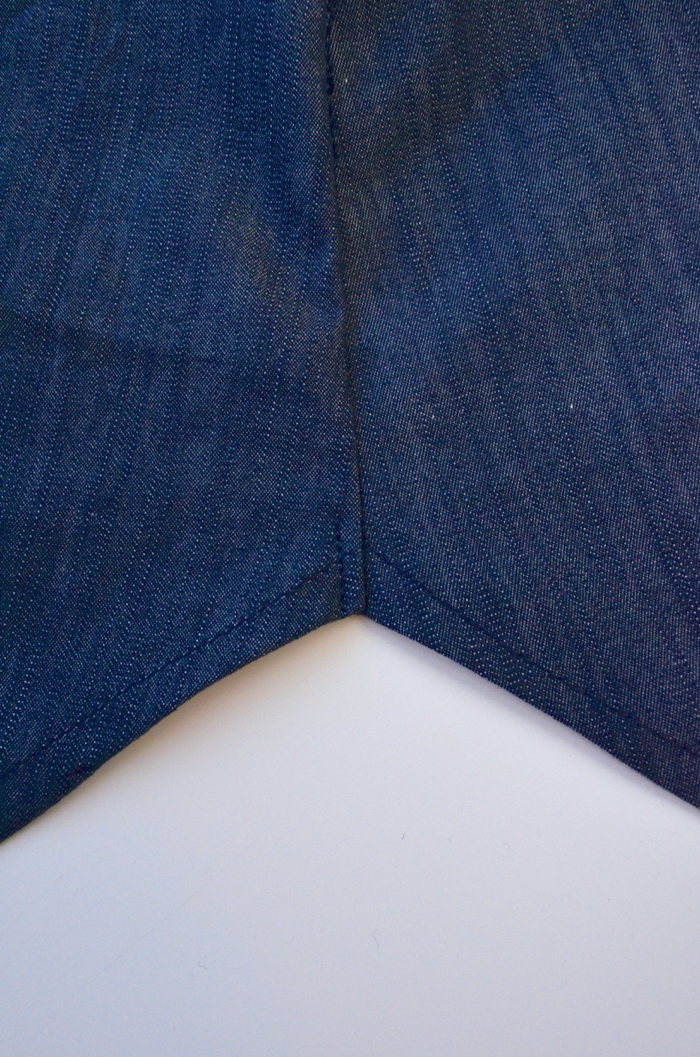
Now onto the last step – the cuffs!  Sew a basting stitch across the upper portion of the non-interfaced edge using a 3/8″ seam allowance.DSC_0175

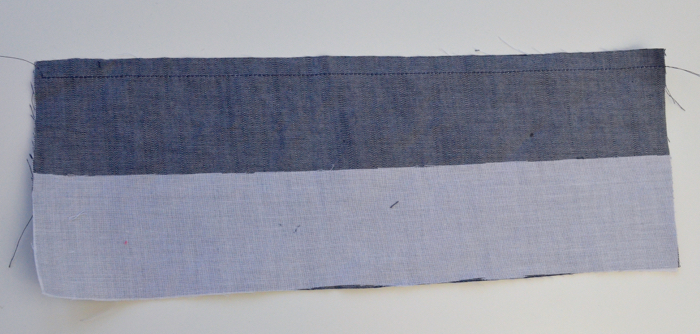
Press the cuff to the wrong side along the basting stitch.DSC_0176

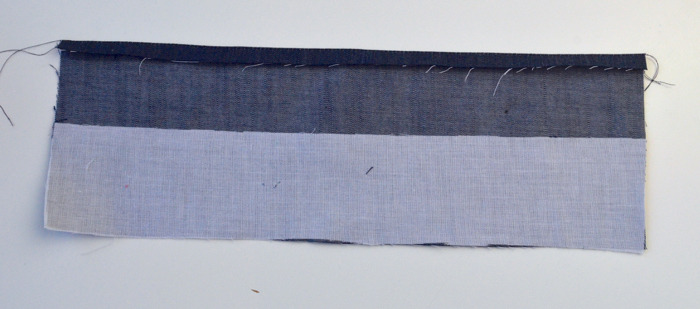
Fold the cuff along the fold line marked on the pattern right sides together (the fold line is also where the edge of the interfacing is).DSC_0178

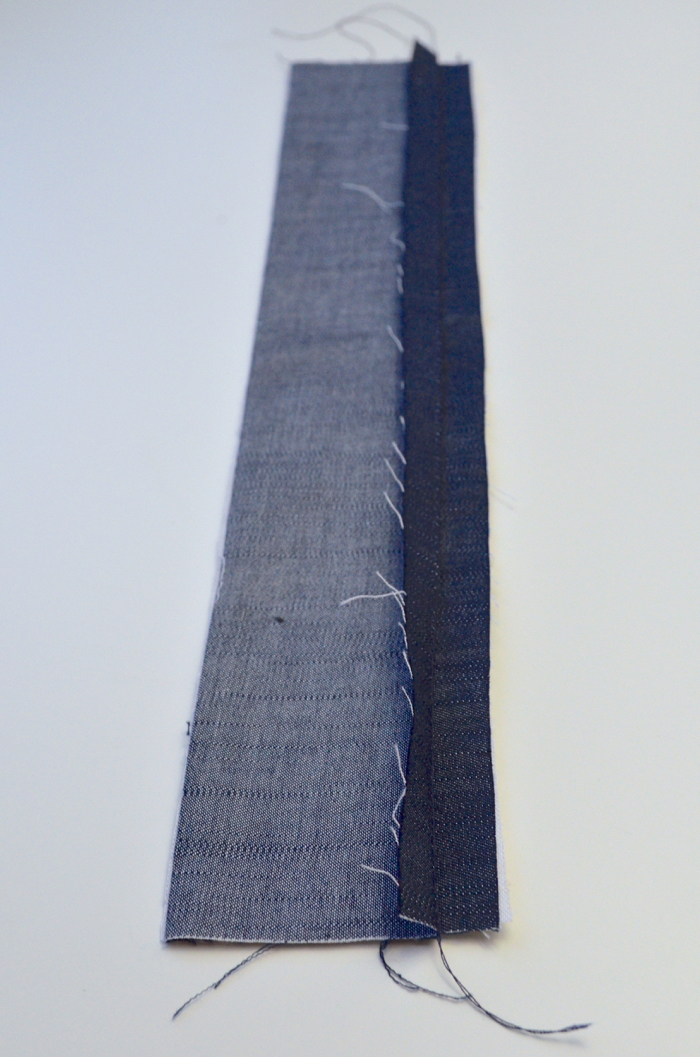
Sew the short ends right sides together using a 3/8″ seam allowance, maintaining the original fold.DSC_0179

Trim the corners and then flip the cuff right sides out, pushing out the corners and pressing well.DSC_0180

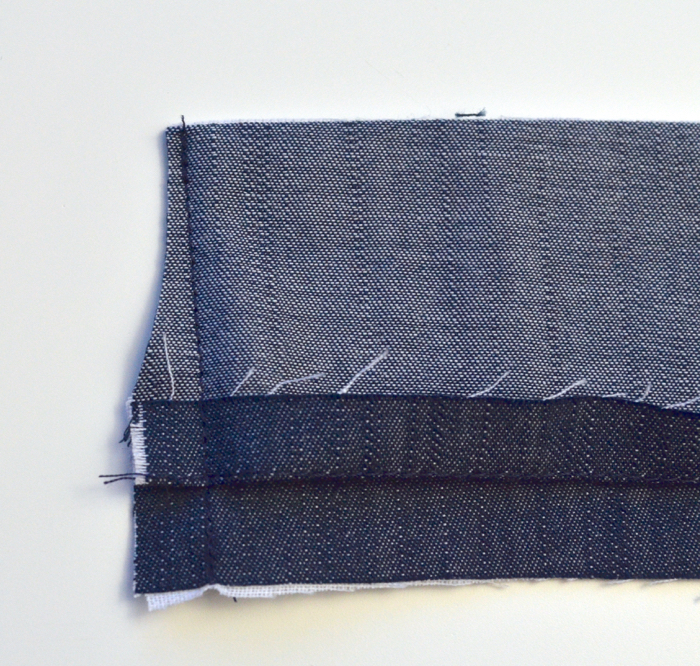
Your turned-out cuffs should look like this now.  The interfaced portion will be the cuff, the non-interfaced part will be the cuff facing.DSC_0181

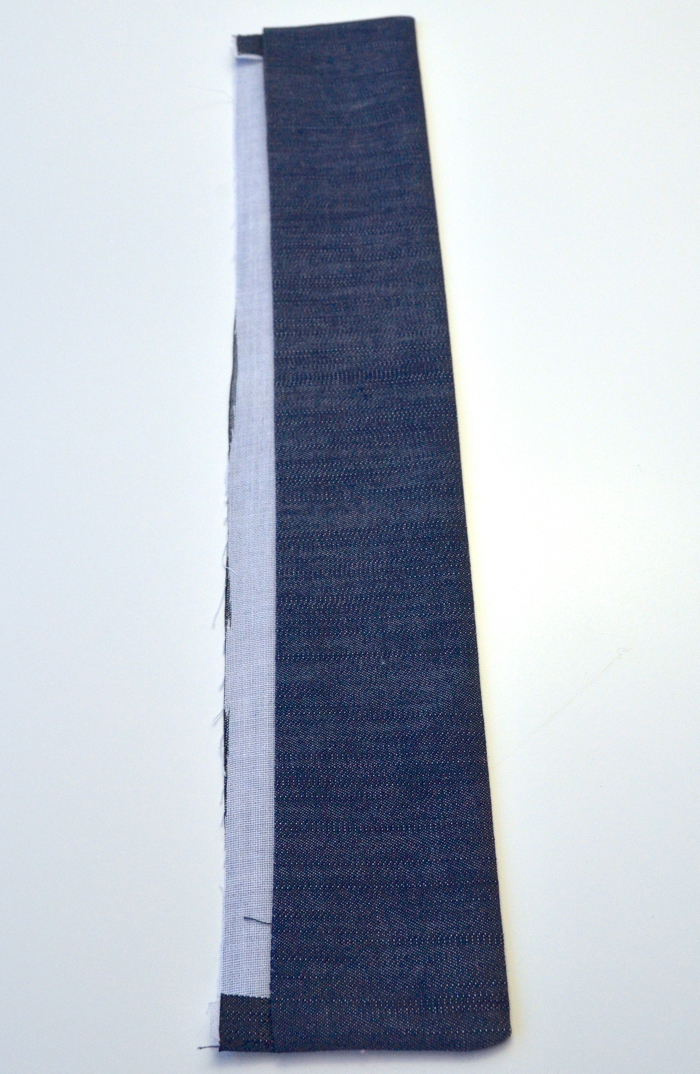
Because the cuffs are mirror images of one another, lay out your sleeves and cuffs to make sure you’re attaching the correct ones.  The cuff with the button hole on the right side will go on the left sleeve (as pictured here).  As you can see, the button hole will be below the overlap on the sleeve binding.DSC_0182

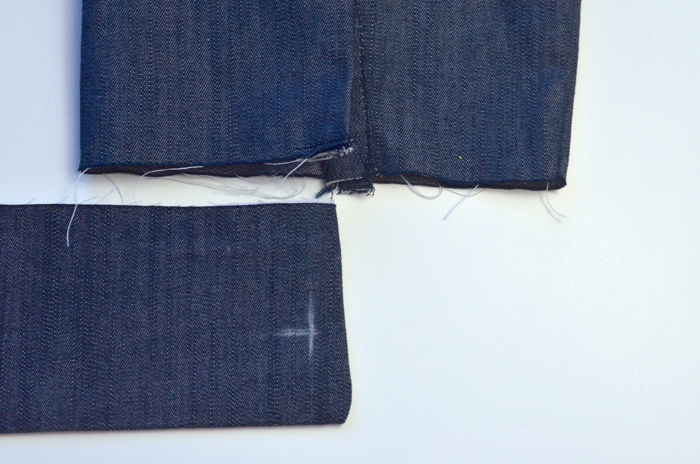
Pin the cuffed and the sleeve right sides together, aligning the edge of the cuff with the edge of the overlap area of the sleeve binding.IMG_20151201_160600

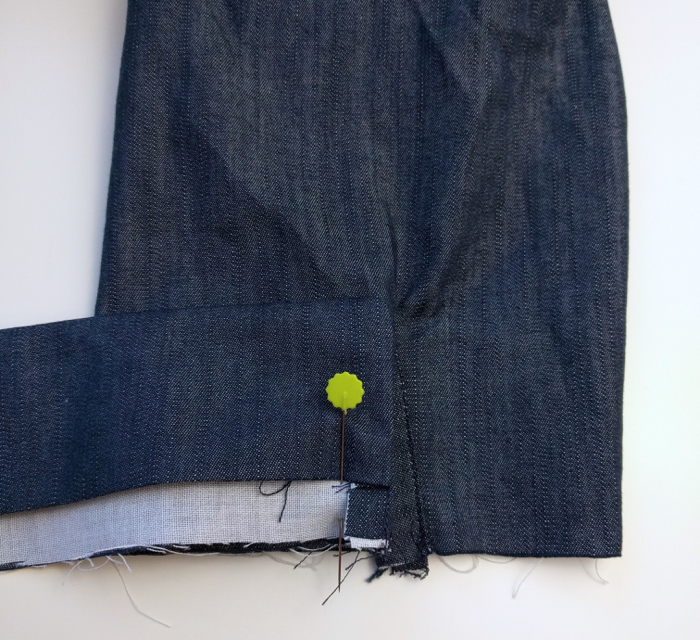
Bring the cuff around the sleeve and pin the other side.  Put a few more pins around the cuff, easing it in if anything stretched out while handling.IMG_20151201_160713

Sew the cuff to the shirt using a 3/8″ seam allowance.  Do NOT catch the cuff facing in this seam.IMG_20151201_161028

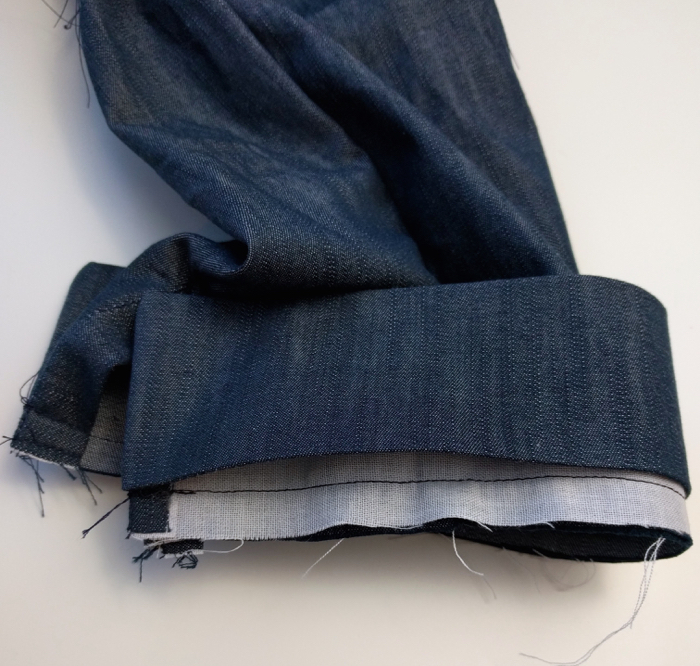
Flip the cuff down and push all seam allowances down into the cuff.  Press well and pin to keep the cuff facing in place.IMG_20151201_161406

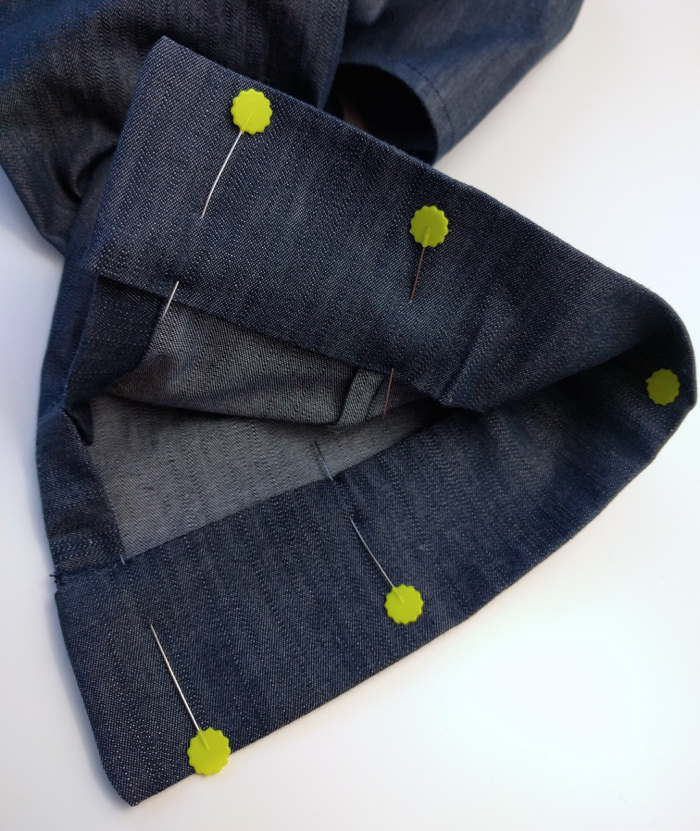
On the right side of the cuff, top stitch around the entire perimeter, starting at the top center of the cuff.  Sew toward the edge, then down and around the entire cuff until you reach the point where you began.  Leave your needle down and pivot at each corner.IMG_20151201_202903

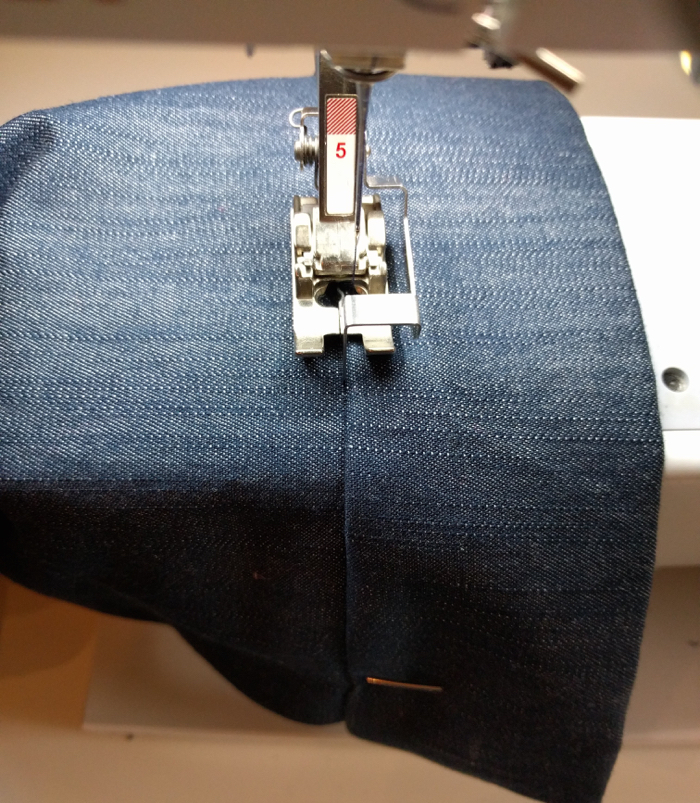
Here’s that beautiful edge stitching foot in action one more time.  As you can see, this time I’ve moved my needle over to the right because of the direction I was sewing.IMG_20151201_161616

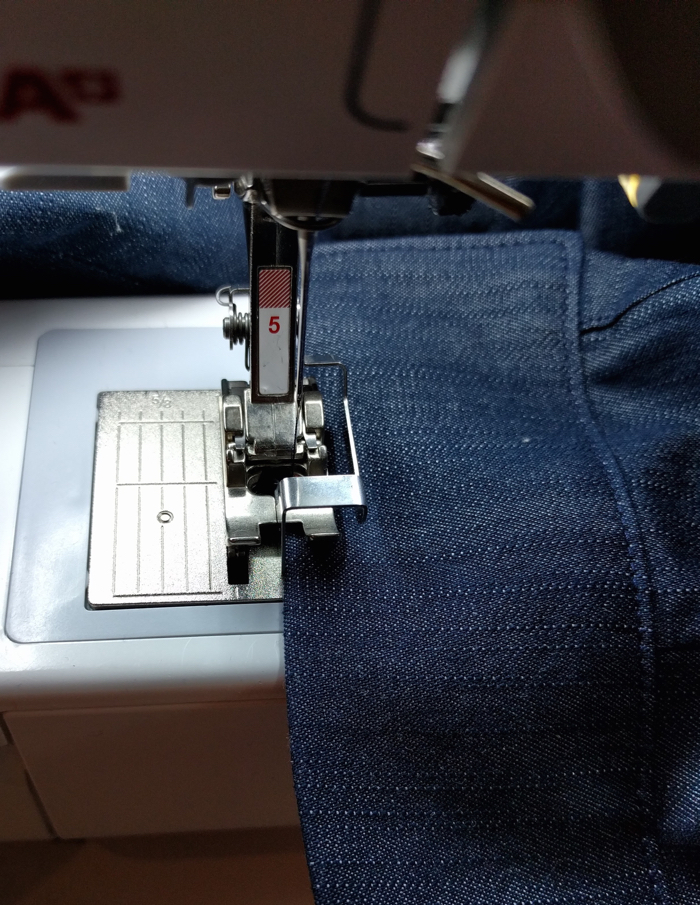
Now your entire cuffs should be edge stitched and the cuff facing should be caught on the inside.IMG_20151201_161844

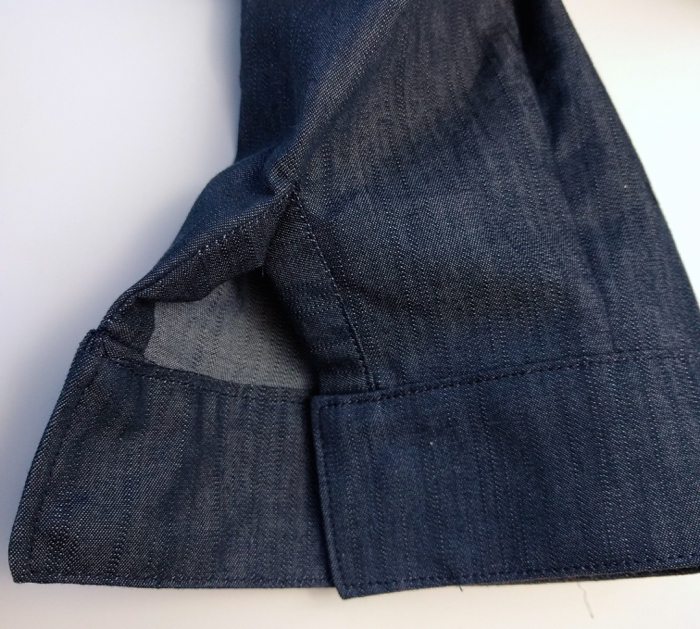
Sew the buttonholes into the cuff where marked.IMG_20151201_204404

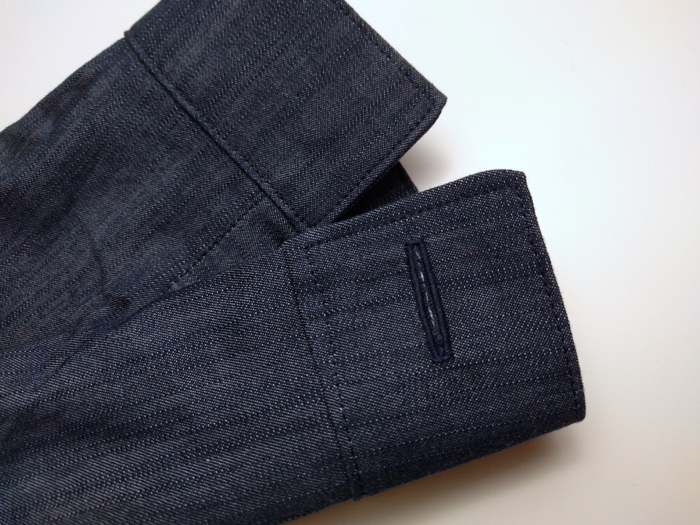
Use a pin to poke through the buttonhole and mark the location for your buttons on your cuffs and your front placket, if you didn’t already.  Sew buttons where marked.IMG_20151201_204839


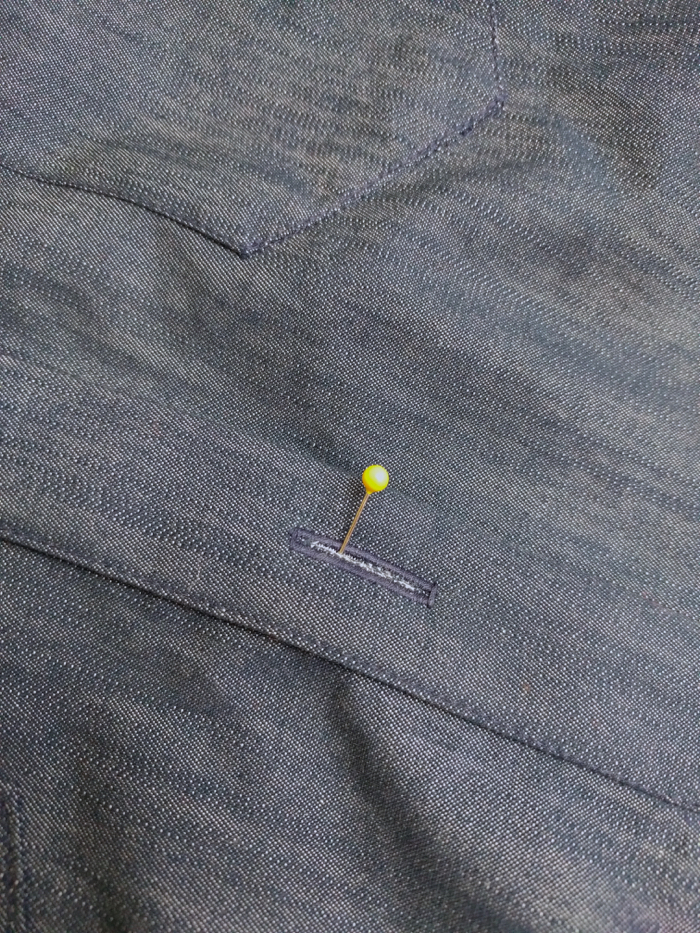
And that’s it!  You’re finished!  Congratulations on making your Cheyenne View B!  I’d love to see your finished shirts – throw them up on Instagram with hashtag #CheyenneTunic or join the Hey June Facebook group and share your pictures there so we can all admire them!  There’s also a ton of support over there if you have any questions from anything from pattern construction to choosing fabric 🙂

If you’d like to make a View A or long sleeves, you can follow along with most of these steps, but come back tomorrow for some pictures of the trickier parts.

Previous Post: « Cheyenne Tunic Sew Along Day 4: Sleeve Binding and Sleeves
Next Post: Cheyenne Tunic Sew Along Day 6: View A and Long Sleeves »

Reader Interactions

Comments

  1. Urszula says

    April 2, 2019 at 4:21 am

    Thank you so much for that tutorial! And for beautiful pattern . It was a pleasure to make Cheyenne Tunic and I hope to make another one soon. I have to confess that placket was easy peasy with your instructions but the collar was the hardest part. Anyway it’s now my favourite shirt!

  2. Shelley Barnett says

    January 12, 2020 at 7:21 am

    The third one I’ve made but I always use your sewalong and I’ve told so many people how wonderful this pattern it. Thanks you for putting this all together and sharing.

Primary Sidebar

Welcome to Hey June! I'm so glad you're here. Whether you're an experienced sewist or a beginner, I aim to provide simple, modern sewing patterns that are as fun to sew as they are to wear. Read More…

Never miss a post, sale, or new pattern!

Categories

  • Free Patterns
  • Juniors Patterns
  • Kid's Patterns
  • Other Sewing
  • Sew Alongs
  • Tutorials
  • Women's Patterns

looking for something?

Disclaimer: Amazon Affiliate links are sometimes used in blog posts.
Nothing scarier than hearing the serger running in Nothing scarier than hearing the serger running in your sewing room when you're not in your sewing room 😱. But this girl decided to get up and make herself a Nikko Top and I'm so proud 🙌. I haven't really taught my kids to sew, but I'm happy they're getting into it on their own anyway.  I'll be here to nurture their interest and attach arm bindings when they ask though!  How are you approaching this skill with the next generation?⁣
⁣
#NikkoTop #truebiaspatterns #sew #sewist #seweveryday #handmadewardrobe #handmade #sewistsofinstagram #sewistsgonnasew #sewcialists #diyfashion #memadeeveryday #memadewardrobe #imakemyclothes #isew #isewmyclothes #sewingpattern #sewingtutorial #sewingblogger #instasew #slowfashion #modernsewist
Sharing a giant sneak peek of our next pattern tod Sharing a giant sneak peek of our next pattern today because the fabric I used and loved is on sale!⁣
⁣
@raspberrycreekfabrics is starting their black Friday sale early so you can have your holiday fabrics in hand and start sewing now! ⁣
⁣
@littlebitco and I both used their linen rayon for this project and it works fabulously - highly recommend!  Plus, it comes in several gorgeous colors.  I used rust, naturally 💁🏼‍♀️🧡⁣
⁣
Swipe to see the fabric recs and reqs for this pattern and keep an eye out for it in a few weeks!!⁣
⁣
#comingsoon #HeyJunePatterns #sew #sewist #seweveryday #handmadewardrobe #handmade #sewistsofinstagram #sewistsgonnasew #sewcialists #diyfashion #memadeeveryday #memadewardrobe #imakemyclothes #isew #isewmyclothes #sewingpattern #sewingtutorial #sewingblogger #instasew #slowfashion #modernsewist
Grabbed all* my supplies to sit in bed, watch a mo Grabbed all* my supplies to sit in bed, watch a movie, and sew buttons on my two new button-ups.  Can you tell what I'm missing? This is what happens to a chronically anti-hand-sewing person 🤦🏼‍♀️⁣
⁣
*All =/= all ⁣
⁣
#CheyenneTunic #AmherstShirt #HeyJunePatterns #sew #sewist #seweveryday #handmadewardrobe #handmade #sewistsofinstagram #sewistsgonnasew #sewcialists #diyfashion #memadeeveryday #memadewardrobe #imakemyclothes #isew #isewmyclothes #sewingpattern #sewingtutorial #sewingblogger #instasew #slowfashion #modernsewist
Thank you, former me, for having the foresight to Thank you, former me, for having the foresight to use French seams on this robe topper so I could roll it up on these warm autumn days 🍂☀️⁣
⁣
I voted, and then promptly lost my sticker.  I hope all my fellow Americans did the same! (Minus the lost sticker bit, I don't wish that upon anyone.)⁣
⁣
#selfdrafted #HeyJunePatterns #slublinen #sew #sewist #seweveryday #handmadewardrobe #handmade #sewistsofinstagram #sewistsgonnasew #sewcialists #diyfashion #memadeeveryday #memadewardrobe #imakemyclothes #isew #isewmyclothes #sewingpattern #sewingtutorial #sewingblogger #instasew #slowfashion #modernsewist
I'm back today with another modification to the pu I'm back today with another modification to the puffed sleeve tutorial released yesterday!  A few simple changes to the style lines yields a shorter banded puff sleeve with volume at the hem.  I am so in love with this top - using a sweater knit makes it so comfy but also dresses it up just enough for me 🖤. Hope you enjoy!  Don't forget to tag me if you use these tutorials, I'd love to see!⁣
⁣
#HeyJunePatterns #UnionStTee #sew #sewist #seweveryday #handmadewardrobe #handmade #sewistsofinstagram #sewistsgonnasew #sewcialists #diyfashion #memadeeveryday #memadewardrobe #imakemyclothes #isew #isewmyclothes #sewingpattern #sewingtutorial #sewingblogger #instasew #slowfashion #modernsewist  #YouCanHackIt
Add some drama to your Unions this fall with this Add some drama to your Unions this fall with this puff sleeve tutorial!  It's a super simple way to dress up a wardrobe staple.  After you have your pattern piece altered for this modification, come back tomorrow when we'll add to it for another cute sleeve style!⁣
⁣
#HeyJunePatterns #UnionStTee #sew #sewist #seweveryday #handmadewardrobe #handmade #sewistsofinstagram #sewistsgonnasew #sewcialists #diyfashion #memadeeveryday #memadewardrobe #imakemyclothes #isew #isewmyclothes #sewingpattern #sewingtutorial #sewingblogger #instasew #slowfashion #modernsewist #YouCanHackIt
I finally used this gorgeously thick and soft cott I finally used this gorgeously thick and soft cotton sweatshirting from @dashuepfendekomma to make the hoodie of my dreams 🙌. I've been sitting on this fabric and matching ribbing since last winter trying to decide on the perfect pattern.  In the end I (predictably) just ended up modifying a few style lines to get exactly what I wanted.  I'm sharing my tutorial for a dropped sleeve Brunswick with a bit of volume at the wrist on the blog today!⁣
⁣
#BrunswickPullover #HeyJunePatterns #sew #sewist #seweveryday #handmadewardrobe #handmade #sewistsofinstagram #sewistsgonnasew #sewcialists #diyfashion #memadeeveryday #memadewardrobe #imakemyclothes #isew #isewmyclothes #sewingpattern #sewingtutorial #sewingblogger #instasew #slowfashion #modernsewist
Ok I'm fully obsessed with a pocket and I don't ca Ok I'm fully obsessed with a pocket and I don't care who knows it.  I hope I can keep the momentum going on the rest of this garment because right now I just wanna make welts all of the times.⁣
⁣
#HeyJunePatterns #WheatonWindbreaker #sew #sewist #seweveryday #handmadewardrobe #handmade #sewistsofinstagram #sewistsgonnasew #sewcialists #diyfashion #memadeeveryday #memadewardrobe #imakemyclothes #isew #isewmyclothes #sewingpattern #sewingtutorial #sewingblogger #instasew #slowfashion #modernsewist
There may be snow on the ground but it's still sum There may be snow on the ground but it's still summer!  @thepetitesewist is on the blog today sharing a tutorial to turn the Bryce Cargo Pants (or any pants!) into bermuda shorts (or any length shorts!) So versatile and cute!  Link in profile 😊⁣
⁣
#heyjunepatterns #BryceCargoPants #sew #sewist #seweveryday #handmadewardrobe #handmade #sewistsofinstagram #sewistsgonnasew #sewcialists #diyfashion #memadeeveryday #memadewardrobe #imakemyclothes #isew #isewmyclothes #sewingpattern #sewingtutorial #sewingblogger #instasew #slowfashion #modernsewist
Took a little break from pattern drafting to do so Took a little break from pattern drafting to do some necessary sewing.  Now all guests at Chez Appl will be required to wear satin gloves and monacles cuz we fancy.⁣
⁣
This is a gorgeous 100% linen from @fabricwholesaledirect.  I bought 3 different colors for napkins and reusable "paper" towels so we should be good (after I sew more than just this one 😂)⁣
⁣
Do you have any necessary sewing to do?  Next on my list are some mesh shampoo bar bags (makes them last forever!) and reusable produce bags!⁣

#sew #sewist #seweveryday #handmadenapkins #linennapkins #handmade #sewistsofinstagram #sewistsgonnasew #sewcialists #diyfashion #memadeeveryday #isew  #sewingblogger #instasew #slowfashion #modernsewist
Load More Follow on Instagram
  • About
  • Contact
  • FAQ
  • Policies
  • Positions

Copyright Hey June Handmade © 2021 · Log in