
Cheyenne Tunic Sew Along Day 1: Interfacing and Placket
Cheyenne Tunic Sew Along Day 2: Pockets and Yoke
Cheyenne Tunic Sew Along Day 3: Neckbands and Sleeve Tabs
Cheyenne Tunic Sew Along Day 4: Sleeve Binding and Sleeves
Cheyenne Tunic Sew Along Day 5: Hem and Cuffs
Cheyenne Tunic Sew Along Day 6: View A and Long Sleeves
OK, you’ve made it through the placket, so let’s reward ourselves with some easy sewing today on your Cheyenne Tunic. All we have on the docket are the pockets and the yoke, and they’re both constructed in a way that ensures a perfect outcome each time with almost no effort on your part. Where else do you get that in life?
First up, the pockets! Remember that pockets are optional, or you can just use one.
Press the interfaced portion of the pocket down to the right side.

Press the edges of the interfaced portions to the wrong side by 1/4″.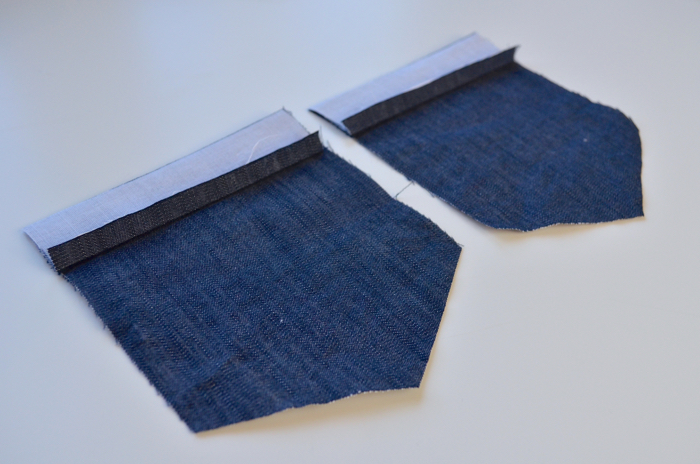
Sew around the sides and bottom of each pocket using a 3/8″ basting stitch. Make sure you sew over the pressed edge from the last step so it stays in place.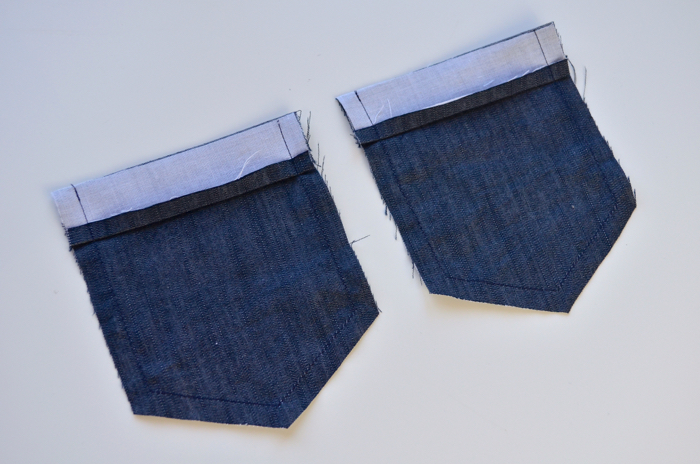
Clip the upper corners of each pocket.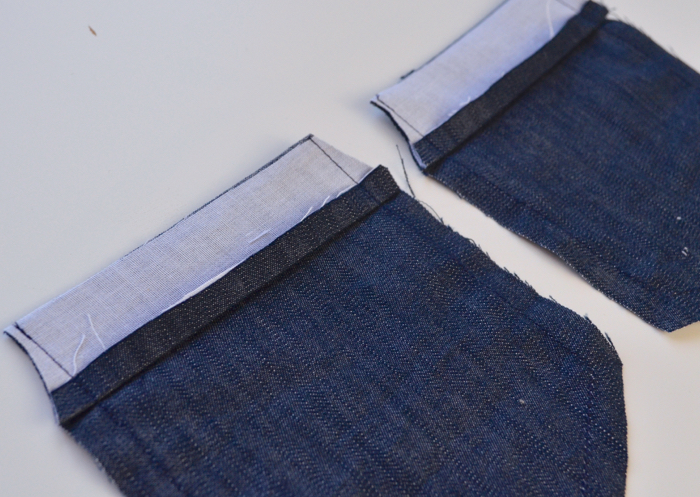
Turn each pocket right side out and push the corners out, pressing them in place well.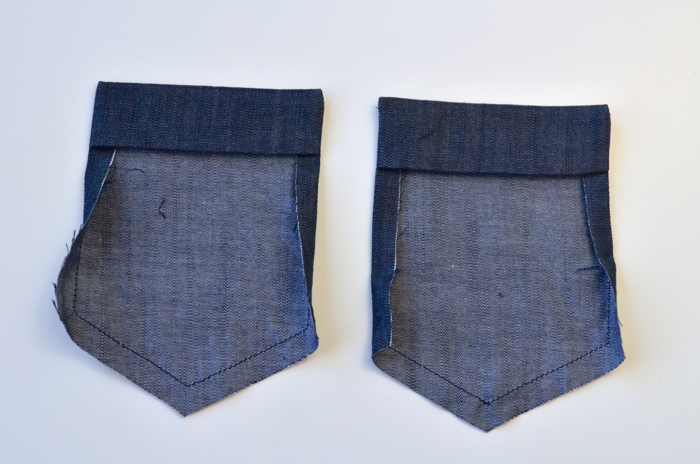
First press up the bottoms of the pocket along the basting seam to the wrong side, then press the sides in.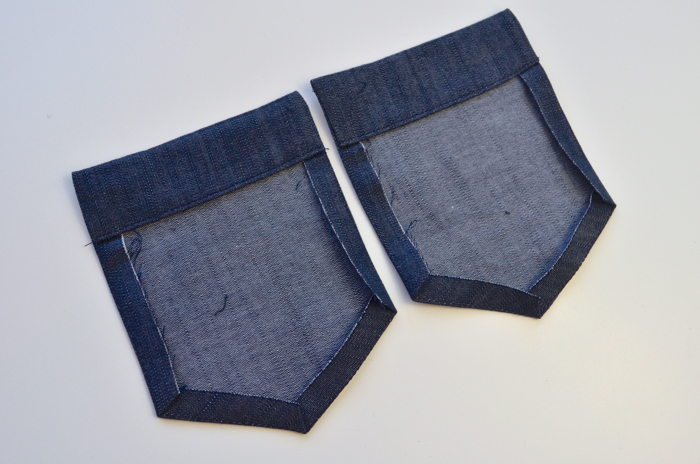
Edgestitch along the fold of the pocket. This step is actually optional. It adds some nice detailing, but if you’re making a more formal shirt with fancier fabrics you can certainly omit this step.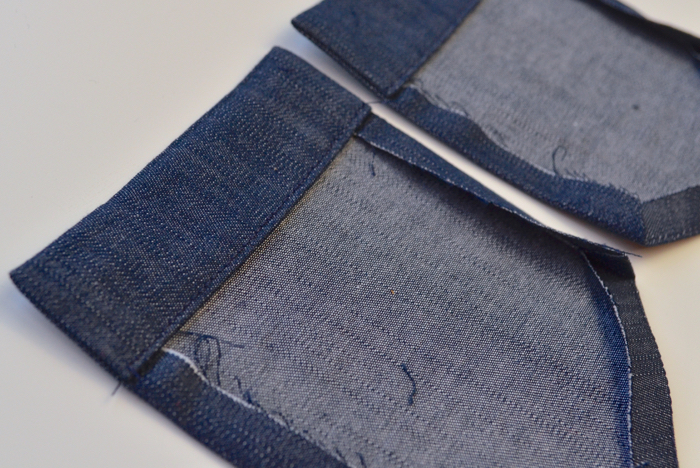
Position your pockets on the shirt front where indicated by the markings you transferred. I like to use a plain old glue stick around the pocket edges before I lay them on the shirt so they don’t move around. Because fabrics moves around when cutting and marking and sewing the placket, at this point it’s more important to make sure your pockets are even with one another than perfectly aligned with your markings. Use a ruler to be sure. As you can see, I ended up moving my left front pocket down a smidge to align with the other pocket.
Pin your pockets in place. If you used a gluestick, you probably won’t need more than two pins here.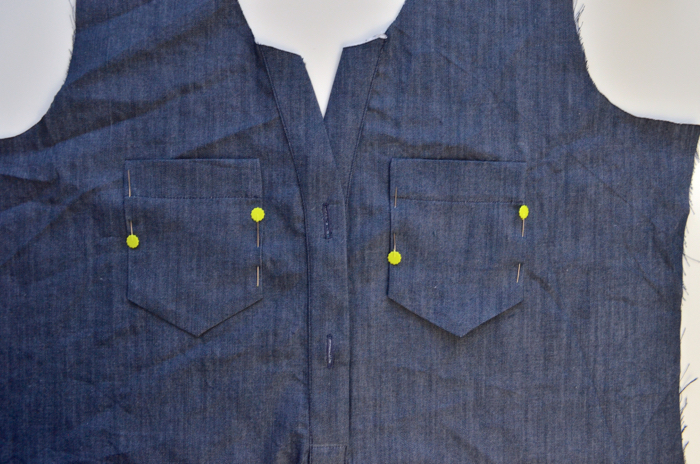
Begin sewing at the hem stitch line that you sewed on the pocket earlier. Sew up to the top of the pocket at an angle. This angle is personal preference, but I like to do a very slight angle so I only end up with 3-4 stitches at the top of the pocket reinforcement triangle. You can use a marking tool for precision if desired. When you finish sewing around the pocket (leaving your needle down and pivoting the fabric at each turn), count off the stitches at the top of the reinforcement triangle so they are the same as the first triangle you sewed. Then continue sewing back down to the hem stitch line. Repeat for the other pocket and your pockets are finished!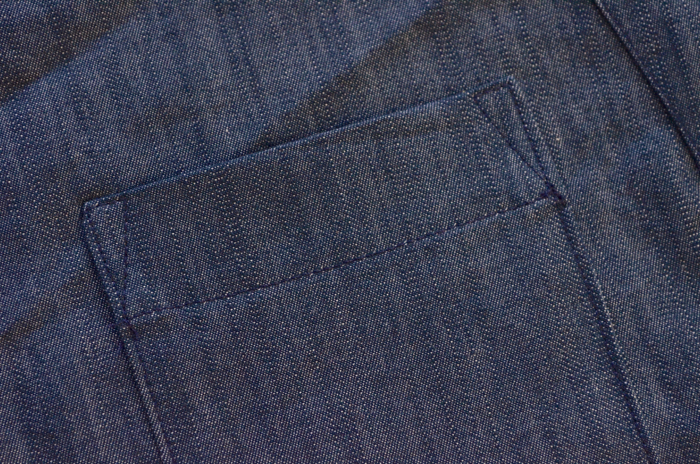
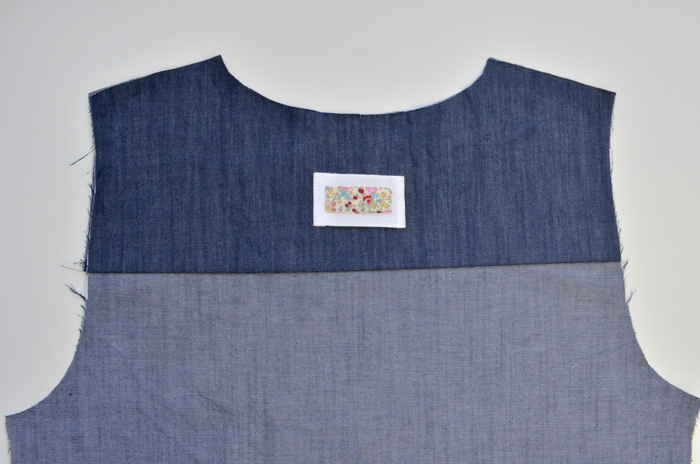
Moving on to the yokes! First, if you have a tag or a scrap of fabric you want to use as a tag, sew it to the yoke facing now. This will be the inside back of the shirt. If you cut your yoke on the bias, your yoke facing will be the yoke cut on the straight grain.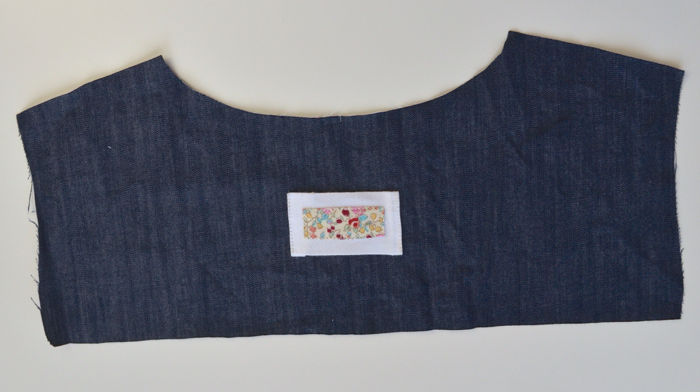
The terminology gets a little confusing here, so pay attention to the pictures! Lay your yoke facing right side up, upside down. Lay your back piece right side up over it, aligning the upper edge with the lower edge of the yoke facing.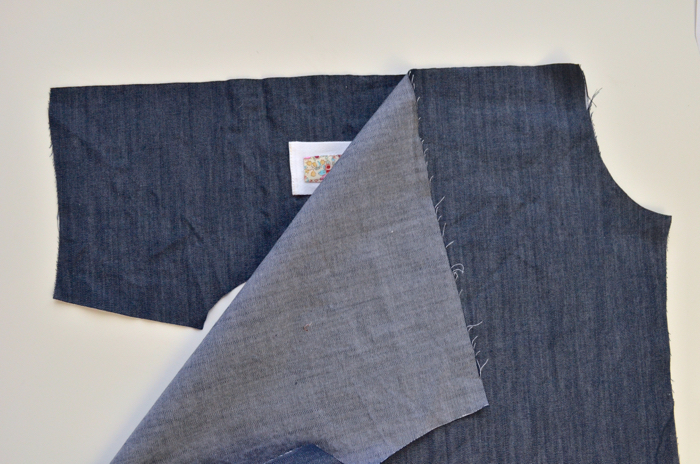
Lastly, lay your yoke (the one that will show on the outside of the shirt) WRONG side up, upside down, again aligning the lower edge with the upper edge of the shirt back.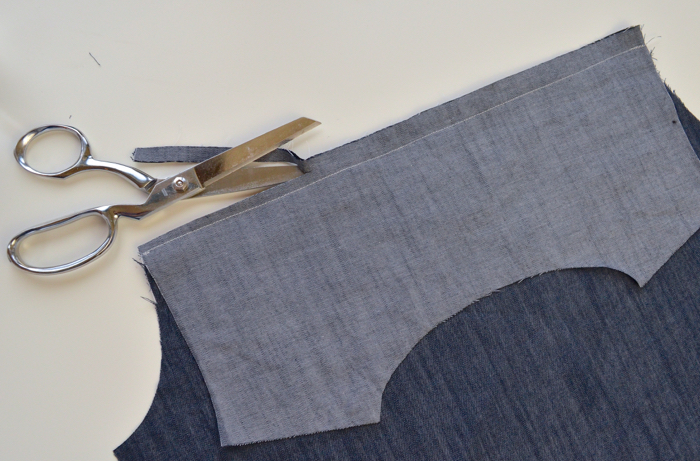
Sew all three layers together using a 5/8″ seam allowance. Trim your seam allowances to 1/4″.
Flip both yokes up and press them well, making sure they’re completely turned up and not buckling at the seam.
Top stitch along the yoke using a 1/4″ seam allowance away from the seam you just sewed.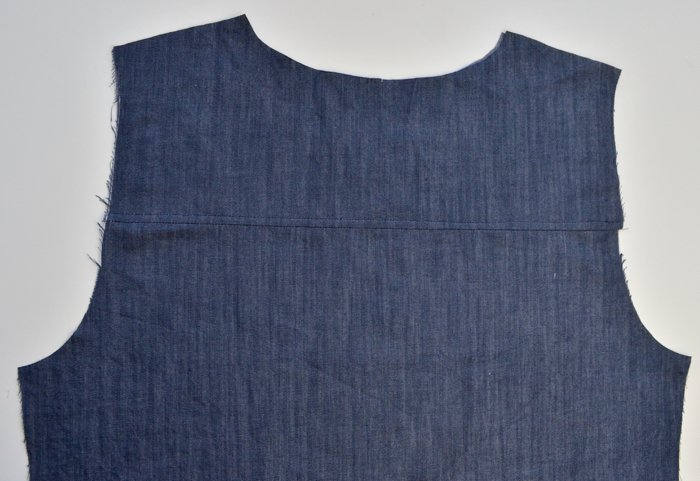
Now pin the front of the shirt to the yoke facing ONLY, leaving the yoke to hang free. You’ll be placing the wrong side of the shirt front against the right side of the yoke facing. Pin them together at both shoulder seams.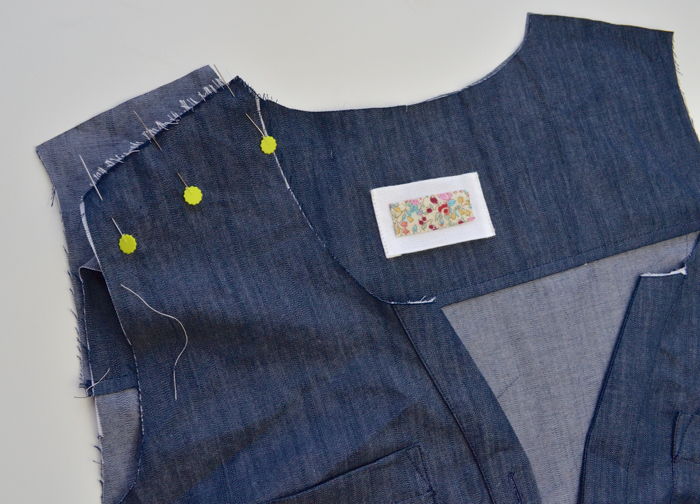
(see? no yoke in this seam!)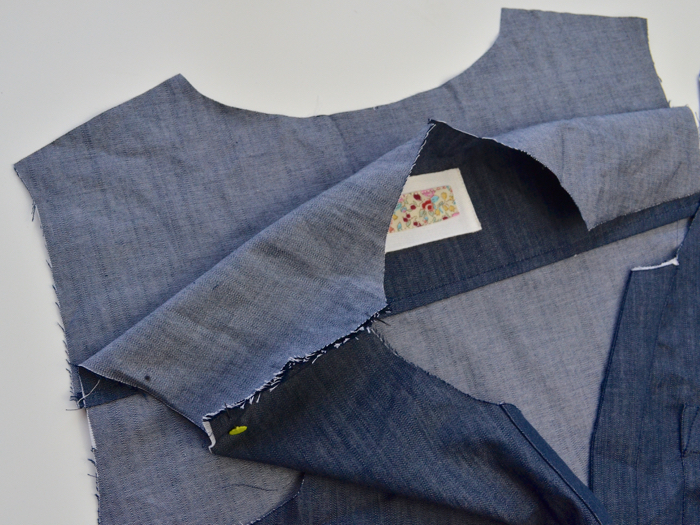
Sew the shirt front to the yoke facing using a 1/4″ seam allowance.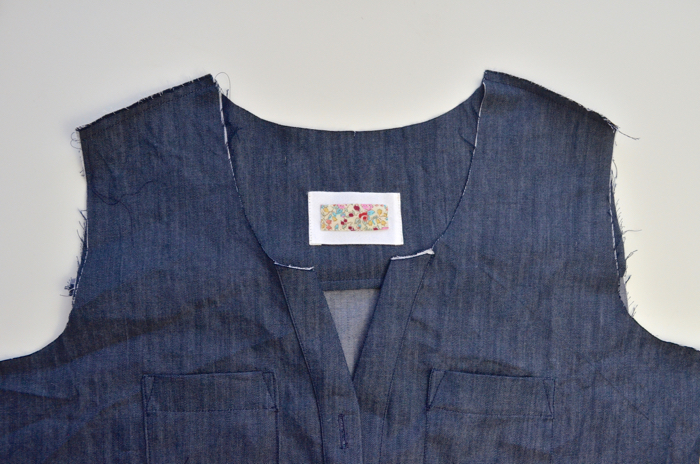
Now here’s the fun part! Roll up the front and back of the shirts until it looks like the picture. The yoke and yoke facing will be separated and both lying right side up.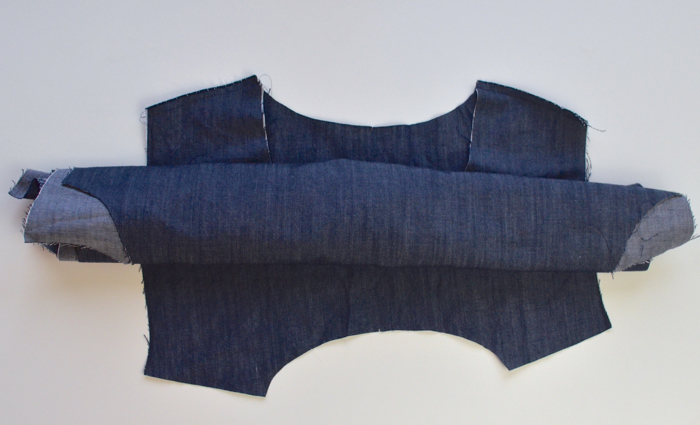
Bring the yoke up and around the rolled up shirt to match the shoulder seams with the yoke facing, right sides together. Now you’ll have this weird burrito roll thing. Pin the shoulder seams together and sew using a 5/8″ seam allowance. This seam will be catching the yoke facing, shirt front, and yoke.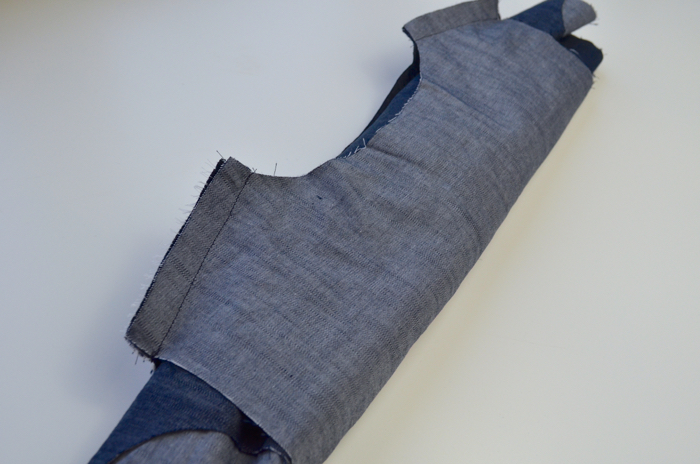
Pull the shirt out through the neck and press everything nice and flat. Top stitch along the shoulder seam on the yoke using a 1/4″ seam allowance.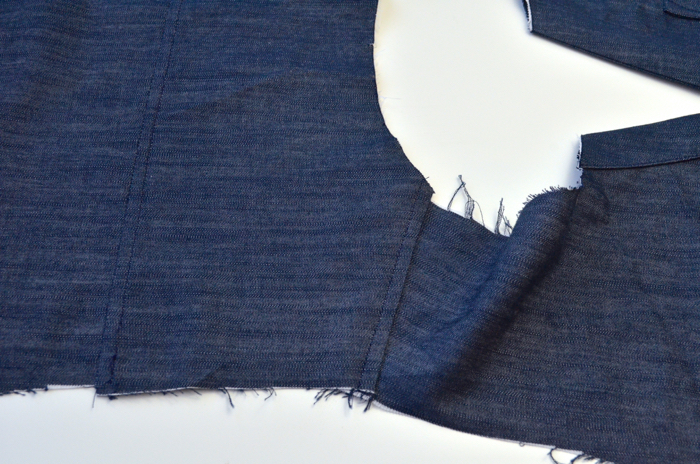
And that’s it for today! I told you it was an easy day! And now you have perfect pockets and a fully enclosed yoke and back with no interior seam allowances to deal with. Perfection was never so simple 🙂
I’ll meet you back here tomorrow for the neckbands and sleeve tabs!
I am seeing this for the first time I’m confused I printed out the yoke for the back where is the rest of the back of the shirt. I only printed the front and the back yoke I’m trying to follow your tutorials,sorry new to learning about sewing. Thank You