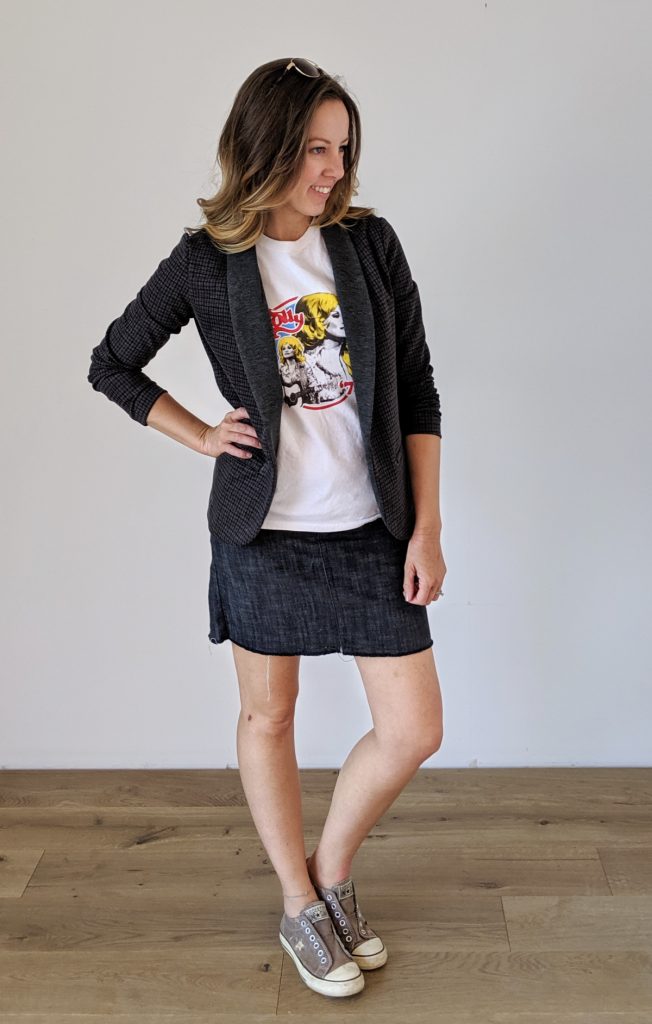
The Evans Blazer has a classic blazer silhouette and can be dressed up as much as a woven blazer, but it is really a very straightforward sew. All of the difficult parts of fitting and sewing a blazer have been eliminated due to the shawl collar and knit fabric. However, if it is your first time sewing a jacket with a roll line, lapel, and facing, there may be some methods that are new to you. So I put together this post with just the “tricky bits” to help you out!
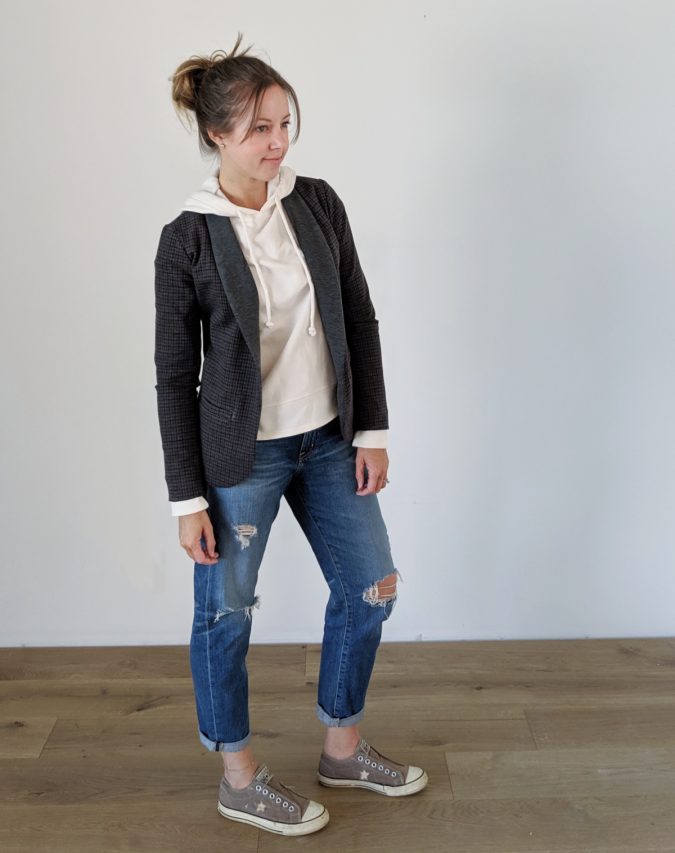
Please note that the blazer used for the sew along uses the wrong side of the fabric for the lapel. This is a great option for most pontes! But it means that in the steps where the facing and jacket are sewn right sides together, the images are a little tricky because it looks like they’re being sewn right side to wrong side. For reference, the right side of the jacket is checked, and the right side of the facing is gray. Just be aware of that little note.
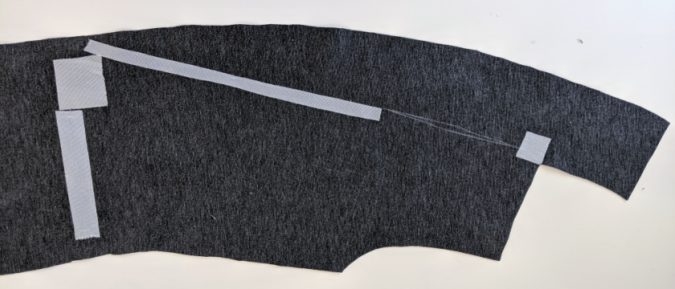
Before sewing, there are some important marks to make on the fabric and you will need to apply interfacing where necessary depending on view. This jacket is view A, so I’ve applied the square of interfacing at the corner of the inner shoulder, the strip of interfacing on the inner edge of the roll line (the roll line on a jacket is where the facing turns out to the right side of the jacket to create the lapel. In this case, it’s from the bottom of the dart to the break point). If using pockets, you’ll need to add interfacing to the back of the welt opening. For this jacket, I also applied a rectangle of interfacing to the area where a buttonhole and button would be applied because I did not interface the facing. This ponte is on the upper end of the recommended weight and thickness for this pattern, so I did not feel like fully interfacing the facing was a necessary step. I did not end up adding a button, but if I ever want to, the interfacing support is there. For view B, you would only need the square at the inner shoulder. I don’t recommend interfacing the roll line for view B because it is more fluid and you want the drape to be dictated by your fabric.
Lastly, if you are using a more drapey fabric, such as french terry, I recommend applying a 1.5″ strip of interfacing at the hems of the jacket and sleeves to help give them structure so they don’t collapse.
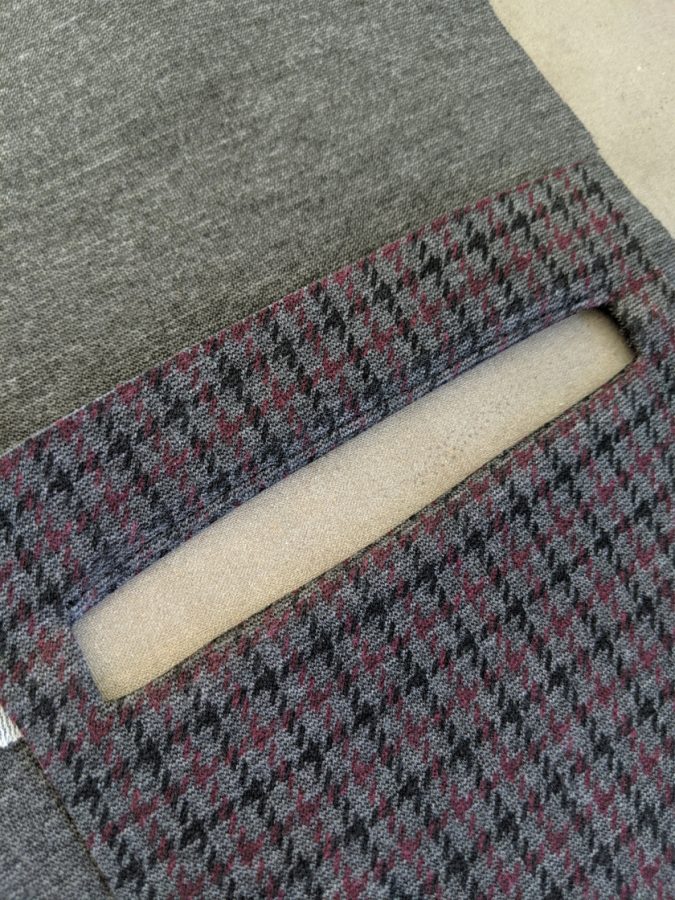
The next few steps will walk you through the welt pocket construction. After sewing the two parallel stitch lines, cutting through the center, and flipping the pocket to the inside of the jacket, press it very well so the pocket lies flat, as pictured. If using drapey fabric, you may want to understitch the pocket to the cut seam allowance on the top of the welt.
Flip up the pocket and make sure the cut seam allowances under are pressed down.
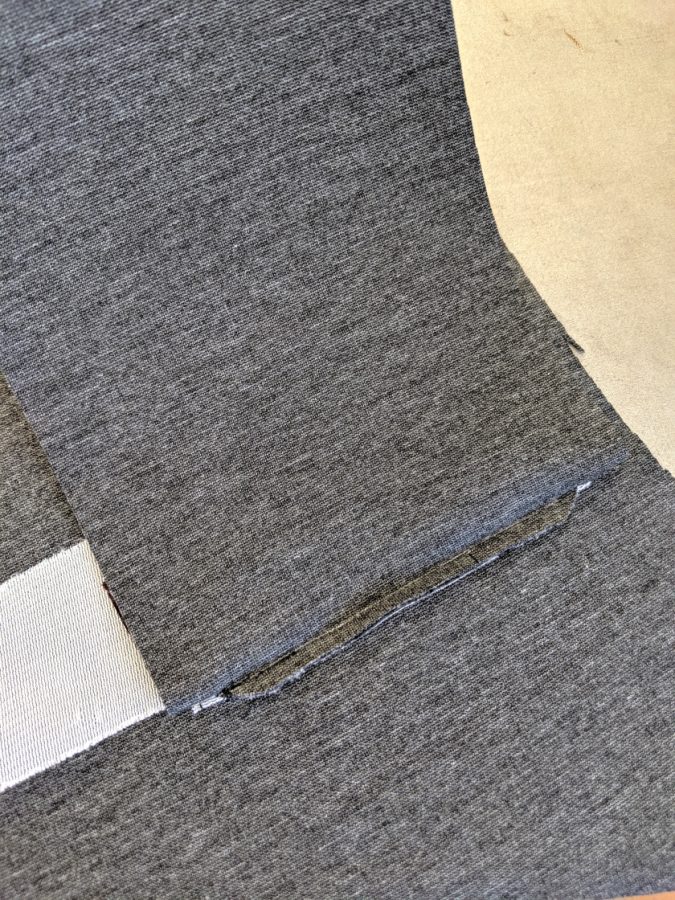
To form the welt lip, fold the pocket up until it creates a fold that reaches just to the top of the welt opening.
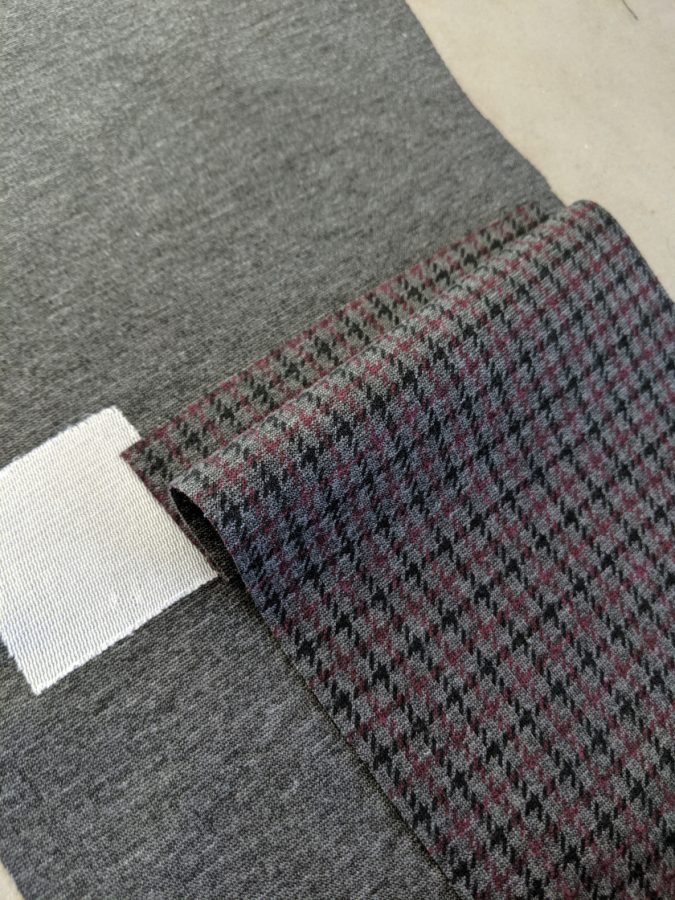
Press that fold in place well, making a sharp crease at the top of the welt.
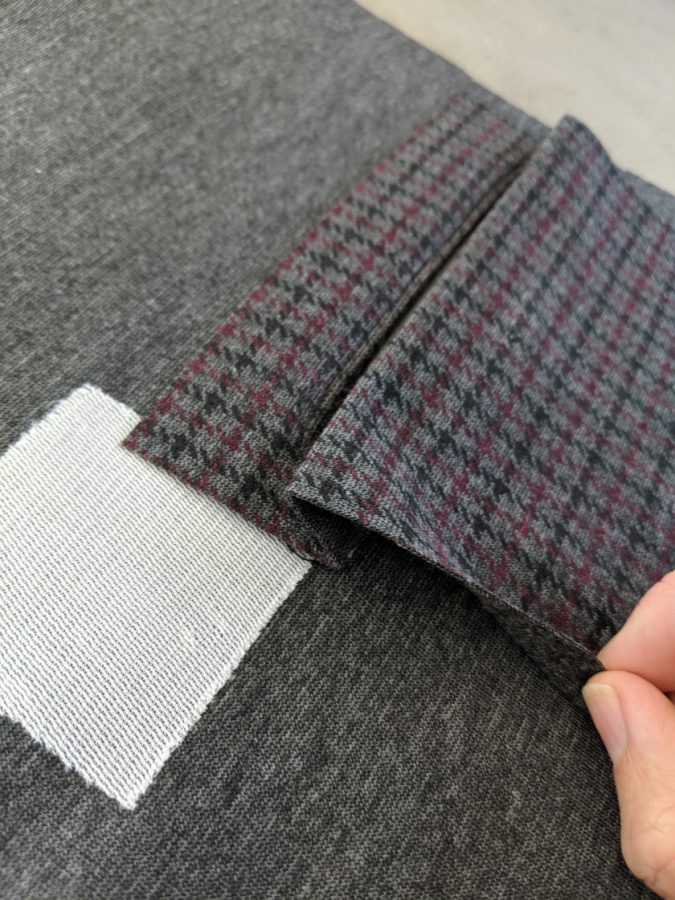
Flip the jacket to the right side and check to make sure the welt lip is even and in line with the top of the welt opening. Pin in place when you are satisfied. The pins should only be placed on the two short sides of the welt opening to catch the welt folds and keep them in place.
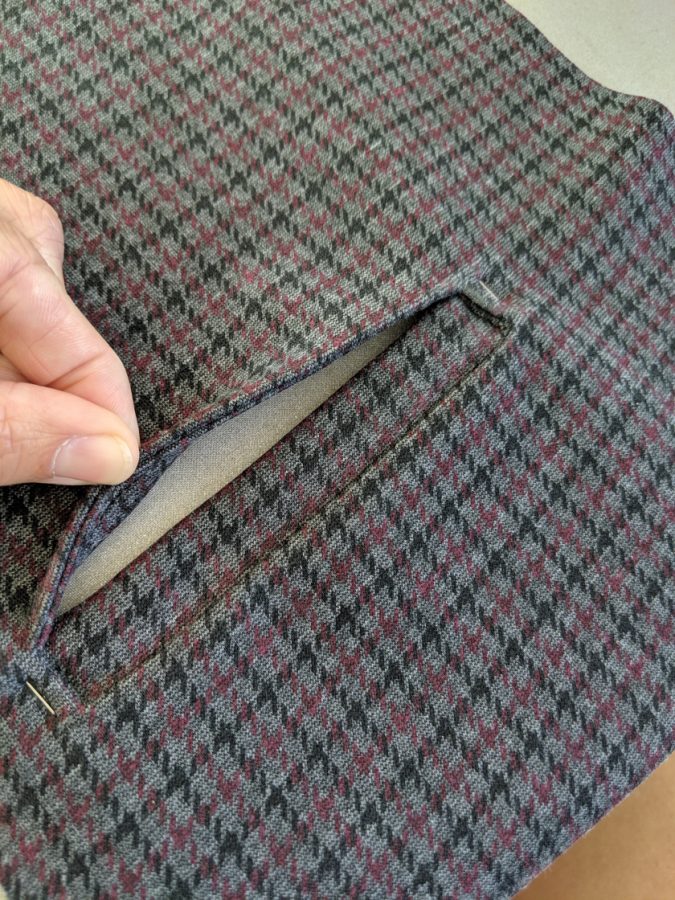
With the jacket facing right side up, flip the jacket up on each side of the welt to reveal the folded welt lip and the cut triangle. Sew straight across, catching the triangle, both layers of the welt lip fold, and the pocket. Sew as close to the welt opening without catching the jacket in this seam.
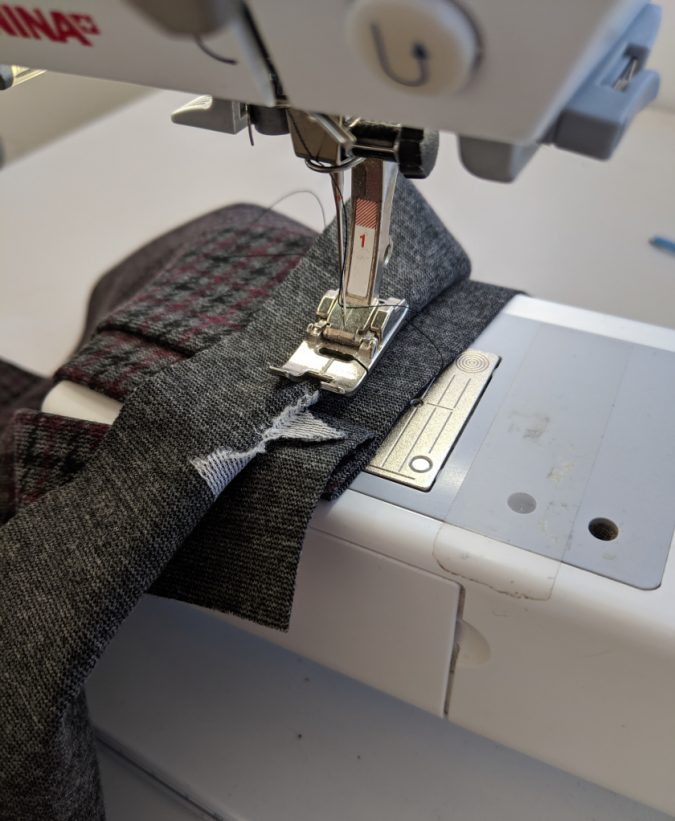
This is how that seam should look after sewing and locking stitches. It acts to keep the welt lip in place without any visible top stitching on the jacket. Continue sewing the pocket bag closed per instructions.
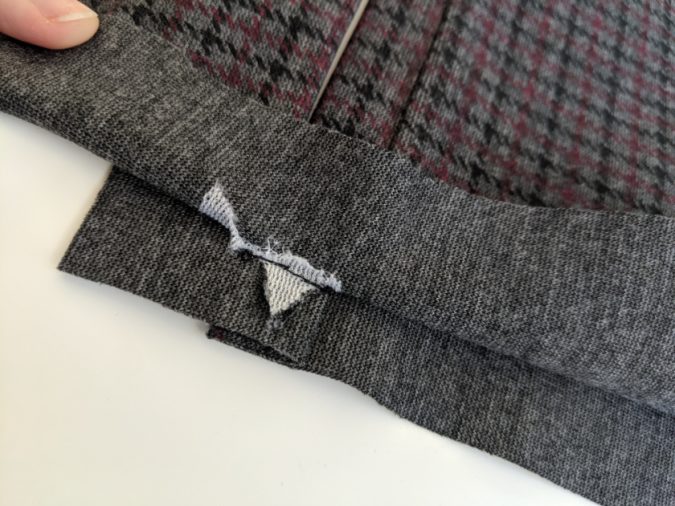
The next few steps will walk you through the shoulder and collar seams. Sew the jacket front and back right sides together at the shoulder seams, stopping at the corner marked in step 2 of the pattern. Cut into the front jacket seam allowance ONLY, at a 45° angle from the corner of the collar and shoulder just to the seam line.
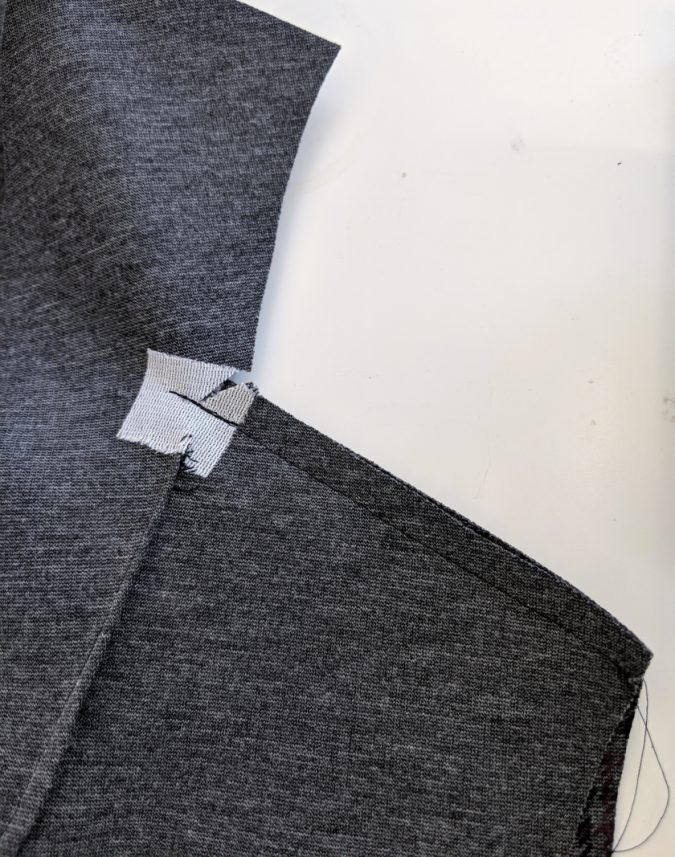
In step 17, sewing the collar to the back neckline, sew from center back just up to the shoulder seam from the previous step. These two seams should meet perfectly at a 90° angle just inside the cut slit in the seam allowance. The seam allowance should be opened up to allow these seams to meet. Be sure not to catch the excess fabric from the jacket in this seam.
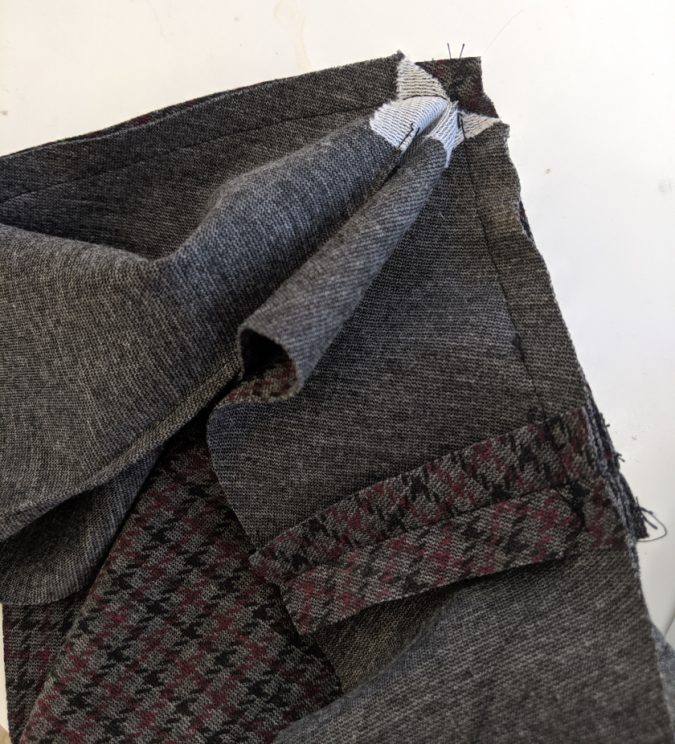
After sewing the collar to the jacket, press the shoulder seam toward the jacket back and the collar seam toward the collar.
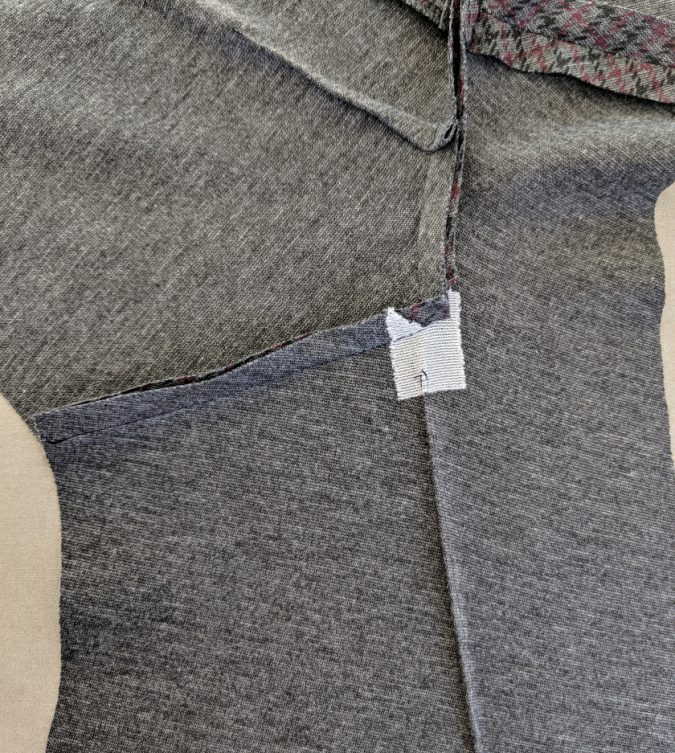
Press on the right side of the fabric as well. The pivoted seam should look nice and flat, as shown below. Almost all fabrics appropriate for this pattern will require a press cloth to avoid flattening the fabric or creating shiny spots.
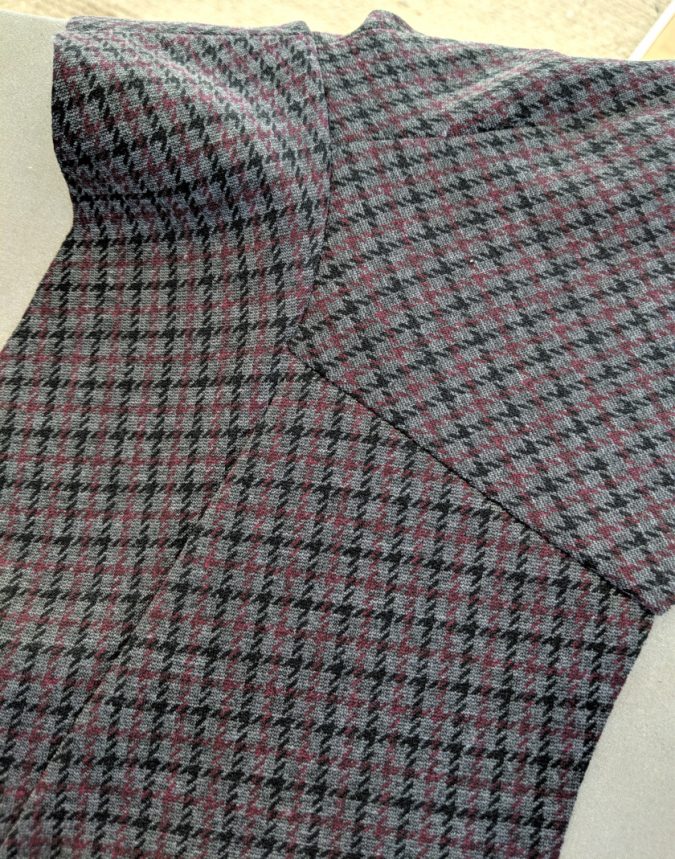
Sew the sleeve to the jacket, aligning all marked notches and the front seam lines. After sewing, ball up some scrap fabric and put it under the sleeve cap so it can be steamed into a nice cap shape without any puckering. If you have a pressing ham or a dress form, you can also use those for this step.
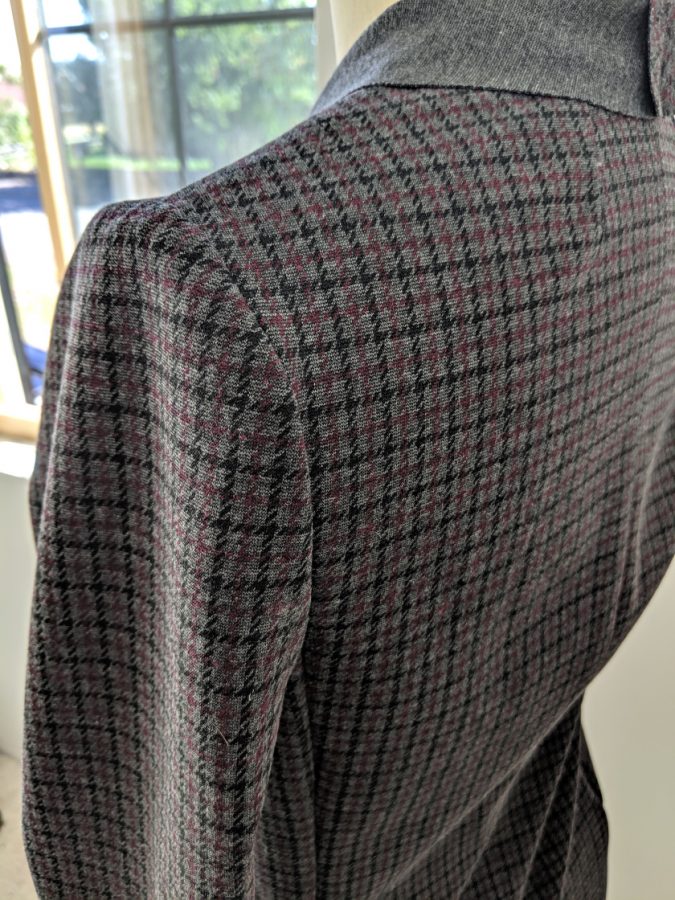
The next several steps will outline attaching the facing to the jacket. Just like you snipped into the seam allowance at the inner shoulder point on the jacket, you will need to recreate this snip on the facing. The only difference is that the jacket had a seam on it, whereas you will be cutting to the marked corner on the facing before sewing.
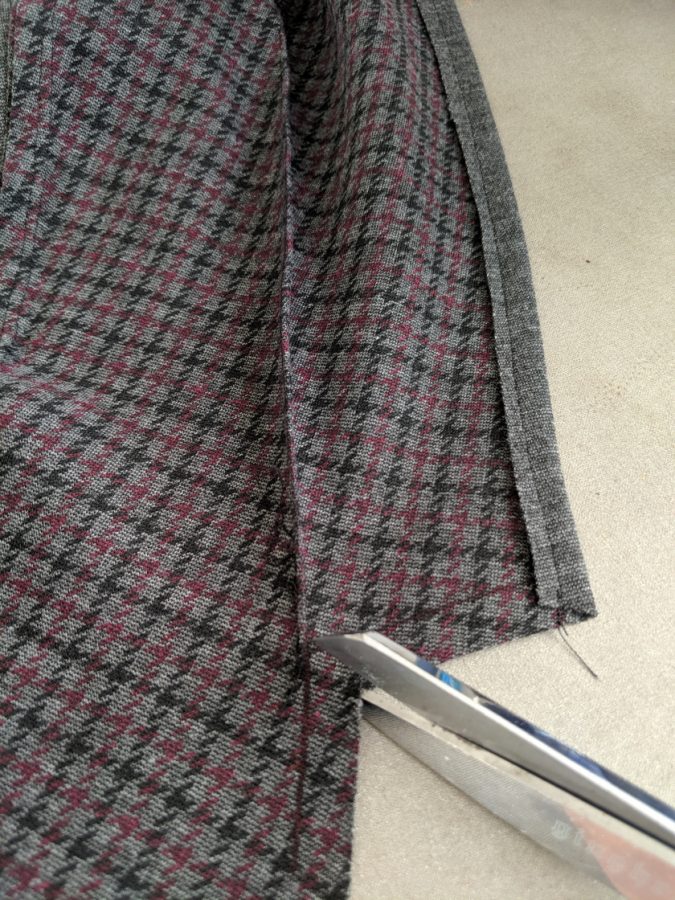
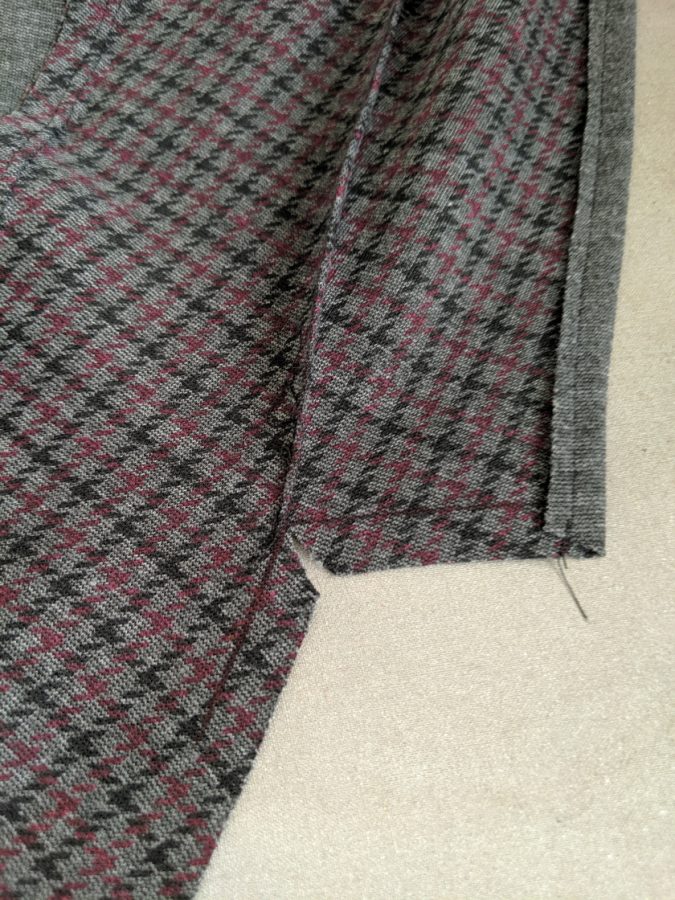
After finishing the inner edges of the facing and sewing them together at the center back neck, sew the facing and jacket right sides together along the inner edges. Remember, this jacket is shown right sides together because the wrong side of the fabric is acting as the right side on the facing. On this seam, be sure to continue the stitch all the way to the edge of the facing, maintaining the seam allowance even above the jacket’s hem extension.
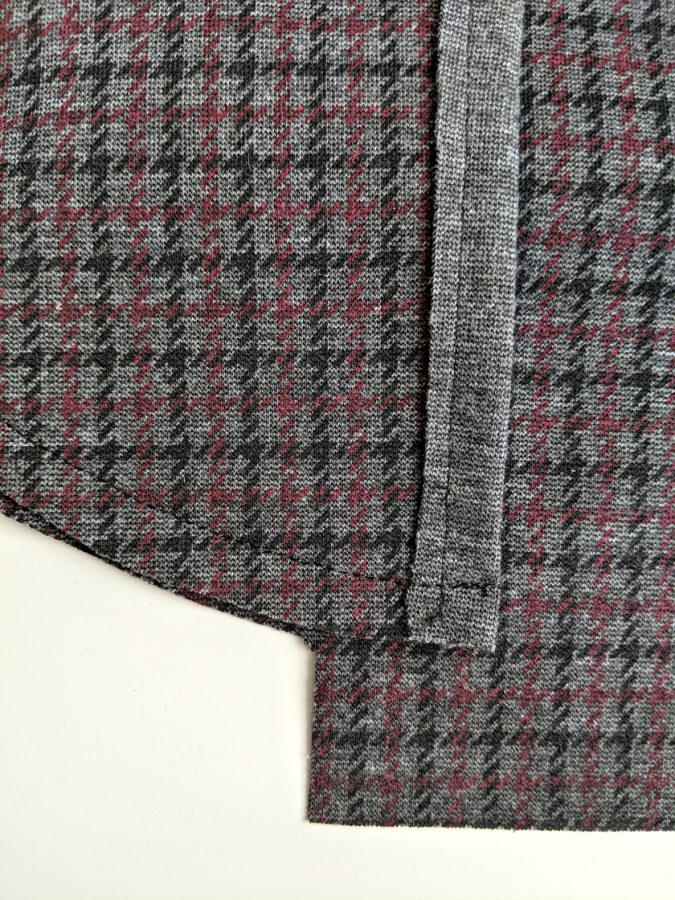
When understitching the facing to the seam allowances, start at the end of that seam. The hem extension will be below this seam, as pictured. My preferred way of understitching is to move the needle over as far to the right as it will go and then align the original seam with the center notch on my presser foot. That creates a nice edge stitch just to the right of the seam.
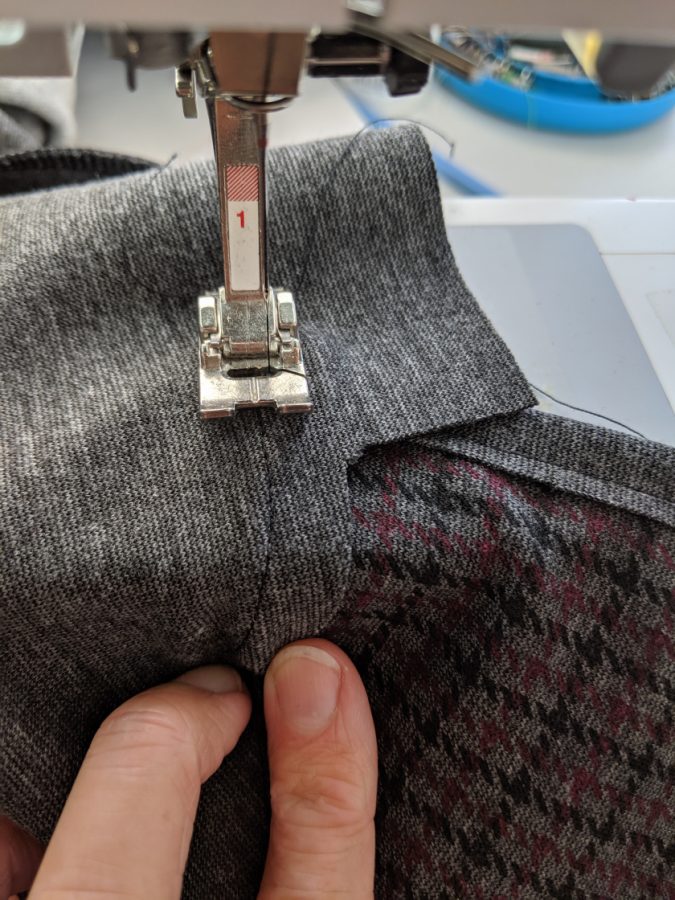
When you reach the break point, stop understitching the jacket facing. Lock stitches. Make sure the breakpoint notch extends all the way to the seamline. Press the seam allowances above the break point toward the jacket. Starting about an inch above the break point notch, start understitching again, but this time you will be sewing the jacket FRONT to the seam allowances, not the facing. That skipped inch allows the jacket to roll out at the bottom of the lapel without revealing any understitching.
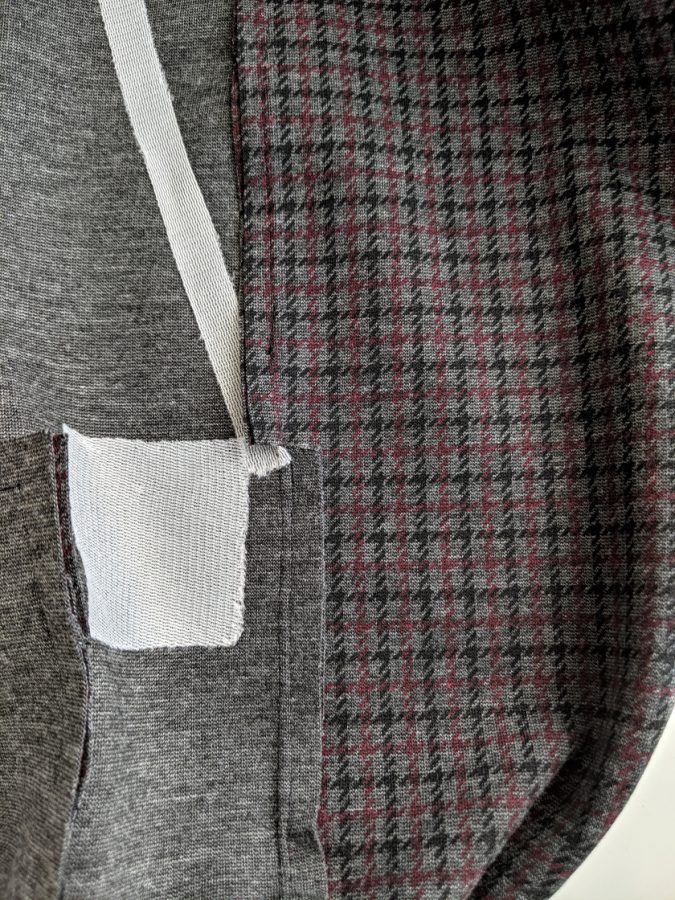
Turn the facing to the inside of the jacket and press it very well. The hem extension will be forced up at the hemline. Press the hem in place at that height, using the notches on the side and back seams to align it as well. The hem should be 1.5″ all around.
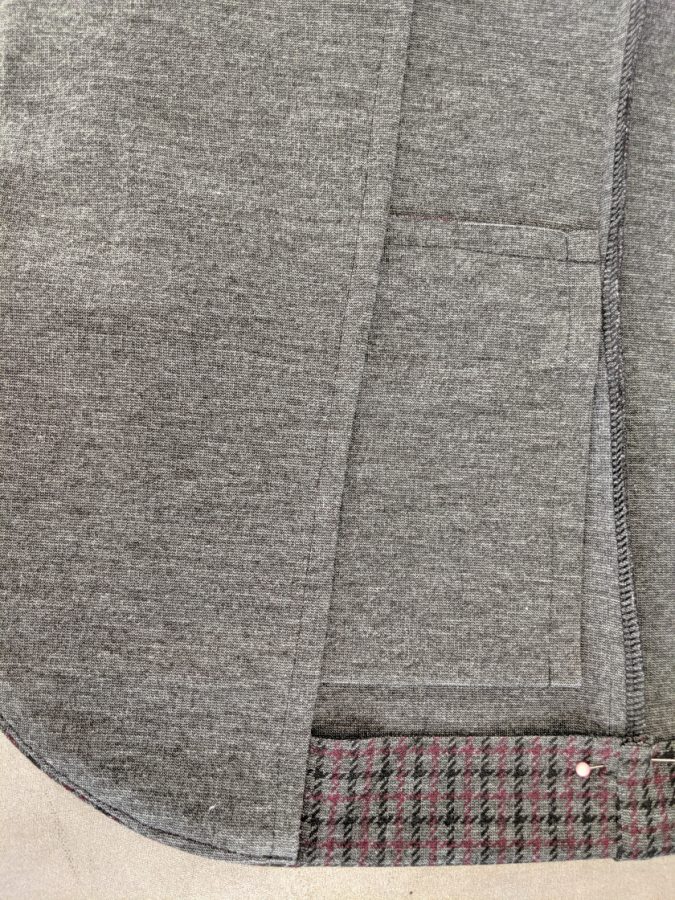
Now you will need to attach the loose shoulder seam of the facing to the jacket. To do this, align the cut inner shoulder seam allowances on the jacket and facing. They are both a 45° angle cut, so they should align perfectly. Line up the raw edges of the seam allowances on the facing and jacket (remember that if you serged you should not have removed any width from the seam allowance, ie: do not let your serger cut the seam allowances). Now you will sew the facing to the jacket ONLY within the seam allowances with a straight stitch. This is really just tacking the facing to the jacket in a way that it will not show on the right side.
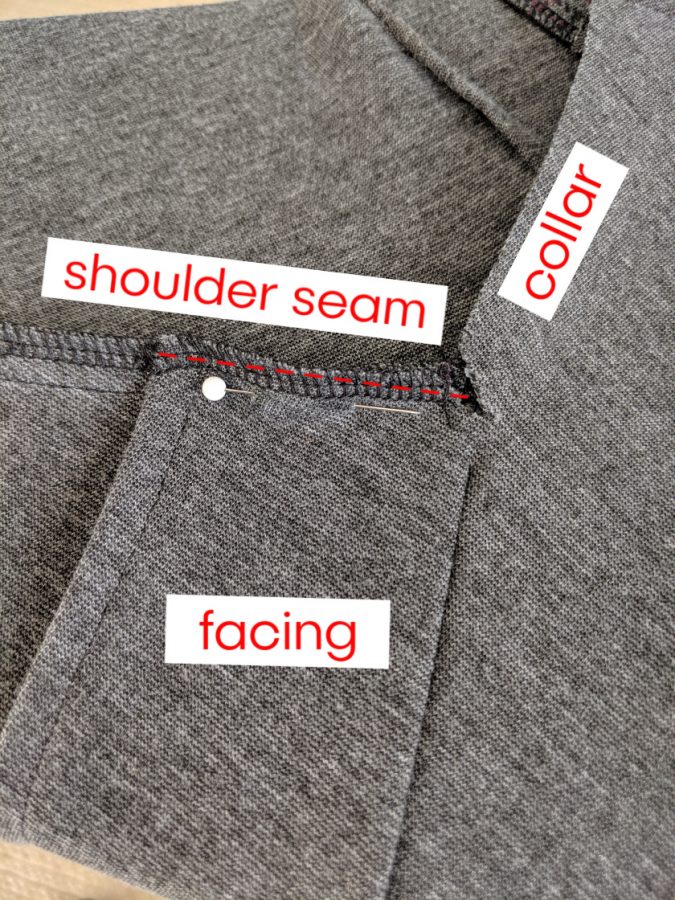
Fold the raw edge of the facing’s collar toward the wrong side by 1/4″. Make sure the fold just covers the seam from the jacket’s collar. Pin the facing collar in place on the wrong side of the jacket. On the right side, stitch in the ditch of the collar seam on the jacket to catch the facing on the wrong side. This stitch will be invisible on the right side of the jacket because it will sink into the seam (and the collar will cover it) and should just catch the facing collar fold on the wrong side of the jacket.
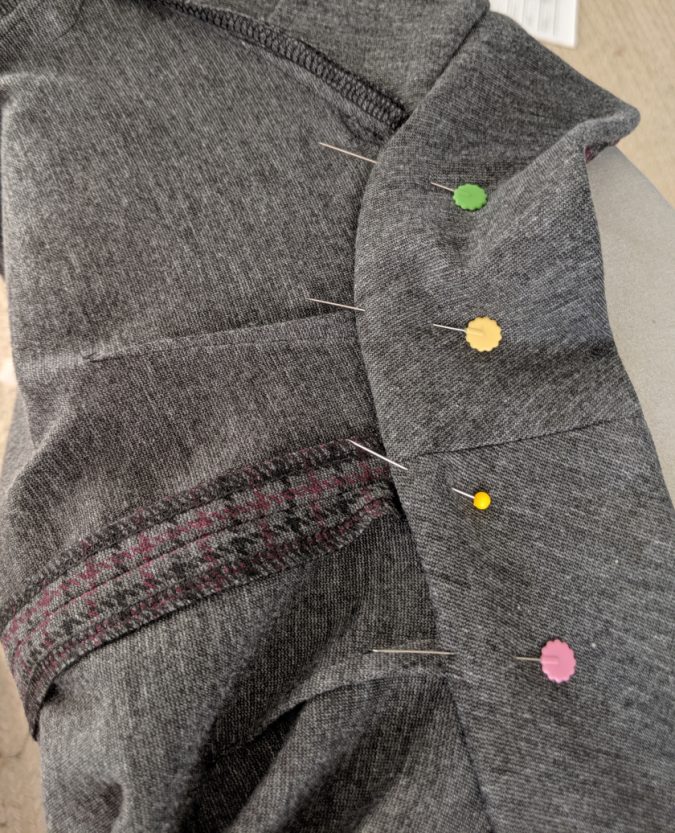
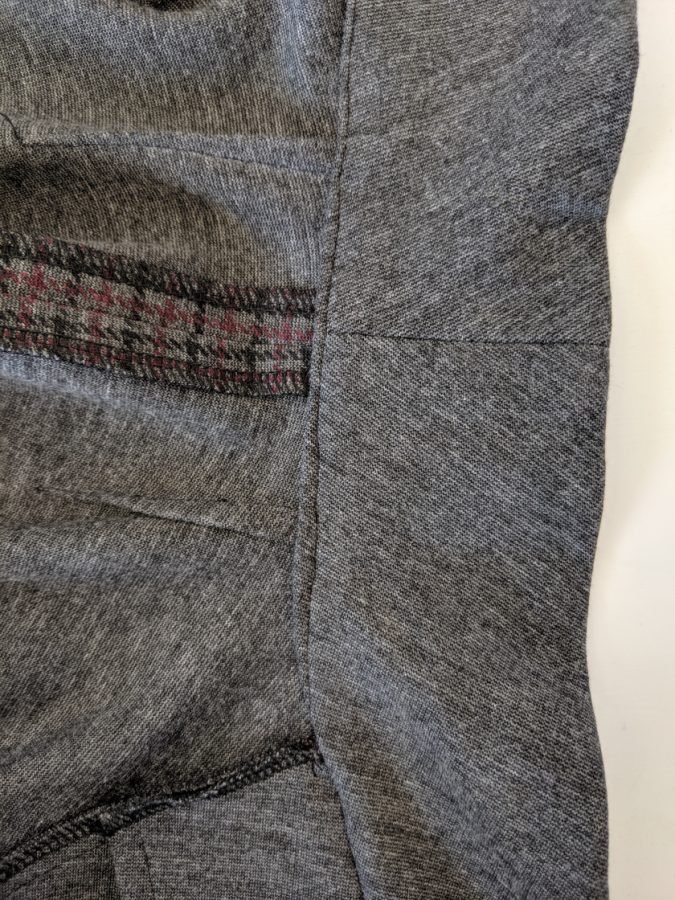
The next few steps will deal with hemming the jacket and sleeves. You will need to unfold the hem where it was pressed up earlier. For this jacket, I used a lace hem tape. You can also use bias tape, solid hem tape, or fusible hem tape. You could also fold the edge of the hem over, though that can be quite bulky depending on your fabric. A final option is just to leave the hem raw or serged because knits will not fray. However, it is helpful to have a finish on the hem so you have something to catch in the blind hem later.
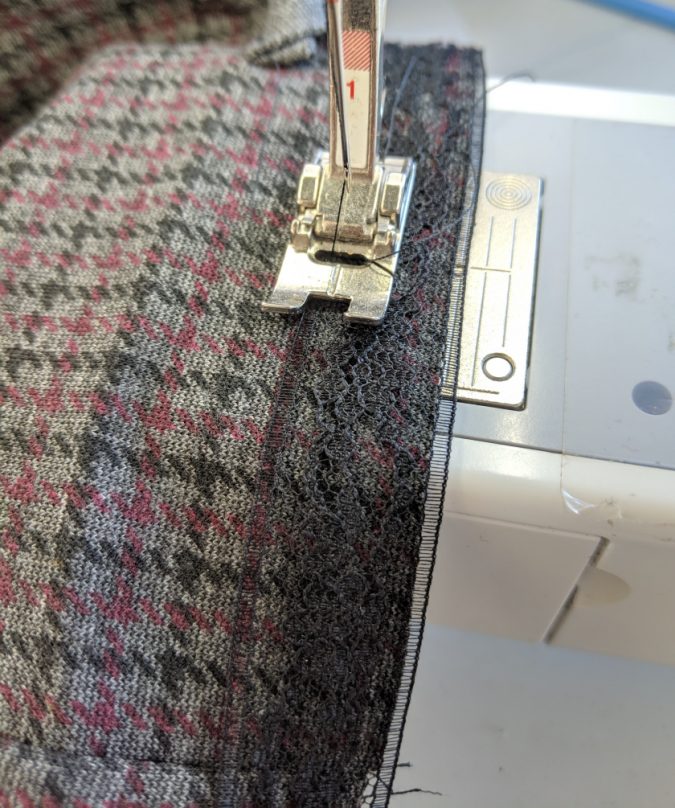
To apply the tape, sew it to the right side of the jacket so the tape just hangs off the raw edge of the hem. My tape is hanging about 1/16″ off the edge.
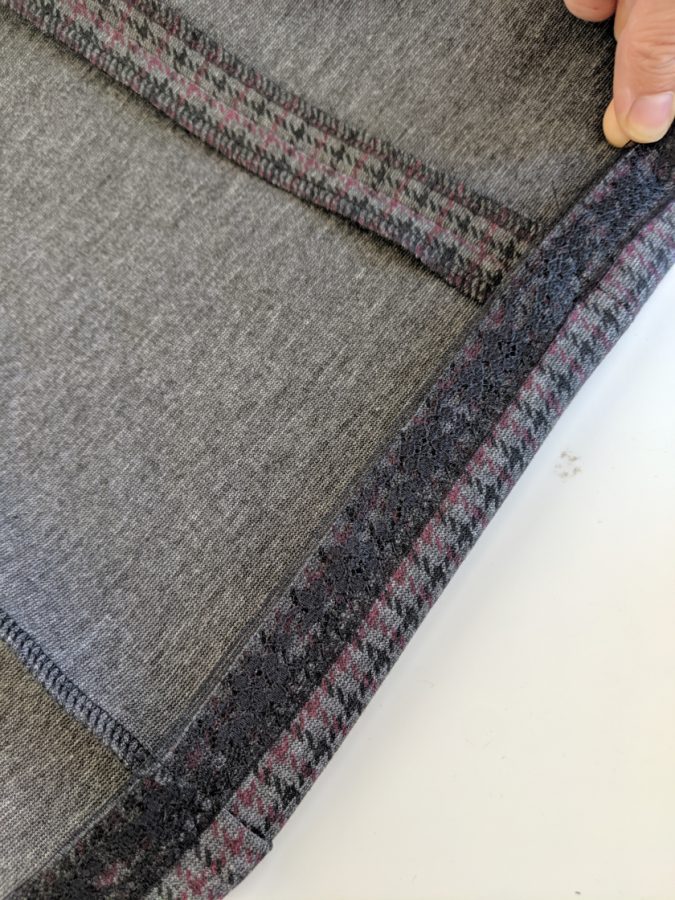
When you refold the hem up at 1/2″, the tape will cover the raw edge.
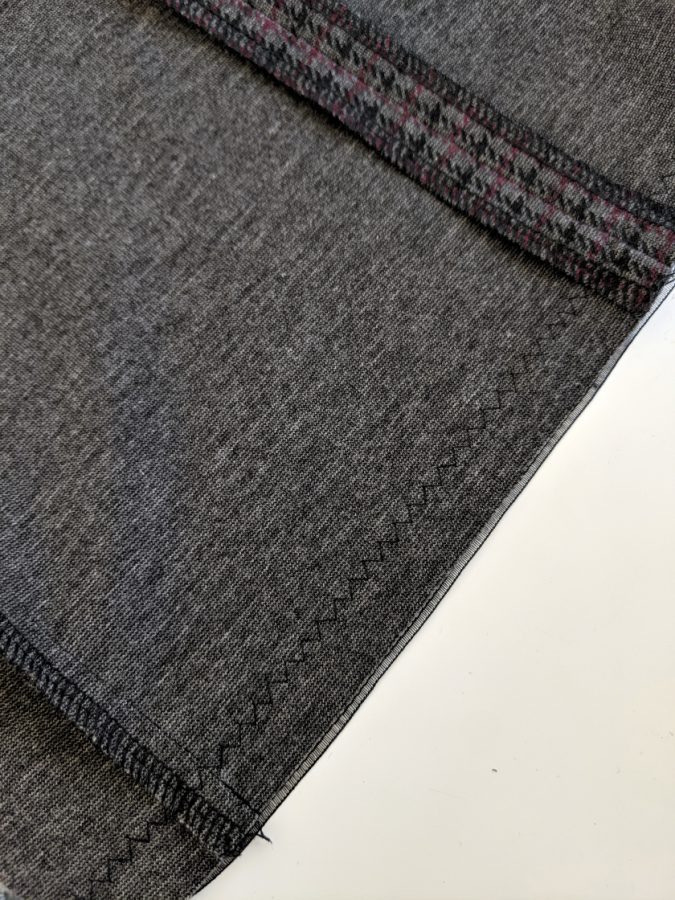
On the wrong side, you will see the stitch from applying the tape. As you can see, I used a zig zag stitch to help hold the lace in place. If using a solid tape a straight stitch is fine.
Remember that when hemming any sleeve in any way, it is always easiest to turn the sleeve inside out and sew on the right side of the sleeve.
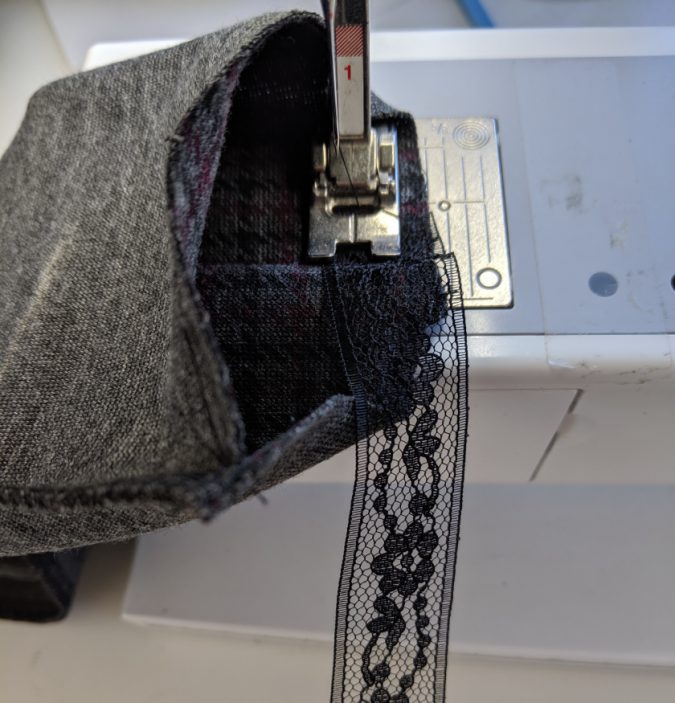
Flip up the sleeve hems and press them well.
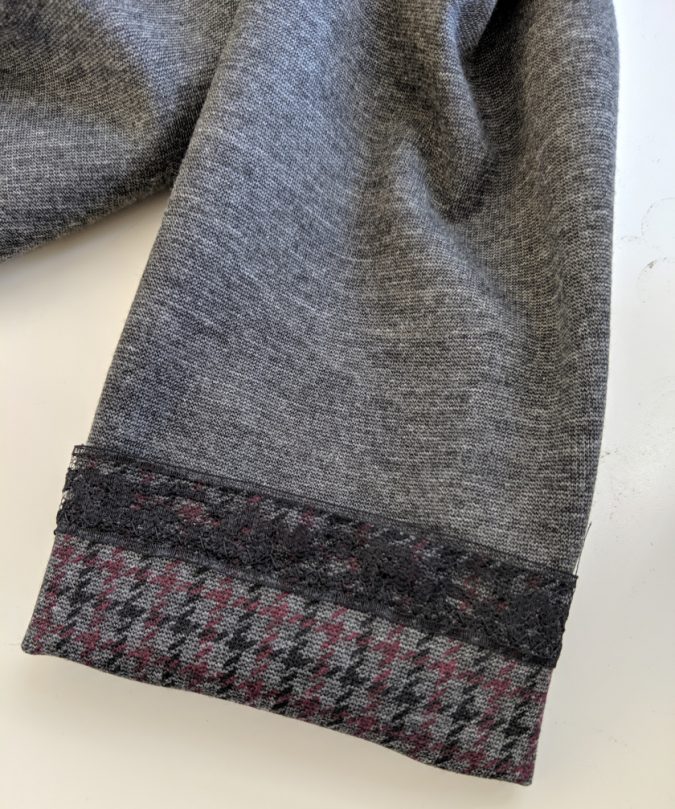
Now it is time to secure the hems in place with a blind hem stitch. This can be done on a machine if you have a blind hem foot and stitch, however it is very simple to do by hand as well. It is relatively quick to sew these hems, but you may want to put on a good show to watch!
There are a few ways to sew a blind hem, and to some degree they will depend on the finish you chose. If you used a hem tape like mine, you will need to do a pick stitch on both the hem and the jacket. If you used bias tape or created a fold in the hem, you will have a fold that will allow you to use a modified ladder stitch, with a ladder through the hem and a pick on the jacket.
For a blind pick stitch hem, you just want to be sure to catch anywhere from a couple millimeters to a cm of the hem in your stitch, then move over about 1 cm and catch just 2-3 threads on the jacket. That way the thread goes securely through the jacket fabric, but is not visible on the right side of the jacket. The thinner the jacket fabric, the more a dimple will be visible. These blind hem dimples are normal and to be expected on a blind hem.
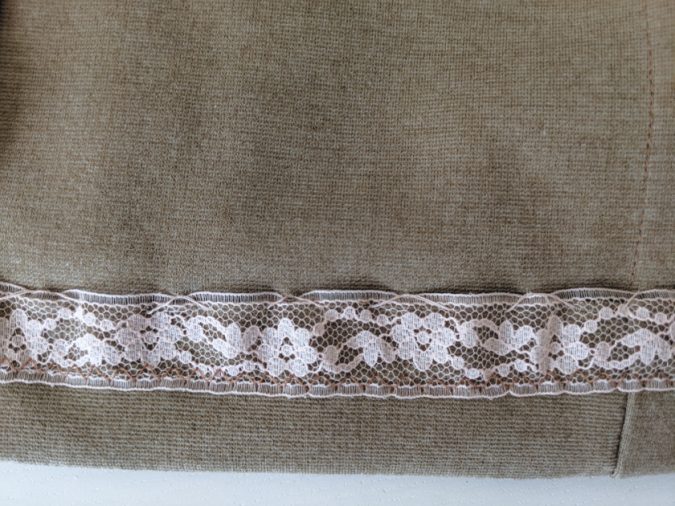
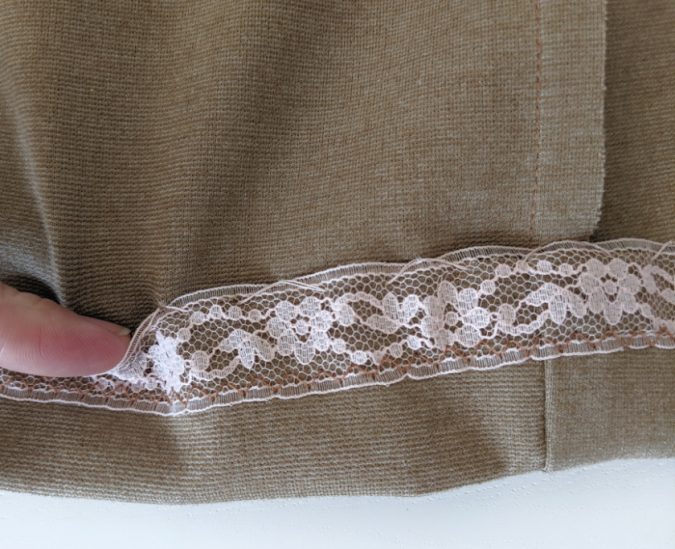
For a modified ladder stitch, you can run your needle through about 1 cm of the hem fold or bias tape fold before bringing it up and catching 2-3 threads of the jacket.
I hope that helps you with the techniques of sewing the Evans Blazer that may be new to you! Remember that a lot of times when sewing something that seems difficult it helps to just sew it as instructed without trying to make sense of the instructions. Just because you can’t wrap your head around a list of instructions doesn’t mean it won’t all work out if you follow along! After you’re finished sewing and can see how it all came together it may make more sense.

I also find that reducing the stitch length, as you approach a corner, makes it much ‘sharper.’
This is really a great way to help beginner sewers