

A lot of things happen behind the scenes in pattern-making world, I’m here to tell ya. Last winter around this time I had the idea for what eventually became the Lucerne Blouse and another idea for a camp style shirt with tie sleeves. At the end of the day, I decided to give the tie sleeve to the Lucerne because it was otherwise so simple and needed a fun detail. But I knew if I ever got around to that button down I was for SURE going to hack it to have that tie!
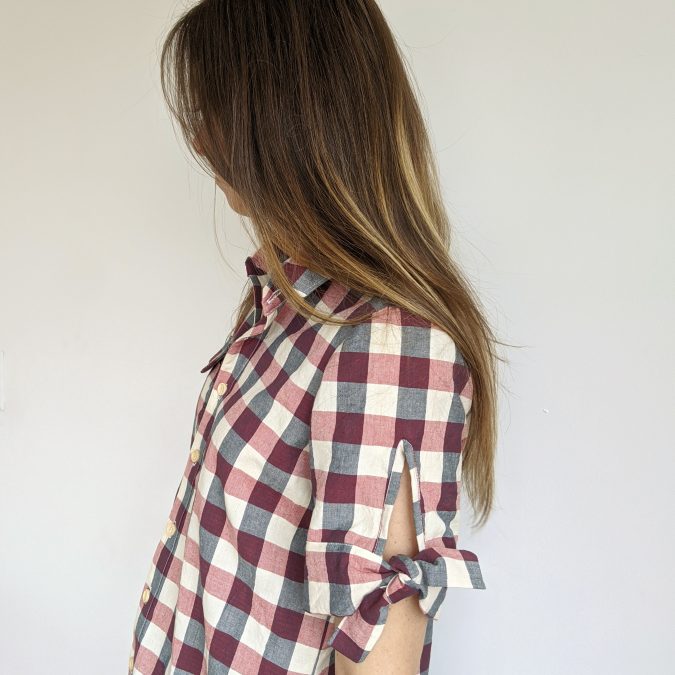
Here we are a year later and I’ve released that camp style shirt – the Amherst! I think this pattern has plenty going on without a sleeve tie; there’s a collar and stand, button placket, sleeve cuffs and tabs. But I had to finally make my dreams come true and add that Lucerne tie to the Amherst sleeve!

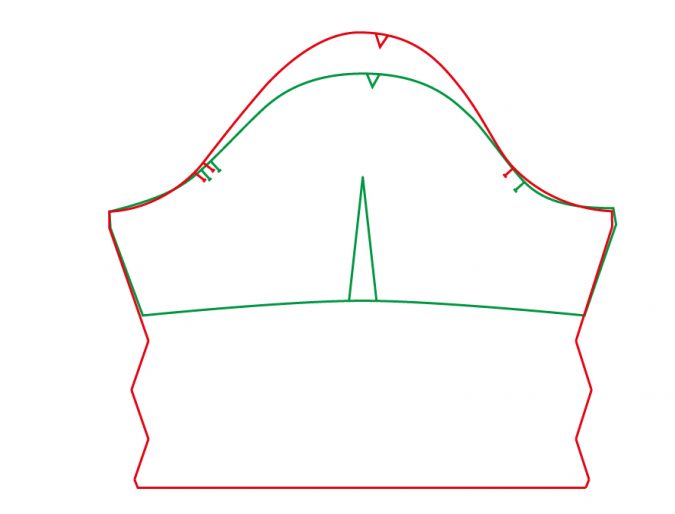
I hesitate to even call this a tutorial, because it’s really not. All you have to do is lay the Lucerne sleeve over the Amherst sleeve and cut a new hemline. Lucerne is shorter and curves up in the center and has the marked slit line for what will eventually become the keyhole opening above the tie. If you’re making the new size 0 or 24, simply use the closest size on the Lucerne and make it work! The Amherst sleeve is really doing all the heavy lifting here anyway, all you need is that sleeve length and curve from the Lucerne, so don’t sweat it if you have to fill in some gaps. In this pic, the Lucerne is in green and Amherst is in red.
After you trace your new sleeve pattern (shown in the black dotted line below), simply apply the Lucerne tie piece when sewing your Amherst using the Lucerne instructions. That’s it!
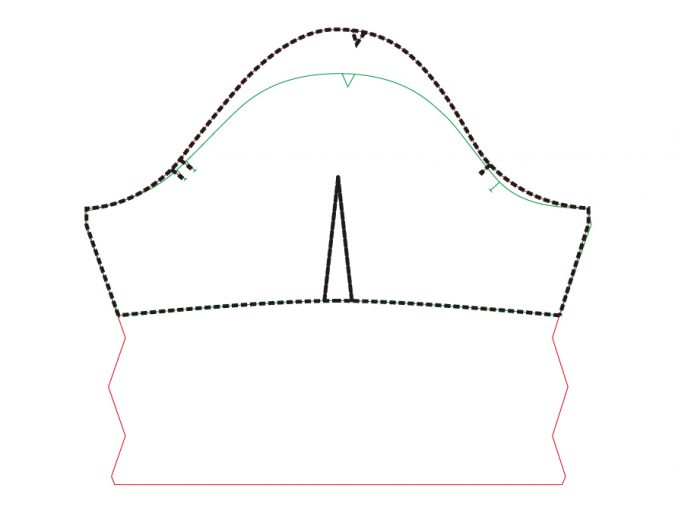
Note that the tie on the Lucerne is integrated with the cuff, so it does add a little over 2″ to the sleeve length. If you want to make it even shorter, shorten the updated sleeve piece before adding the tie.

This shirt definitely feels patriotic picnic-y to me, so now I suppose I have a Memorial Day and 4th of July uniform! I plan to pair it with my dark wash Sandbridge Skirt all summer, but today was of course the first chilly day we’ve had in weeks, so you’ll have to wait for that outfit – maybe during Me Made May!
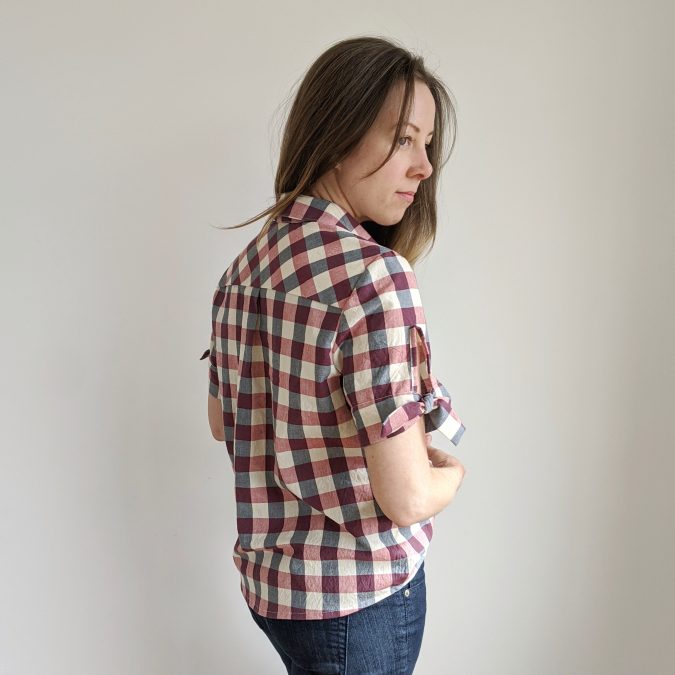
I chose to just add one pocket to this shirt and I put the buttonholes on the opposite side of normal. I also cut the back yoke in two pieces on the bias. All of these choices came down to fabric matching and quantity. You work with what you’ve got!

I hope you’ll tag me if you make one of these tie-sleeved Amherst Shirts! I’d love to see!
Pocket? What pocket? I don’t see any pocket! But seriously, I’ll be copying this ASAP. Love it!
There is a breast pocket on the right side.
She is joking because it’s pattern matched so well 😉