
Please welcome Jen back to the blog with this gorgeous ruffled Cheyenne hack made with Liberty fabric! She’s sharing a tutorial so we can all copy!
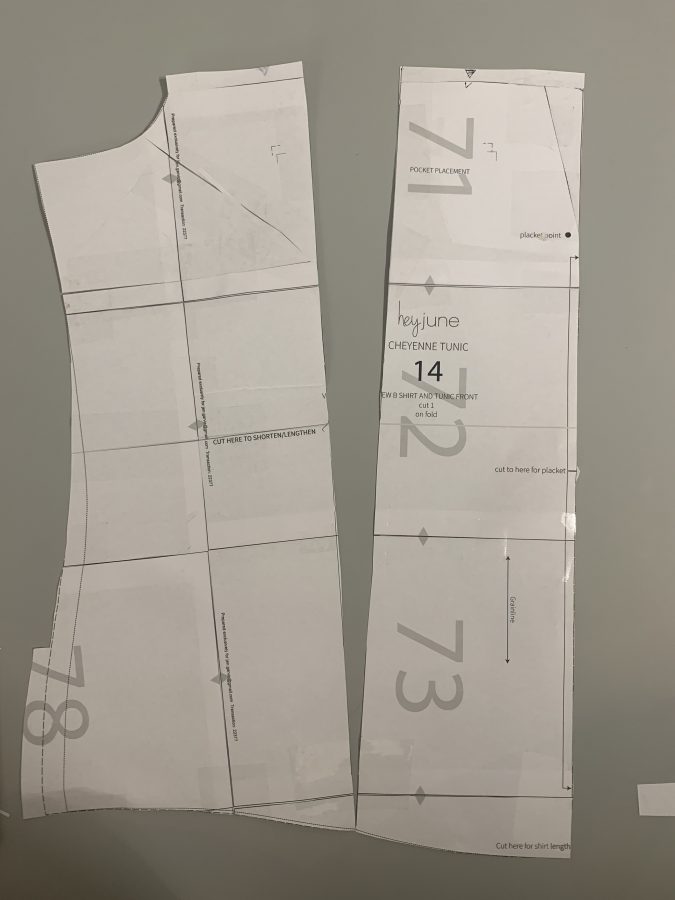
Hello! Thanks for having me back on the Hey June Handmade blog to talk more about my favorite HJ patterns. I’ve sewn so many Hey June makes that it seems (even to me) that I’ve made every single released pattern but that’s not the case. I am a repeat-sewer. In fact, I tend to sew the same patterns over and over again. I truly believe there is where much of my sewing knowledge has developed from. And even though this shirt I’m sharing with you today doesn’t outwardly seem like a Cheyenne Tunic, I assure you that I started from the Cheyenne Tunic pattern, a pattern I’ve sewn and feel confident sewing as written, and made my adjustments from there.
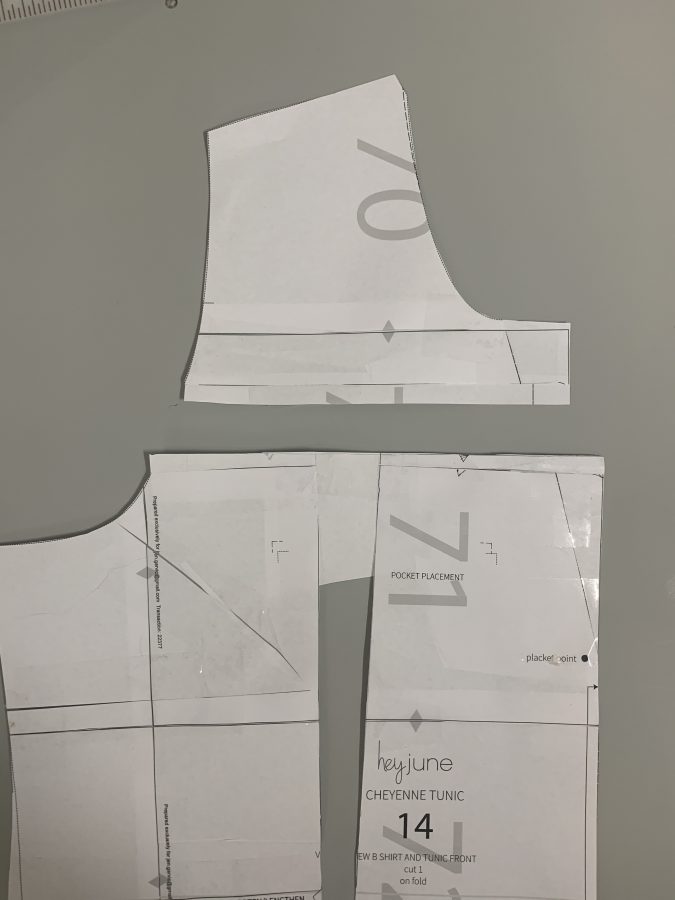
I’ve sewn several Cheyenne Tunics previously. This pattern taught me to sew a collar stand and collar as well as create tower plackets for cuffs. The repetition of sewing the same pattern gives me confidence on these skills, and it was this confidence that gave me the courage to do the ultimate sewing risk: hack a favorite pattern to resemble an awesome (and expensive) ready to wear style.
Why do I call this a risk? For one, if you are a repeat-sewer like me, it’s easy to settle into the security of knowing what will come next in the steps. When you take on a pattern hack, you are stepping outside of the instructions provided by the designer. THINGS CAN GO WRONG (and often do) on pattern hacks but if you are confident with the construction of the original pattern then it is easier to figure out a solution to any bumps in the road.

Of course, I upped the ante by not only deciding I wanted to (majorly) hack the Cheyenne Tunic pattern view but I also wanted to use my precious two yard cut of Liberty of London cotton lawn fabric. The fabric is soft and crisp and was a pleasure to sew from beginning to end. Before you even ask, my answer is yes. Liberty fabric is worth the hype and the price tag. I would definitely splurge again.
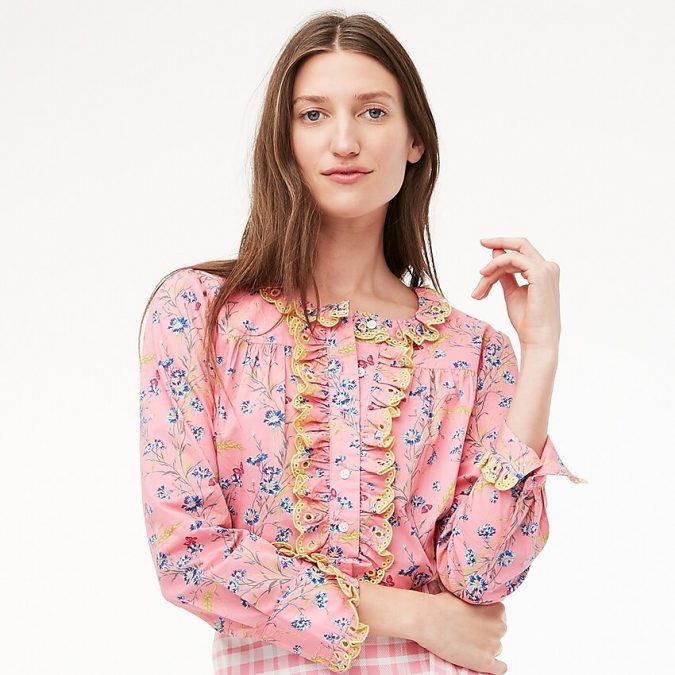
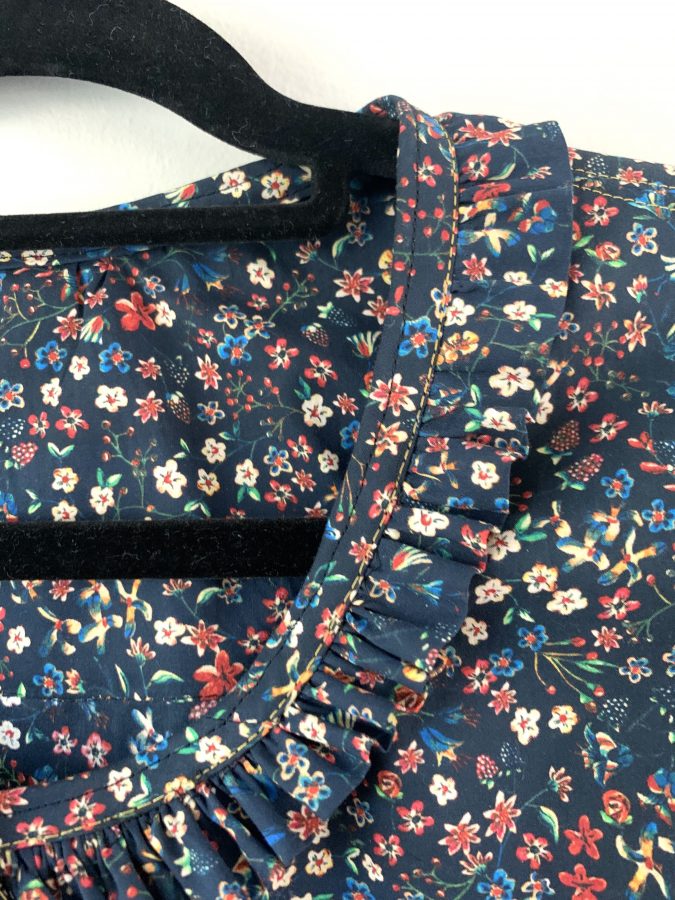
The ready-to-wear piece I chose as my inspiration is a J.Crew Embroidered Ruffle Blouse made in a Liberty floral print. It has a hefty price tag of $128 and while I love the little ruffle details, the bubblegum pink is not in my preferred color palate. I love the front yoke with little gathers over the bust. This style solves a problem I hadn’t yet solved with the four Cheyenne Tunics I’ve previously made; I need a slight full bust adjustment and the gathers under the front yoke provide extra space at the bust without increasing the shoulder size. I also wanted to mimic the little gathers at the shoulder and the ruffle details on the placket and sleeves.
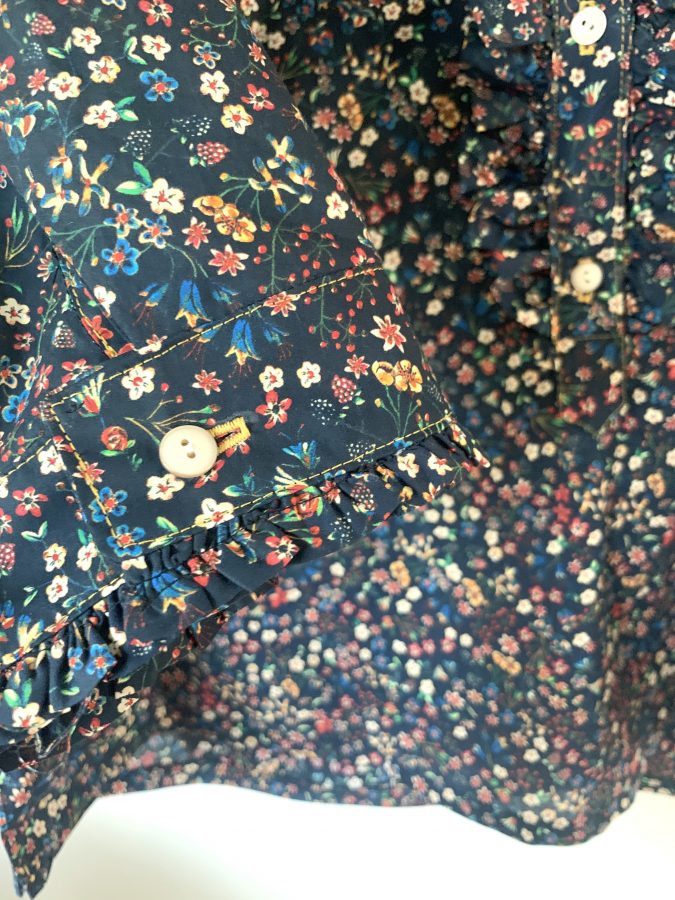
I had to do some serious research to figure out how to make these edits to my pattern to make my Cheyenne similar to the J.Crew inspiration shirt. I researched how to create a front yoke and slash and spread the front bodice piece to allow me to gather a small amount of fabric. I also consulted a few articles on how to add gathering to the sleeve cap without adding poofiness. I knew that the ruffle details were more intuitive adjustments. For the placket I simply sandwiched the ruffle between the placket and the shirt before stitching them together. For the sleeve cuffs, I created two pieces instead of one folded over so that I had a new seam to put the ruffle between. I will include a list of blog posts and resources I used for my hacks at the end of the blog post.

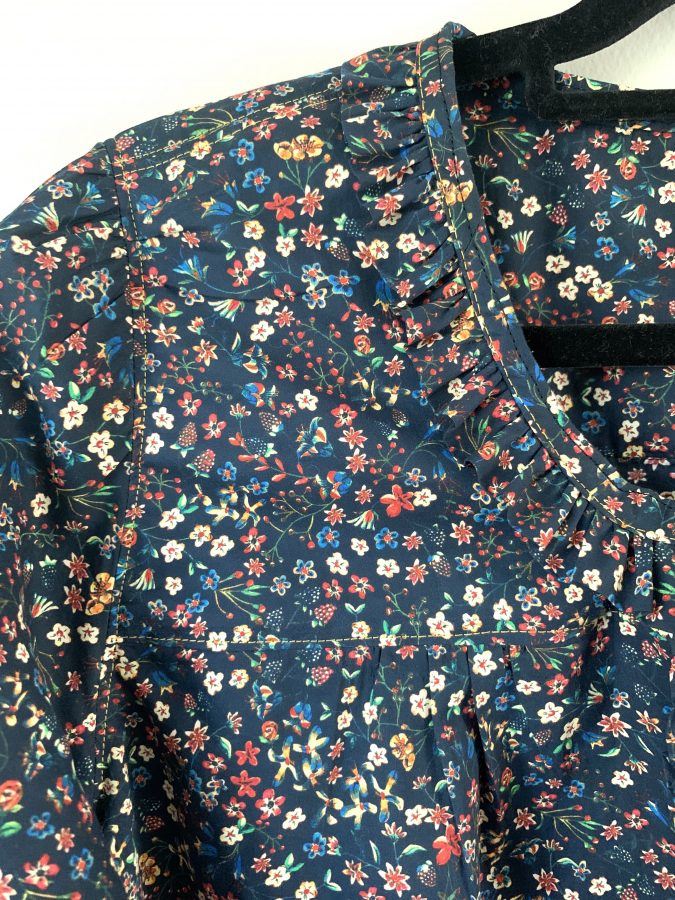
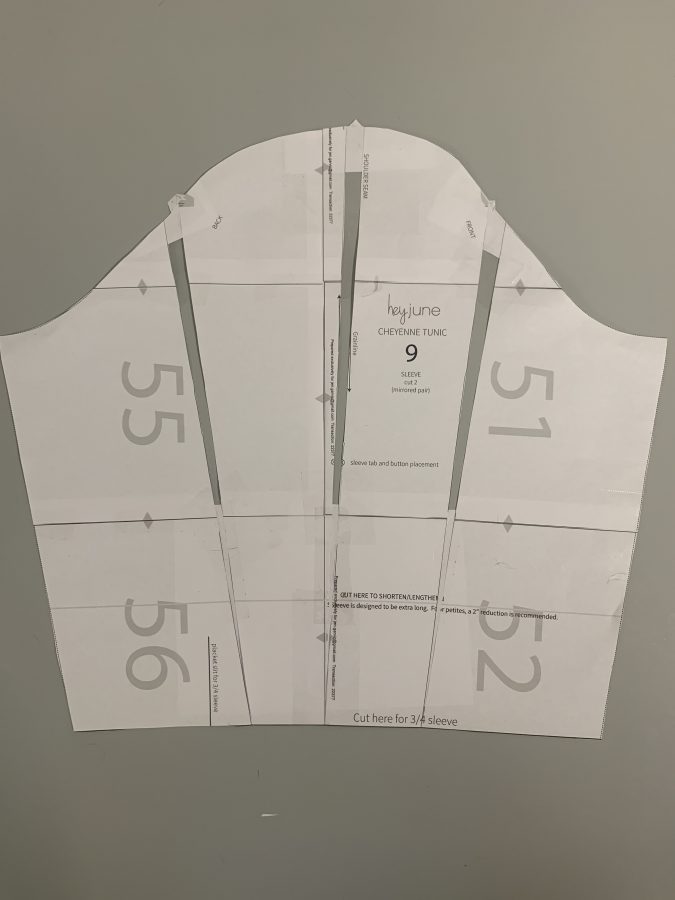
The trickiest part for me, and possibly the part that I’m not sure was completely successful, was adding the gathers to the top of the sleeve cap. Some of the tutorials suggested adding extra height to the top of the sleeve pattern piece. Because I was worried about the sleeve appearing poofy, I did not do that; I only added width. My sleeve seems to pull a bit at the back but I don’t think it’s noticeable to someone who is not wearing the shirt. I may muslin a future sleeve on another shirt to test the difference of adding height + width and just width and make a decision from there. Before you decide to add gathers to the top of your sleeve, do some research and testing of your own on this.
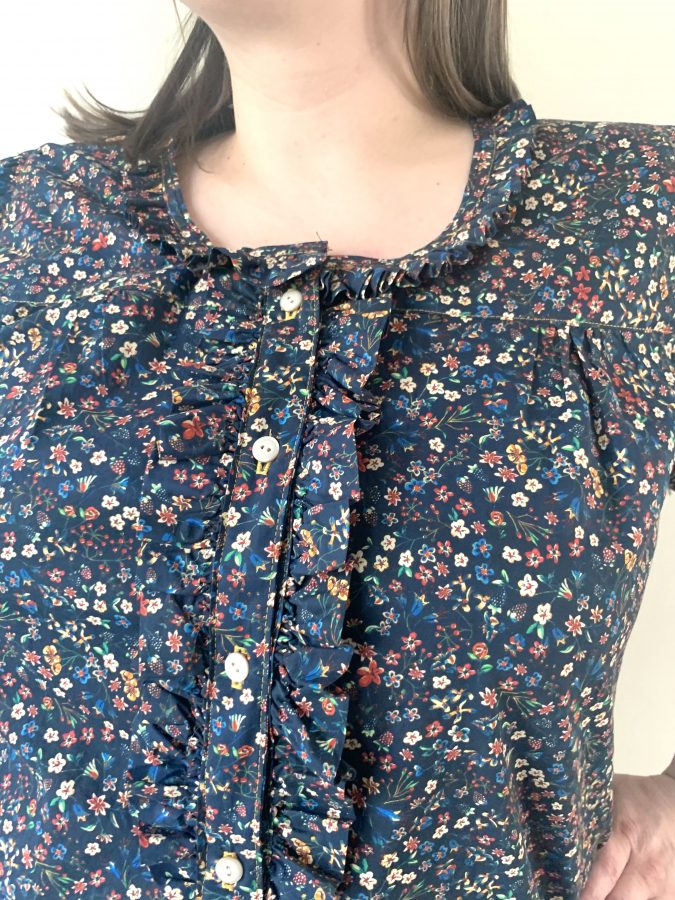
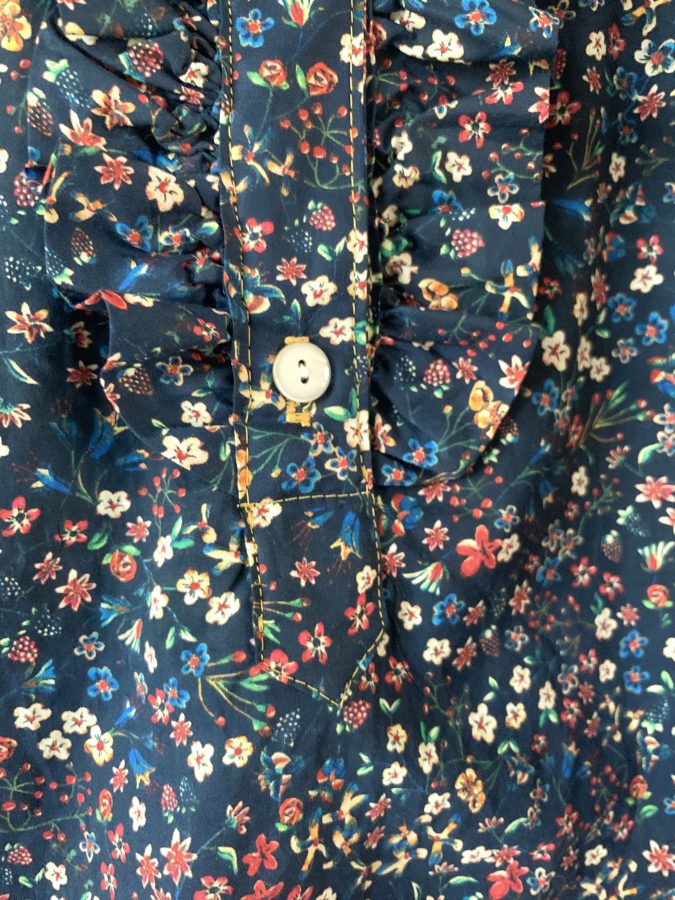
The last big adjustment I made to the Cheyenne Tunic pattern was to eliminate the collar and collar stand, slightly lower the front neckline, straighten out the angled portion of the placket pattern piece, and add a ruffle all the way around the neckline. I did some intend to enclose the ruffle inside the yokes for a clean inside finish but I had already attached the placket to the front yokes and did not want to remove it. I also considered folding the ruffle down with a bias facing, whereas the neckline would appear more similar to the neckline finish of the inspiration top, but I called it good enough after I had sewn the bias tape around the neckline. I decided to keep it simple, treat it as a feature, and topstich the entire bias edge down so that it was visible.
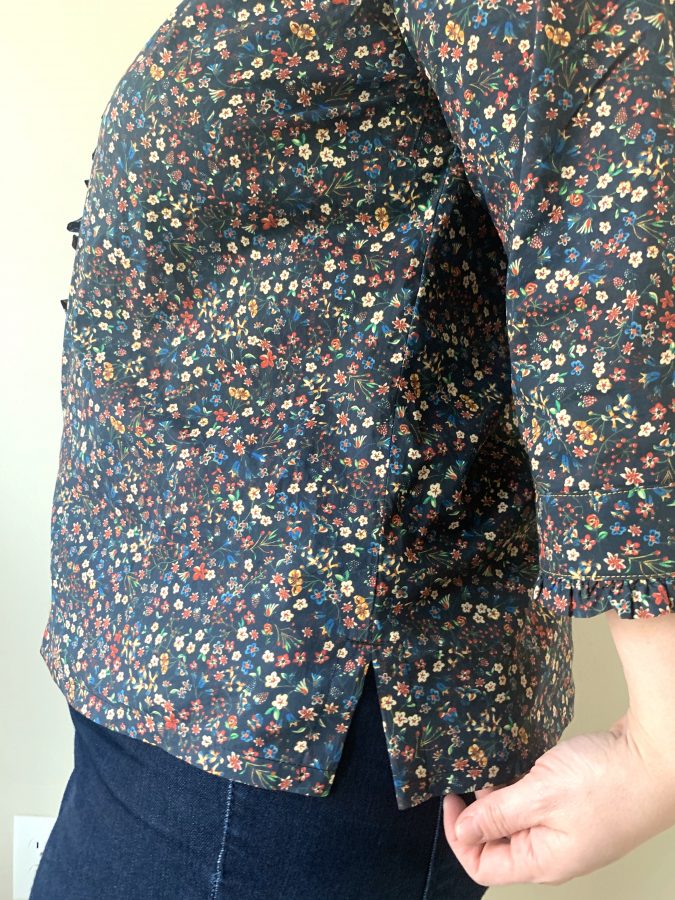
I can’t forget to mention one of my favorite features: the split hem. My hip measurement is currently larger than the pattern measurements and I didn’t want the shirt to feel snug worn over my pants or tucked into a skirt. I did French seams inside the entire garment except at the side seams. I individually serged the side seam allowance of the front and back bodice pieces from the sleeve to the hem so that I could take in or let out the shirt if my body measurements fluctuate. This means that this beautiful shirt can be easily altered and will last longer in my closet!
Forgive me, please, for the difficulty in seeing the details. This beautiful Liberty print does not photograph well, but it absolutely stuns in person. I’m so grateful that I decided to take this deep dive into pattern hacking using the Cheyenne Tunic and some extremely precious fabric. I wouldn’t have attempted it if I hadn’t already sewn this beloved pattern so many times!
My #1 advice about pattern hacking—good enough, close enough, is absolutely acceptable! Give yourself a pat on the back for stretching your creative skills and move on to the next thing! What are your upcoming pattern hacking plans? I’d love to hear all about them!
Websites and Blogs I consulted for hacking support:
Adding a ruffle to a collar or button placket by Whipstitch Adding shoulder gathers to a shirt by Thread Riding Hood
Seven easy sleeve alterations by The Shapes of Fabric
How to Create a Full Sleeve by Clothing Patterns 101
Thank you so much Jen! I couldn’t agree more with your last statement – good enough is definitely good enough! And the more hacks you do the more comfortable you’ll be. Though I have to say in this case you far surpassed good enough – this is perfection!!!
I love Liberty! And this top is stunning. So glad my shoulder gathers tutorial helped!
Thank you again for having me on the blog. I’m wearing this Liberty shirt RIGHT NOW and it’s so perfectly fit to my body that I might never take it off. Sewing is magic, friends!
This turned out beautifully!!!! I love your contrast topstitching and advice on hacking.
Beautiful, so clever – and as a bonus i didn’t realize the Cheyenne had a collar, and it is exactly what I have been thinking about making, so I don’t have to modify another pattern!
Thank you for this post. I have thoughts for a similiar project. Your description and resources are very helpful. I like how the details are present to be seen and savoured without being overwhelming.