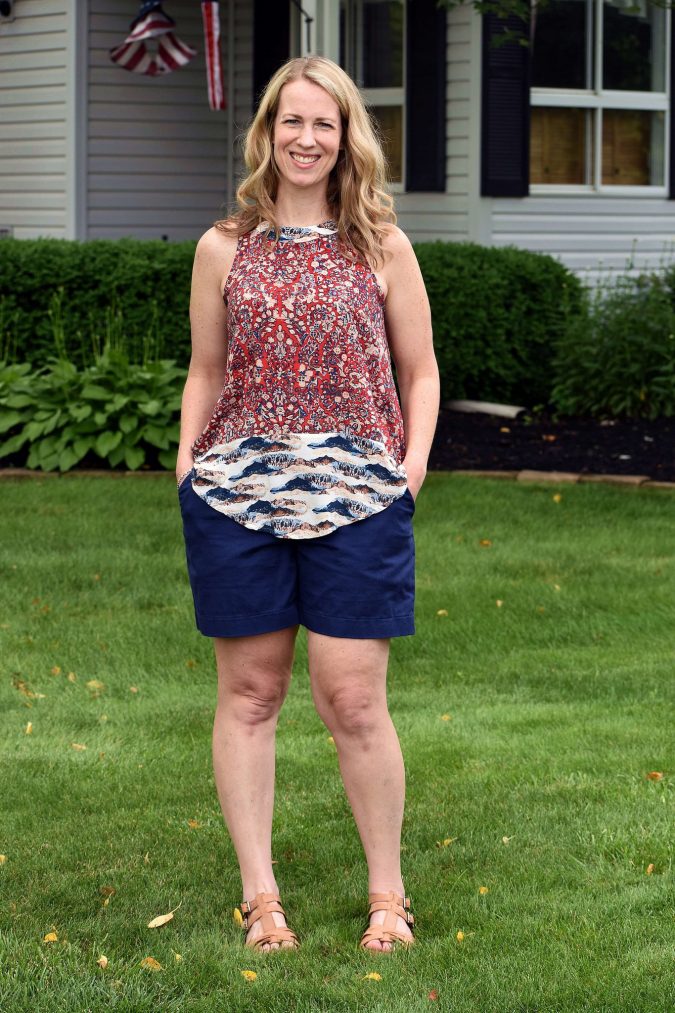
I’m so excited to share the absolutely gorgeous top that Teri made today! Those two April Rhodes Heritage rayons look SO cute together and that tie back neckline is the perfect unexpected detail. I’m sure I won’t be the only one who will want to steal this right out of her closet! Luckily she’s sharing the full tutorial with us so we can make our own!
~~~~~~~~~~~
Hi! I’m excited to be back today with a modified version of one of my favorite Hey June patterns, the Trevi Top. I love my Trevi tops in the Summer! The cut-in shoulders are really flattering and the swingy shape is so perfect for those hot, humid days when you don’t really want your clothes clinging to your body. And of course, there is the fun surprise of the button back. There is something about a top or dress that buttons down the back that seems a little bit glamorous and unexpected to me!
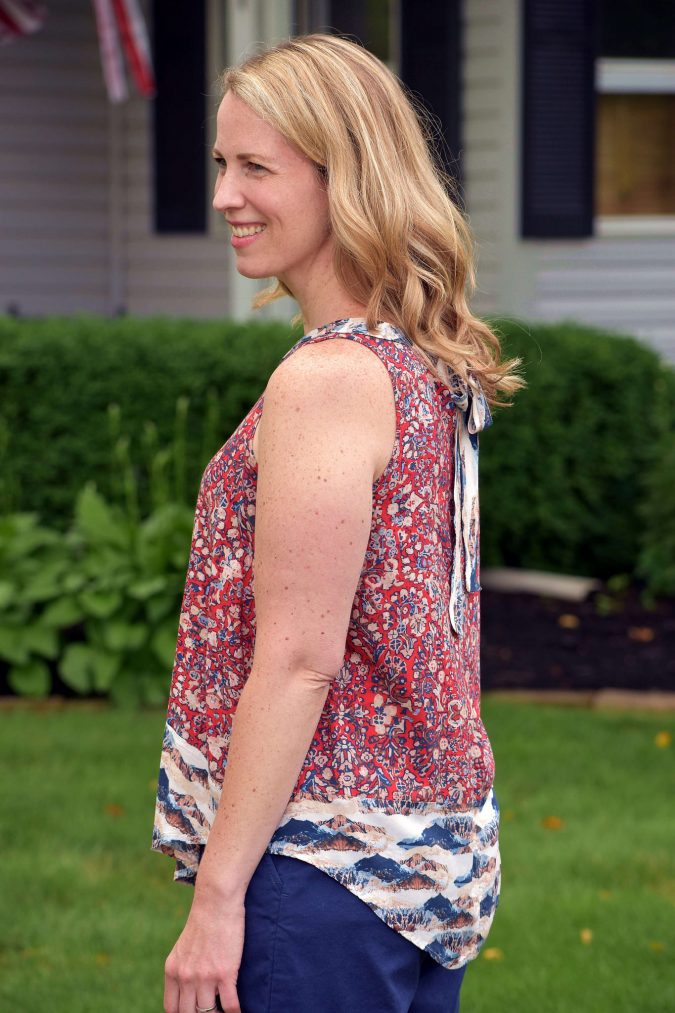
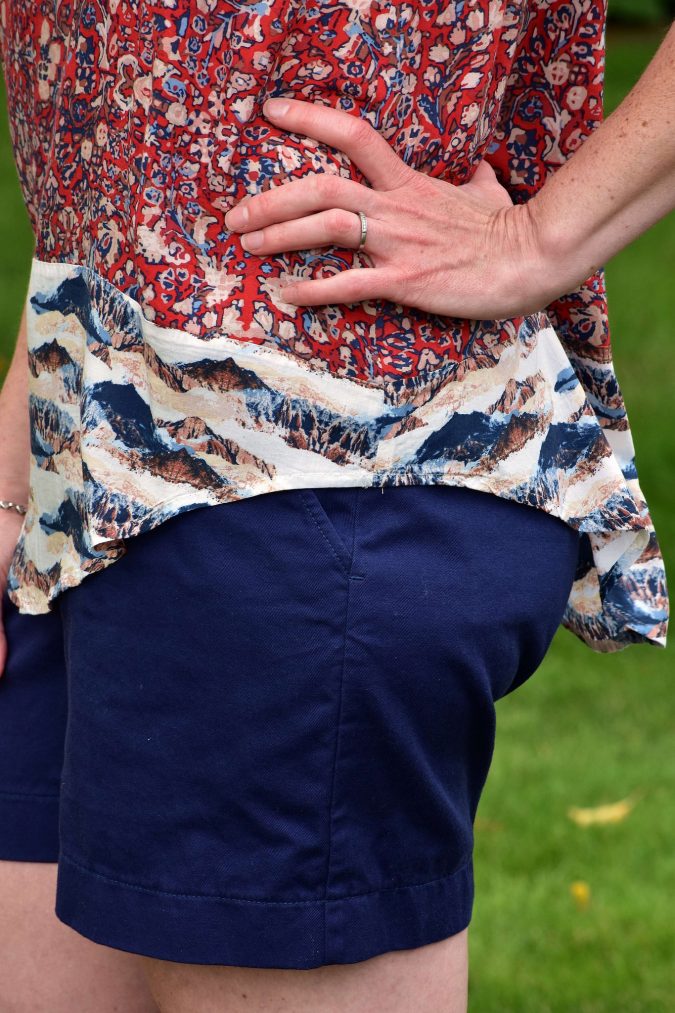
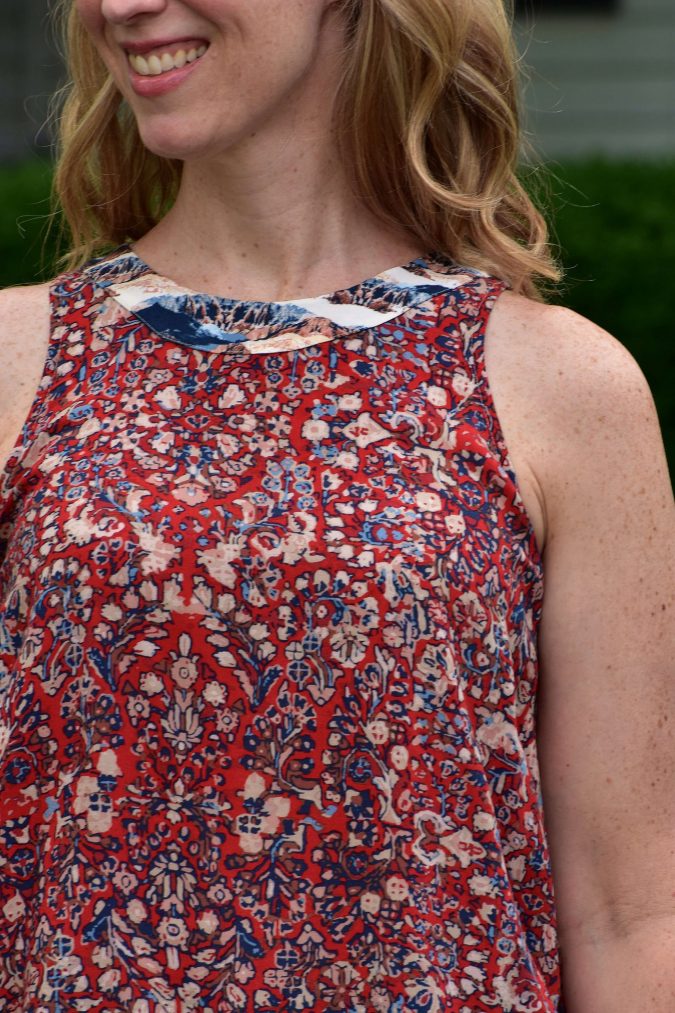
The Trevi pattern is pretty much perfection as-is but I couldn’t resist making a couple of changes after I was inspired by a shirt I saw when I was doing some online window shopping recently. I saw this tank top from Boden and it immediately made me think of the Trevi top pattern. The swingy silhouette is similar but the neckline is a little different. I knew I preferred the shoulder coverage of the Trevi because it means my normal bra still works with the straps crossed in the back.
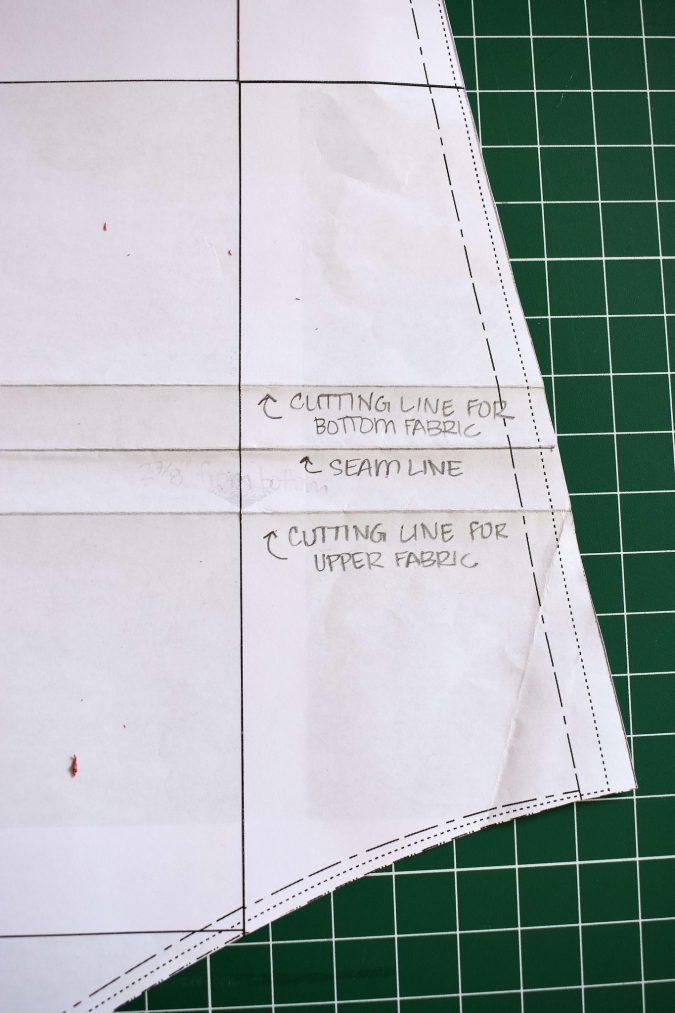
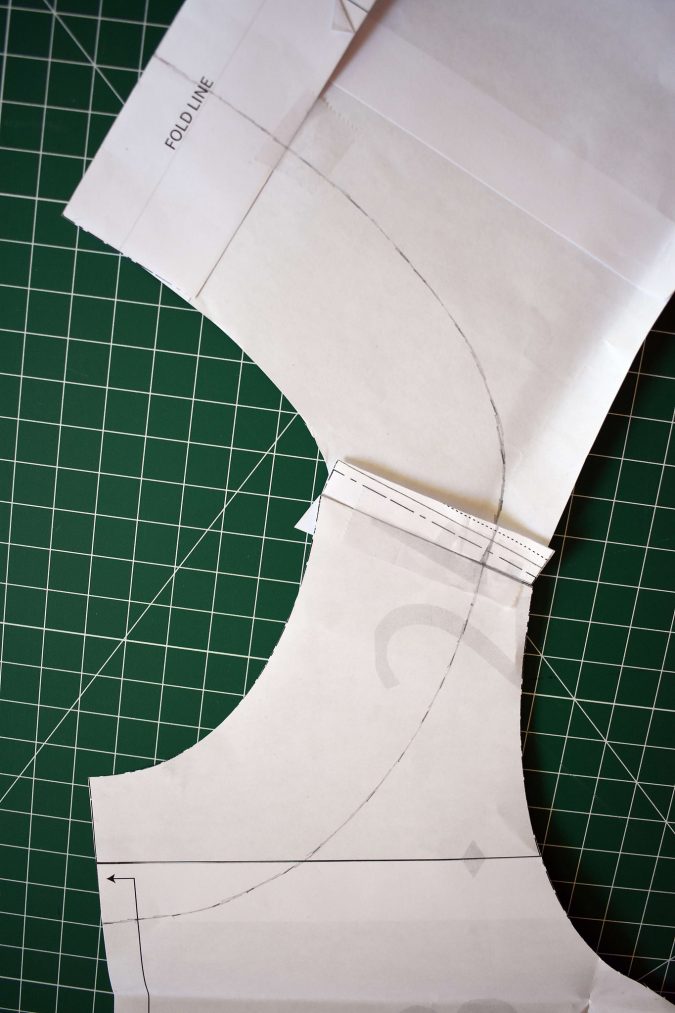
The first change I made to the pattern was to cut the front and back pieces in two in order to create the contrast panel at the bottom. I drew a line perpendicular to the grainline about 3″ up from the bottom of the side seam where I wanted the contrasting fabrics to join together. I added 1/2″ seam allowance to each of those pieces so that I could sew them together with french seams. I think it might have been better to draw a curved line on the front piece, since the seamline ends up higher in the middle when I’m wearing the top. That’s something I’ll try if I make this hack again in the future. This photo shows the seamline where the top and bottom pieces are joined and the cutting line for the top and bottom pieces. Having the lines drawn in and marked makes it easy to trace the new pieces and keep your existing Trevi pattern in tact!
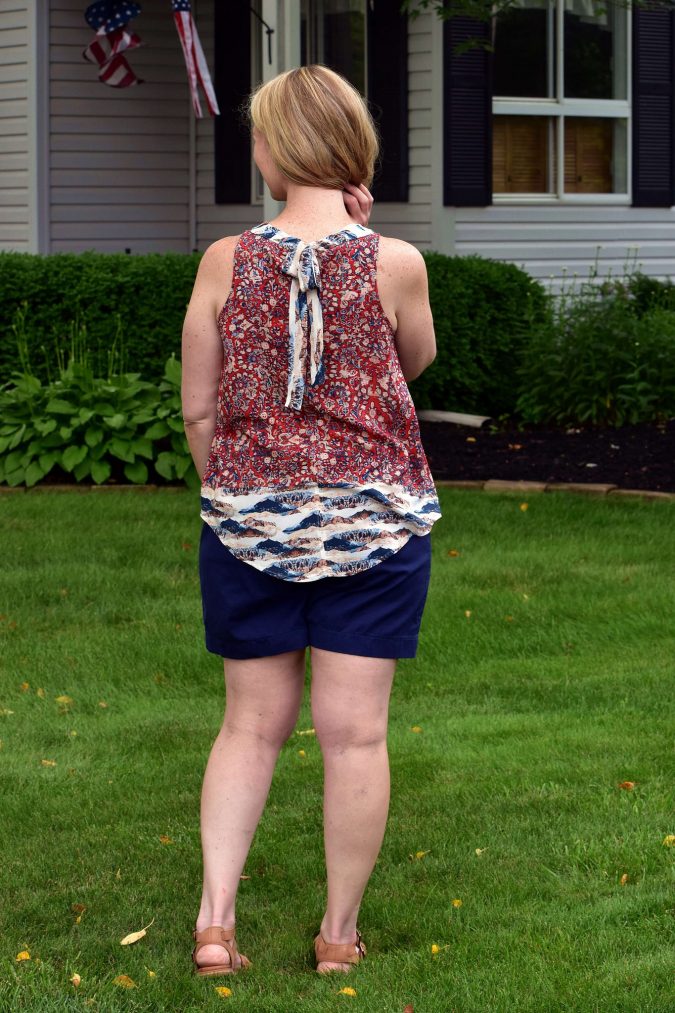
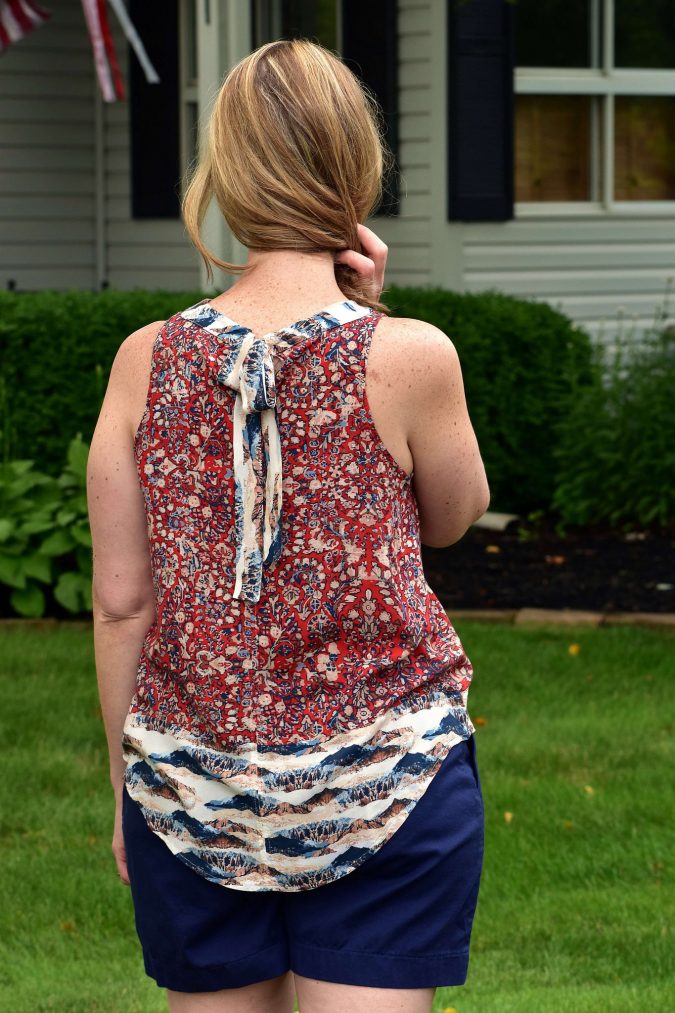
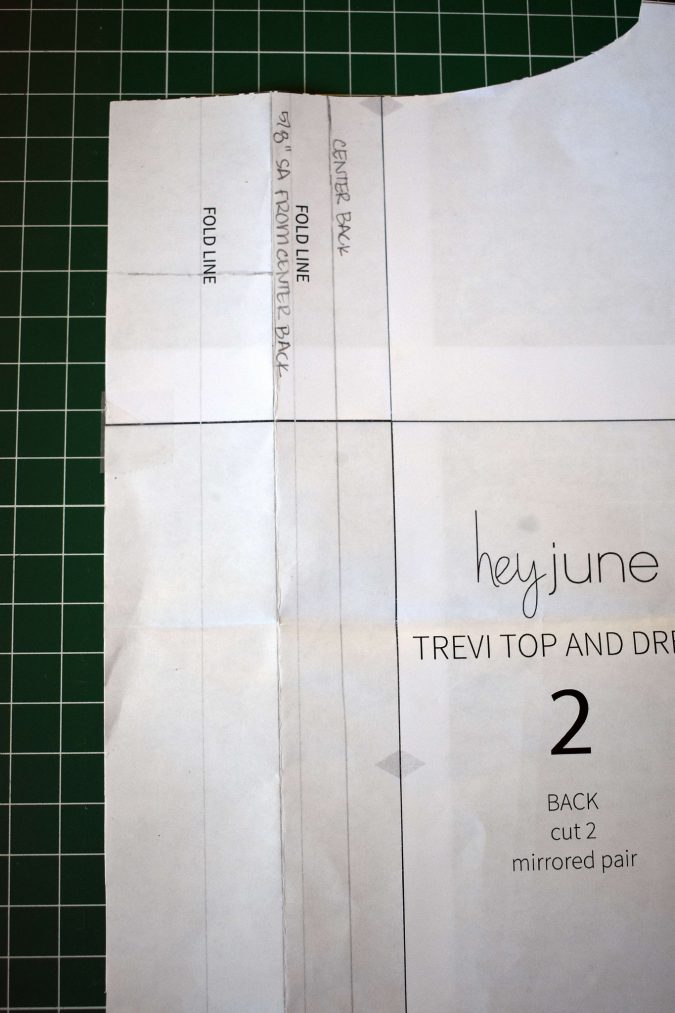
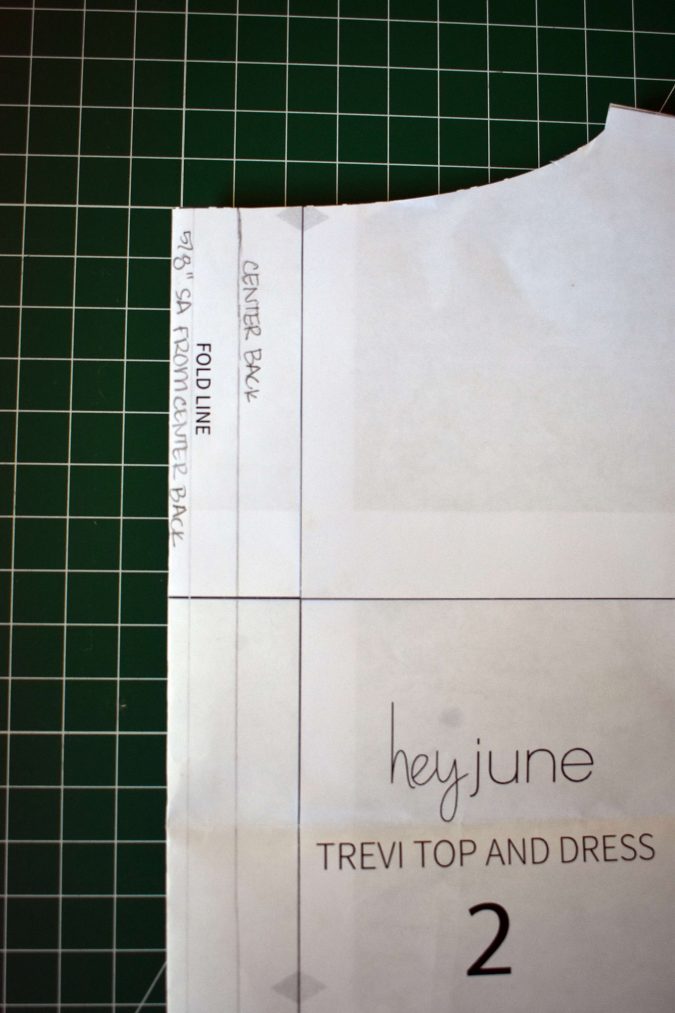
I decided not to add the button back to this Trevi and instead I added ties to the back neckband. I thought this added something unexpected and also made it possible to get the top over my head! To eliminate the button back I found the center back of the top, which is 1/2″ to the right of the right fold line on the back pattern piece. I drew in that line from the top of the pattern to the hem, added 5/8″ seam allowance to the left of that line, and cut off the excess pattern to the left of that. Here are photos of the back pattern piece with the center back line marked, and the cutting line with the 5/8″ seam allowance added.
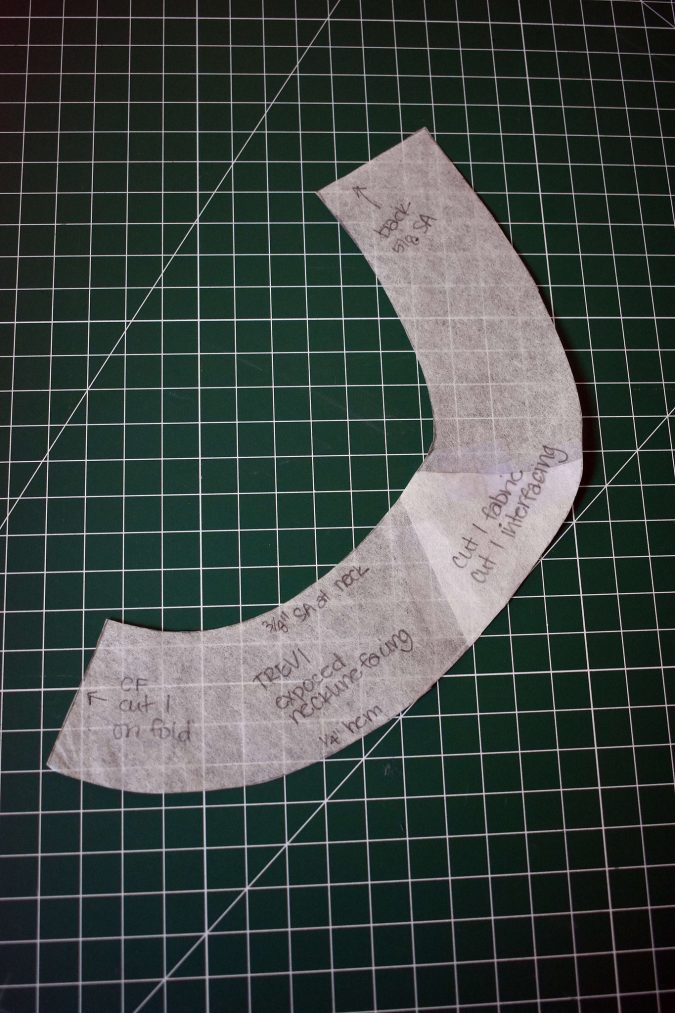
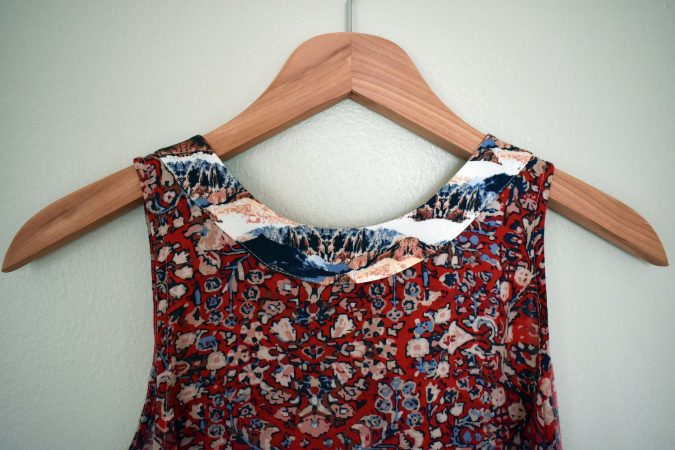
I created an exposed neck facing to mimic the neckband of the Boden top. I wanted my facing to be one continuous piece, so I took the front and back Trevi pattern pieces and folded the shoulder seam allowances out of the way. I taped the pieces together at the shoulder so I had the complete neck curve to use to draft the facing. I drew a curved line on the pattern pieces 2″ from the neckline and traced a new pattern piece using this line. The new facing piece needs to be cut on the fold of the fabric and interfaced.
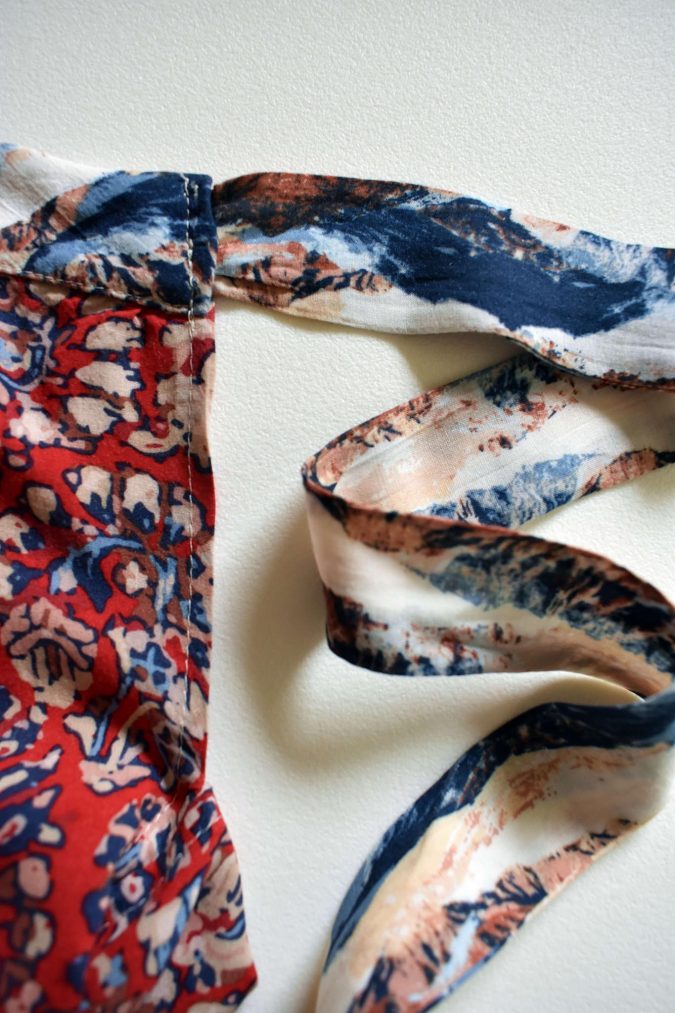
The last thing to do is cut the pieces for the ties. I made mine 3.75″ by 29.5″. I folded them in half lengthwise and sewed them with a 3/8″ seam allowance. Because of the way that they are attached into the facing they could be made wider but for this top I wanted them to be approximately as wide as the finished neck facing.
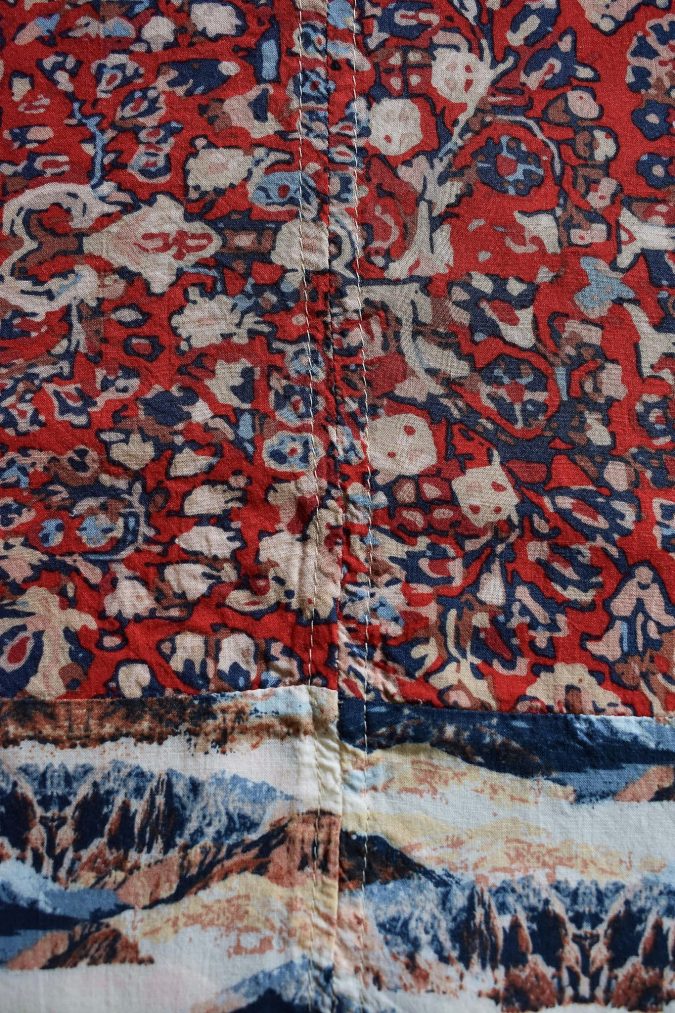
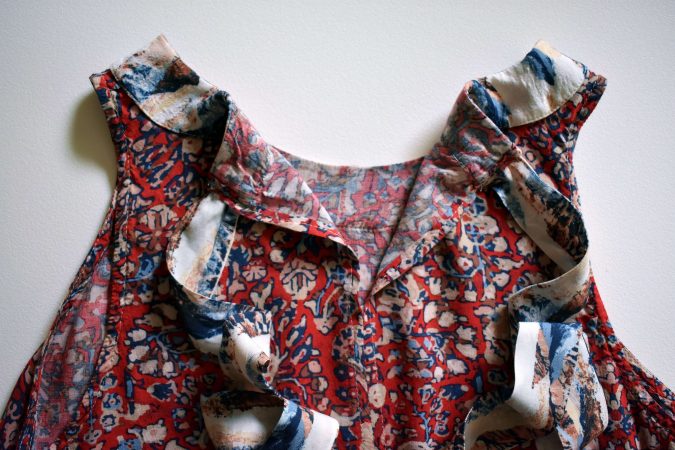
To construct this Trevi top sew the top and bottom panels together at the 1/2″ seam allowance to create one colorblocked front and two colorblocked back pieces. Staystich the neckline and armscyes, sew the shoulders, side seams, and armscye bindings as the pattern instructs. Sew the back pieces together using a 5/8″ seam allowance starting at the bottom of the center back and stopping 4.5″ from the neckline. Press the back seam allowances open, turn the raw edges under, and topstitch them in place. (One of the best parts about sewing Hey June patterns is the clean insides, right?!) Turn and topstitch the section that was left open at the top, too. Here’s what my center back looks like from the outside and from the inside (that photo was taken after the ties were added, which comes later):
Next up, fuse the interfacing to the wrong side of the neck facing. Turn the outer edge of the facing under 1/4″ to the wrong side and press it into place. (I find it easiest to serge around the entire outer edge of the interfaced facing piece and use the serged stitches as a pressing guide. If you don’t have a serger, running a basting stitch 1/4″ from the edge would be a great option.) To attach the neck facing, pin the right side of the facing to the wrong side of the bodice at the neckline. I started attaching in the center front and worked my way to the center back. The center backs of the facing will extend past the finished edges of the back pieces by 5/8″. Stitch around the neckline with a 3/8″ seam allowance. Flip the facing to the outside of the garment and press the neckline. Press the center back short edges of the facings under so that they are flush with the center back of the top. Pin the facing to the outside of the top along the outer edge and edgestitch it into place, leaving the small, vertical center back area of the facings open.
The ties are attached by inserting them into that small opening in the center back of the facings. My ties ended up a little wider than the opening so I had to gather them slightly to fit them in the opening. Pin the ties in place and stitch the facing closed vertically. I tried to make this stitching line blend straight down into the topstitching I’d done down the center back. This will attach the ties and close the facing at the same time. I stitched over the ties a couple of times to make sure they were secure.
All that is left is to hem the top using the pattern instructions and you’re done! I know this is going to be one of my most worn tops this Summer. I hope you are inspired to give this modified Trevi top a try!
~~~~~~~~~~~
Just stunning, Teri! Thank you so much for sharing a great tutorial for changing up the Trevi!



Would this hack work for any shirt / sweatshirt? I’ve been looking everywhere for a tie back sweatshirt …. kinda like this …. (although I don’t really care about the key hole back) …. littlespree.com/mama/mama-everyday/ribbon-ties/
Thank you for sharing.
Yep, you could use the same principles to add it to any garment. You might have to alter it a bit depending on how the garment closes in the back. This is probably overkill for a knit garment with no keyhole.