Hi everyone and Happy Independence Day tomorrow to those of you in the US! I’m popping in today with a quick, easy, and really fun tutorial from Brittney! I love little additions like this that are simple to sew but really allow you to customize your garments with cute details. I can’t wait to make my girls some Morrisons for the new school year using this tutorial!
~~~~~~~~~~~
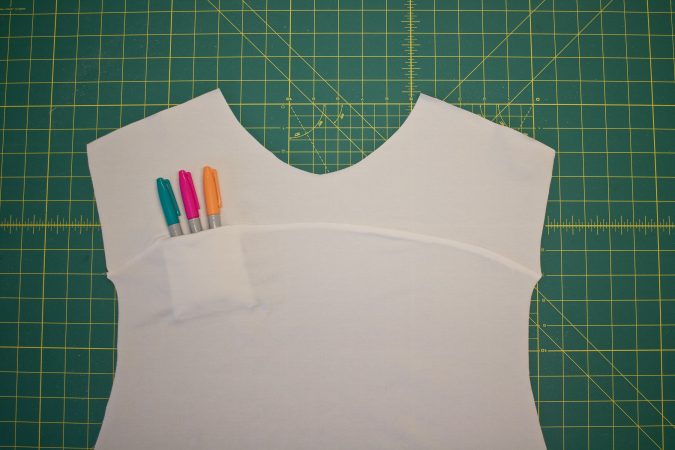
Are you ready for a quick and easy inseam pocket tutorial? I love the little pop of contrast it gives when worn. Is contrast not your thing? It is even faster to use self fabric, so you will end up with the pocket that pops open just a little but is more discreet. It works great on a dolman like the Morrison, Santa Fe or Aurora so the yoke blends in with the sleeve, but you can always use it on any tee pattern.
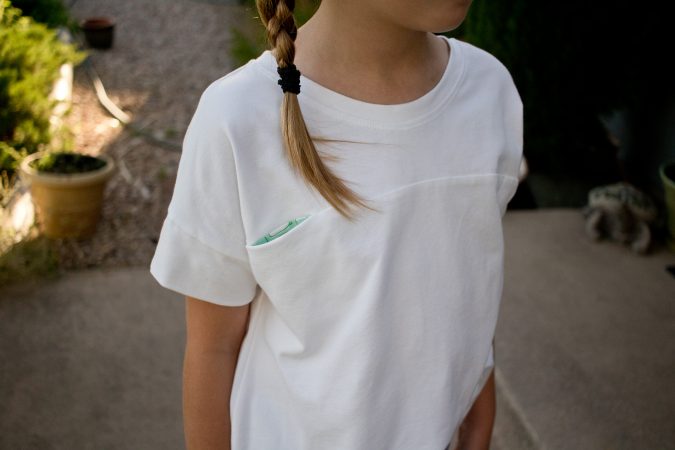
Because this is an inseam pocket, the first thing we need to do is add a seam to the shirt front. Hint, this also gives you a good opportunity to colorblock if you’d like!
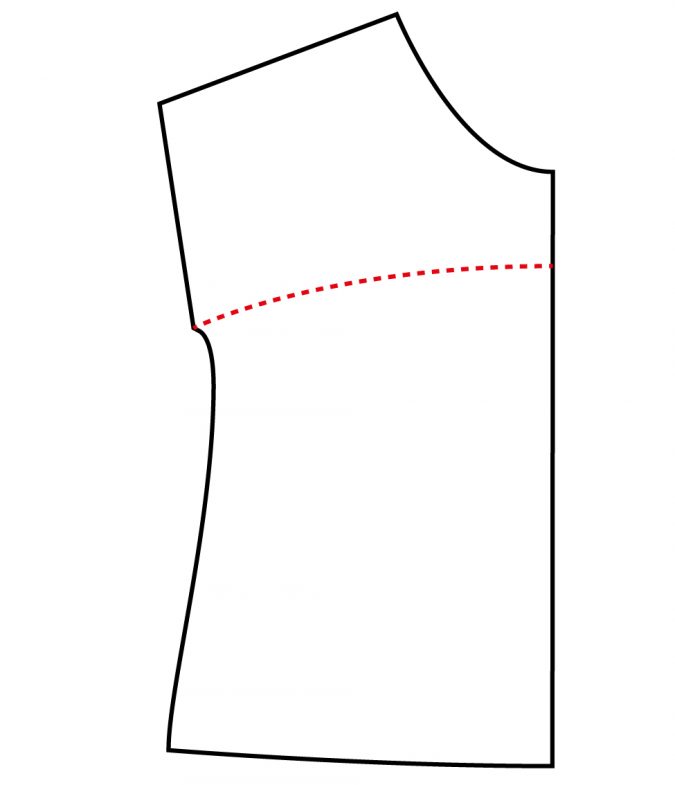
Starting with the front pattern piece, make a slight arch from center front to the bottom of the dolman sleeve and cut the pattern apart at that line. 2.5″ – 3″ down from the neckline is a good place to start for the top of your arch, but this is purely personal preference. You can also have the seam go straight across the dolman sleeve to the sleeve hem. 
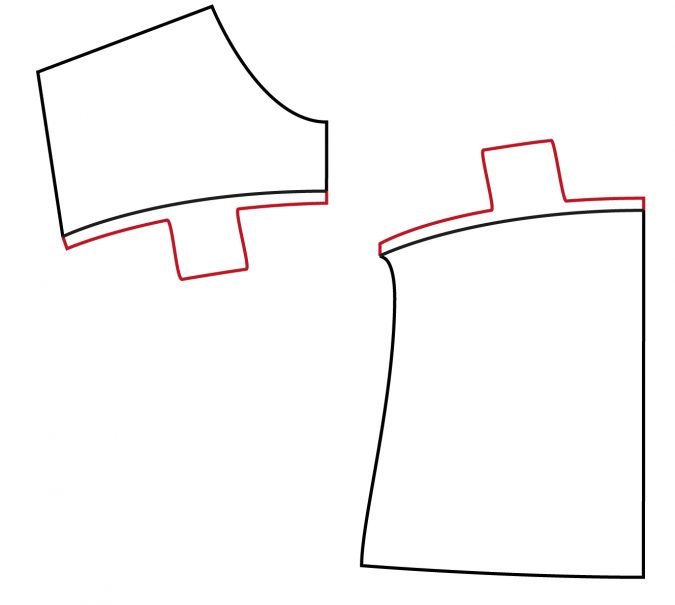
Next, add the seam allowances to the new top and bottom of the shirt front. If you choose to use self fabric for the pocket, add the pocket to the pattern piece. Remember that even though the final pattern pieces will be cut on the fold, the pockets will only be cut on one side. The pocket size is your choice, but 2.75″ wide by 3.75″ long is a good size for a kid’s shirt and yields a final pocket size of 2″ x 3″ after 3/8″ seam allowances. Measure to make sure the pockets will align perfectly with one another when the top and bottom of the shirt are right sides together.
When sewing, sew the shirt top and bottom pieces together, stopping at the pocket to pivot and sew around the pocket bags and back down to the shirt. Then turn the shirt right side out and press the pocket down.
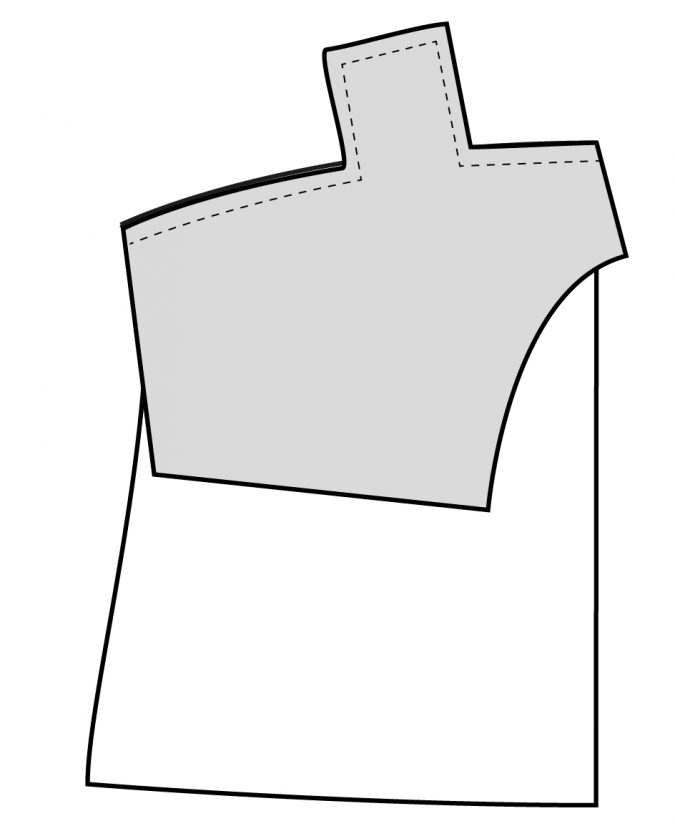
To make a contrasting pocket, add the seam allowances to the cut pattern pieces the same as illustrated above, eliminating the pocket. Cut the pocket from a different knit or woven fabric. Sew the pockets right sides together with the top and bottom of the shirt, making sure they will align when you sew the shirt front together. Use a smaller seam allowance than the one you added (1/4″ is a good choice if you added 3/8″ seam allowances.) Press the pockets away from the shirt, right sides facing up. Then sew the top and bottom of the shirt front and pockets together as illustrated above.
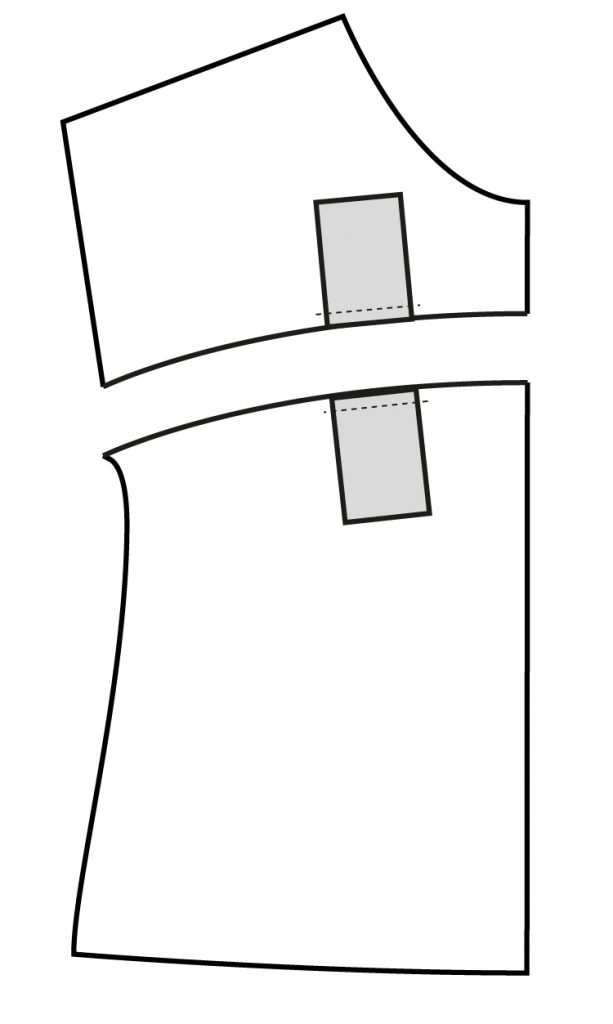
Fold the pocket piece down and press well.
Tip: I found it easiest to sew around the pocket first with my regular sewing machine, then going back to sew the whole front together with my serger.
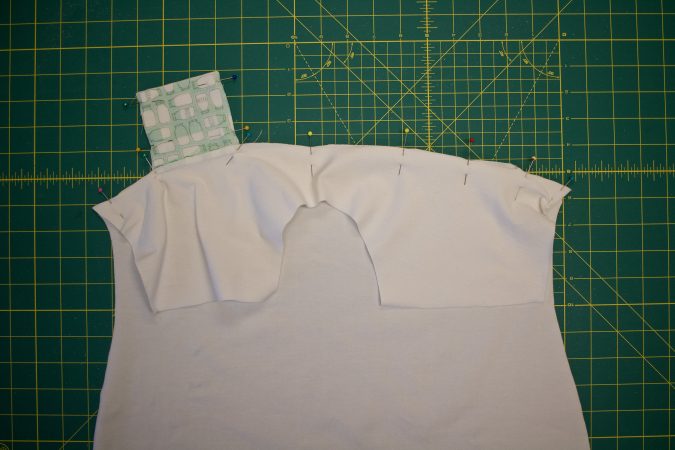
Finish sewing the pattern as written. So easy, right?
~~~~~~~~~~~
Thanks so much, Brittney! Perfect way to customize basically any top pattern! I love the idea of adding a little pop of color using the interior of a chest pocket!
