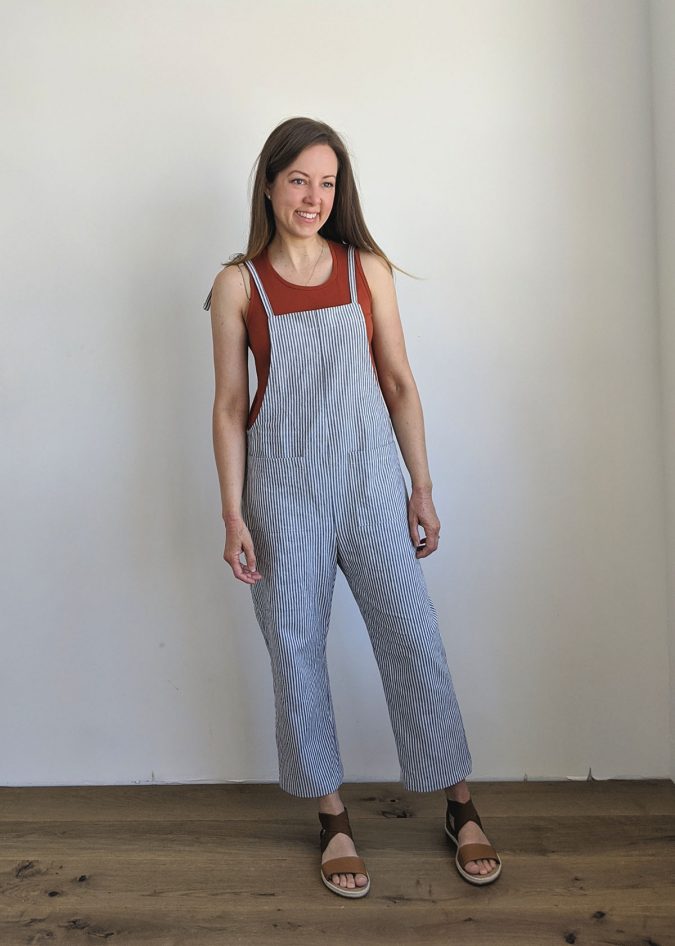
Introducing the Greer Jumpsuit!
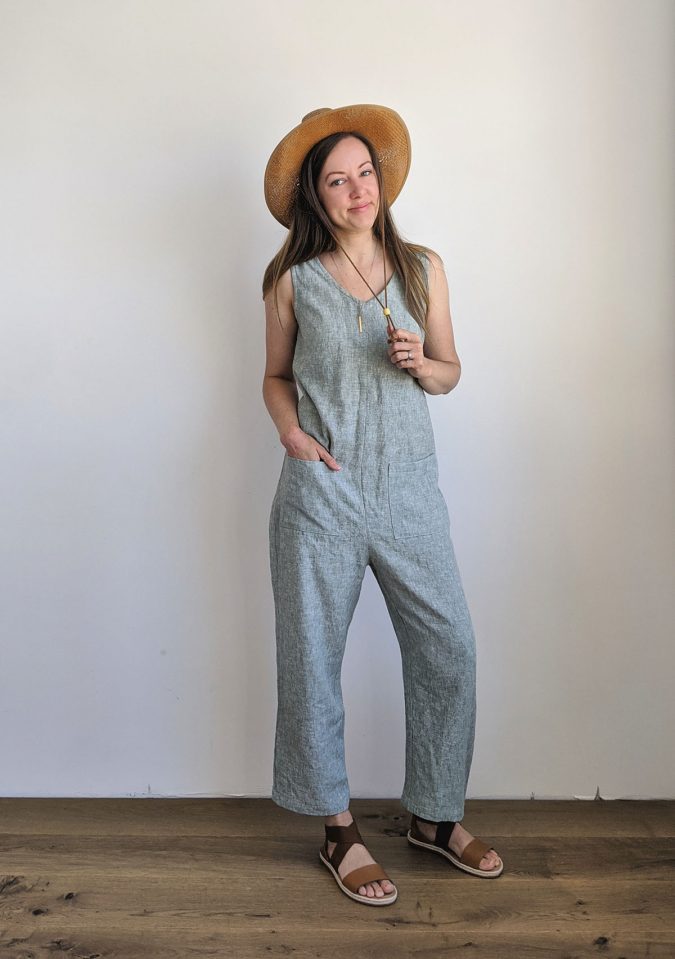
Style + Inspiration
The Greer Jumpsuit is a very casual and relaxed garment meant to have that beachy/hippie/bohemian vibe. It is designed to look best in very drapey wovens. This type of jumpsuit is perfect for throwing on with a pair of sandals and a straw hat to keep that laid-back look going on a sunny weekend. When it’s safe to engage in regular activities again, the Greer would be perfect for a run to the farmer’s market, a flea market, brunch with friends, an afternoon picnic at the lake, hanging out on the deck with a cold beverage, a warm weather vacation, or just doing some light yardwork. It also works really well as a swim cover! I’ve put together a compilation of Greer Jumpsuit inspiration garments in this pinterest board if you’d like more fabric and styling ideas!
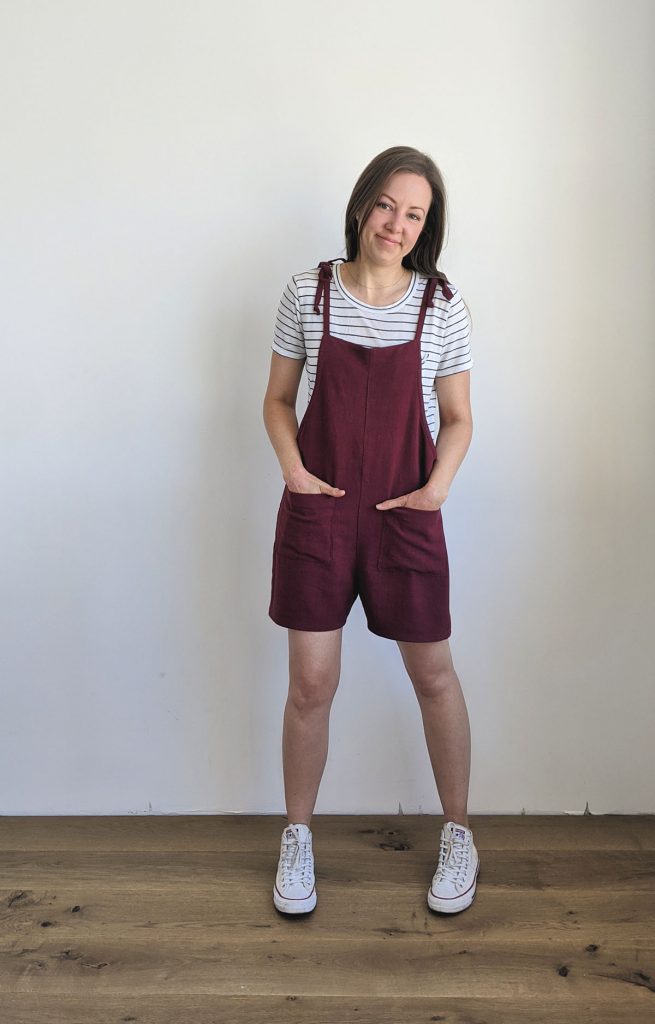
And of course, there’s always the original intent behind this garment – an easy-on/easy-off outfit for when you’re sewing something that requires frequent try-ons and alterations! Now you don’t have to sew in your underwear!
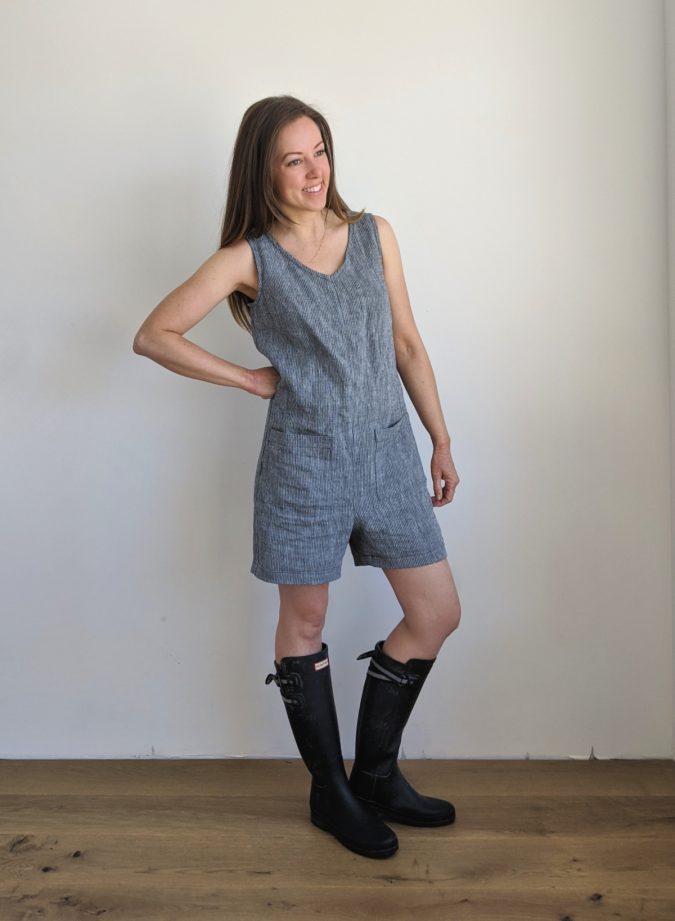
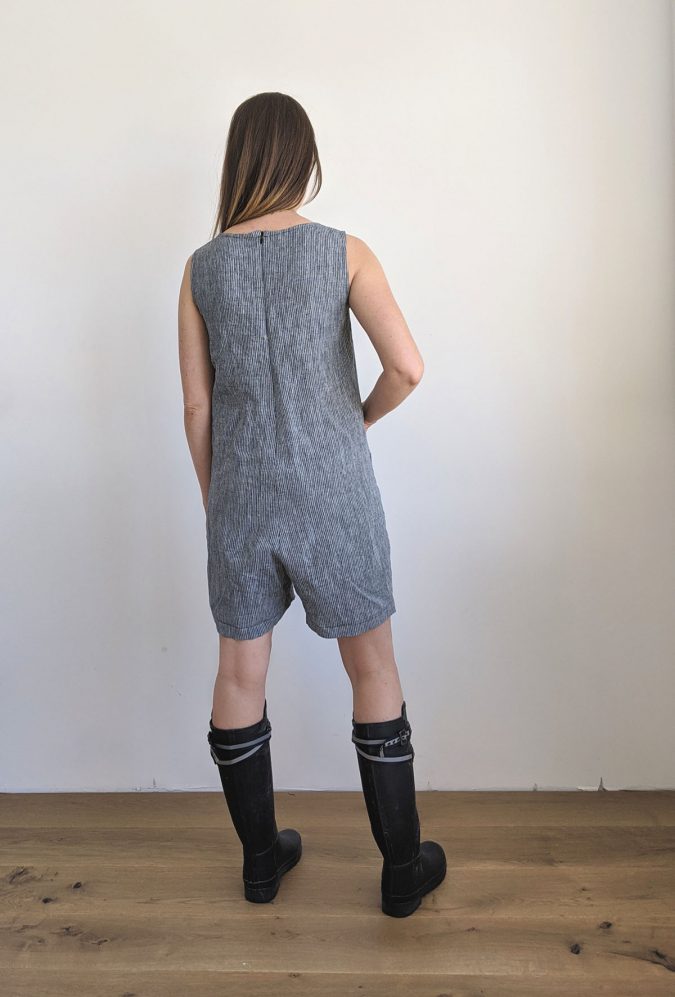
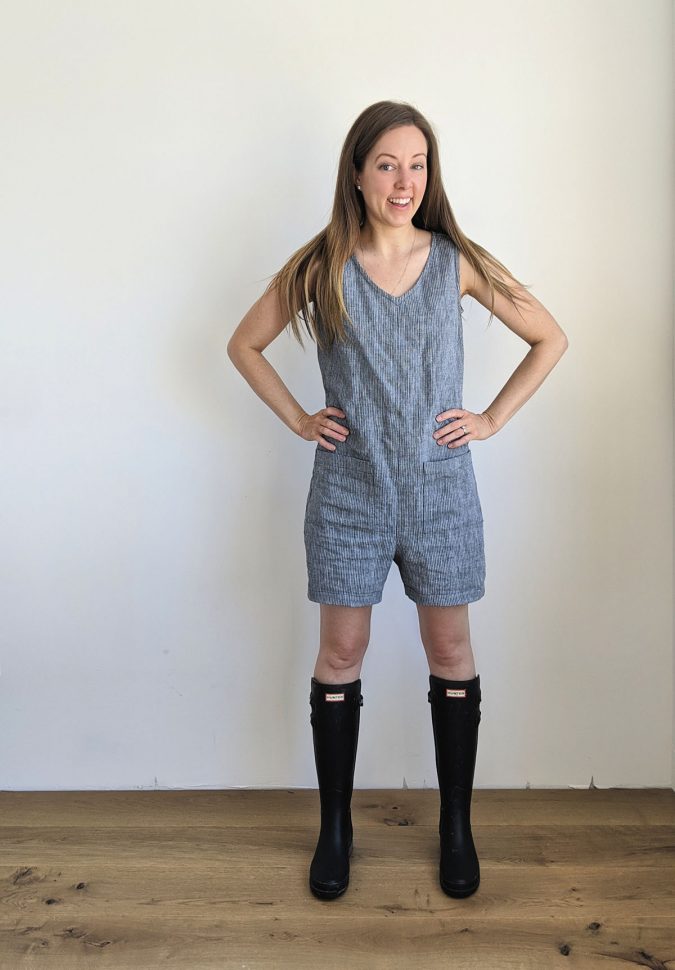
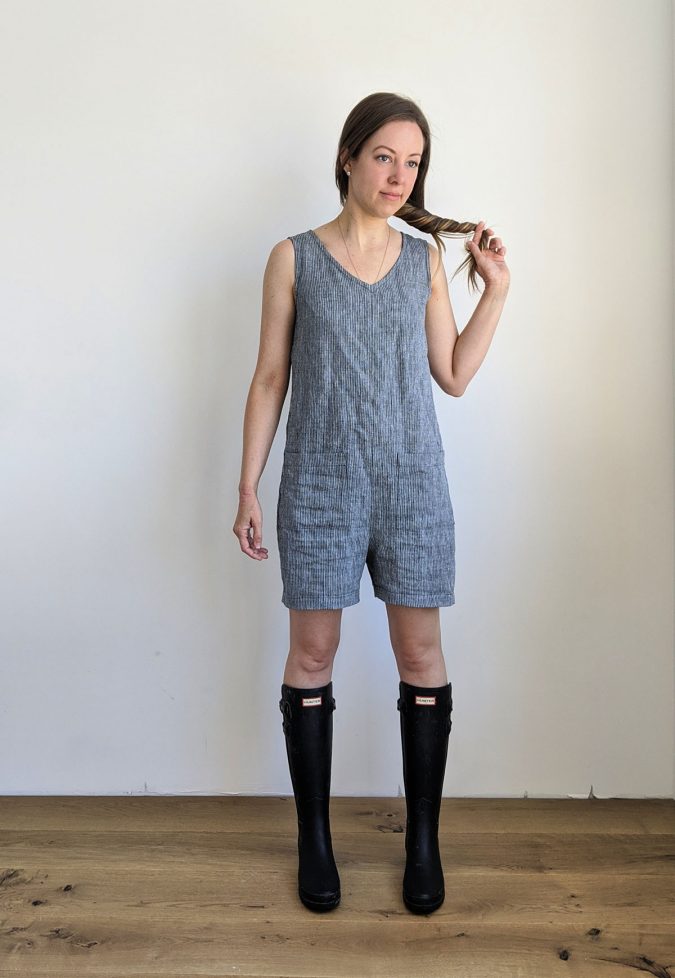
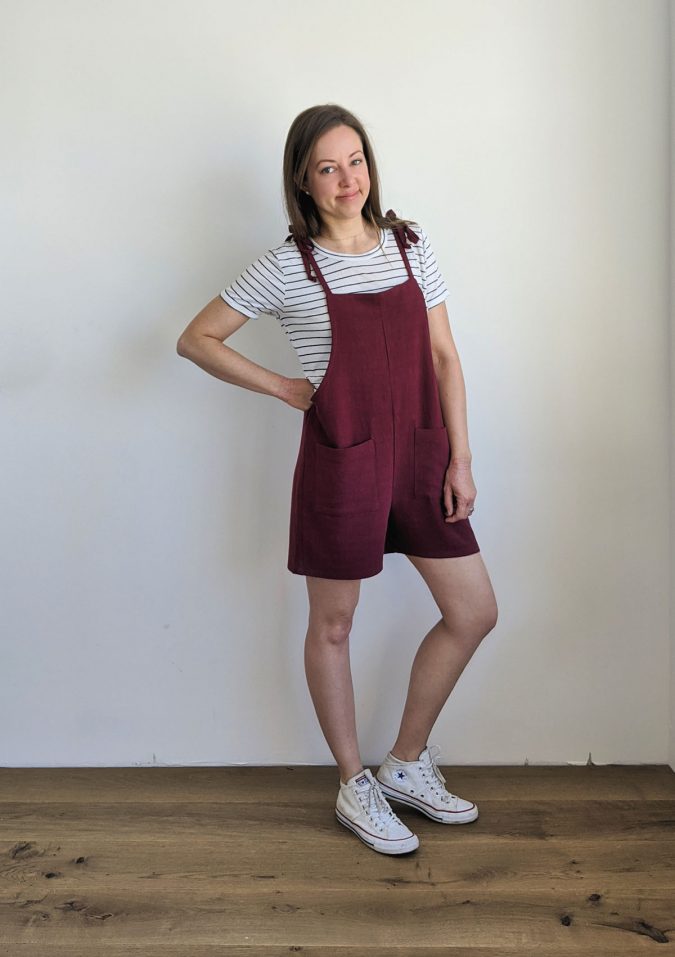
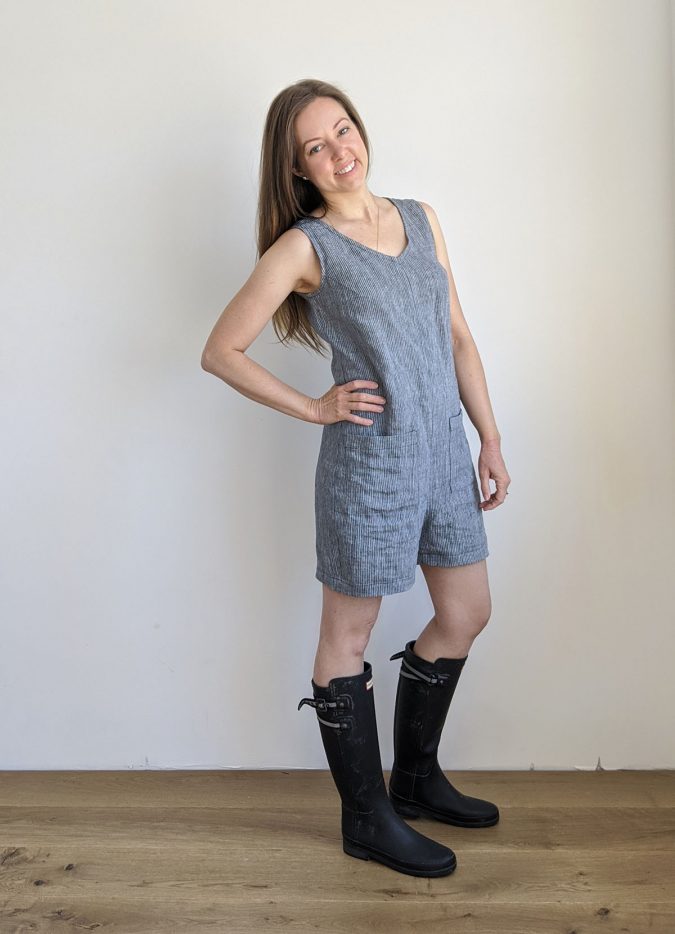
I’ve been wearing these view A shorts with my wellies to do light yardwork during Colorado mud season – it’s been perfect for our warm days before enough grass (weeds) grows in to control the dirt and mud!
Options
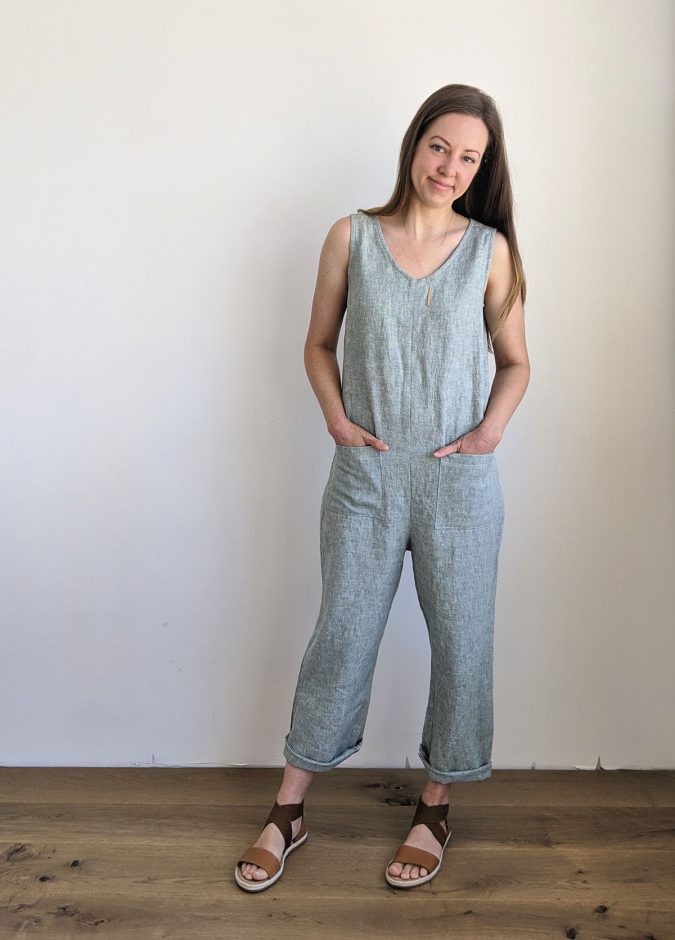
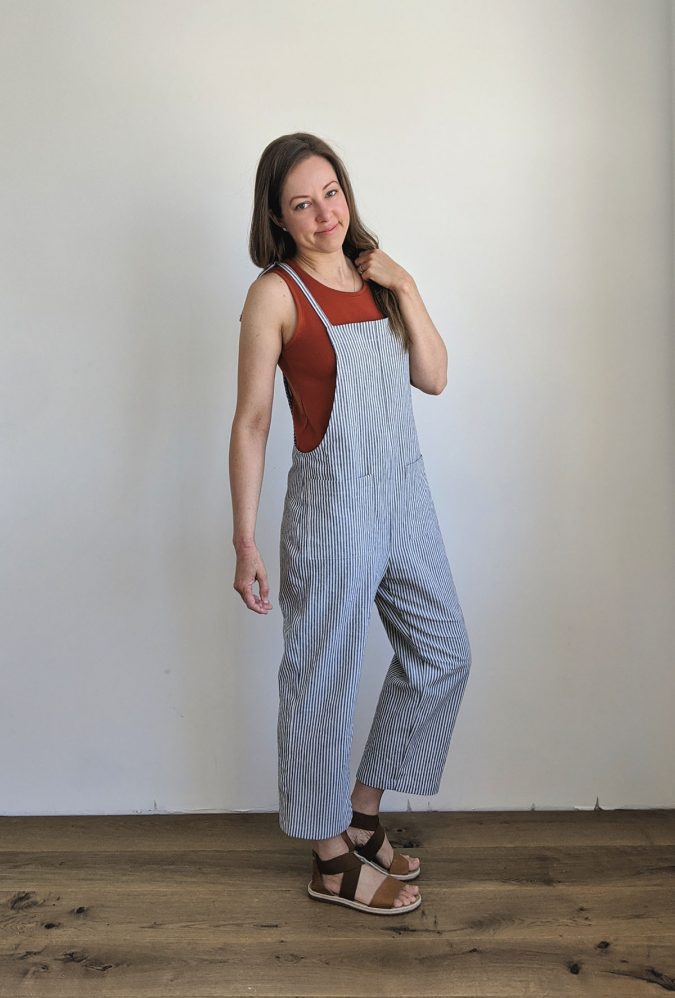
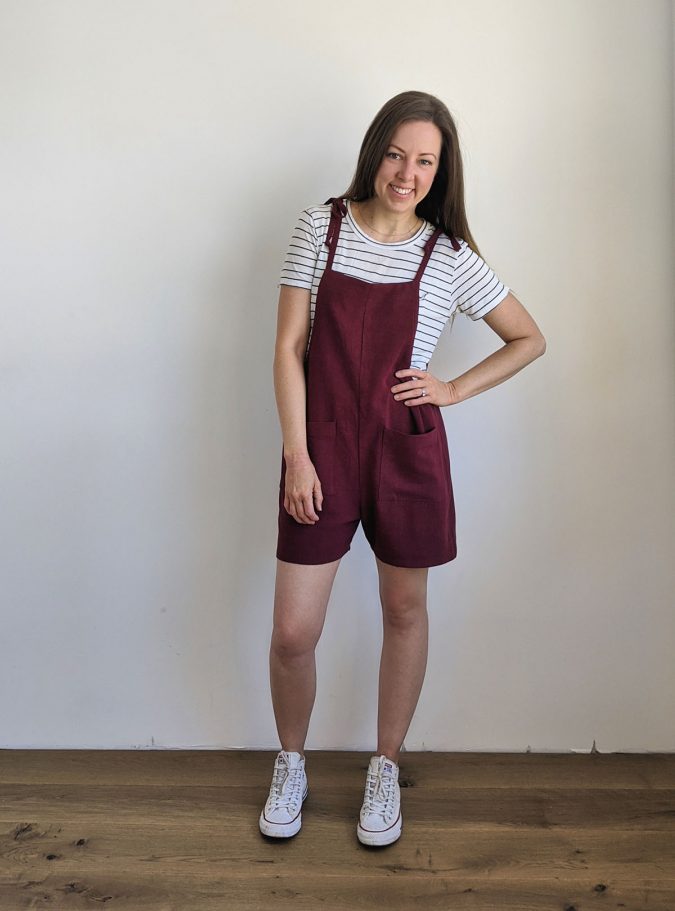
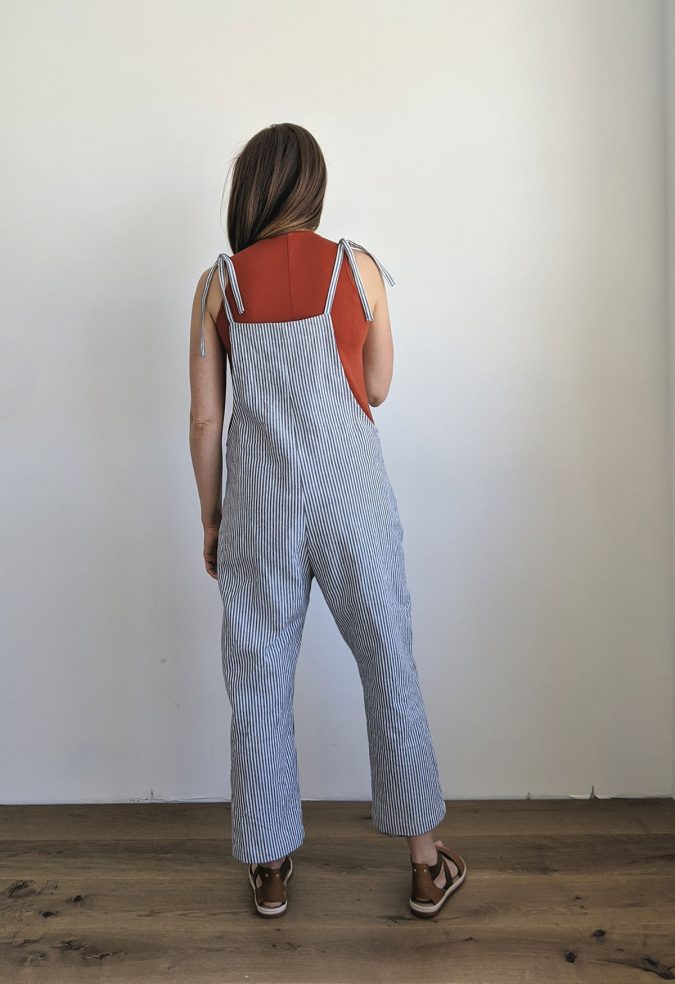
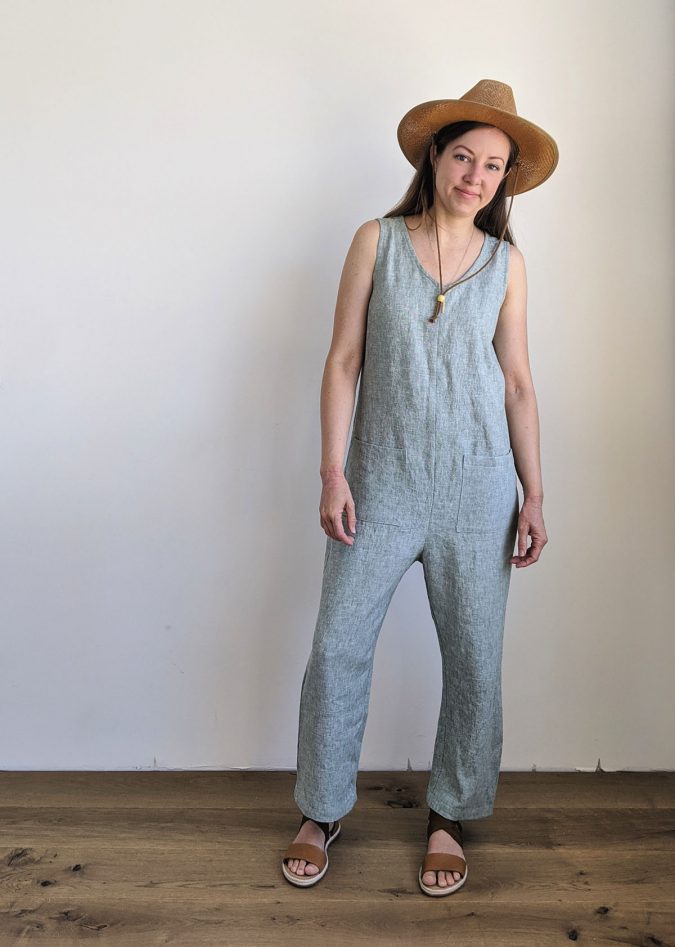
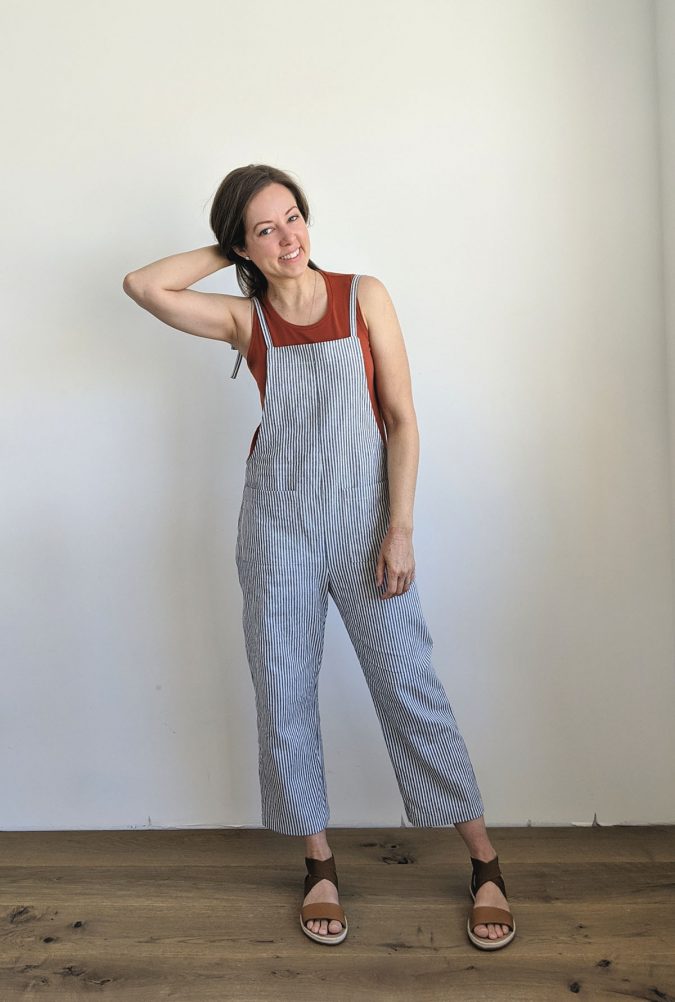
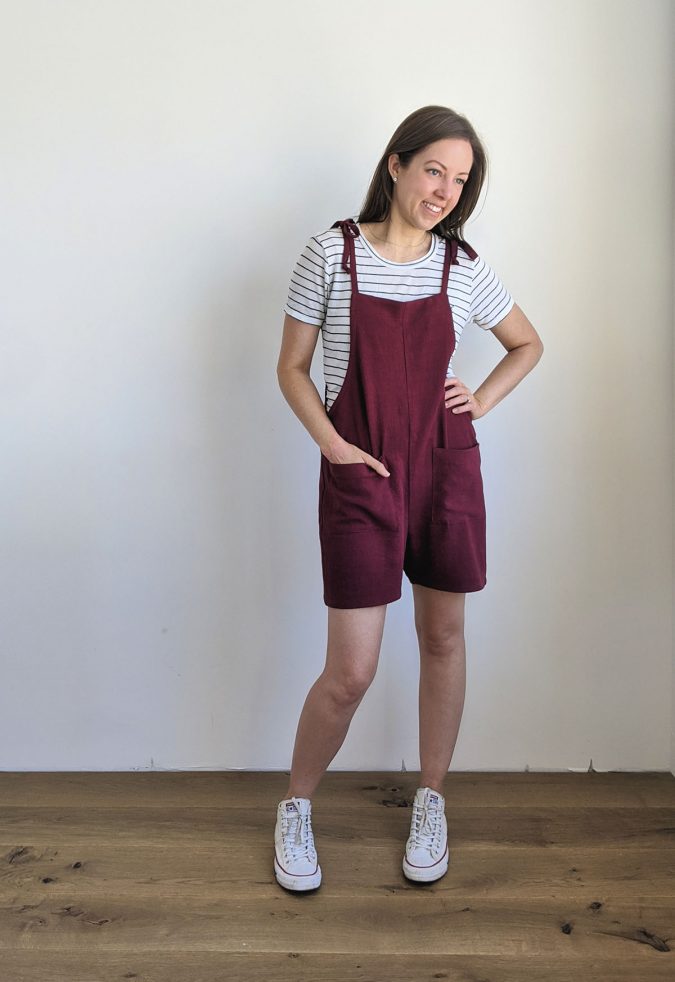
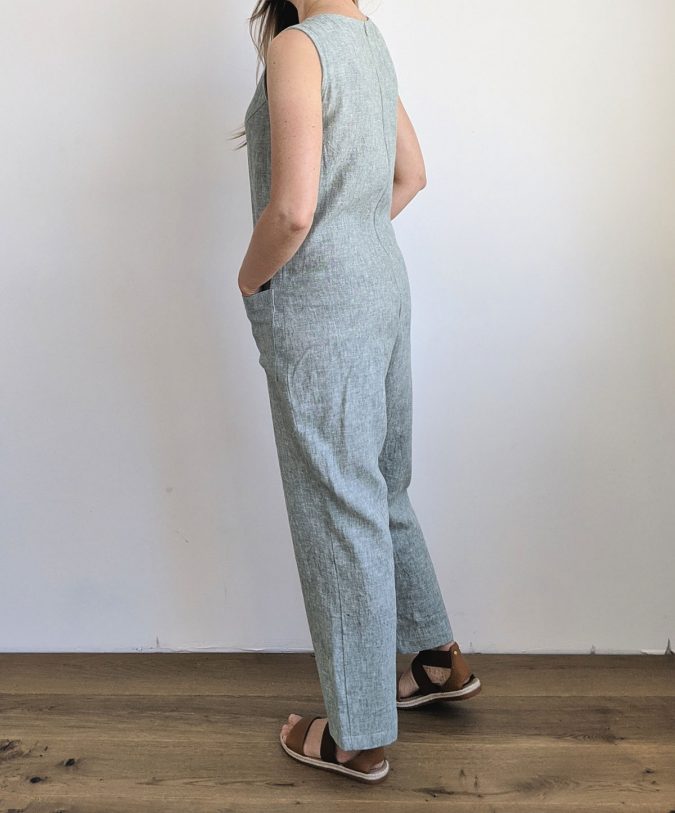
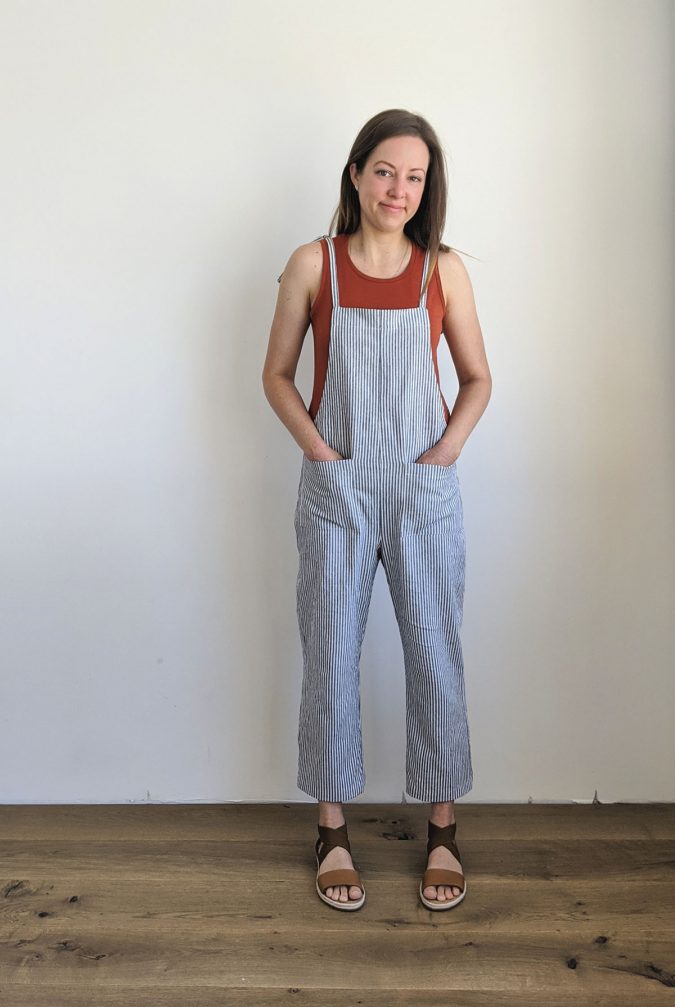
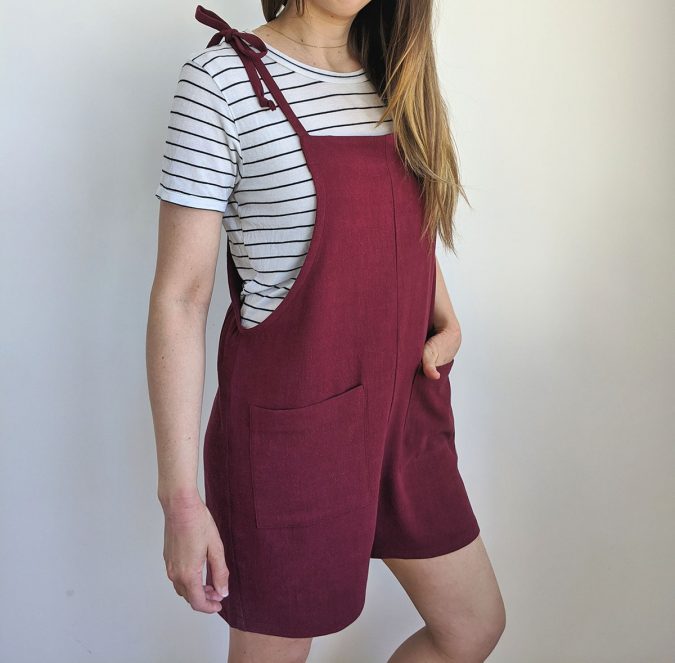
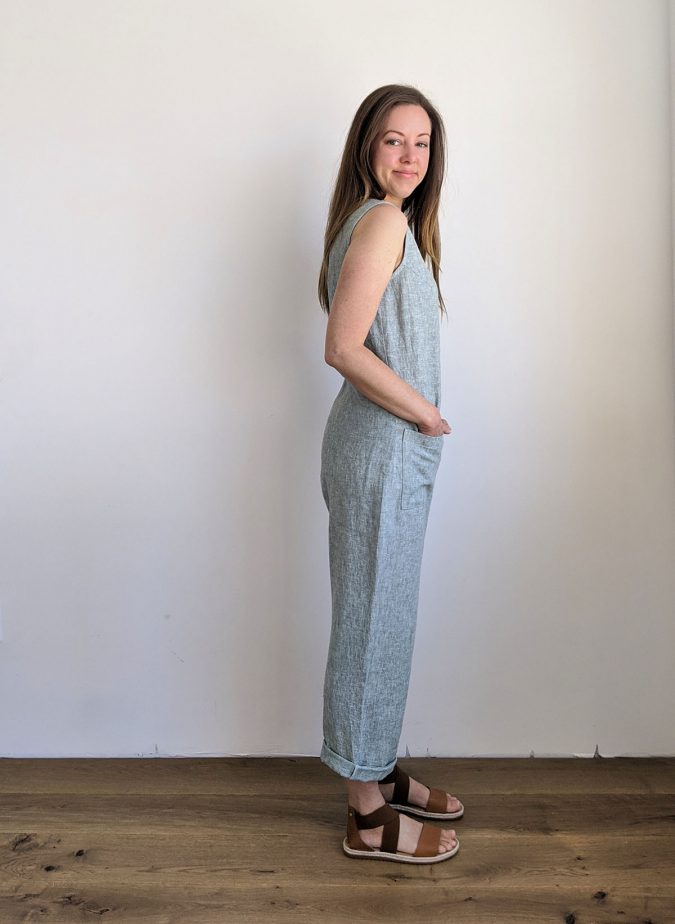
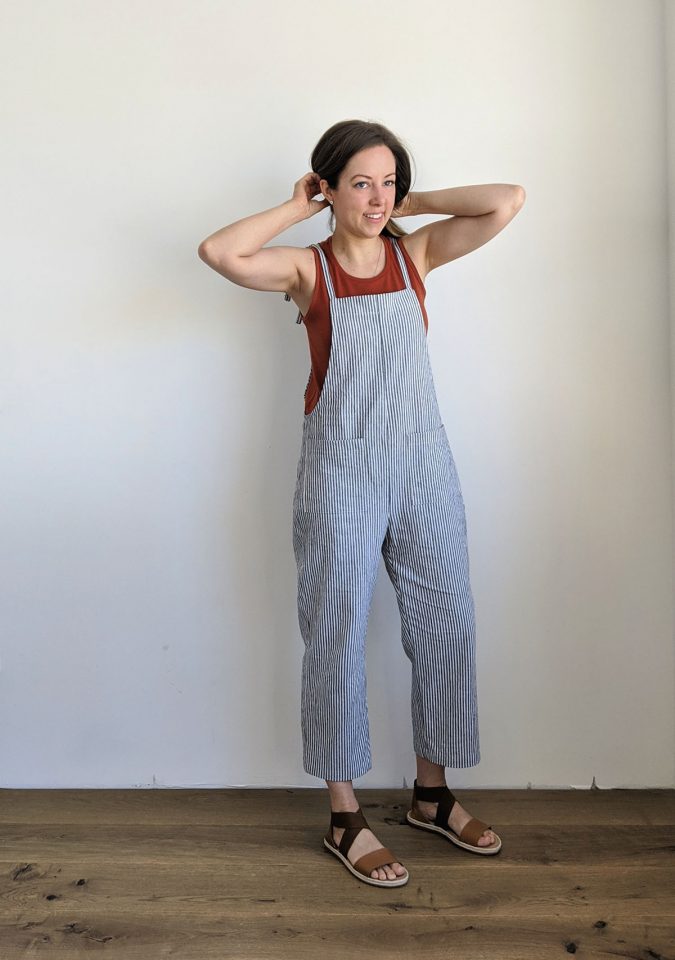
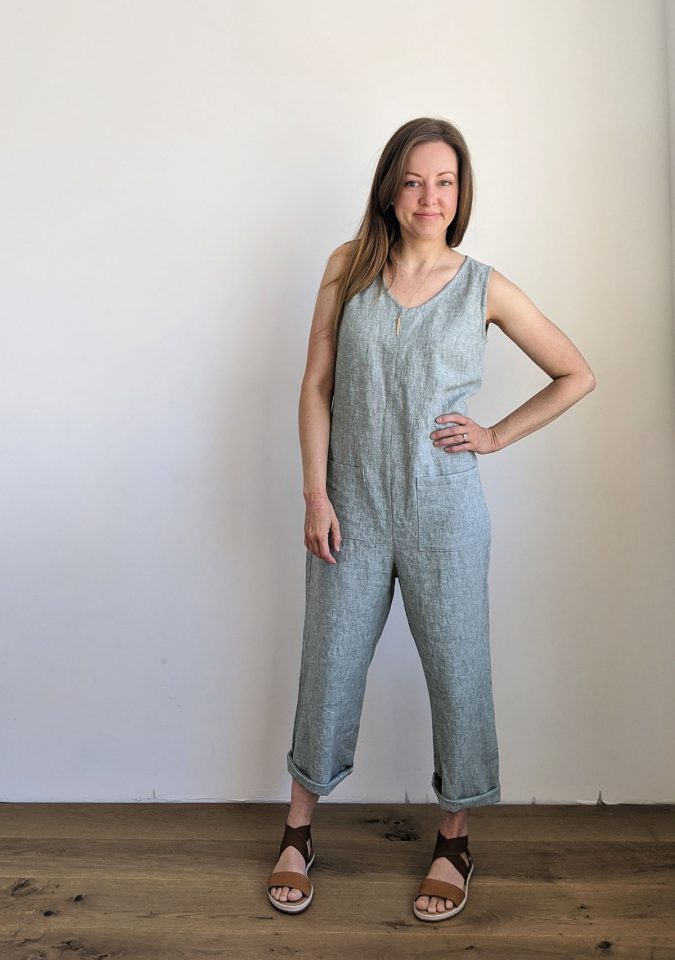
The Greer comes in two views. View A is a full bodice sleeveless jumpsuit with a v-neckline, armscye bust darts, and a center back zip for dressing. The neckline and armscyes are finished with self bias tape. View B is a simplified overall silhouette with tie straps at the shoulders. The sides are finished with self bias tape and the front and back have facings to finish them at the top so the bias tape and straps are all enclosed for a neat finish. Both views have the option for 2 oversized pockets and a shorts cut length with a 4″ inseam.
Sizing
The Greer is available in sizes 0 – 24. See the size chart in the listing for more precise sizing information. Choose your size based on high bust and size down if between. This will give you the best fit through the shoulders and bust, but please see the information below for full bust adjustments and grading if necessary below that point. All of the samples in this post were made in the size I measure into, except the maroon view B shorts. I sized up for those and used an extremely drapey fabric for a really oversized look.
Alterations
Body Length
Despite the laid-back, relaxed fit of the Greer, it is important to hit a few key spots with a good fit. The most important is the body length. In the pattern measurements (page 4), this is indicated by a HPS to crotch measurement. In sewing terms, HPS (high point of shoulder) is exactly what it sounds like – the highest point on your shoulder, about midway from your neck to shoulder point. Often times the shoulder seam will sit slightly farther down from your HPS, so do not use that seam to measure. On your body, run a measuring tape from your HPS over your bust and down to the crotch seam on a pair of leggings or jeans. The crotch seam is the 4-way seam where the front and back of the garment intersect with the front and back of the leg. This will be your body measurement. The garment measurement should ideally be 2″ greater. Compare your HPS to crotch measurement to the body HPS to crotch measurement in the pattern to know if you will need to add or reduce length through the body.
The best way to add or reduce length in the body is via the shorten/lengthen lines on view A or at the line where you tape the top pieces to the bottom pieces for view B (this is shown and explained in the pattern on page 8.) It is important to alter the pattern at that point so the side seam for view B will also be raised or lowered. If you simply raise or lower the bib height, your side seam will end up too high or too low. If your body length does not need adjustment but your bust is greater than the drafted B cup, you may perform a FBA on view B by only raising the bib height. This is addressed in the FBA section in the pattern on page 9. Keep in mind that you may need to adjust the body length and the bib height.
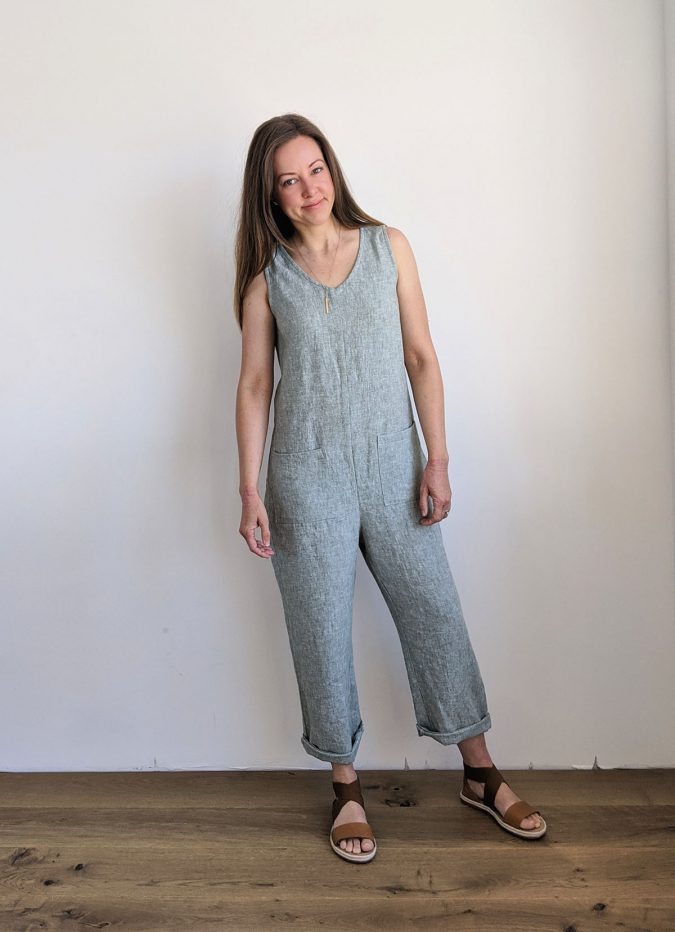
As always, fabric makes a huge difference in total garment length, so if you are on the verge of needing to shorten the body and use a heavier drapey fabric like a linen/rayon blend, you may want to take out some length. I did not remove length from the sage one below and you can see the crotch is much more dropped than on my other versions.
Inseam
The inseam is another area that may need adjustment in length, but fortunately this one is much easier, especially given the ankle length style. The inseam on this pattern is 23″ for every size, but that measurement is taken from the dropped crotch. The full length from your body ends up being closer to 25-26″ inseam. You can adjust this to maintain the intended ankle length (where the hem falls just above the ankle bone), or you can lengthen or shorten them as desired. In testing we found that a rolled-up hem is really cute on the full length pants version, so you may want to leave the pants on the longer side if you intend to roll them. As always, this pattern is drafted for an average height of 5’5″ – 5’6″, but that tends to have no correlation with leg length or torso length, so do not rely on full height to make alteration decisions. The shorts inseam is 4″ from the drop and can also be shortened or lengthened depending on your leg length and personal preference.
Neckline
The back neckline on view A gaped on some testers but not on others, so we left it wider for maximum range of motion. The weight of the fabric and the zipper can greatly affect this area as well. If you find your back neckline is gaping, that is an easy fix. Simply increase the seam allowance when sewing the zipper to the back as you approach the neckline on both sides. This can also be a result of the neckline stretching out, so a staystitch or steam may help maintain the width. You can also simply lower or raise the V in the front to your preference.
Grading
As per all garments, the Greer can also be graded in or out at any of the girth measurements (waist, hip, thigh, calf) if necessary. After choosing your size based on your high bust, you will need to evaluate the measurements of the rest of the garment against your body measurements to make a decision about grading. Use the FBA instructions on page 9 if necessary. If your bust dictates that you make a larger size than your hips, you can also make a straight size from your bust and baste fit through the hip and thigh if necessary for a more precise fit.
Muslining and total length
I recommend making a muslin for view A, if only from shoulder to thigh (you can cut the pants to a 1″ inseam to get an idea of how the bodice and body length will fit). For view B, you can also just do a quick muslin from bib to crotch, or you can even hold the pattern up to your body for a quick idea on where the side seam and bib height will hit your body. Make sure you are dropping the crotch about 1.5″ below your crotch point to account for the dropped crotch and seam allowance. View B has a little more wiggle room since the straps are adjustable, but you still want to make sure the side seam and bib hit at the desired point on your body. In testing we found that the front bib height looks best when it is about 2″ above bust apex for a B cup.
Fabric
The fabrics used for the samples shown are as follows, in order from most soft and drapey to least:
View B maroon shorts: viscose linen noil
View A sage pants: Robert Kaufman Brussels linen
View A striped shorts: 100% linen
View B striped pants: Robert Kaufman Essex linen
Each of these fabrics works really well for the Greer, it just depends on the style you’re hoping to achieve. If you compare the sage view A pants and the railroad striped view B pant versions you can really see the difference that drape makes. The striped version fits much closer to the body and there’s no slouch or sag. They also appear shorter because they don’t have rayon to cause them to grow in length. I love both pairs equally, it just depends on how I want to style them or where I’m wearing them.
All of the fabrics I used can be purchased from several online retailers – my sources are linked below. I suggest doing a google and an etsy search for the terms I used to find your favorite colors and best shipping and pricing. The Brussels linen is a linen/rayon blend and the Essex is a linen/cotton. Both of these lines come with a yarn dyed option that is really lovely and gives them a bit more texture. The viscose linen noil is manufactured by Telio and is carried by several shops, each one calling it something different. You may also try searching rayon linen for that substrate or something similar. 100% linen can be found everywhere as well. I suggest also searching for yarn dyed linen or washed linen for a little extra softness and drape. As you can see, using a 100% linen will lead to some delicious wrinkles regardless of how you steamed it right before taking pictures 🙂 I’m a fan, but just be aware of that if you are wrinkle-adverse.
Sources
Orange tank top: Durango Tank
Striped top: Union St. Tee
Sandals: Sorel
Sneakers: Converse
Boots: Hunter
Hat: Target (old)
Maroon fabric: Imagine Gnats (closed)
Dark stripe fabric: Blackbird Fabrics
Railroad stripe fabric and sage linen fabric: Fabric.com
The Greer is on sale along with the entire shop during our semi-annual Spring sale! Use code “Spring20” for 20% off everything. Shop now!

Hi, I bought the Greer pdf pattern today, and entered the “Spring20” coupon code, but it would not accept it. Can you advise? Regards, Lynn
The coupon expired on May 12.
How much fabric is needed for the Greer jumpsuit View B Pants, and View B Shorts?
Many thanks, Lynn
Hi Lynn,
You can find all fabric and notion requirements in the listing and in the pattern itself. Thanks!
What cup size are your patterns drafted for? How would you do a FBA on a jumpsuit like this (one piece top to bottom vs a jumpsuit that is a bodice attached to pants)? I’m having a hard time visualizing what effect (if any) an FBA would have on the leg angle, crotch, etc.
Thanks!