
Please welcome Teri back to the blog with the most perfect spring blouse! There’s nothing like crisp white trim and blue linen for a warm weather blouse and Teri executes it so beautifully. Follow along for her simple and detailed tutorial!
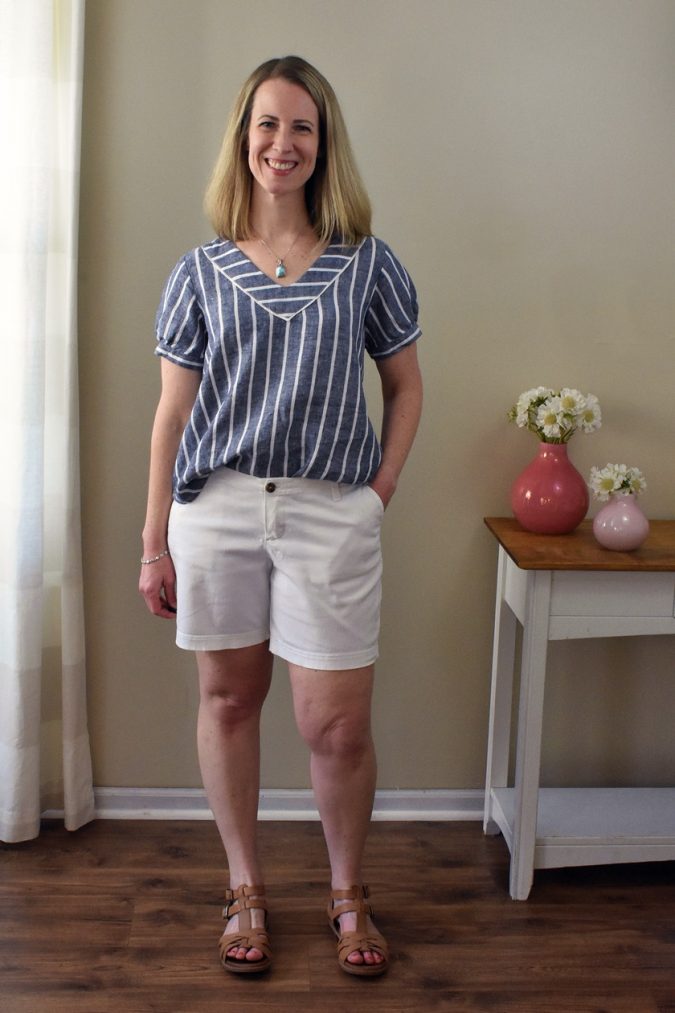
Hello, Hey June readers! I’m so excited to be back on the blog to show off my new, modified Lucerne blouse. I’ve made the Lucerne once before and I really love the fit! I was window shopping on Anthropologie’s website and came across this blouse and knew that I could make something similar using the Lucerne pattern as my base.
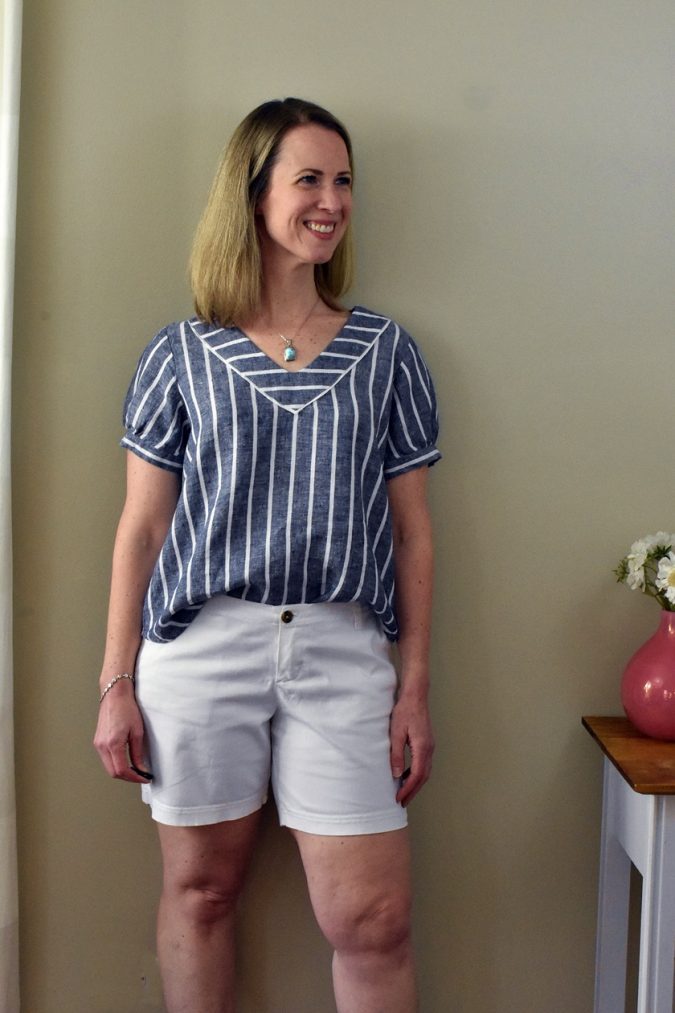
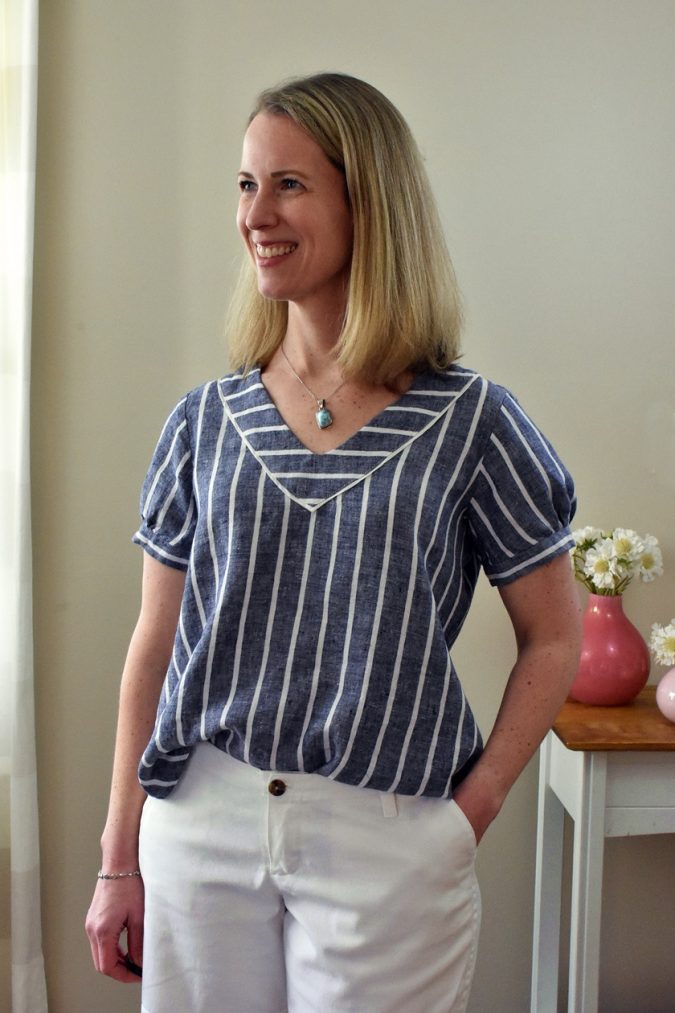
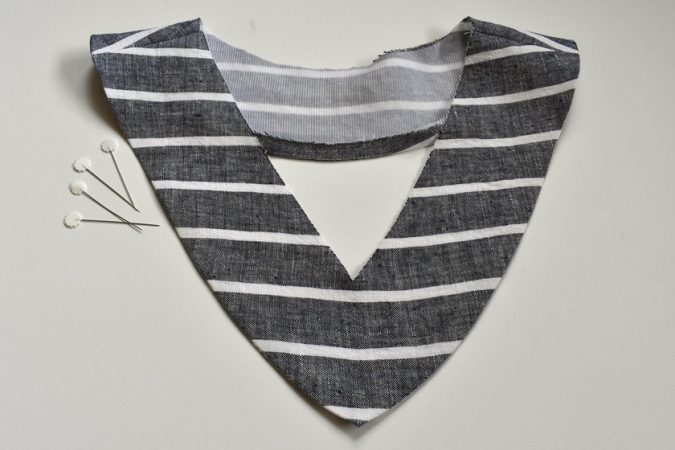
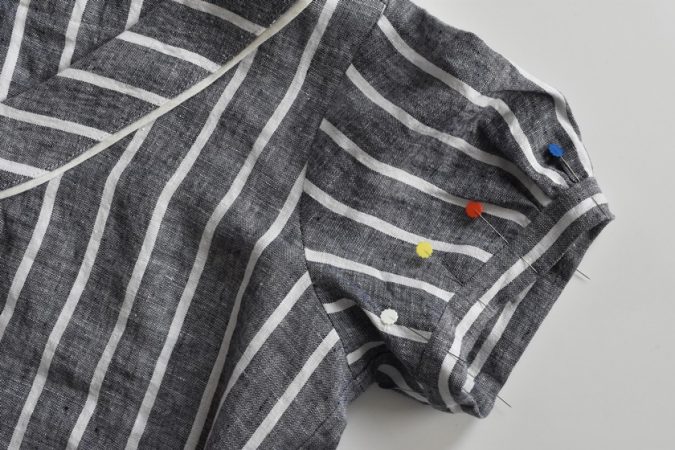
To create this hack I slightly modified the shape of the front and back neck facings and sewed them so that they are on the outside of the blouse instead of the inside. I also added some flat piping to the underside of the facing to really call attention to the pretty v-neckline.
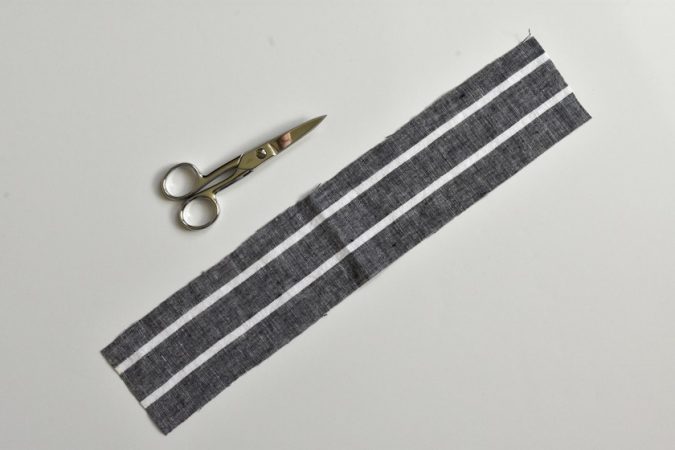
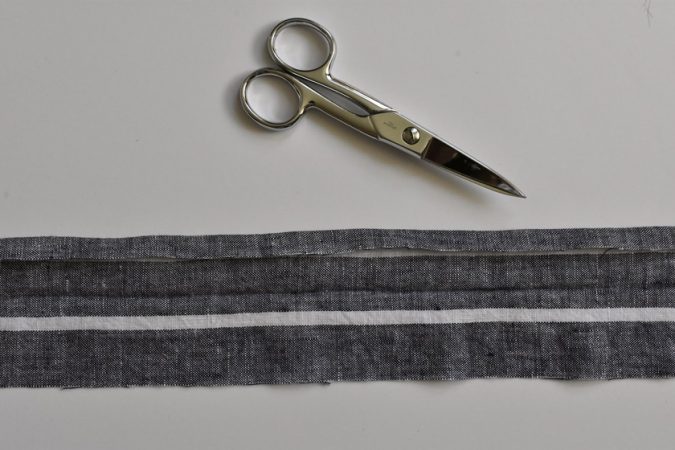
I had some navy and white striped linen in my fabric stash that I thought would be perfect for this top. It gave me a great opportunity to do some stripe play with the exposed facing, and the linen will be perfect for wearing with shorts or pants this Summer.
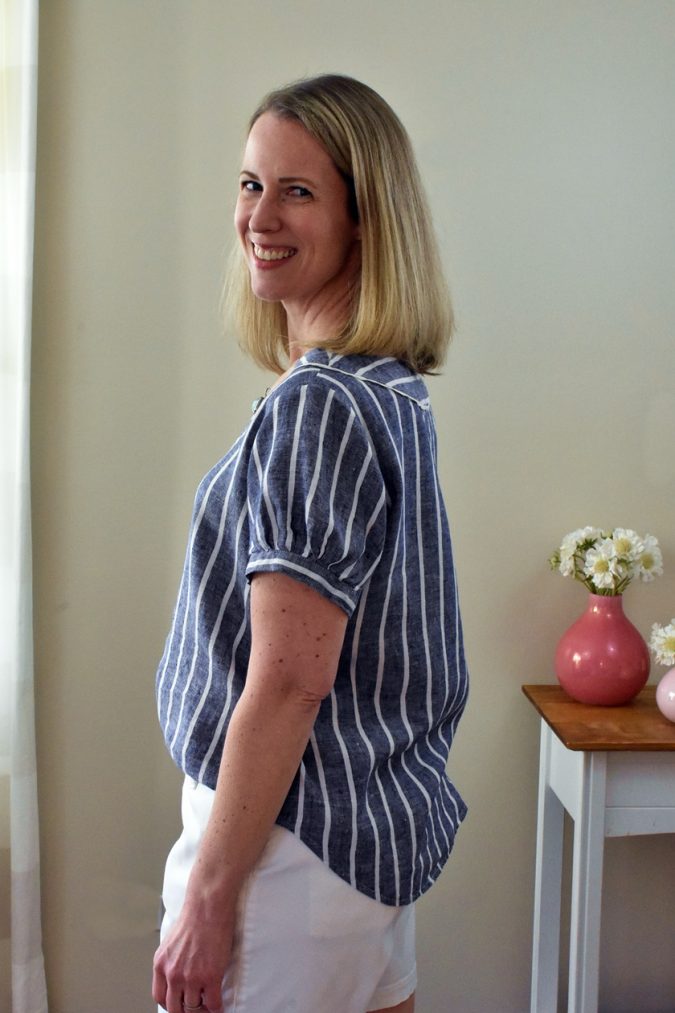
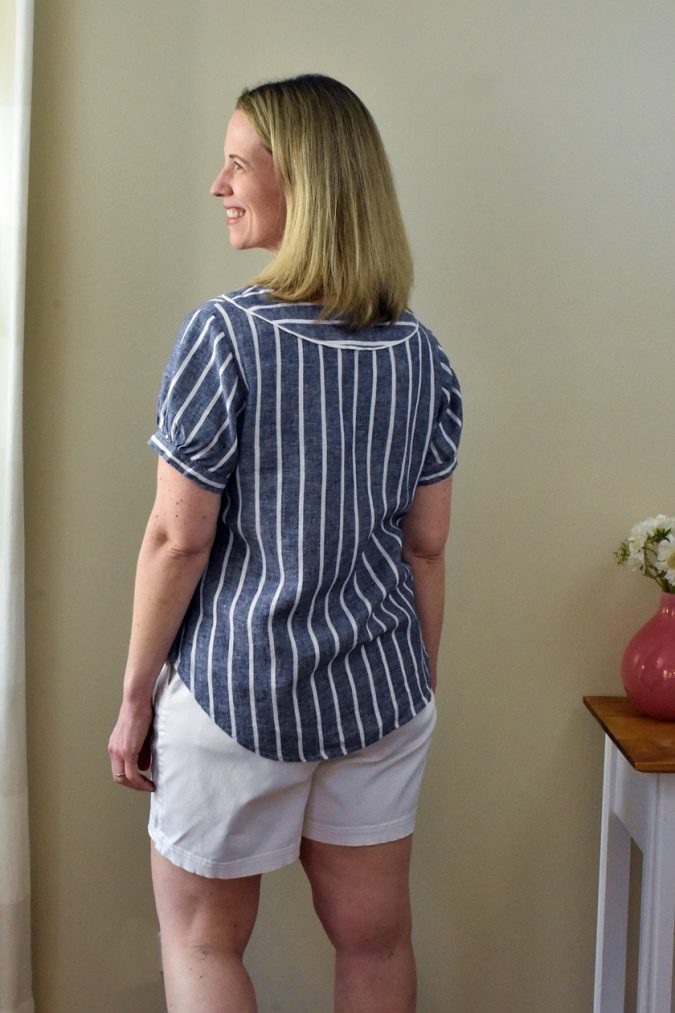
My inspiration blouse has long sleeves, but I opted to keep the Lucerne’s short sleeves. I changed the sleeves to be slightly gathered and finished with a hem band. I am so happy with how it turned out! I love the sailor vibes that I’m getting from the stripes and piping.
Here are the details on how to make the changes to the Lucerne pattern and how to sew your own:
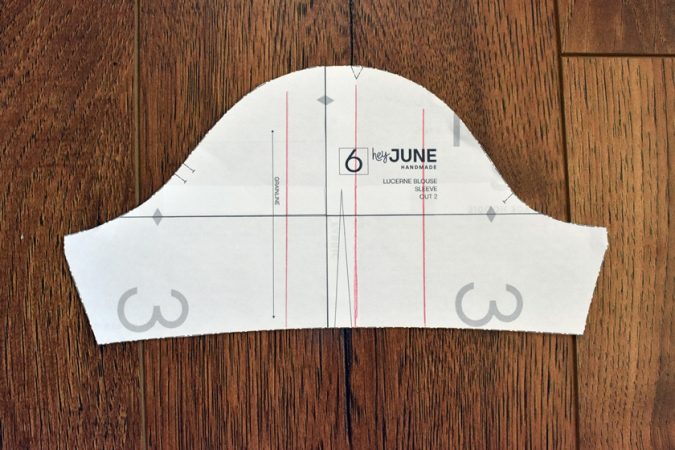
Before making any changes to the sleeve piece, I measured the width of the sleeve at the very bottom of the sleeve. That is how long I cut my sleeve hem band, by 3” wide. To modify the sleeves for the gathered hem, I slashed and spread my pattern. I started by drawing a line, parallel to the grainline, from the top of the shoulder notch to the bottom of the sleeve. I added two more lines, 2” apart from the first line, on either side of it.

Next, I cut on those lines, being sure to cut only to the seam line on the sleeve cap (½” from the top) and spread the pattern apart by 1” in each cut line. I filled the spaces in with paper and smoothed out the curves on the sleeve cap and the bottom of the sleeve.
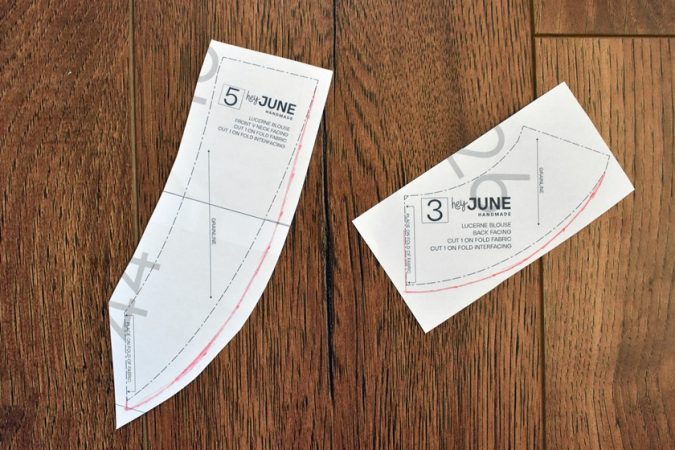
To modify the facings, I measured the width of the front and back pieces at the shoulder seam. I wanted the facings to be the same width all around the neckline, so I marked in new cutting lines using that measurement as my guide. At the bottom of the v-neck, the facing looked better if it was slightly narrower than at the shoulders. I eyeballed this and drew in a gentle curve around the point of the v-neck. My new pattern cutting lines are in red in the photo above.
To begin, sew the front and back bodice pieces together at the shoulder seams and finish the seam allowances.
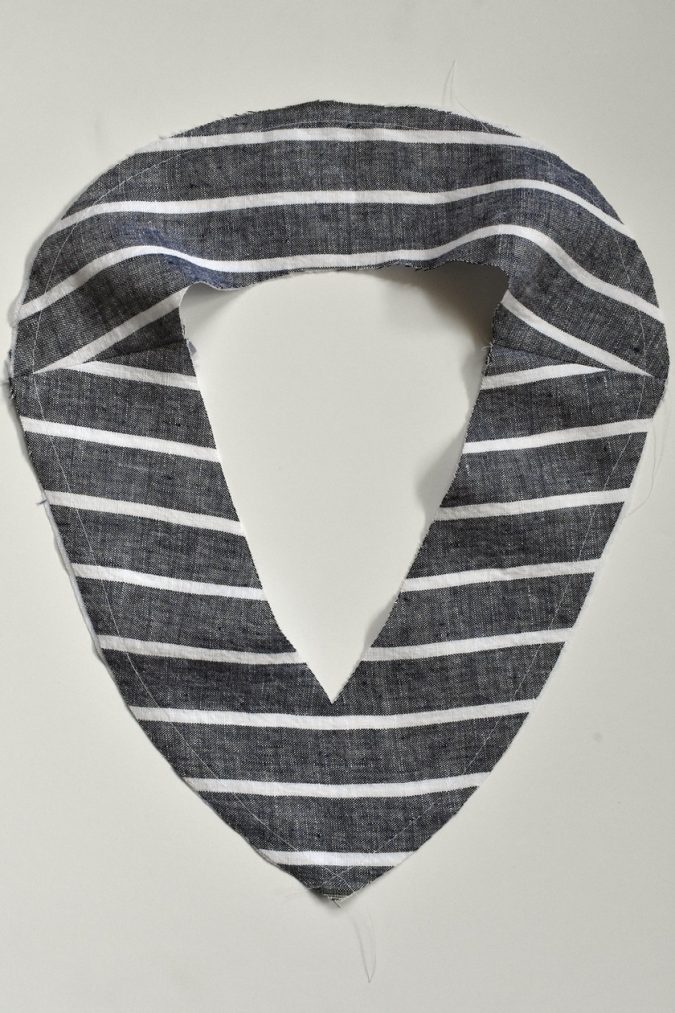
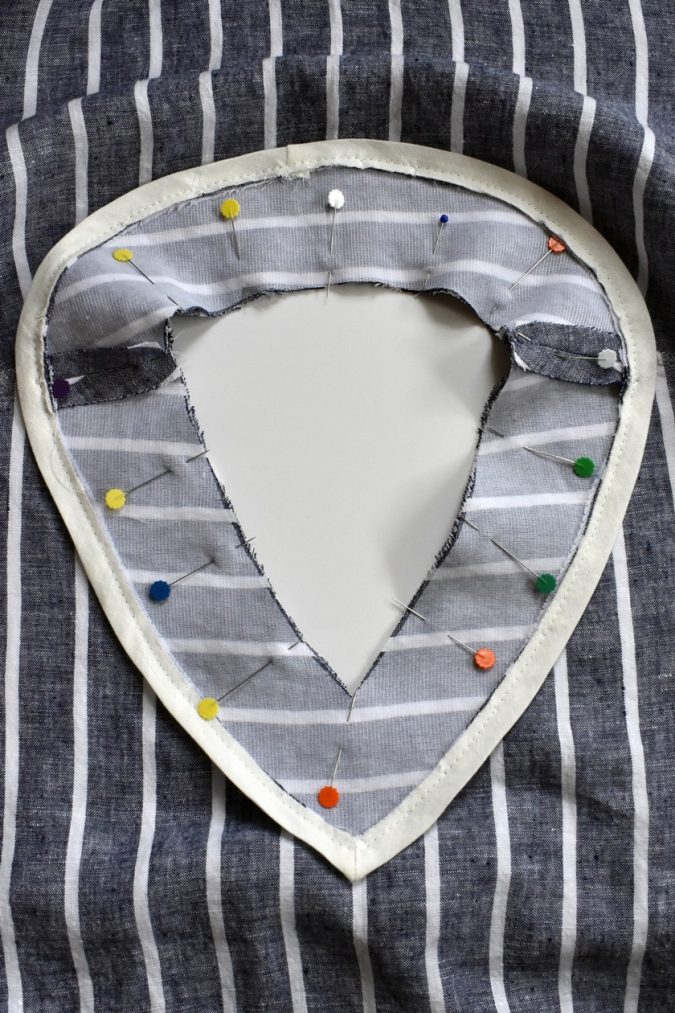
To construct the exposed facing, I followed the instructions to interface my facing pieces and sewed them together at the shoulder seams. I ran a basting stitch ⅜” from the outer edge of the facing to use as a guide for pressing the raw edges to the underside of the facing.
I pressed my raw edges to the wrong side of the facing.
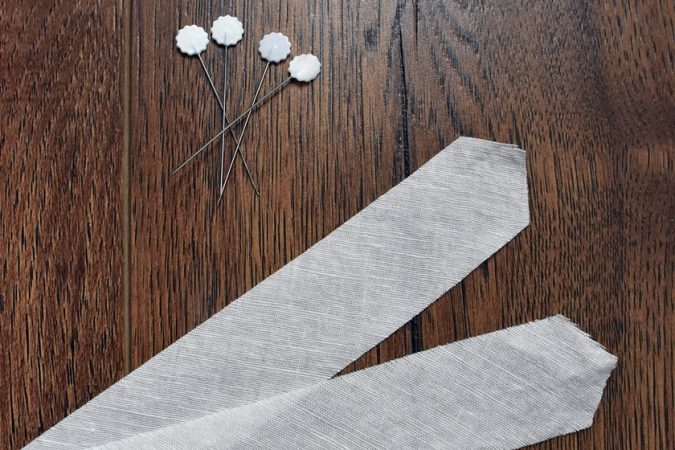
Next, I cut 2 bias strips 1” wide and long enough that they would reach from the front of the facing to past the center back of the facing. One end of each bias strip needs to be cut to a point using 45-degree angles to get a v-shape for the center front of the neckline.
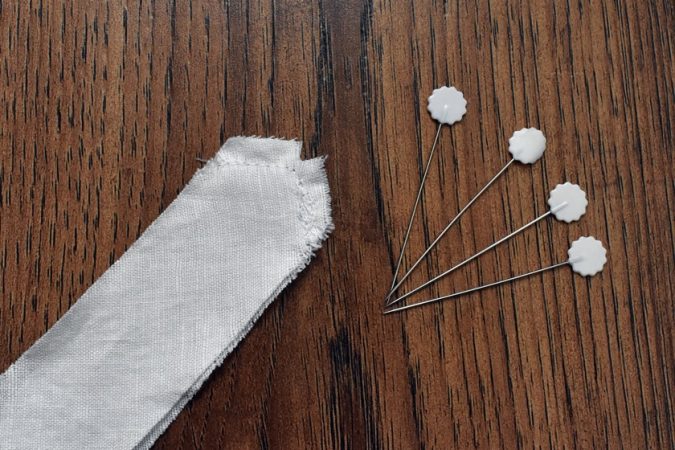
I sewed the pointed ends together and snipped a notch out of the seam allowance at the point. This will help get a nice point when the bias strips are turned right-side out. Be careful not to clip into your stitching!
Then I turned the bias strips right side out and pressed them in half, right sides together, to create the flat piping that will go under the facing.
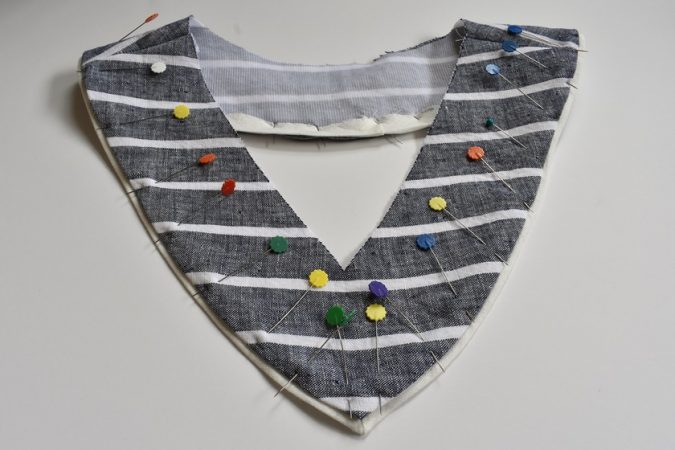
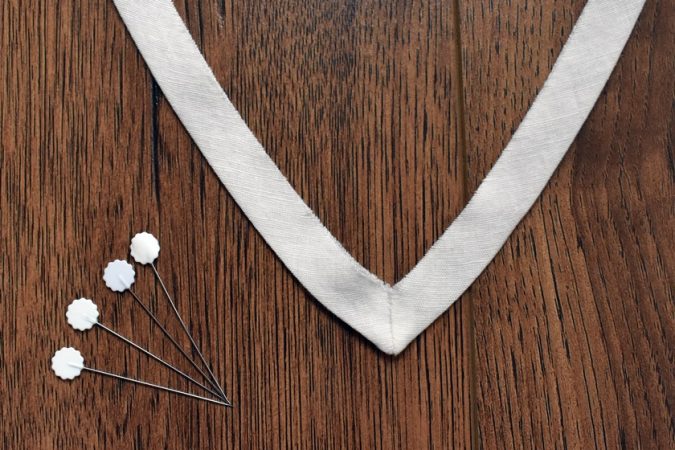
I pinned the piping around the facing so that ⅛” was showing all around the outer edge of the facing. I started pinning with the center seam of the piping at the point of the v-neck and pinned toward the back on each side. When I got to the back I sewed a seam to join the two ends of my piping at the center back of the facing. I basted the piping in place at a ⅜” seam allowance.
Next, I pinned the facing to the neckline. I pinned the right side of the facing to the wrong side of the blouse and sewed it in place at ½” seam allowance. Then I pulled the facing to the right side of the blouse and pressed the seam allowance toward the blouse.
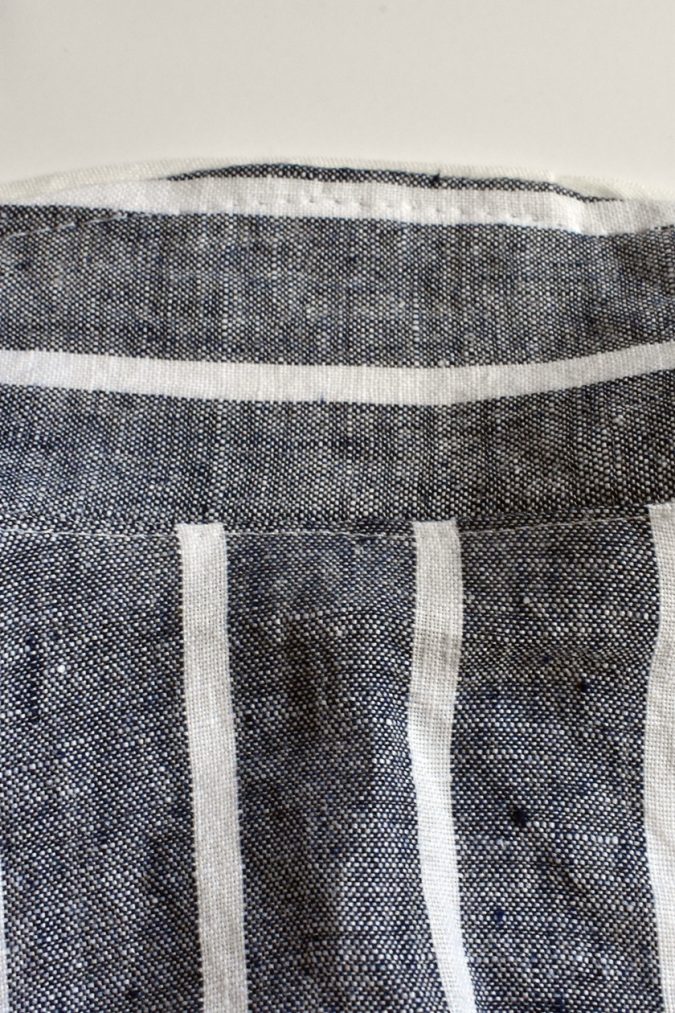
I understitched the seam allowance to the blouse, instead of to the facing. Since the facing is on the outside of the blouse it will cover the understitching.
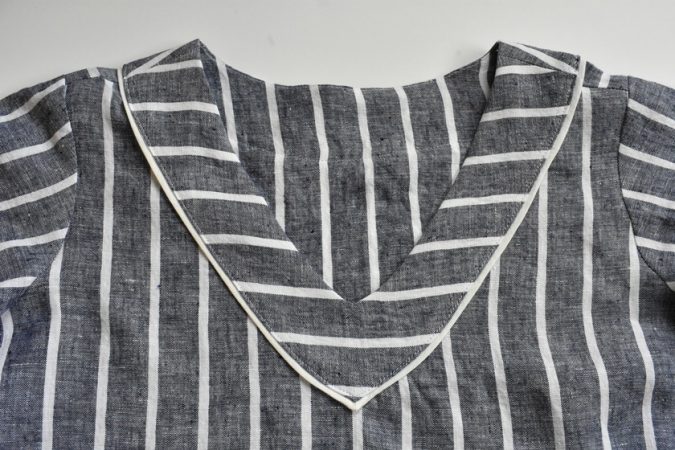
To finish the facing, I pressed it and pinned it to the right side of the blouse. I edge-stitched about 1/16” from the outer edge of the facing. I pulled out my basting stitches from around the facing since the topstitching secured the facing and the piping in place.
After I finished the facing, I attached the sleeves to the bodice and sewed the side seams. I also hemmed my blouse at this point.
The first step to sewing the gathered sleeves is to cut the bands using the measurements from the bottom of the sleeve before it was slashed and spread. My sleeve bands were 15.5” by 3”, but the length will vary with each different size.
Press a crease down the center of the length of the sleeve band. Press one raw edge in toward the center by ⅜”.
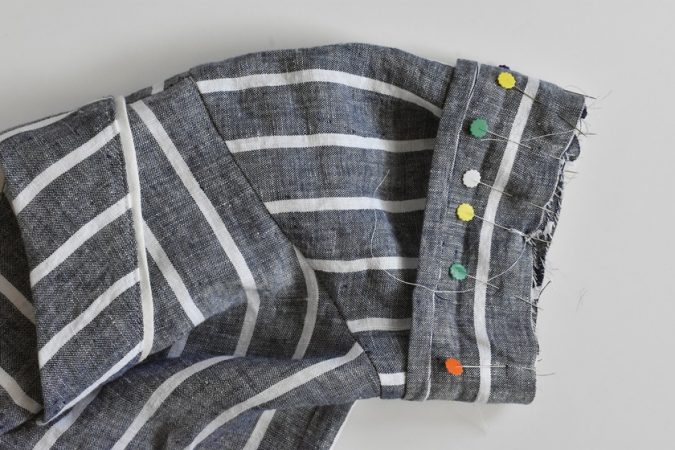
Sew the two short ends of the sleeve band together. Run a gathering stitch along the bottom of the sleeve at ⅜” seam allowance. I chose to start and end my gathering stitches about 3” from the sleeve seam. My gathers are just on the top side of my sleeve, but the gathers could be distributed around the whole length of the sleeve.
Gather the sleeve to fit the hem band and pin the unfolded edge of the band right sides together to the bottom of the sleeve. Sew the band to the sleeve at ½” seam allowance.
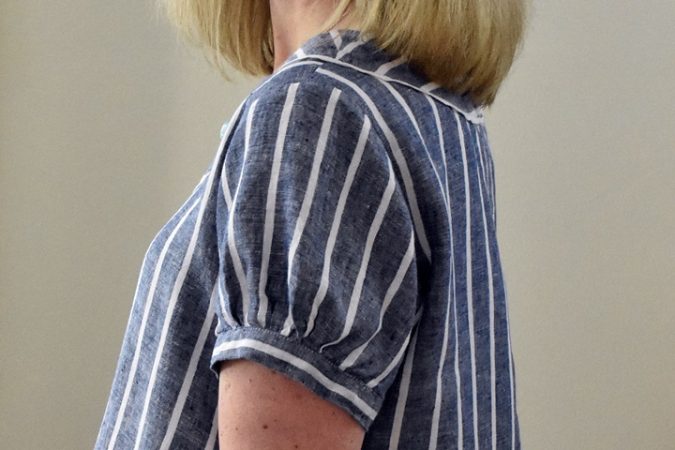
Press the seam allowances toward the sleeve band. Fold the band in half on the previously pressed crease and pin the folded edge of the band so that it just covers the seam. Topstitch at 1/16”, or stitch in the ditch, to secure the sleeve band to the inside of the sleeve.
My Lucerne was done after I gave it a final press!
I hope you enjoyed this tutorial and are inspired to make your own gathered sleeve, exposed neckline Lucerne Blouse!
Thank you so much Teri! I love your blouse!
I really like how this came out. It’s so much nicer to have the facing sewn down, anyway so why not have it be a feature of the blouse? The sleeves are perfect, I think the style goes better with the piped facing than the original sleeve would have. It doesn’t compete with the neckline but it enhances it.