

I am so excited about this tutorial brought to you by one of my long time and very talented pattern testers, Indu! I feel like everything she touches just turns to gold. Her directions for adding a split hem with mitered corners is super professional and can be applied to any top pattern you have! She’s using the Aurora Tee for her tutorial, with a v-neck mod (check out the Union/Santa Fe mash-up for instructions on the neckline!)
~~~~~~~~~~~
I am beyond excited to be part of the HJ Blogger team and share this Aurora Tee hack today. Hey June patterns were amongst the first PDF patterns I ever bought for myself when I first learned to sew, they are easily my favorite patterns to work with. Honestly, at any given time I have at least three Hey June pattern hacks or makes swirling in my head and this was one I’d been dreaming up for quite some time. I love the dropped sleeve and the laidback style of the Aurora tee and wanted to adapt the side split hem into this pattern.
So here’s what I did: I redrew the side and bottom hem lines to remove the shaping in the waist and the curved hem. Even though doing this reduces the hip width, the split hem will compensate for that. But check your measurements and increase hip width if you need to accordingly. The length was perfect for me but if you’re taller than average or even average height, you might want to consider adding length to the pattern here. I added 1” only to the back for a slight hi-low hem.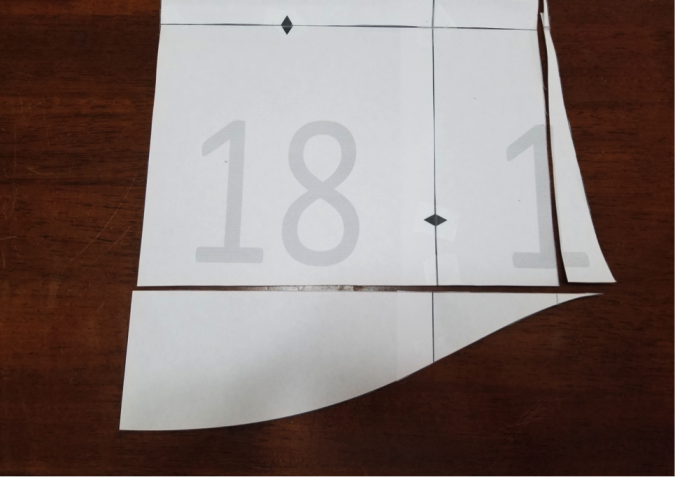
Now to add the side split hem, determine how high you want the split, I made mine 5” high. So measuring up from the bottom hem, mark a line at 5”, which will be the start of your split hem. On the side seam line, mark a point ¼” down from the line you just made. Later, remember to transfer this mark on to your fabric as well.
Now we will add hem allowance to the pattern, a ¾” bottom hem allowance and a ¾” side slit hem allowance. To do this just tape a ¾” strip of paper to the bottom and a ½” strip to the side starting from the line we marked in the earlier step. We’re adding only ½” here because the pattern already has a ¼” SA included in the sides.
To create a mitered corner, we will be removing some fabric bulk to create a crisp corner.
This is really simple and hopefully clear. Starting from the corner point on the pattern, measure out 1.5” (twice your hem allowance) on the bottom edge, and mark it. Then measure out 1.5” up the side hem and mark it. Join these points with a diagonal line going from the side hem to the bottom hem as shown. This will be our mitered edge (or the seam line of our mitered edge), now simply add a seam allowance of ¼” to this line and cut the pattern over that line and that’s it!
Repeat the same process for the back piece as well. Because the back piece is 1” longer, the slit is 6” high on the back piece but everything else is same as the front piece. Now your pattern is ready to be sewn.
Follow the instructions in the pattern to finish sewing the neck and sleeves. Do not serge the sides together. While sewing together the front and back, stop at the point we marked earlier and lock your stitches. Serge the front and back pieces separately. To eliminate bulk in the mitered corner, do not serge across that diagonal edge.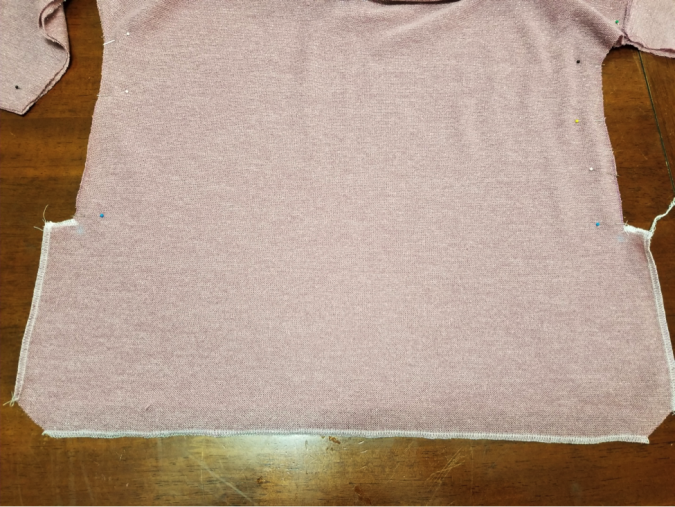
Bring the bottom and side edges together (folding the diagonal edge of the fabric in half) to sew across the mitered edge seam line (SA of ¼”).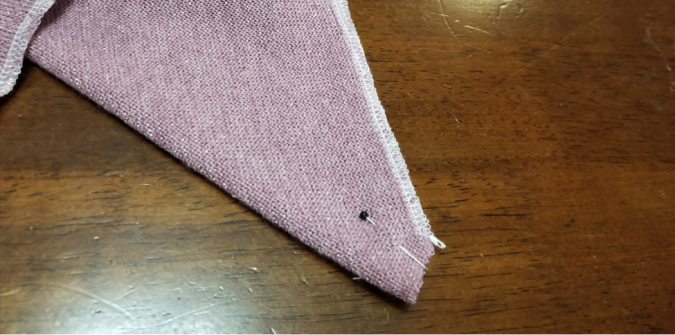
Clip the fold, and turn that corner right side out.
Both the bottom and side hems will be folder under by ¾” and the top of the slit will be folded up by ¼”. Starting from the top of the slit, start sewing across the slit, down and then across the bottom and up and across the other slit to continue on both the front and back all in one go, while pivoting sharply at each right angle. I worry about wonky corners when trying to topstitch seams like this with a twin needle, so I used a regular needle with a stretch stitch.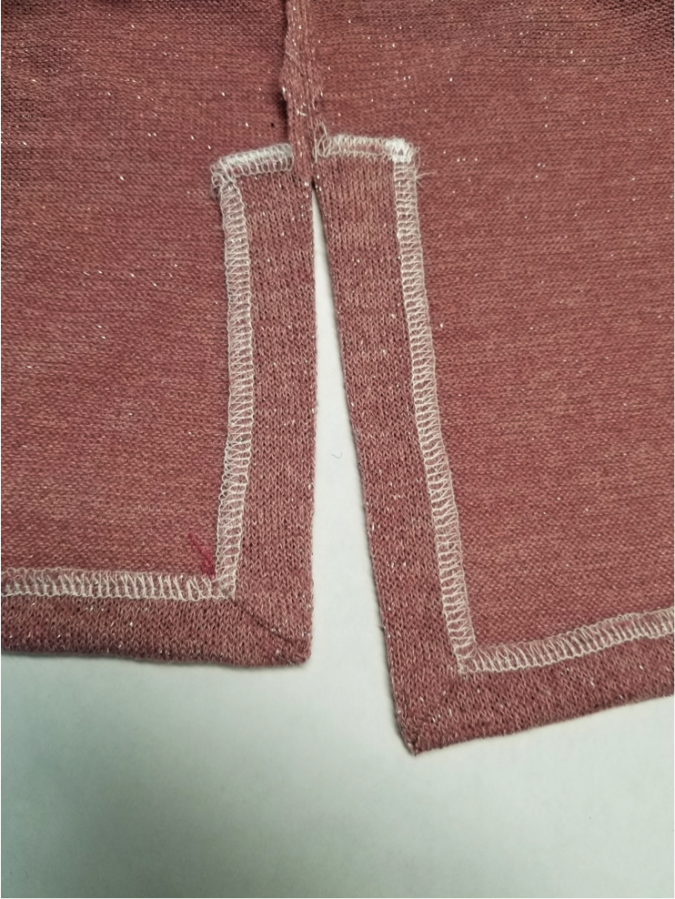
Finish hemming the sleeves and you are all done!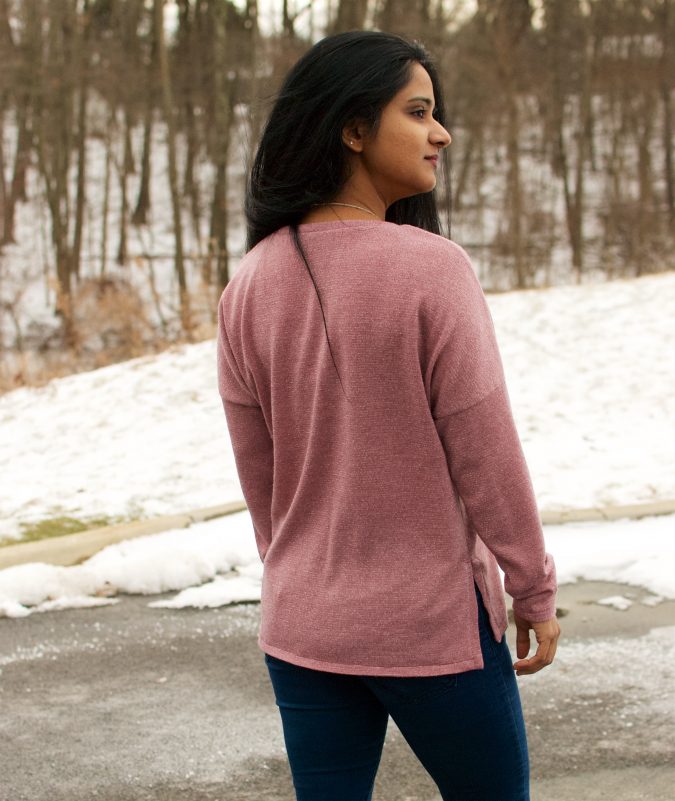

~~~~~~~~~~~
Thank you so much for this great and versatile tutorial Indu!!
I wanted to thank you for this great tutorial.
It’s very timely, because I was just trying to figure out how to do a split hem tunic that would cover my butt at the gym.
🙂 Chris
Verygood listing shearing. I like it.