

Hi guys! I’m here today with another one of my favorite things! Just like Oprah! 
You all know I love mash-ups, so I decided it was high time to do one with two of my very favorite patterns. This is the Santa Fe/Union!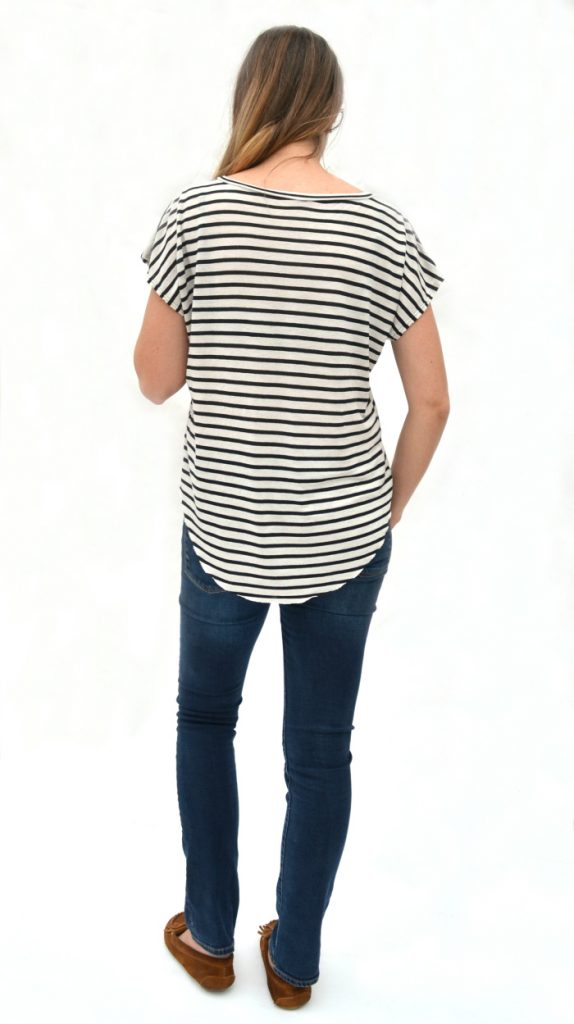 It’s basically a slouchy v-neck tee with dolman sleeves and a shirt tail hem. I saw someone wearing a similar tee on tv and figured it would be an easy hack with patterns I already have printed and ready to go! I love when that happens. Read on for the tutorial!
My first step was to reduce the width of the Santa Fe since it is drafted as a trapeze style top and I just wanted a slouchy top with straight side seams. This is super easy! You’re basically reverse drafting the pattern by using a slash and reduce method instead of slash and spread. You only need to do this to the front piece.
So first, I cut a couple vertical lines from the hem up to the bust: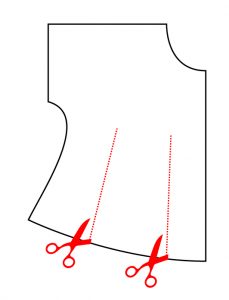
Then I overlapped the pattern at the cut lines to reduce the width at the hem.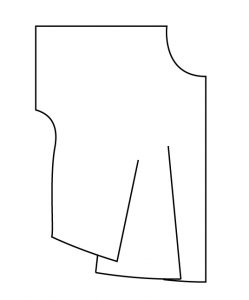
Then I simply reshaped the side seam to eliminate any wonkiness.
Ok, the hardest part is done, and it wasn’t that hard, was it? Now you just need to alter the neckline and hemline (the hem part is optional for this mash up!) Here’s the easiest way to do it:
First fold the fabric like you do and lay the Union St. Tee front piece on it, aligning the pattern on the fold line. Cut up the V-neck until you reach the shoulder point and stop. Remove the pattern.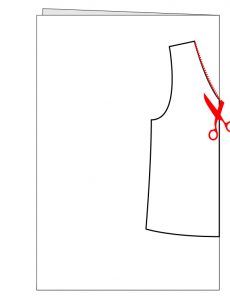
Lay the new Santa Fe pattern on the fold line (this pattern has an optional seam down the center front, so be sure to put it on the fold line instead). Align the shoulder point on the Santa Fe with the point where you stopped cutting the Union. My shoulder points aligned almost perfectly, but for other sizes the Union St might be slightly narrower. The height of the shoulder point is the important part, not the width. The red line indicates the part that was already cut from the Union neckline. The Santa Fe neckline is higher so it’ll cover the point of the V neck.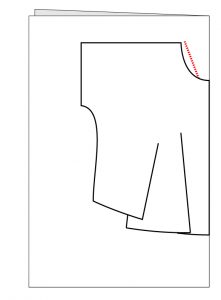
Cut around the Santa Fe dolman sleeve and side seam, and stop when you reach the hem.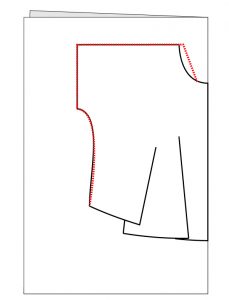
If desired, cut a reshaped hemline by drawing a new one on paper or using a french curve or just eyeballing like I did. You can’t really mess this up, just make sure you cut smooth gradual curves and leave enough at the bottom of the hem remaining perpendicular to the fold line so it doesn’t become pointy. About 3-4″ should be good.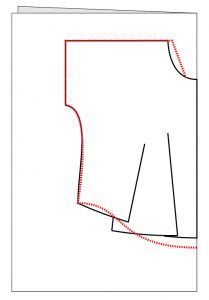
And your front piece is finished!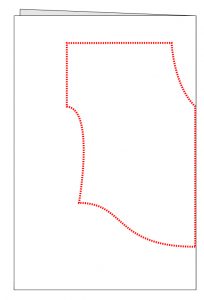
Repeat these steps to use the Union St Tee back piece to cut a neckline and align the Santa Fe back piece in the same way, cutting along the shoulder and dolman sleeve ONLY. Then use the finished front piece as a guide to cut the side seam and hem for the back piece. If desired, you could cut the lower hem of the back piece a bit longer. The finished back piece should look like this: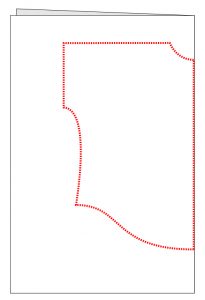
Then just sew it up using the Union St. Tee instructions and neckband piece for the neckline and the Santa Fe instructions for the rest! I omitted the cuffs on mine and also cut 1″ from the length of the sleeve. Also keep in mind that if you intend to hem this shirt it will be easier to hem the front and back before sewing the side seams if you’ve cut a drastic high-low or shirt tail hemline.
That’s it! So easy right? I loved the fit on this so much that I immediately made another with a solid rayon/spandex fabric. If you follow my stories on Instagram you might’ve caught a sneak peek of that version 😉 
Happy sewing!
So good!! I need to try this!
Thanks, love your patterns!
love your site and am trying your lane raglan
Great work! I really impressed with your t-shirt design creativity. That is some incredible beautiful work. I can’t wait to give a try to this. Thanks for sharing.