
Happy Friday!! Please welcome back Heidi from Handmade Frenzy with another very cute, very wearable pattern hack tutorial! It’s the perfect weekend project!

Hi! I’m so excited to be here sharing a fairly easy pattern mash-up between everyone’s two favorite Hey June patterns, the Union St. Tee and the Lane Raglan!

I have seen tops “out in the wild” (aka, rtw) with this fun shoulder accent piece, and knew that at some point I needed to make it happen in my sewing room! Since I am a die-hard stripes lover, of course I chose stripes mixed with a coordinating accent for the shoulders.

For this project, you will need both the Union St Tee & Lane Raglan patterns printed and assembled in your regular size. For my shirts I blended a straight size med Union with a med Lane. I raised the scoop neck line by 3/4″. This is not necessary for this tutorial, I’m just letting you know.
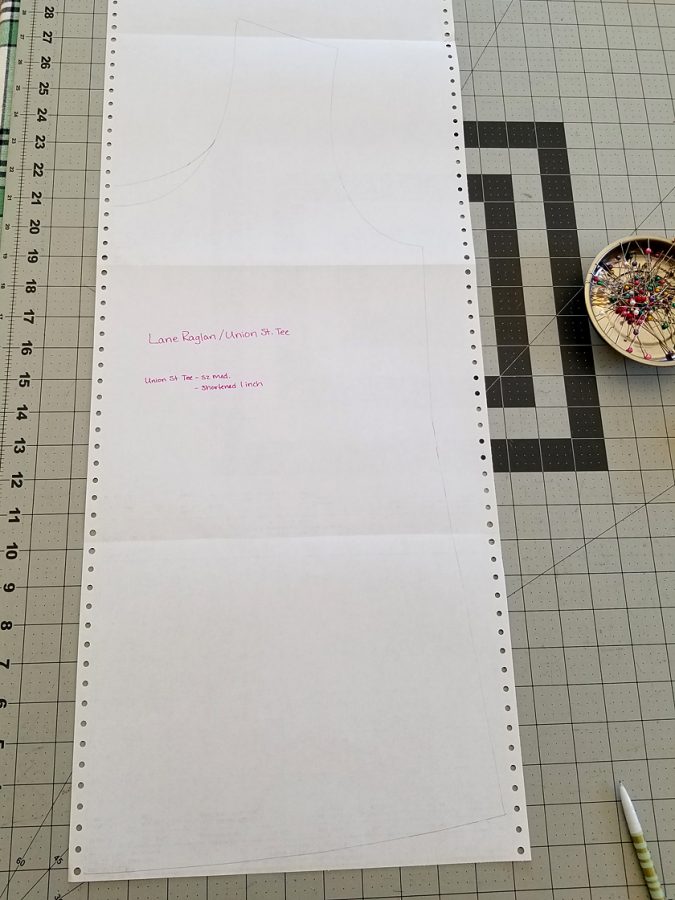
You could do this on your hard copy of the Union St Tee, but I decided to trace it out so that I could preserve my original, because I use it all the time! FYI, the back of used fax paper works really well for this! Haha. I raided my kids’ stash, my husband brings it home from work for them to draw on, because otherwise it just get tossed. It was perfect!
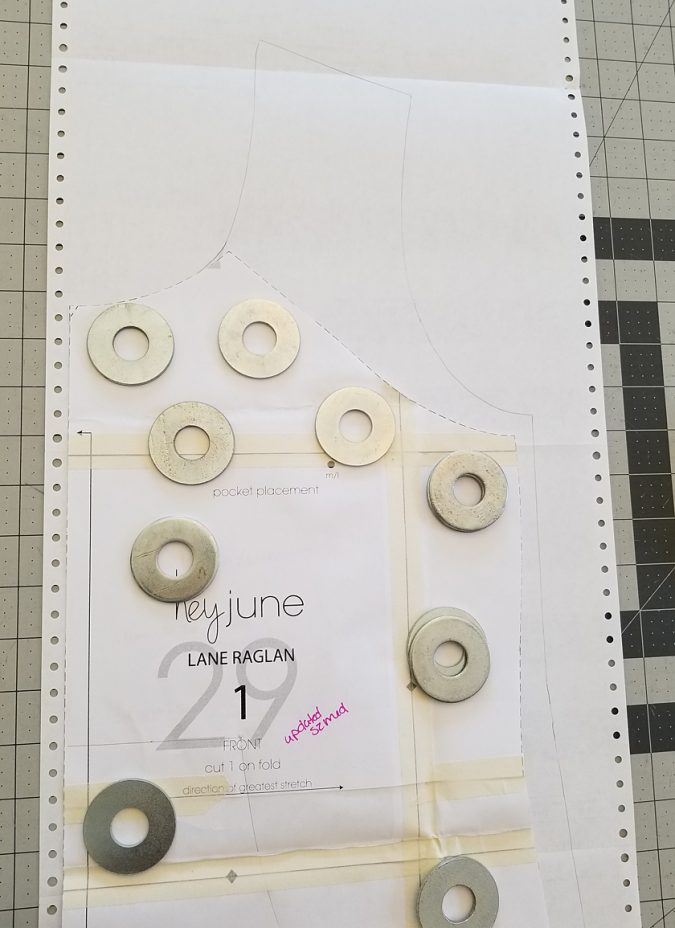
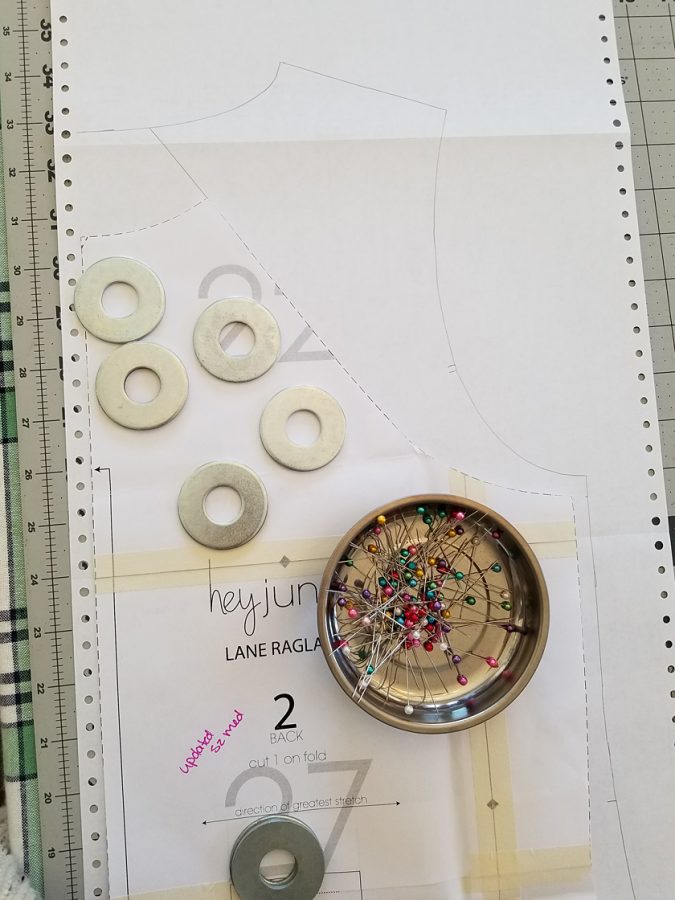
After you have traced out the front and back bodices of the Union St Tee, you will now lay the Lane Raglan bodice patterns on top. You will line up the center fold lines, the bottom of the Lane armsyce should be 1/2″ below the armscye of the Union St Tee. Now trace the raglan sleeve on to the Union St Tee, extending the line up to the neckline as necessary. Do this to both front and back pieces.
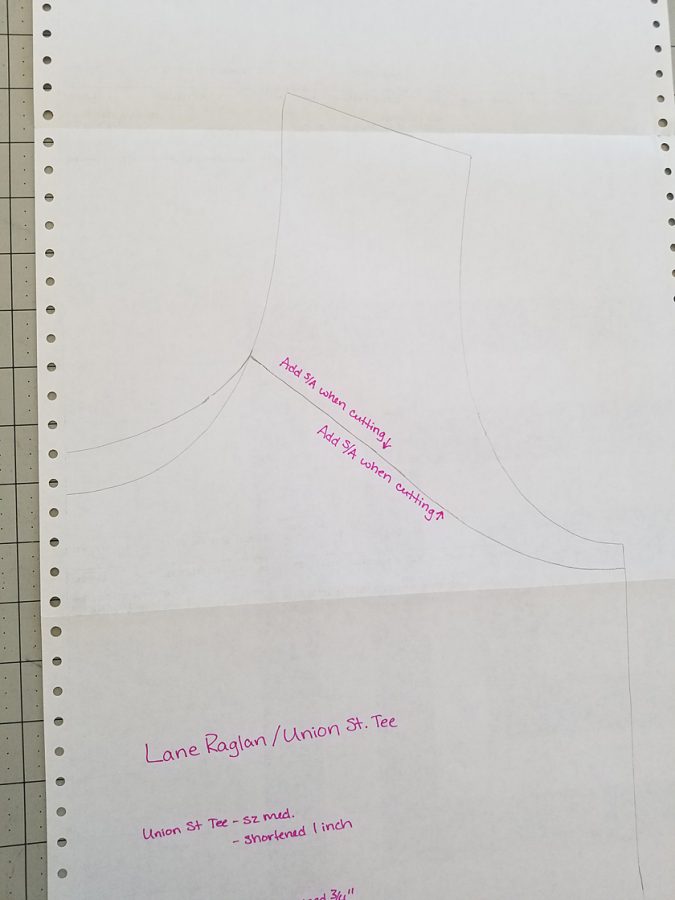
Now you will cut the shoulder piece that you just created from the rest of the bodice. At this point you can add your seam allowances (I like to use 1/4″ for this project) to the pattern pieces if you’d like. I opted to write myself a note to remember to add the seam allowance when I cut. This method is not fool proof!! Lol.
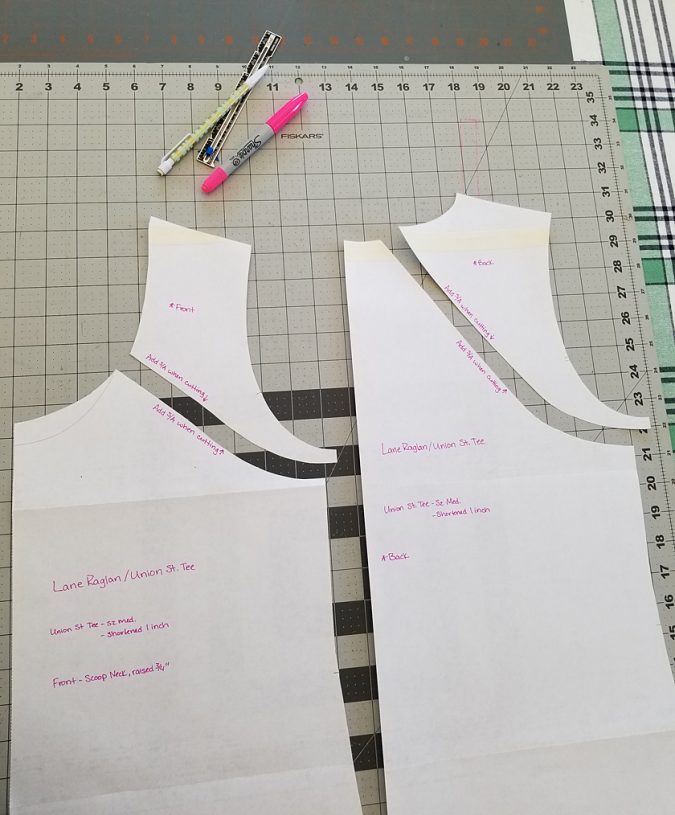
I definitely, completely forgot to add the SA when I cut the main bodice! So to make up for the length difference I added 1/2″ SA to the shoulder accent. Just keep in mind that if you decide to copy me and remember to add the 1/4″ SA to each piece, your accent piece will be 1/4″ shorter than mine ended up being.

I also suggest marking your fabric pieces clearly, by adding notches, or keeping the pattern pieces with the fabric until you are ready to assemble because it is very easy to get the pieces mixed up and sew them on upside down. Ask me how I know. 😉
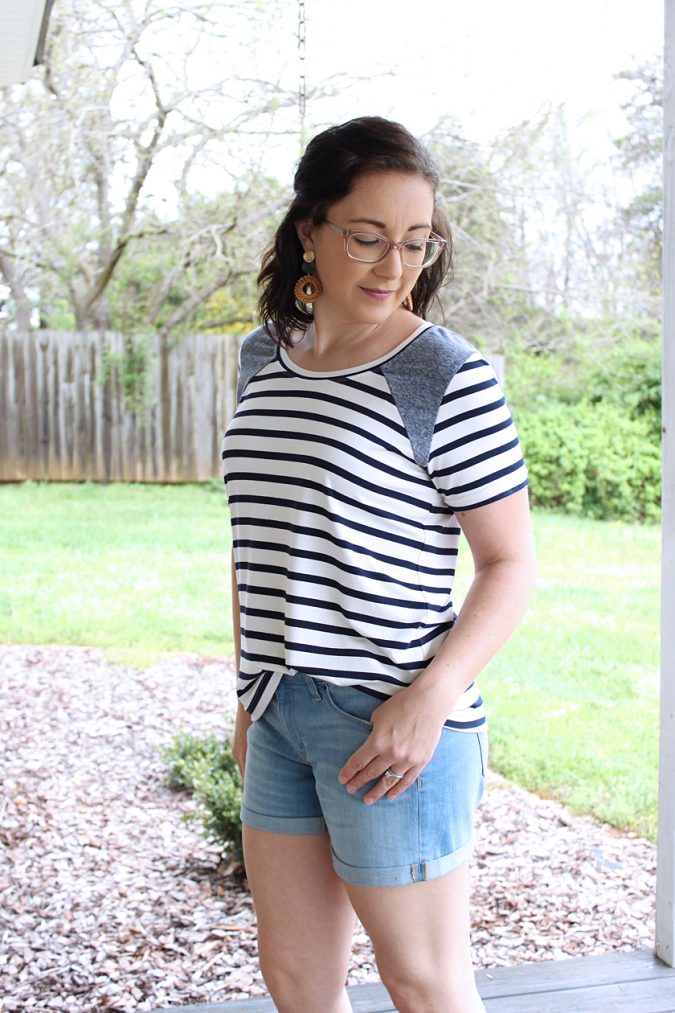
Sew the accent pieces to both the front and back bodice and then proceed on with the pattern as instructed!
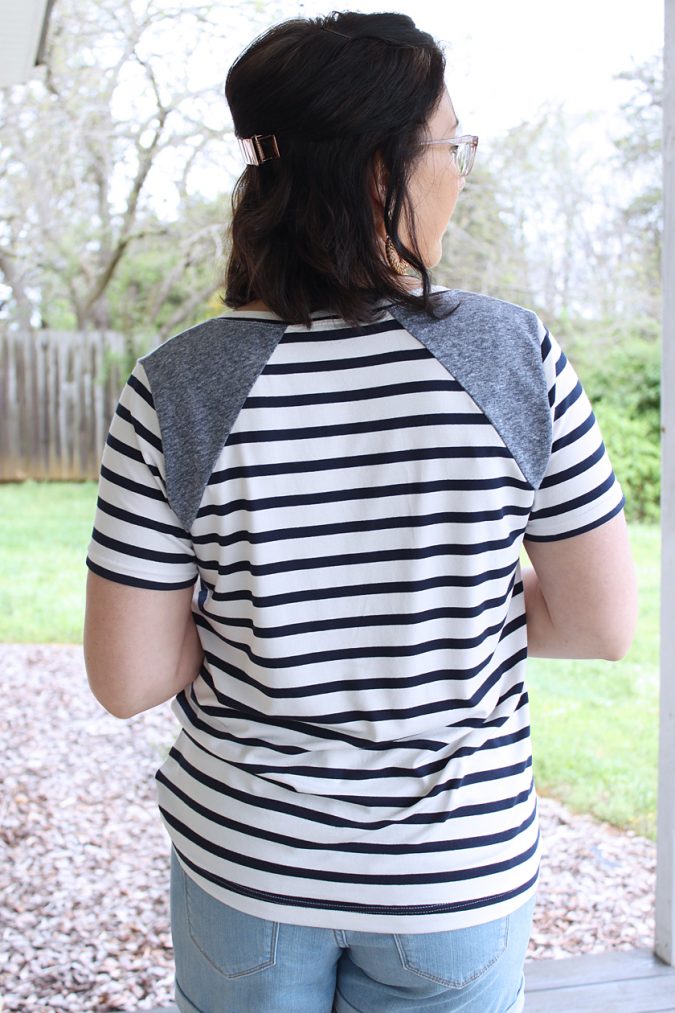
It’s a simple mod, but a really fun accent to add to a regular tee for when you feel like mixing things up! You could also add the accent to only the front for yet another different look, and an even quicker project.

I love how this project ended up, it’s been fun to wear a tee with just a little something extra! Thanks so much for having me here, Adrianna!
Welp, if you’ve been around these parts for more than about 3 minutes you know that this shirt is right up my alley. Couldn’t love it more, Heidi! Thank you so much for this excellent tutorial!
I clicked over immediately to see this—I lOVE IT!!! Great job, Heidi!
Such a great tutorial! It feels like a million years since I’ve seen dot matrix paper. I didn’t know it was still being used today.
Thanks so much, Jen! I’m so happy you like it!
Thank you! I don’t know how many places still use it, but it is abundant at my husband’s work place. ?