Here’s one that’s already been done multiple times by you creative folks, and I decided it needed its own tutorial – the Phoenix Blouse as a dress!
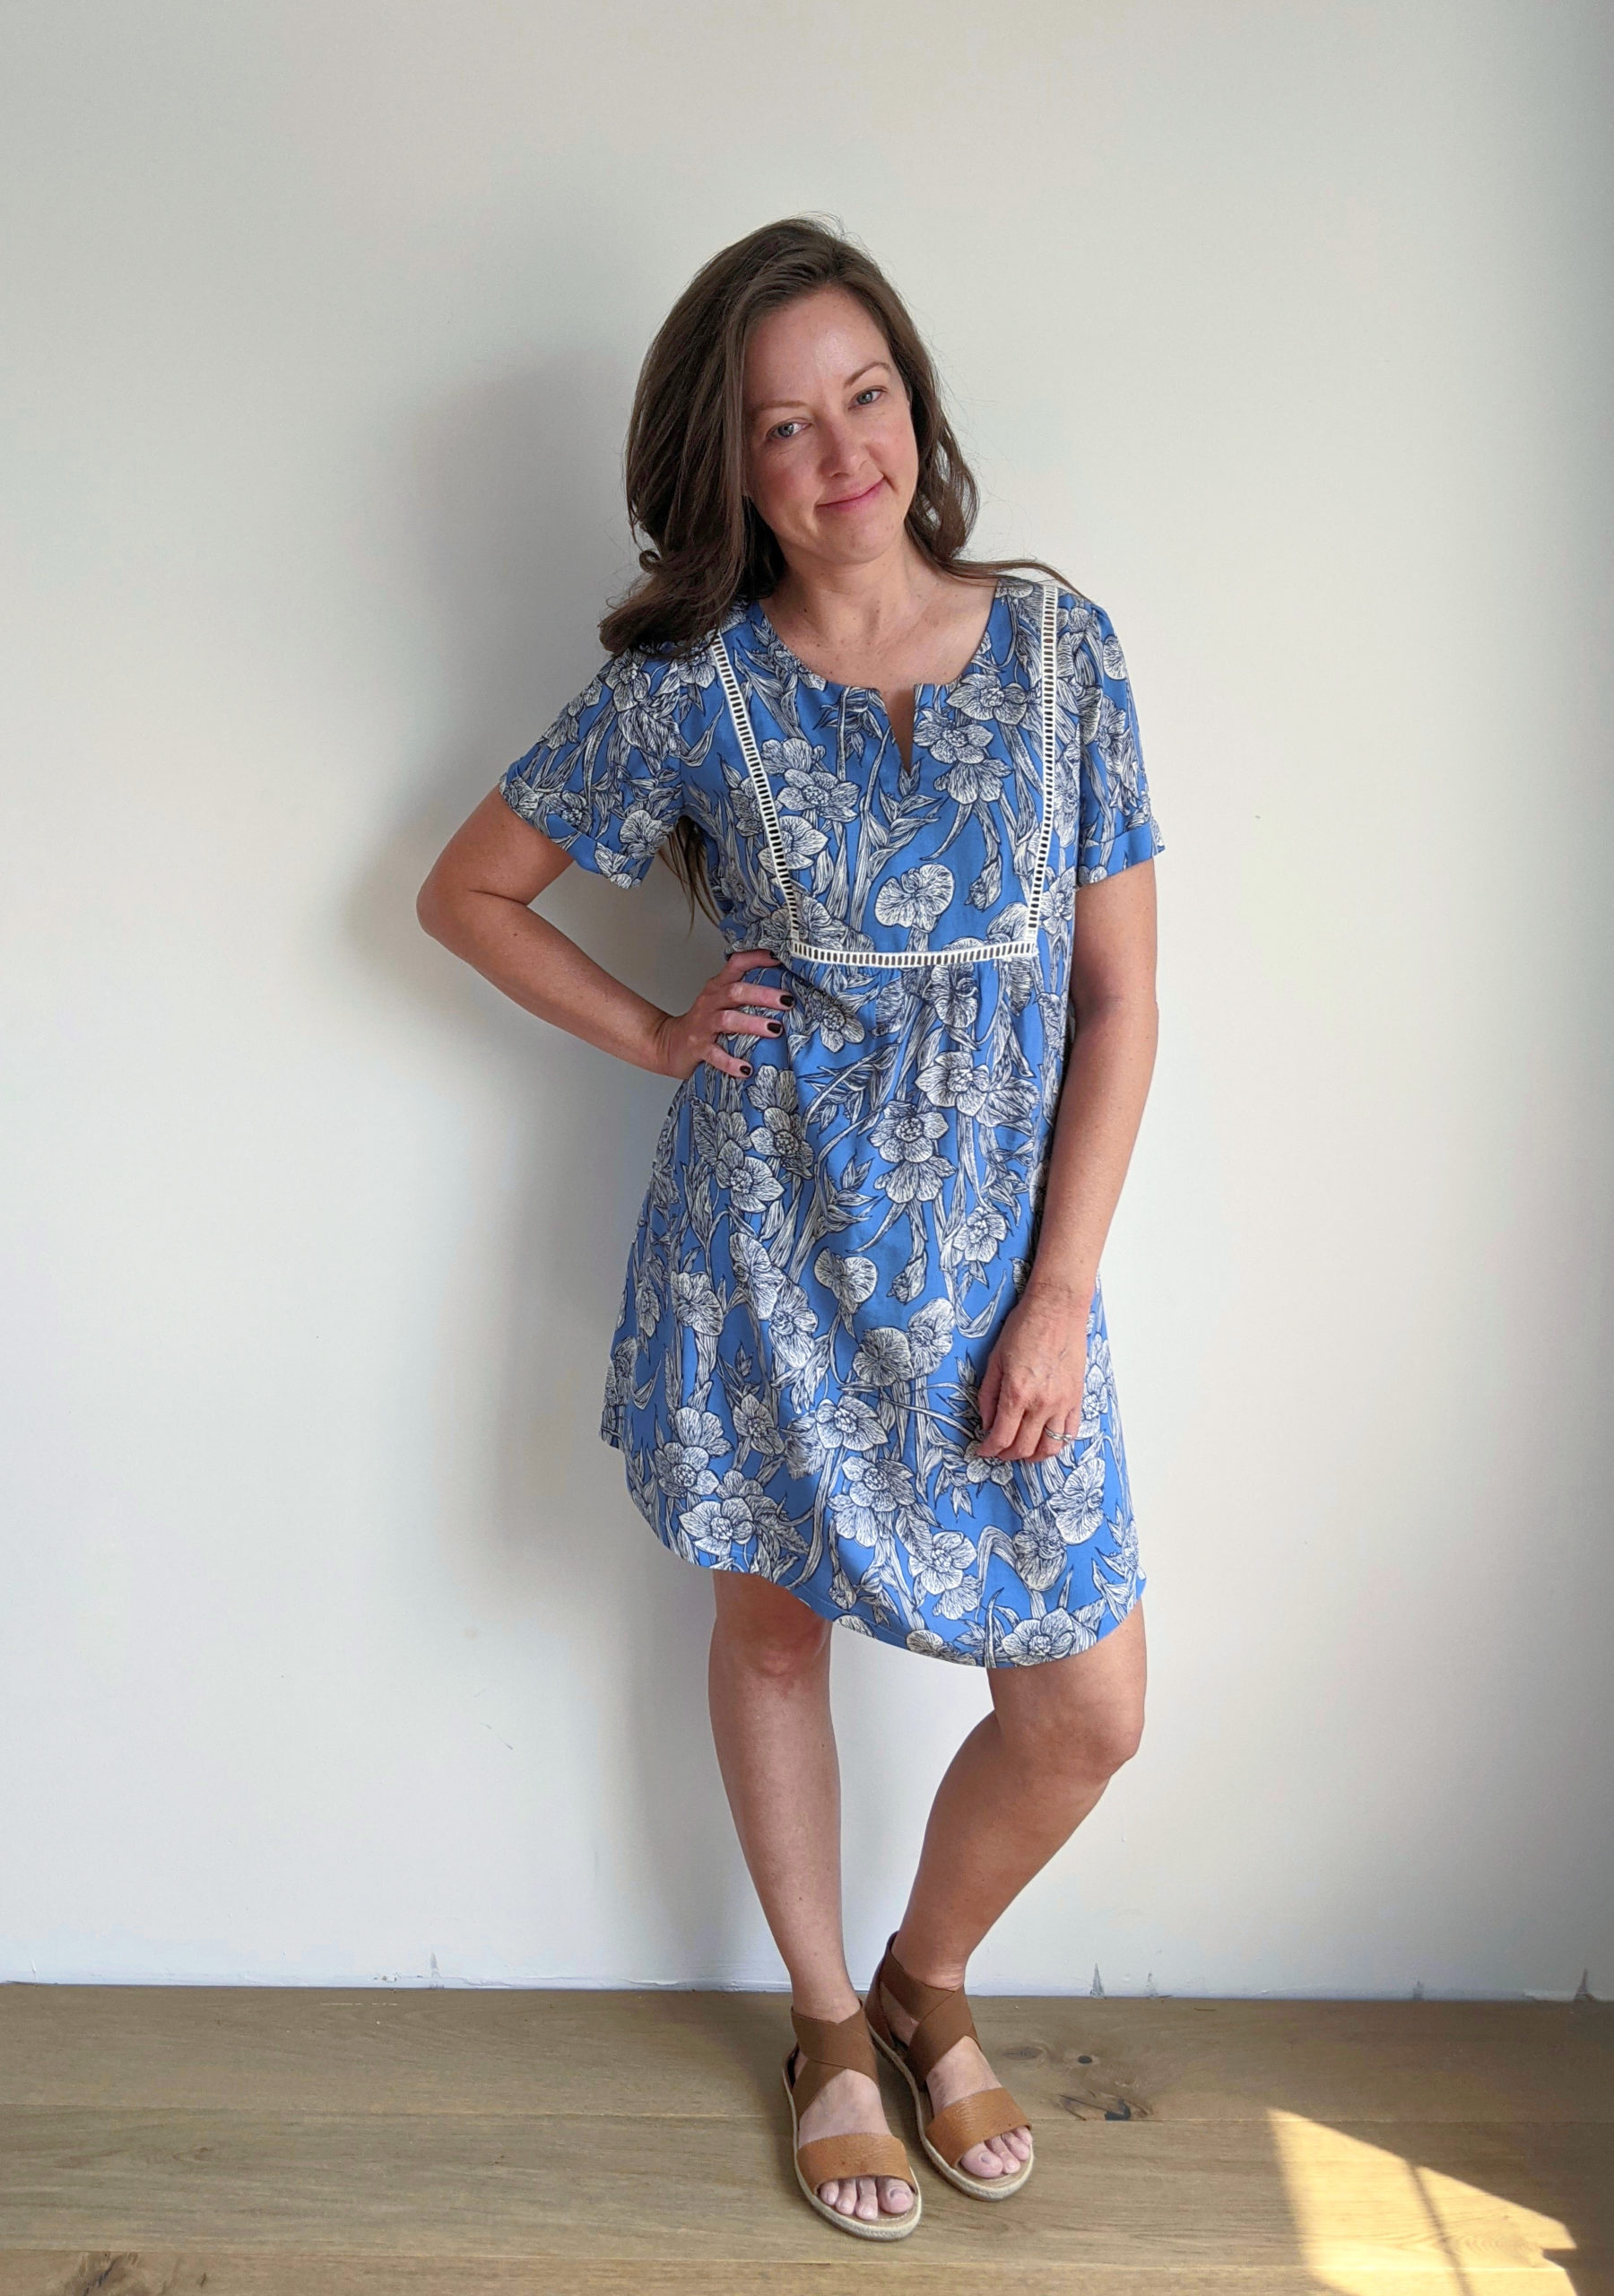
Pattern designers will tell you that self-editing is one of the hardest parts of pattern design. I had the idea to extend Phoenix into a boho-style dress from the moment I conceived of the pattern. And I actually did make one right away after release, but it wasn’t a great fabric choice. Fast forward three years (!) and here we are.
This one is truly simple and open to any of your personal customizations and preferences. At its core, the only thing you actually have to do to make the Phoenix Blouse into a dress is to extend the hem to your desired dress length and then add a bit of width. So easy! Here’s a little tutorial:
Step 1: Decide how long you want your final dress to be on your body. Obviously this is very specific to your tastes, but I will say that a dress like this with a lot of volume tends to look better when it is shorter – just above the knees at most. Any longer, and you get into prairie dress style, which may or may not be your goal. But if you want to maintain the intended boho, festival-chic vibe of the Phoenix Blouse, I suggest keeping it above the knee, or even up to mid-thigh if you’re comfortable.
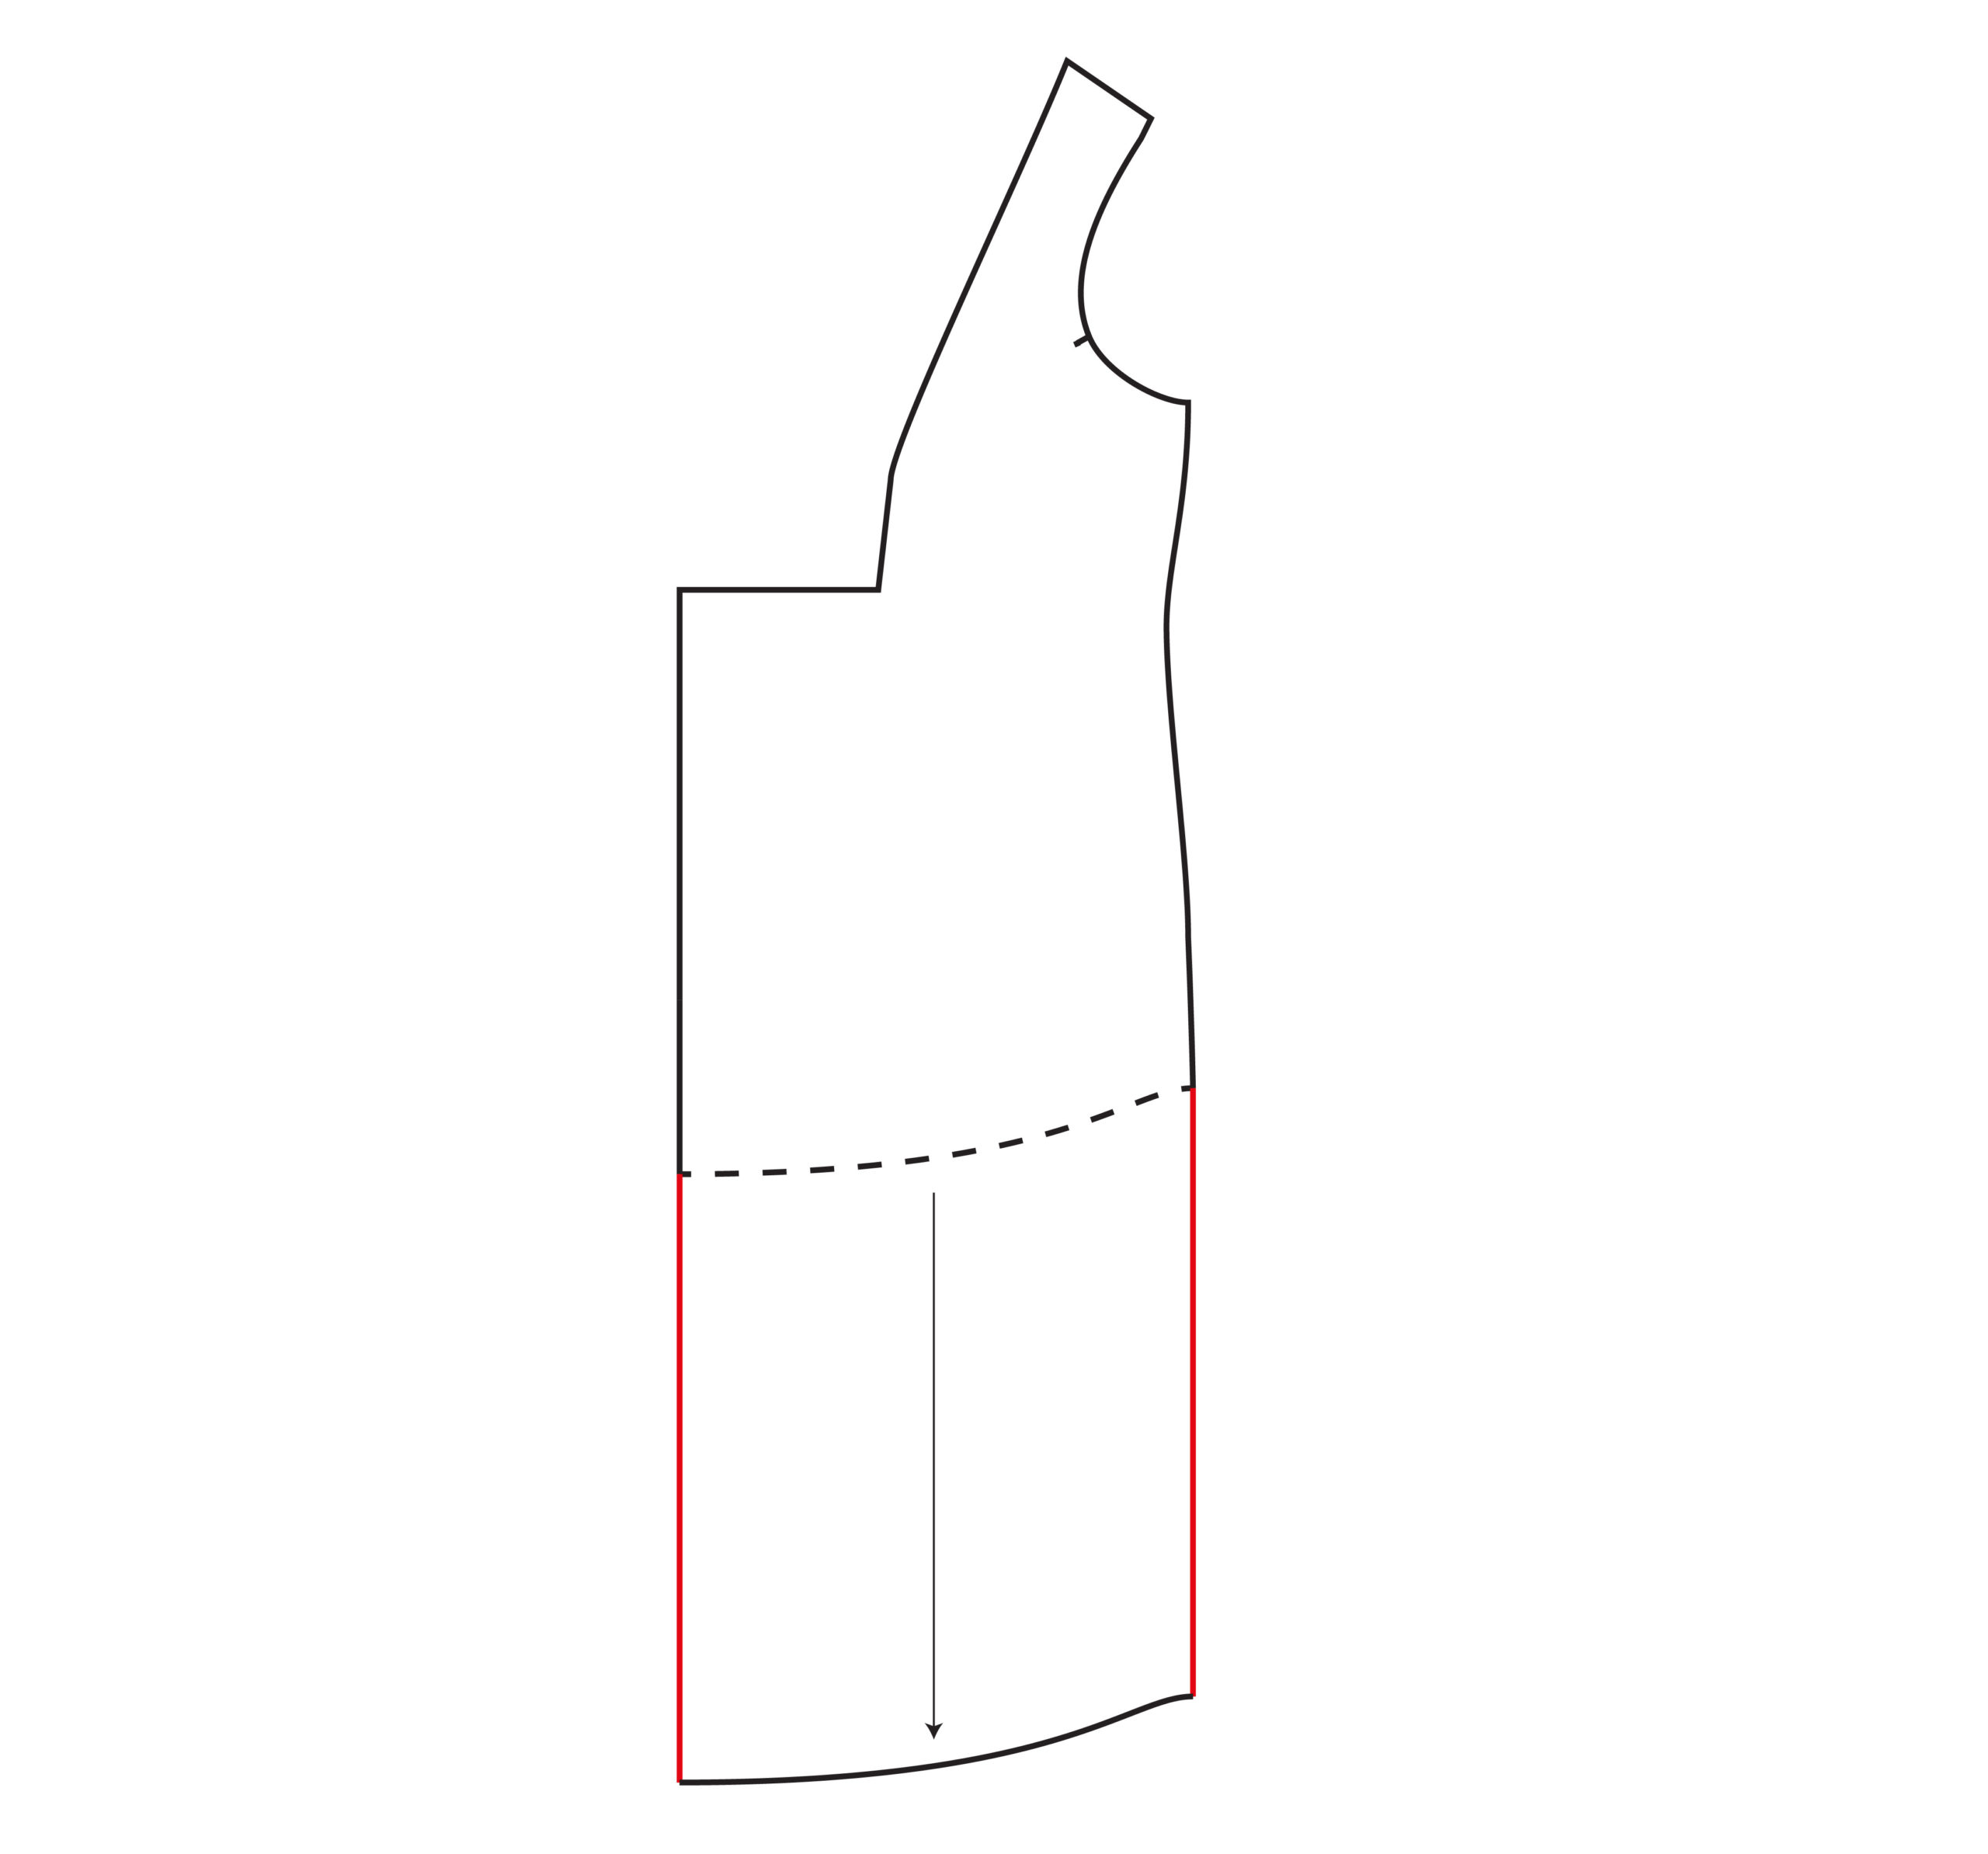
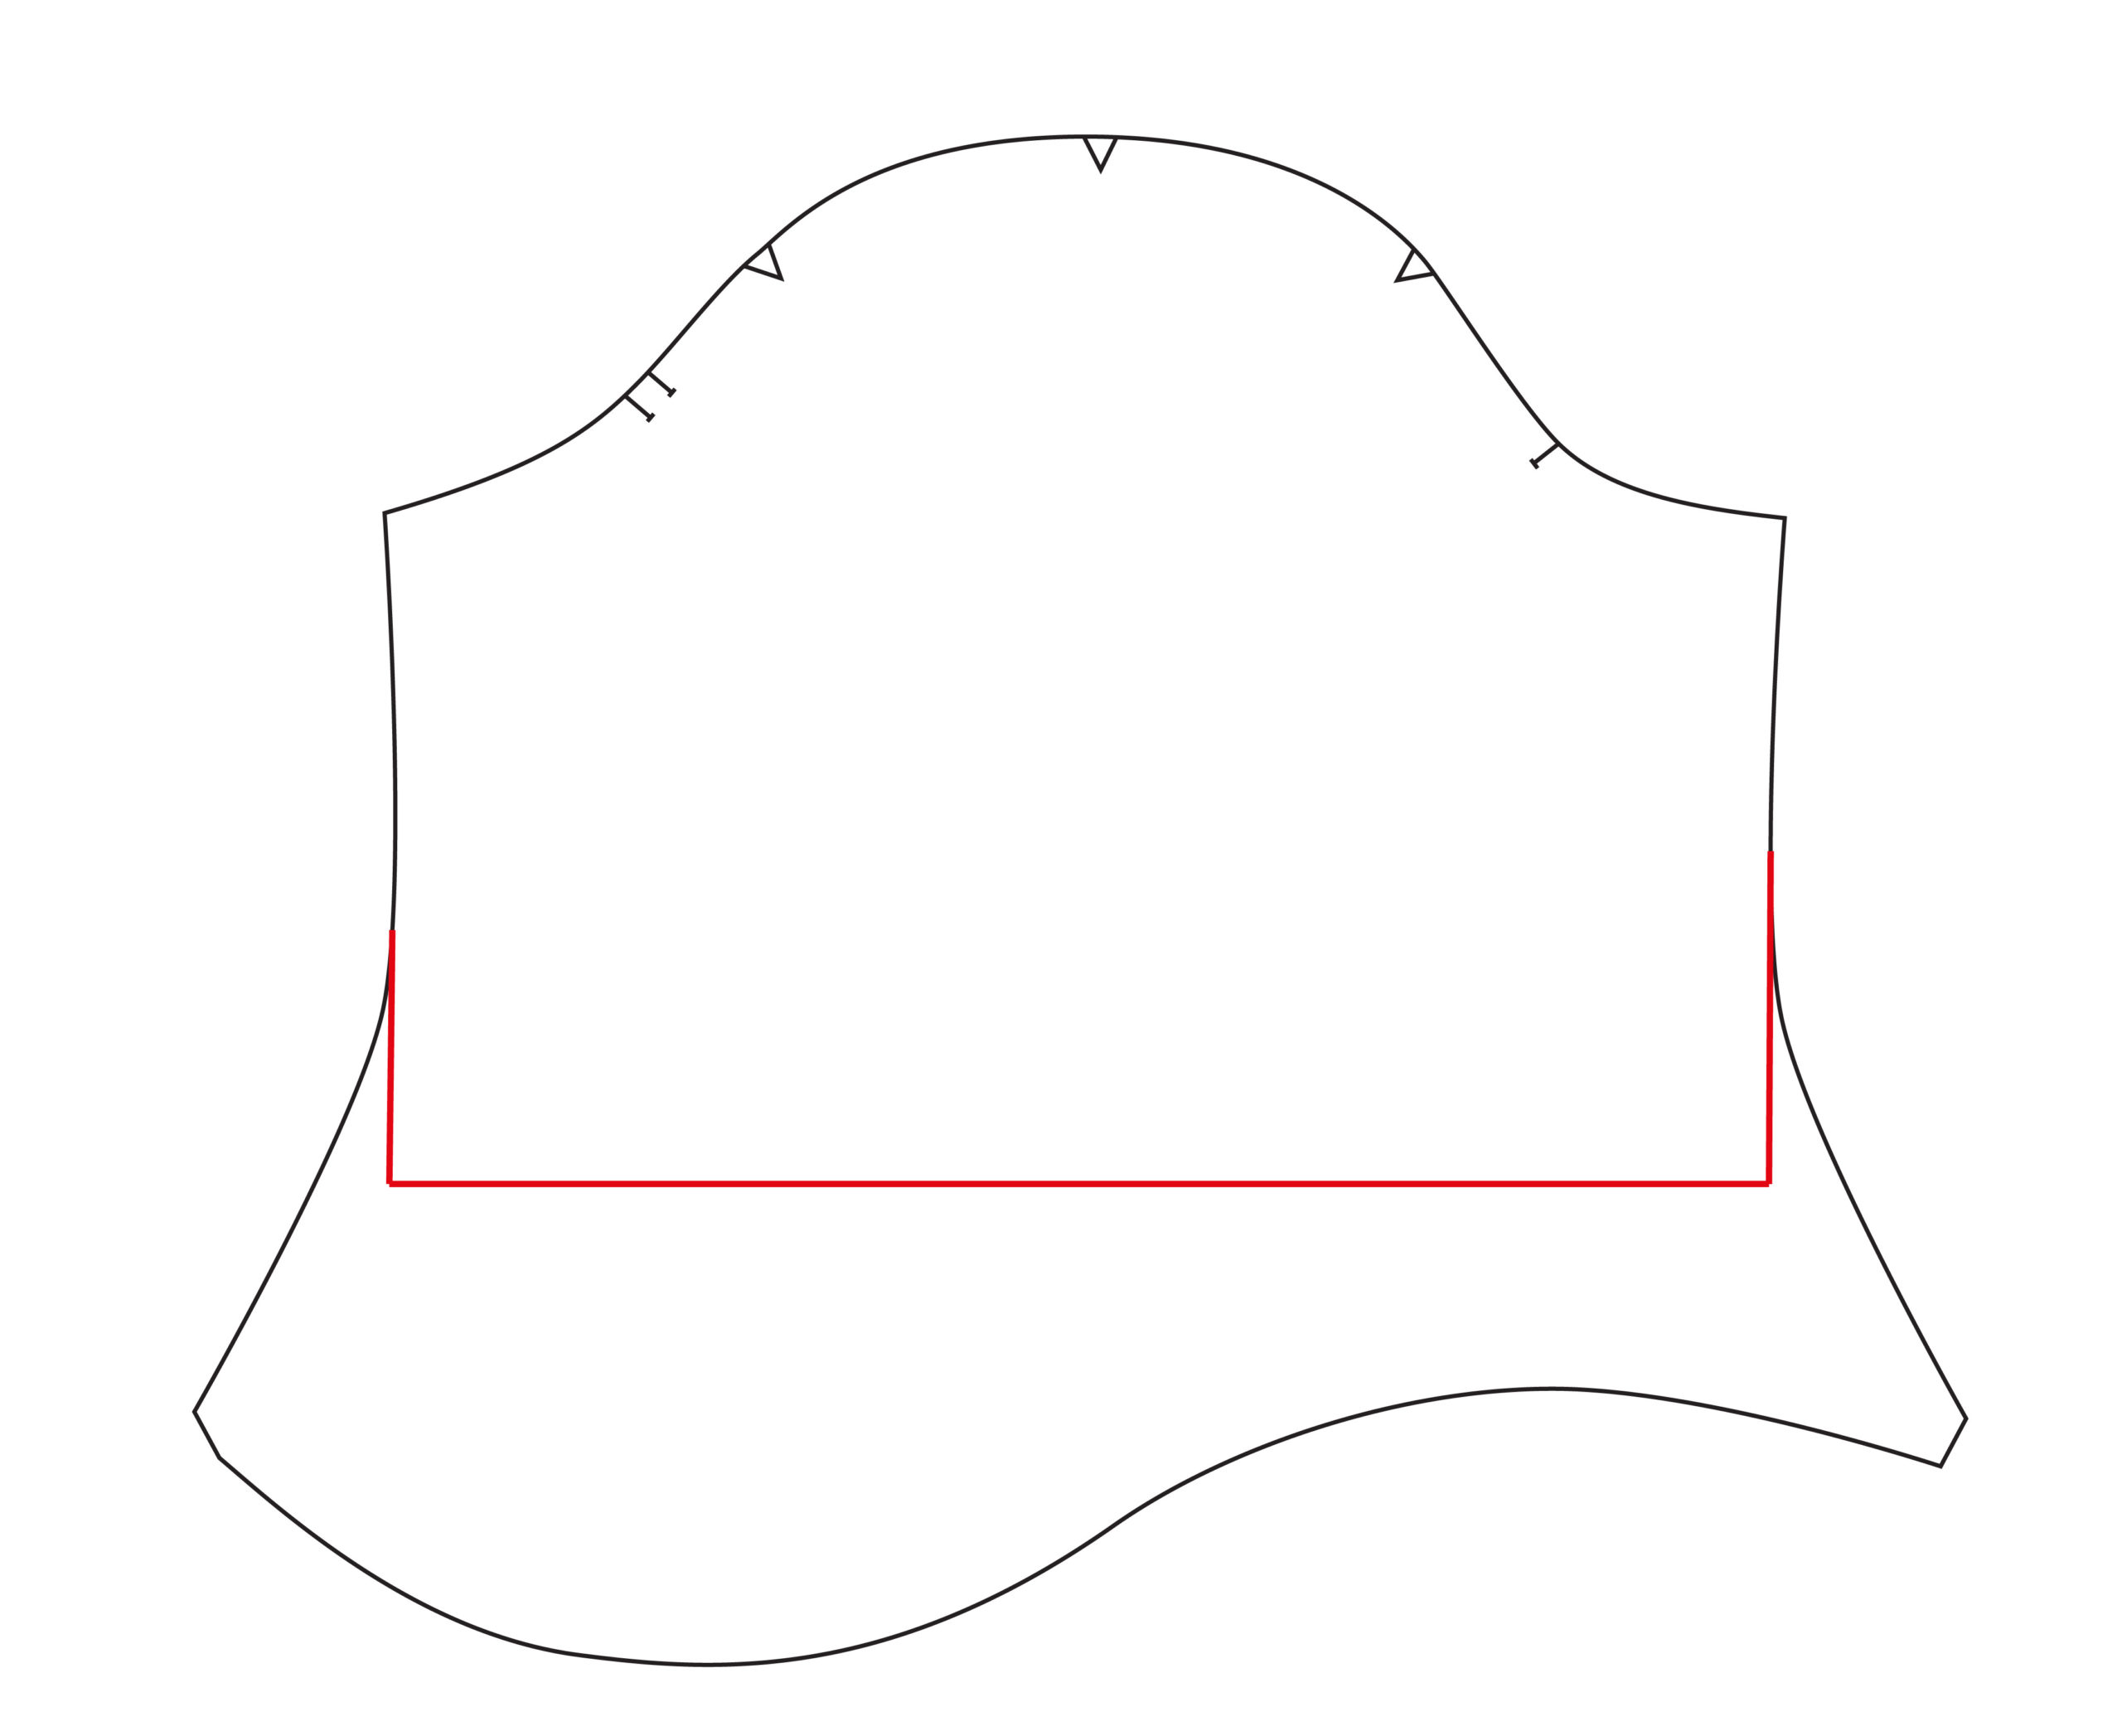
Add the appropriate amount straight down from the center and side seam lines on the pattern front and back (only front is pictured for this tutorial). In the graphic below, those extension lines are shown in red. Make sure they are the same length. Then, simply slide the pattern piece down and trace the hem.
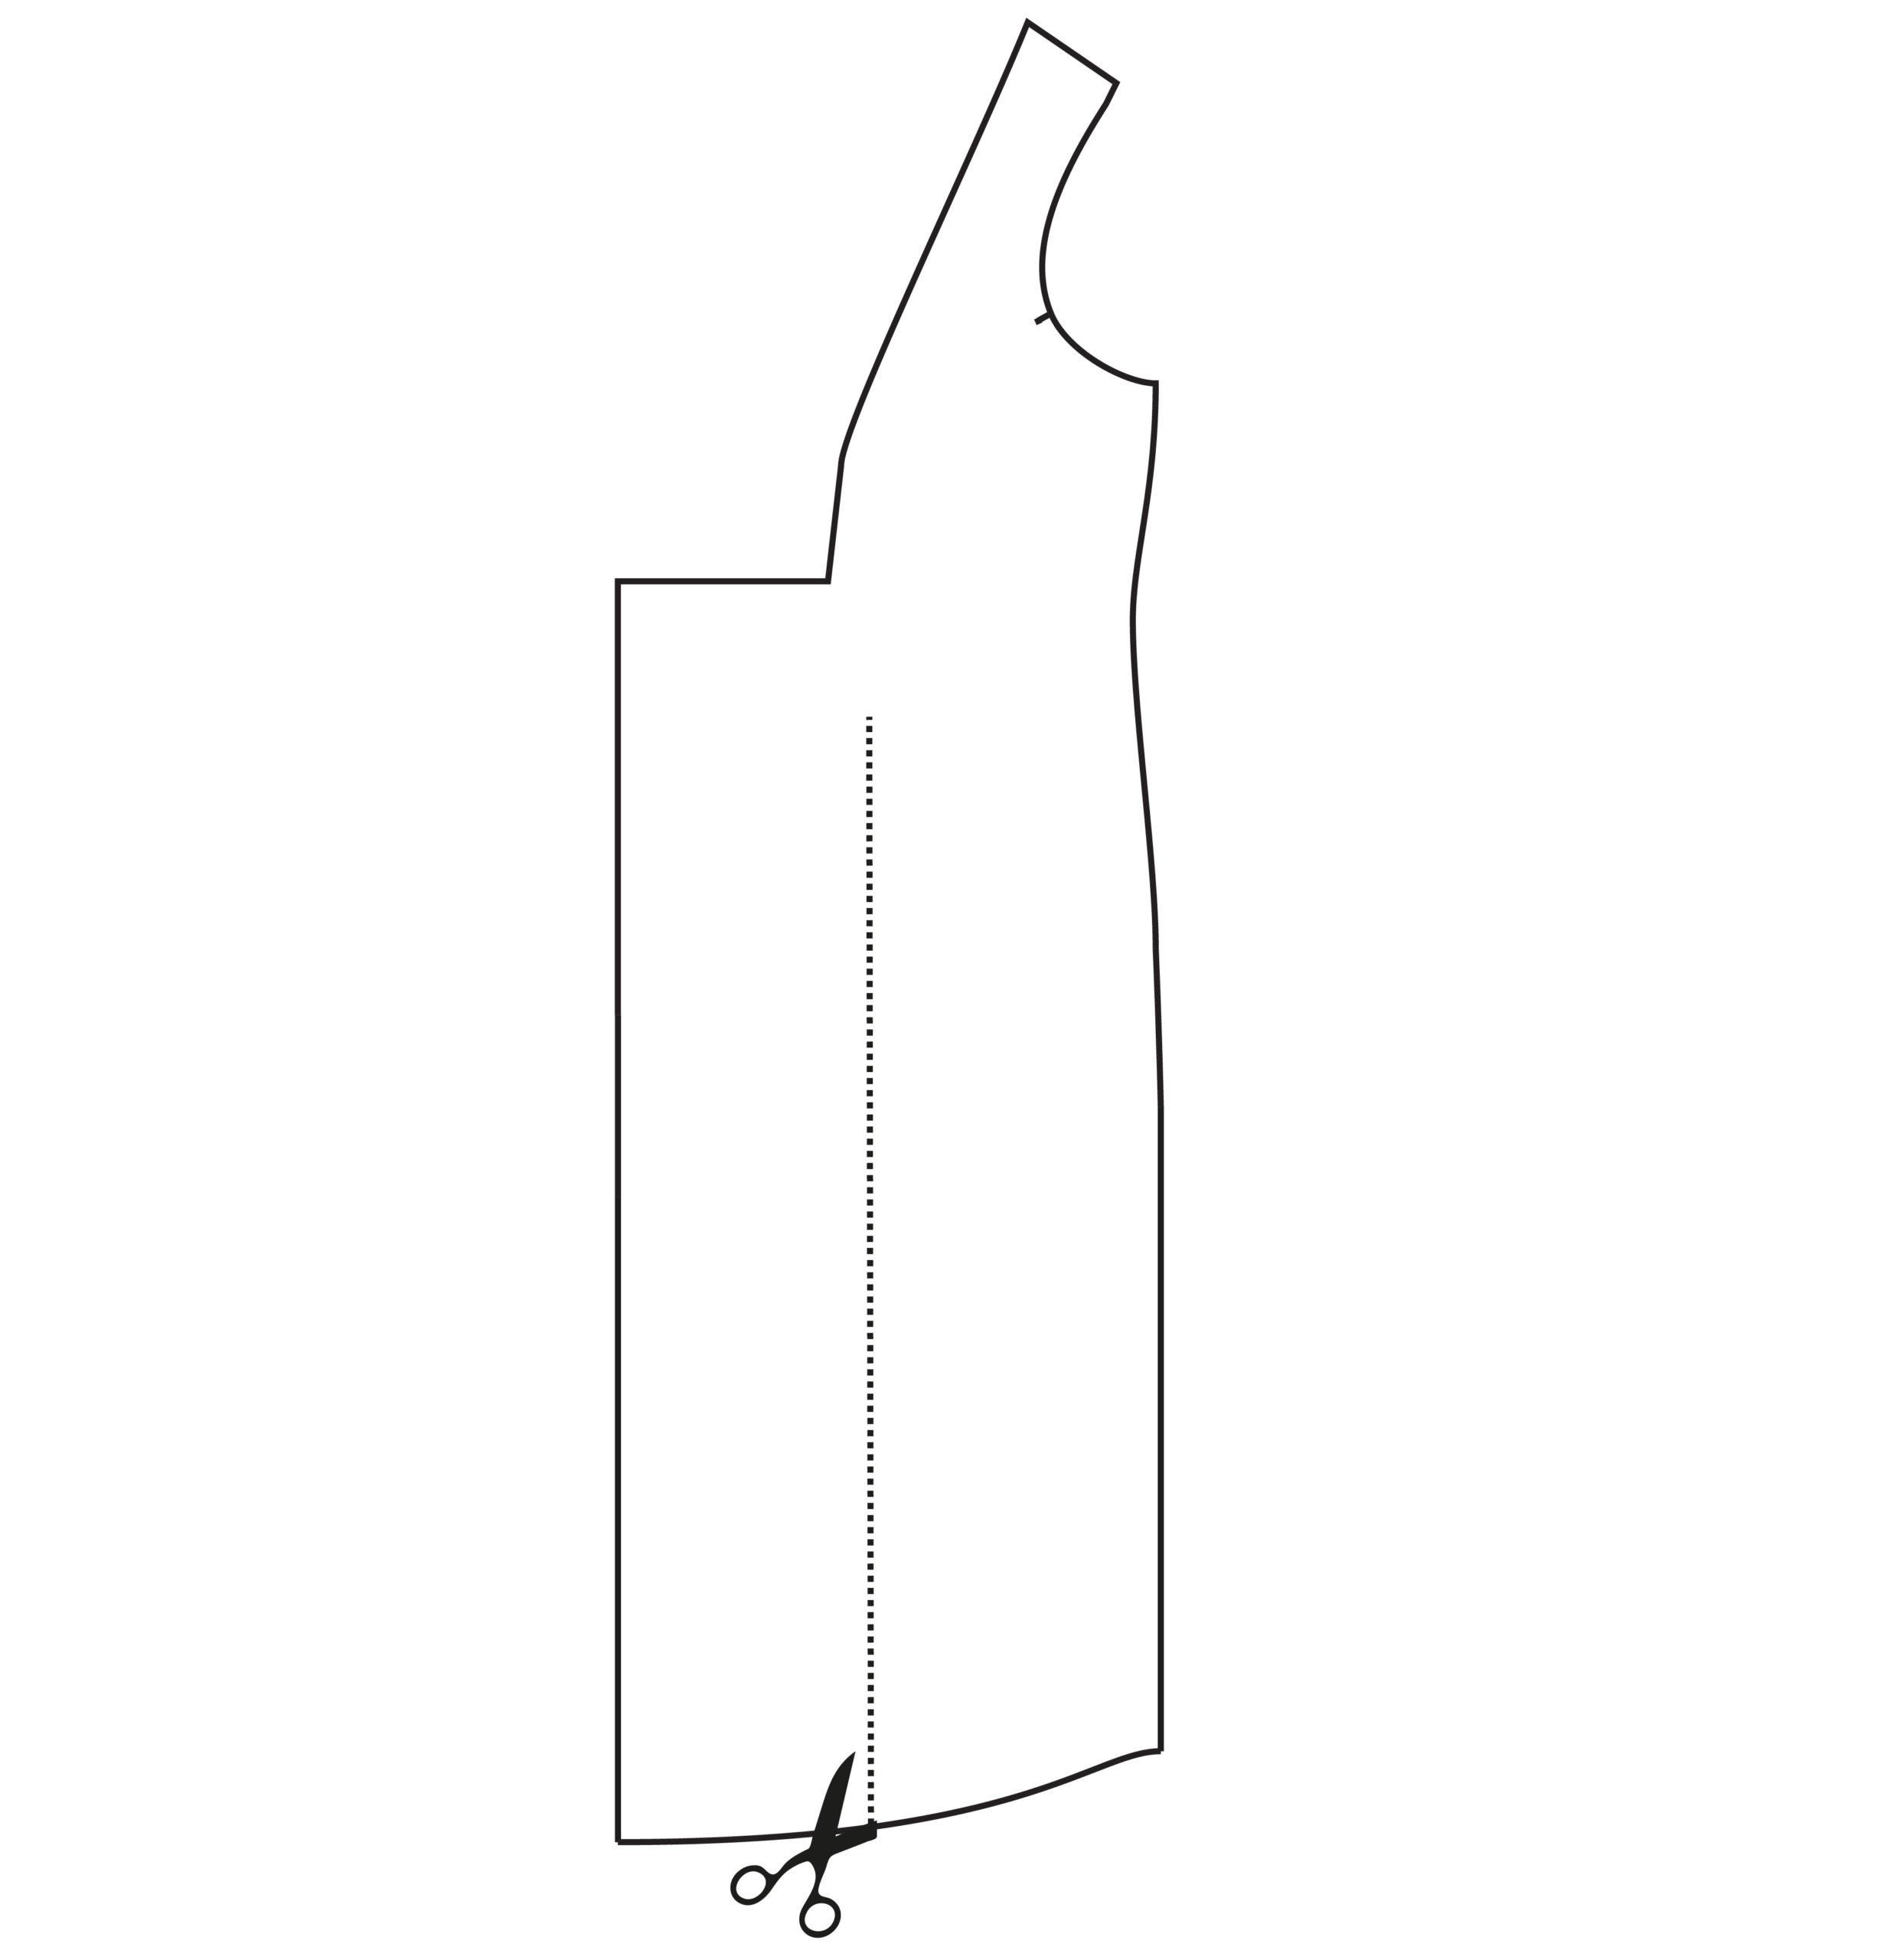
Step 2: Cut from about the center of the pattern piece at the hem up to about the waist point. Precision does not matter for this step, so don’t use a ruler or anything crazy like that ;). Do this on the front and back pieces.
Step 3: Separate the cut sections by rotating the side seam out. The separation, indicated by the red line in this illustration, should not be a large amount. Whatever distance you use here will be multiplied by 4 around the hem of the dress, and the Phoenix has a wider hemline to begin with. For my dress, I added about 1″. Note that if you want to make a super voluminous dress, you should cut multiple lines in step 2 and spread them each individually, starting at the one closest to the center. If you add more volume, you will also need to smooth out the side seam around the waist, as it will naturally grow shorter. Replicate whatever you did on the front on the back.
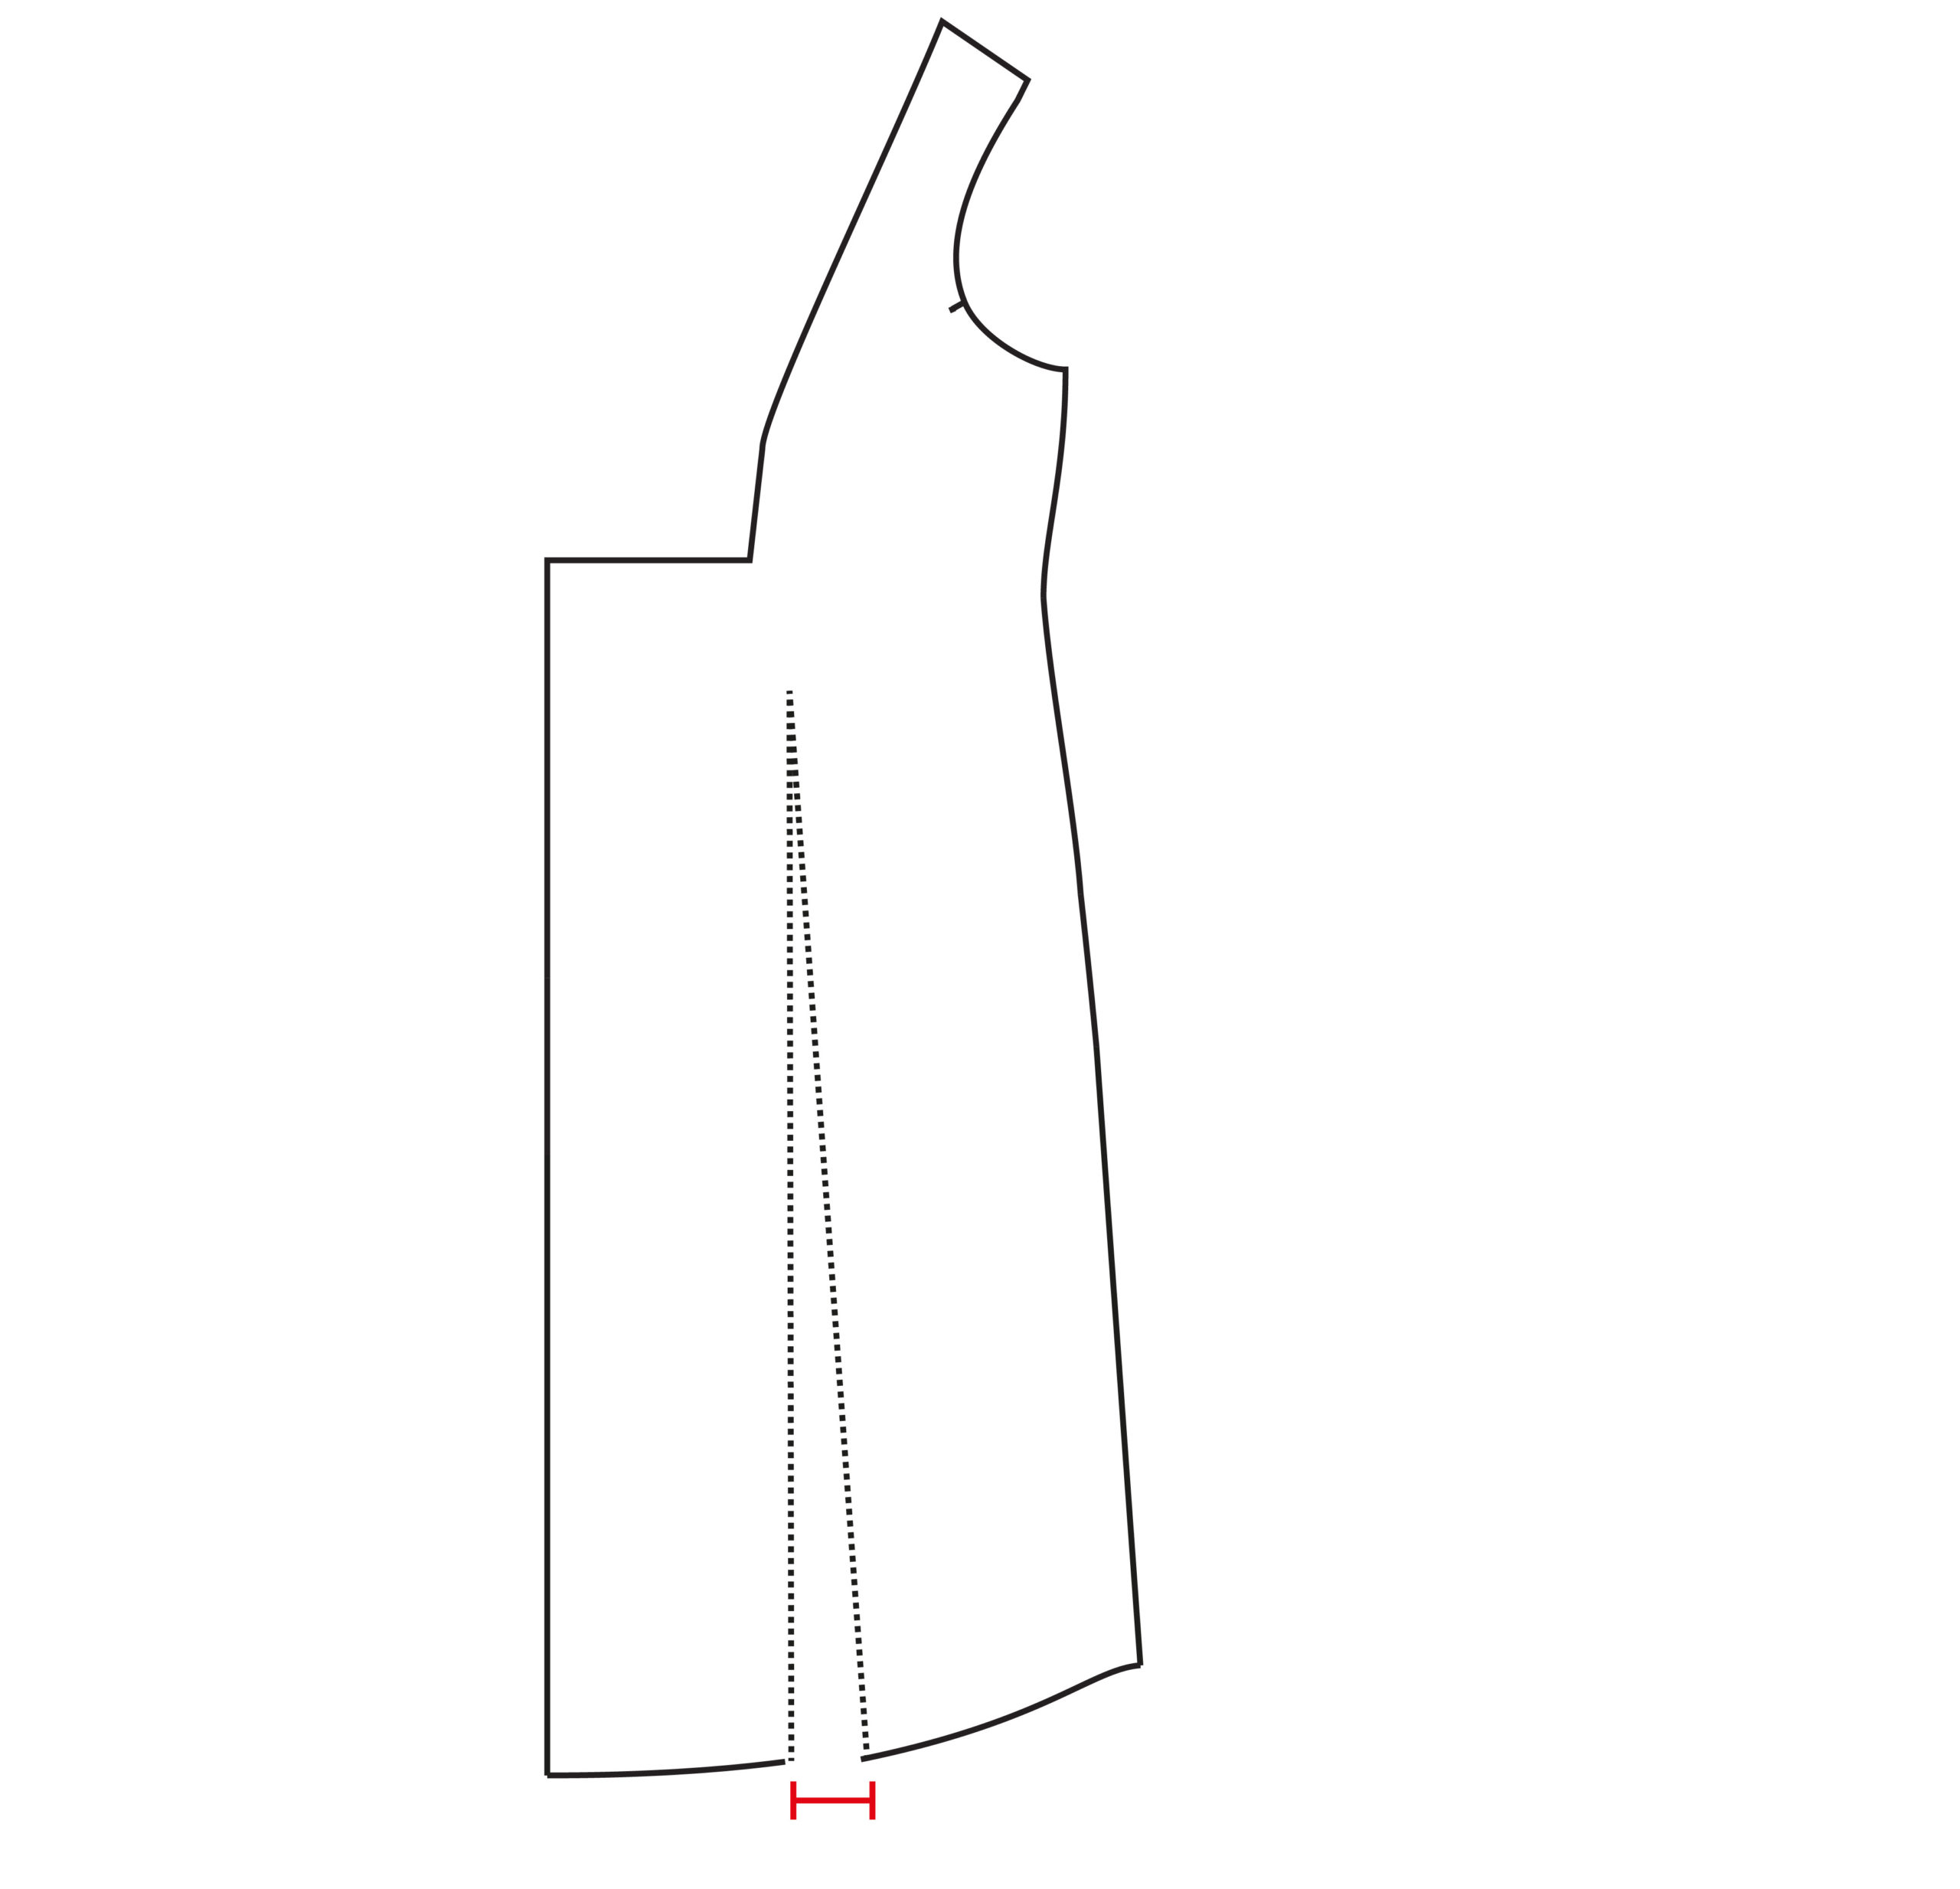
Step 4: Connect your split hem with a smooth curve, even out the side seam as necessary around the waist, and you’re ready to cut your fabric and begin sewing!
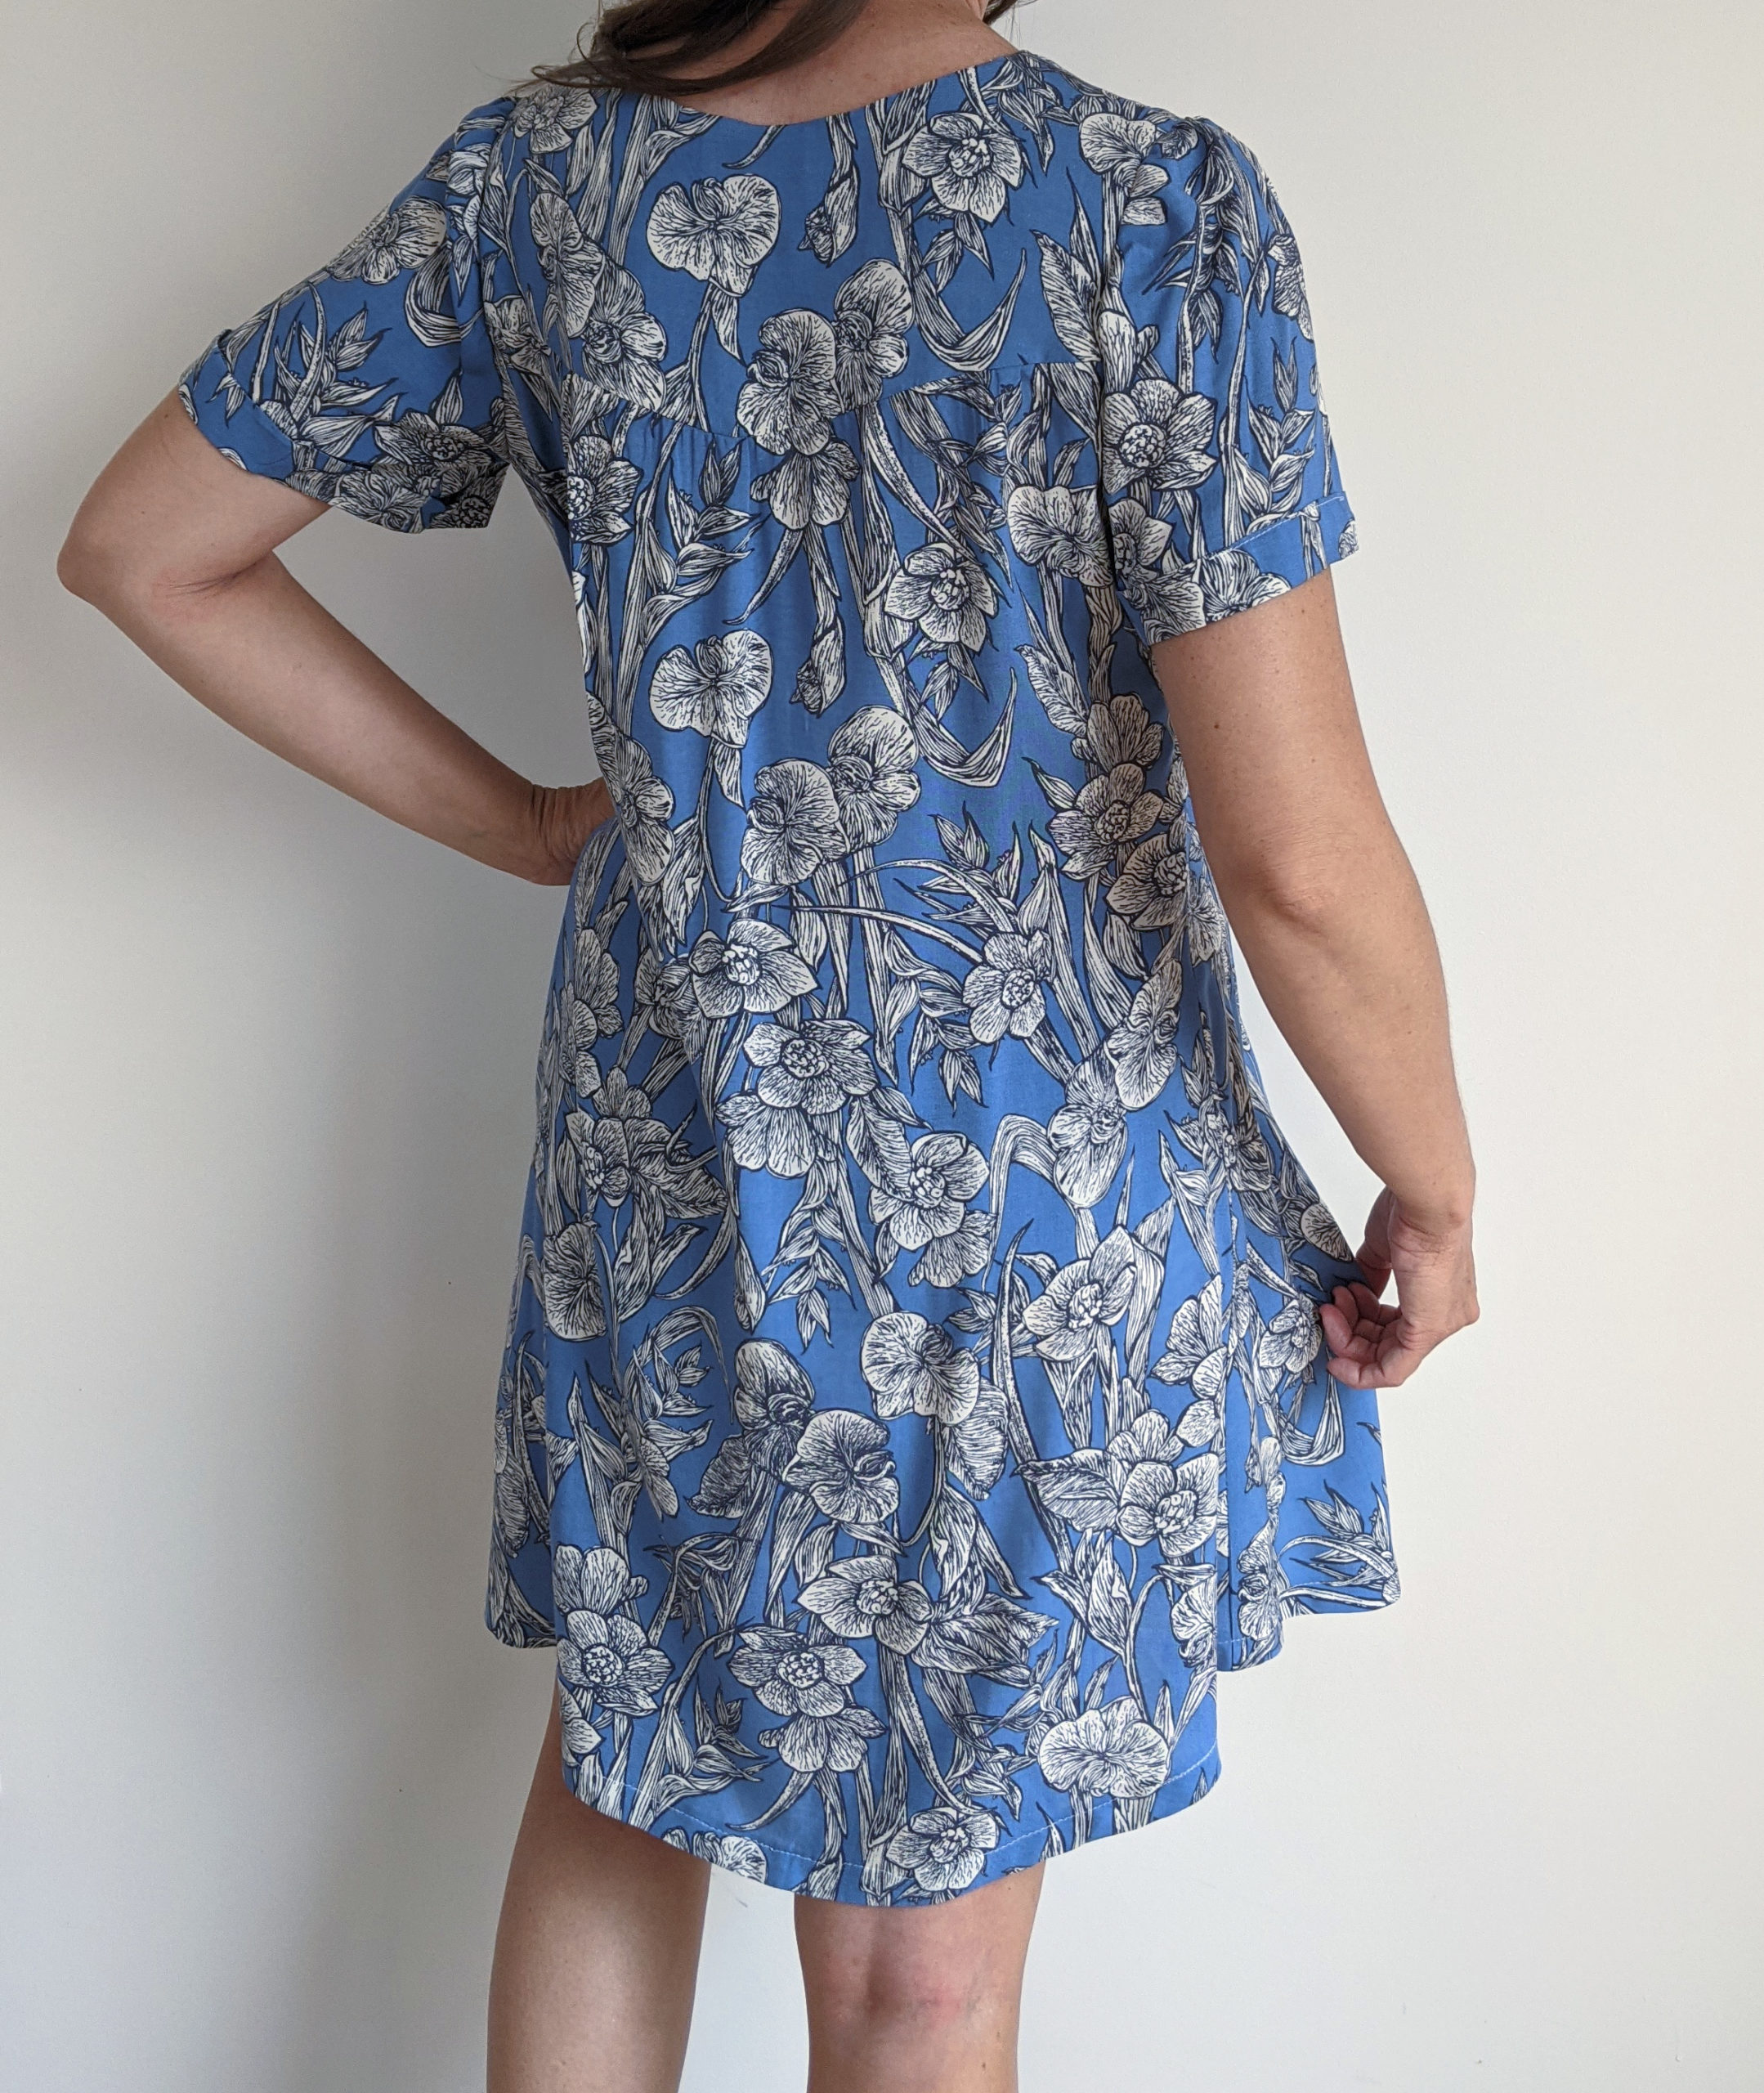
My dress has two elements that aren’t part of the original blouse pattern. First up is the cuffed sleeve. This was a really simply mod using the existing bell sleeve pattern. Instead of incorporating that curved shape, I cut my sleeve straight down, adding enough length to equal twice my desired cuff height. For example, I wanted my final cuff height to be 1″, so I added 2″ and then a hem allowance.
Sewing this kind of integrated cuff is really easy. Just make sure that the entire area to be cuffed is a rectangle and that the side seam of the sleeve is not angled in or out. Then hem the sleeve at twice your intended cuff height. I hemmed my sleeve with a 2″ hem. Then fold your sleeve up at the hem by half the hem width and tack in place. This gives you a simple hem with no wrong side of fabric showing.
And remember, this pattern also comes with a sleeveless bodice, or you can mix and match the sleeves from the Lucerne and Amalfi with this pattern as well!
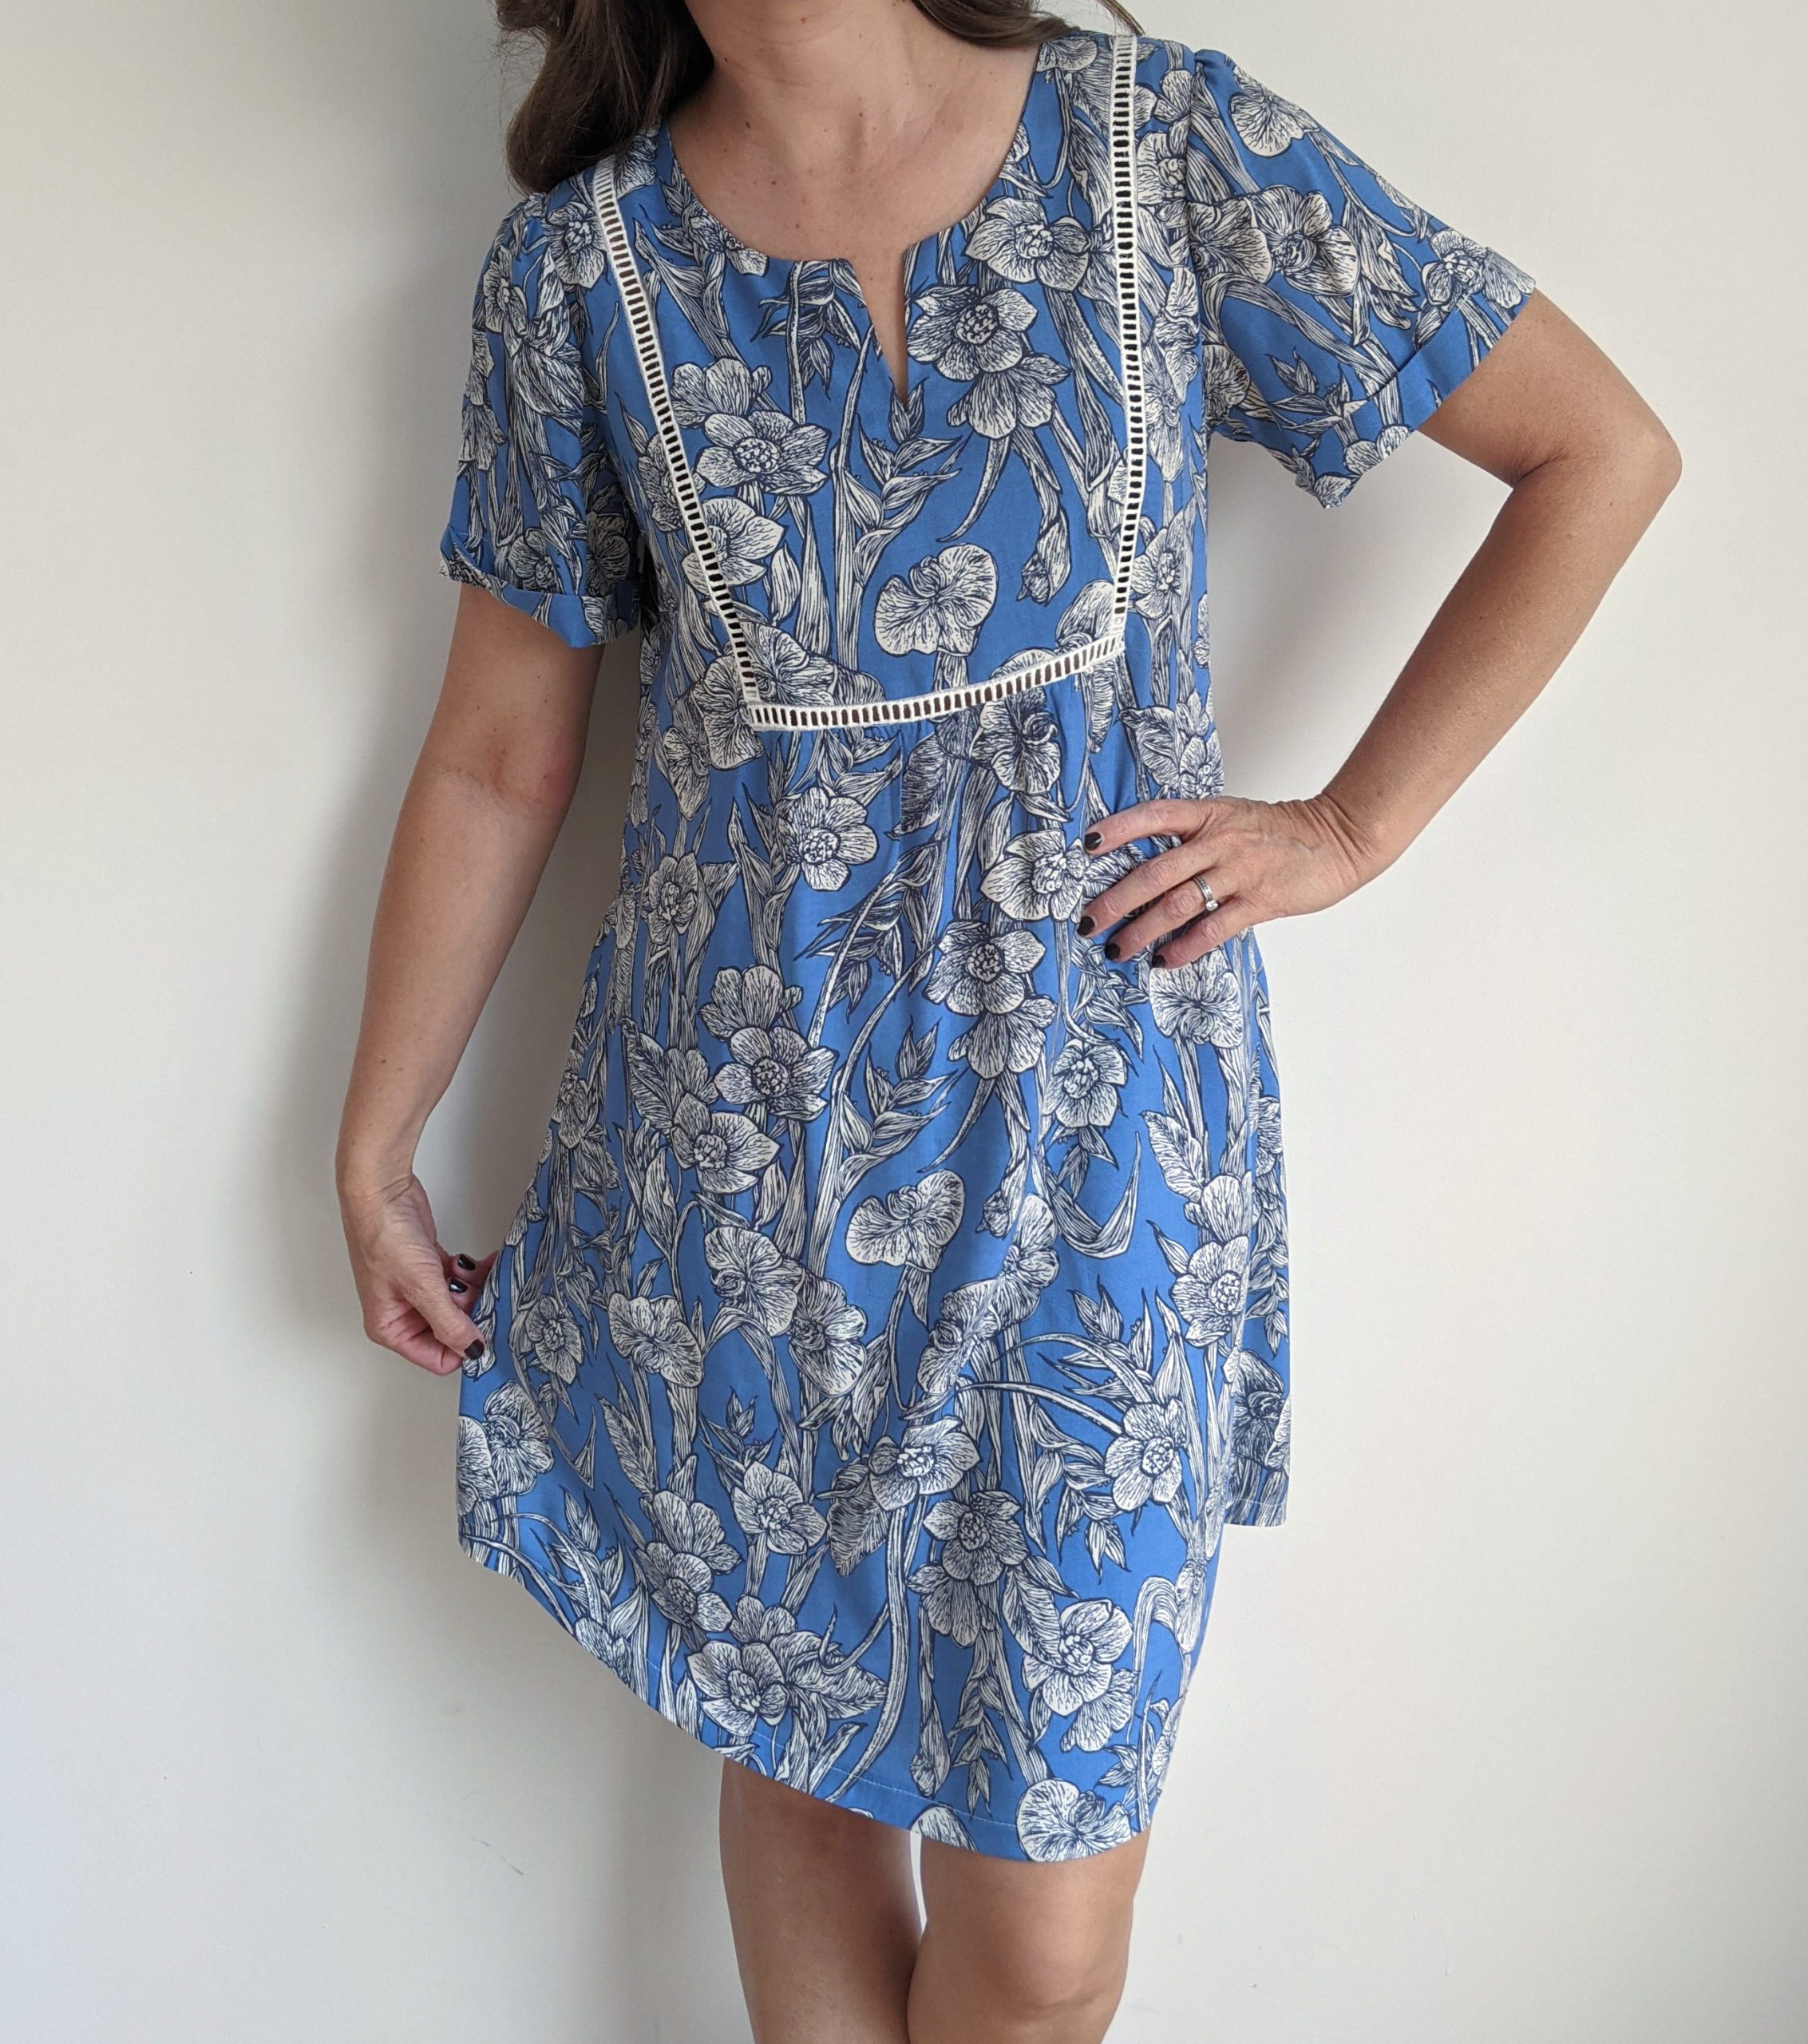
The other feature I incorporated on my dress, which could easily be used on the blouse as well, was trim in the bodice yoke seams. This trim is alternately referred to as entredeux, faggoting, and ladder trim. I suggest using all of these terms while searching, as I got varied results with each one. The main things to look for when purchasing this kind of trim are seam allowances on both sides of the detail area and no more than 1/2″ width for the detail area itself.
Here is a photo from this etsy listing:
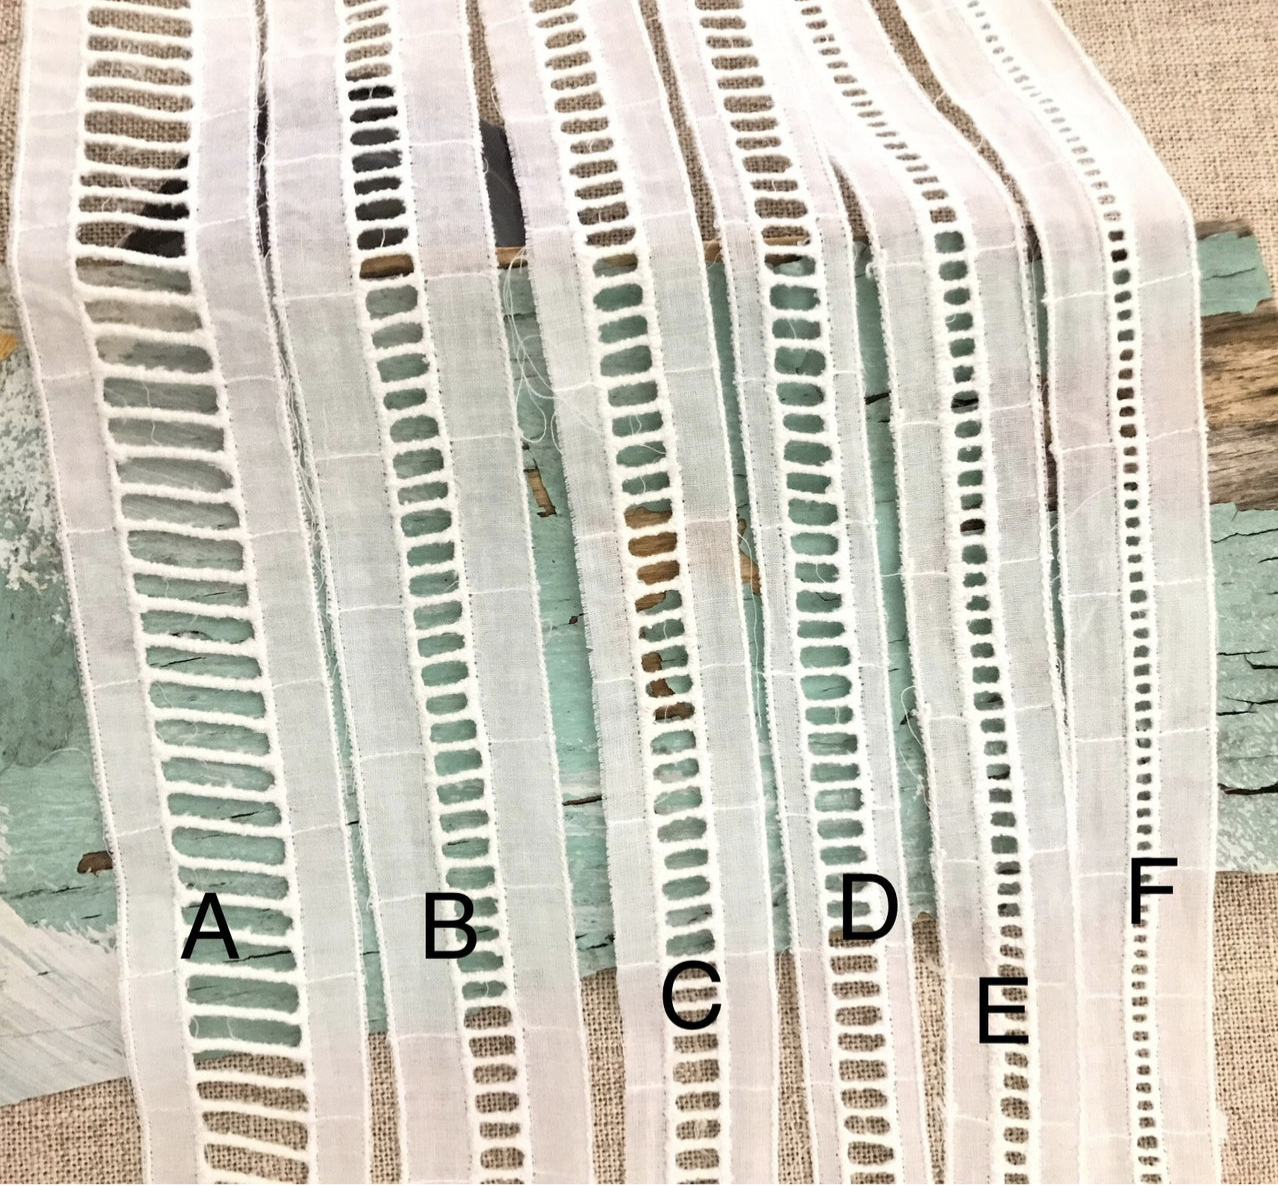
From this photo, I would suggest using either B, E, or F, as the other options either don’t have enough seam allowance or are too wide.
Obviously adding this trim will slightly lengthen your yoke and add width at the shoulder seams. The best way I found to deal with this, rather than doing a lot of math and alterations, was just to sew the trim into the yoke, sew the yoke to the front piece, and then use the front pattern piece to trim back the armscye at the shoulder seam and the height at the neckline to remove the excess. Sometimes when sewing, intuitive is best! (but don’t get me wrong, I still love math.)
Here’s what my innards look like. You can see my first stitch really close to the trim. It’s important to keep that distance as even as possible while sewing, as any discrepancies will show on the front with excess trim seam allowance poking out. After sewing, I serged the seam allowances together for a nice clean finish.
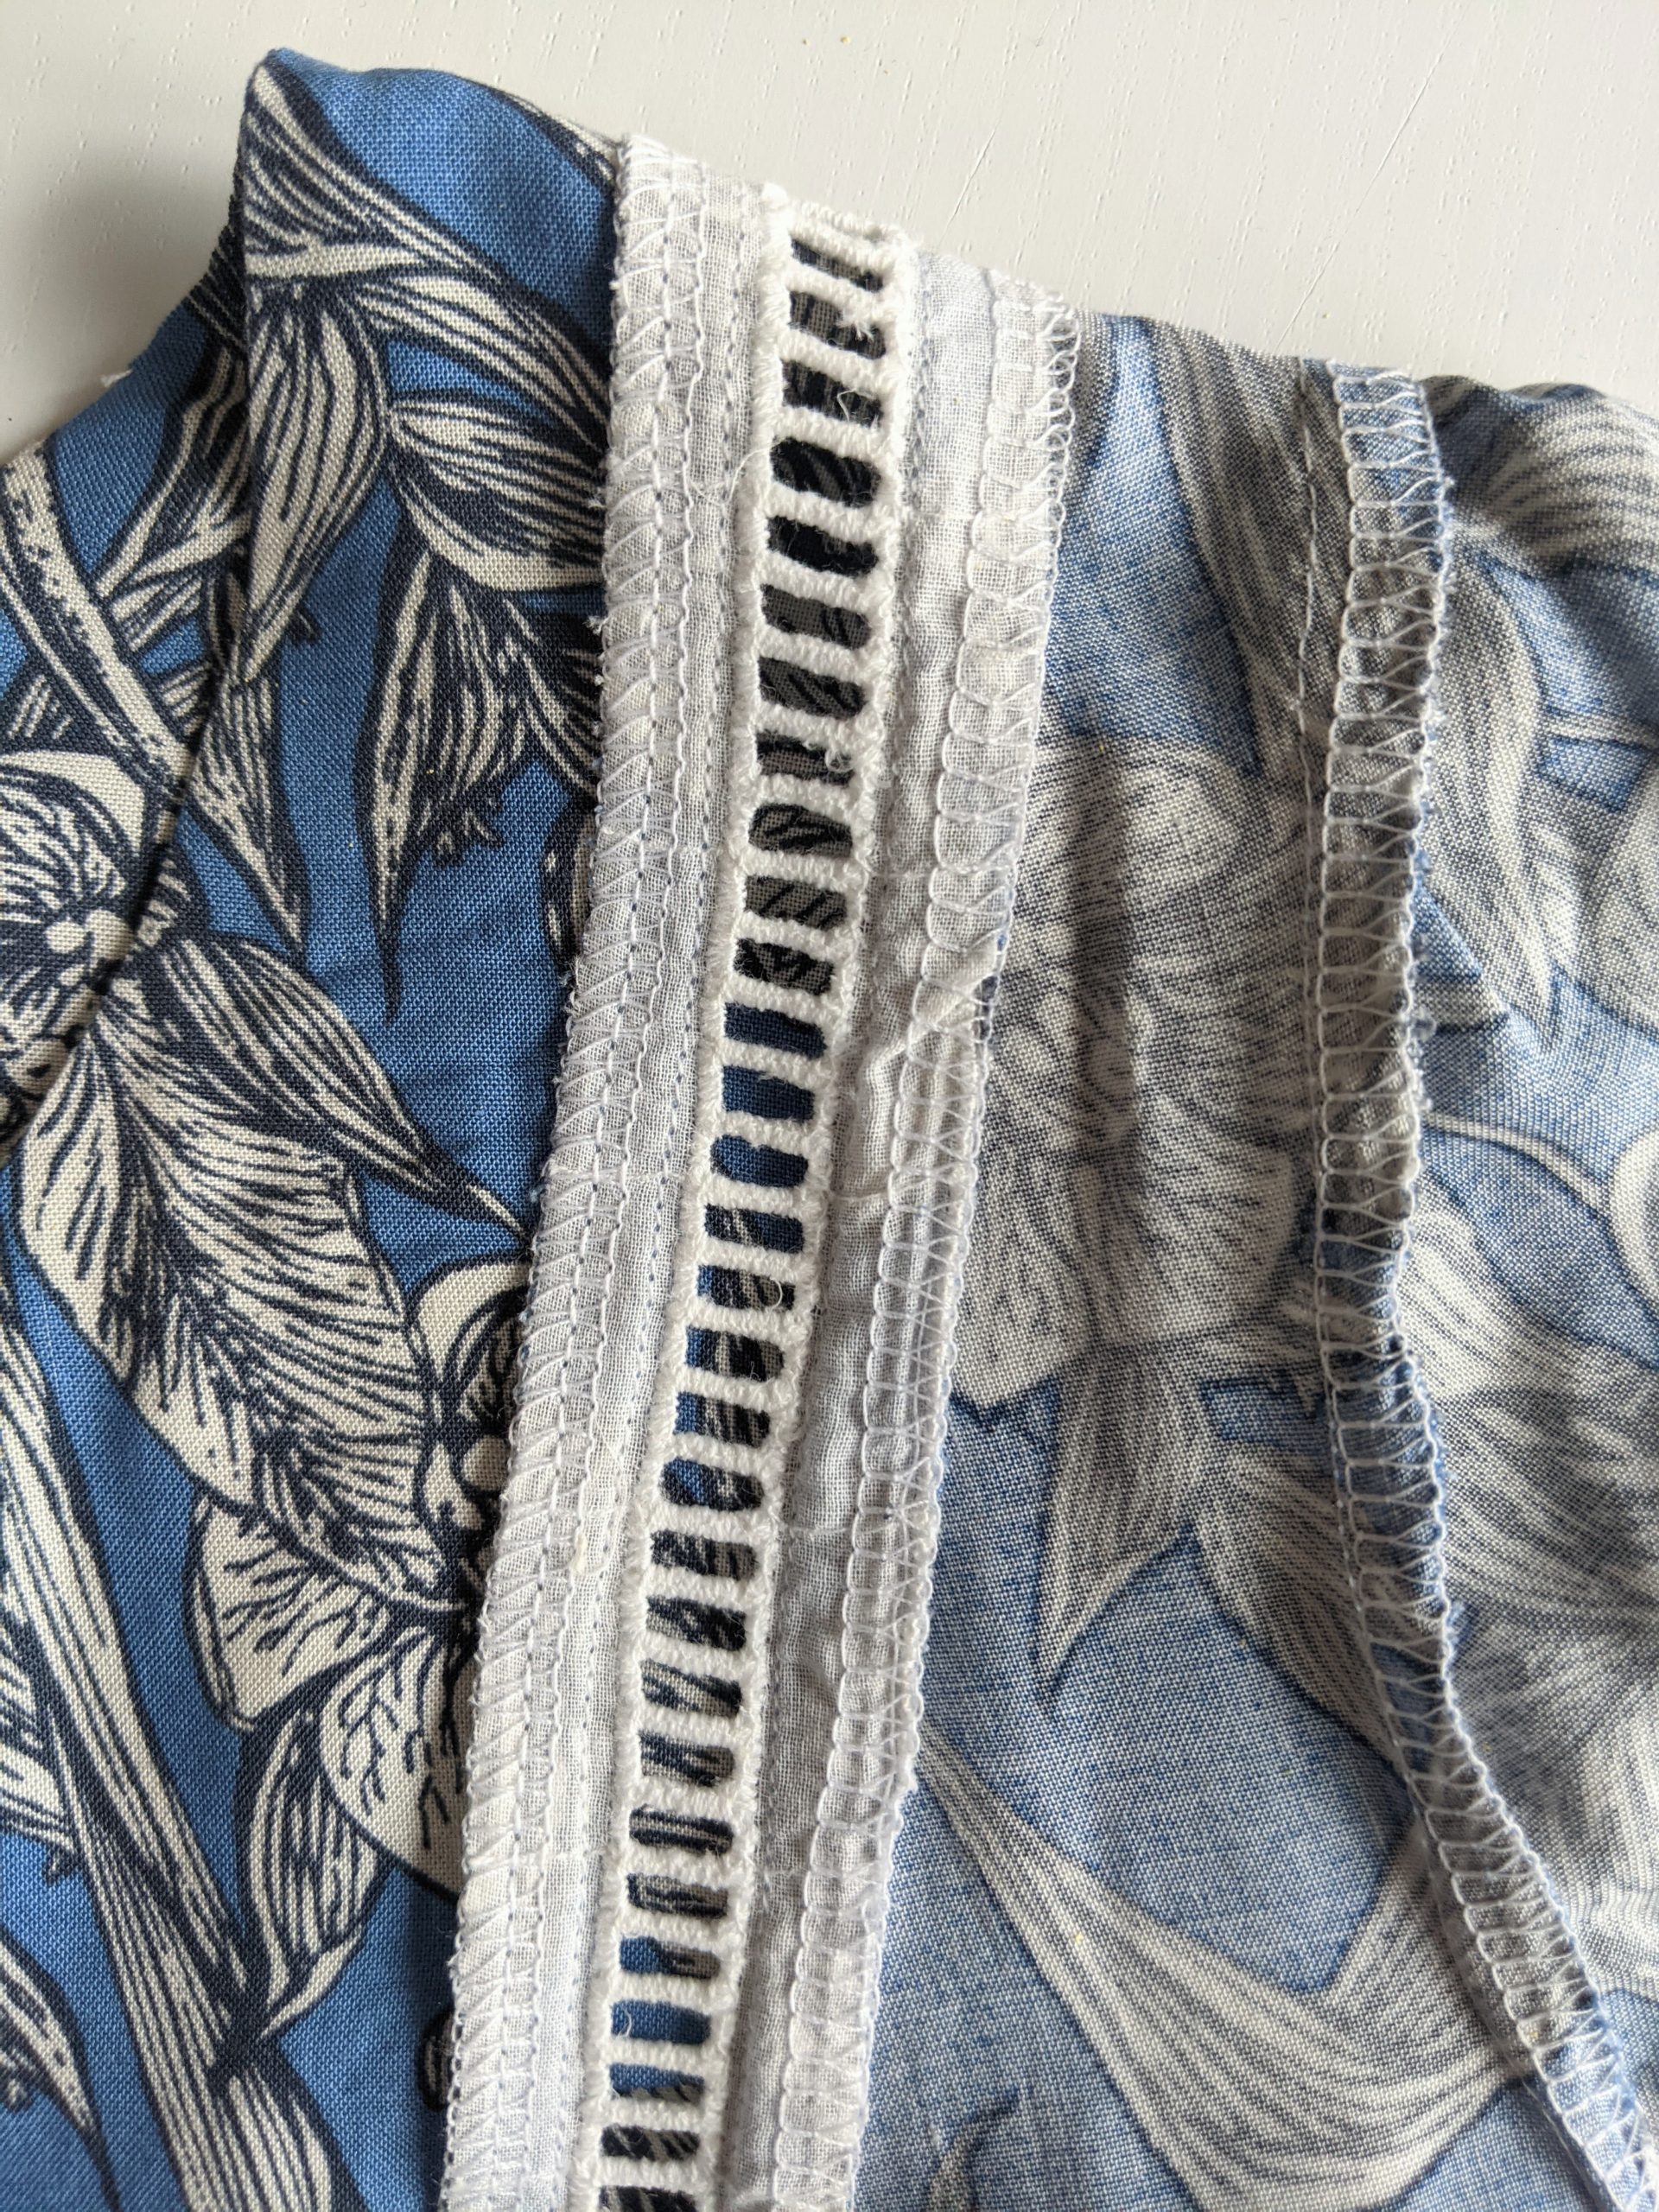
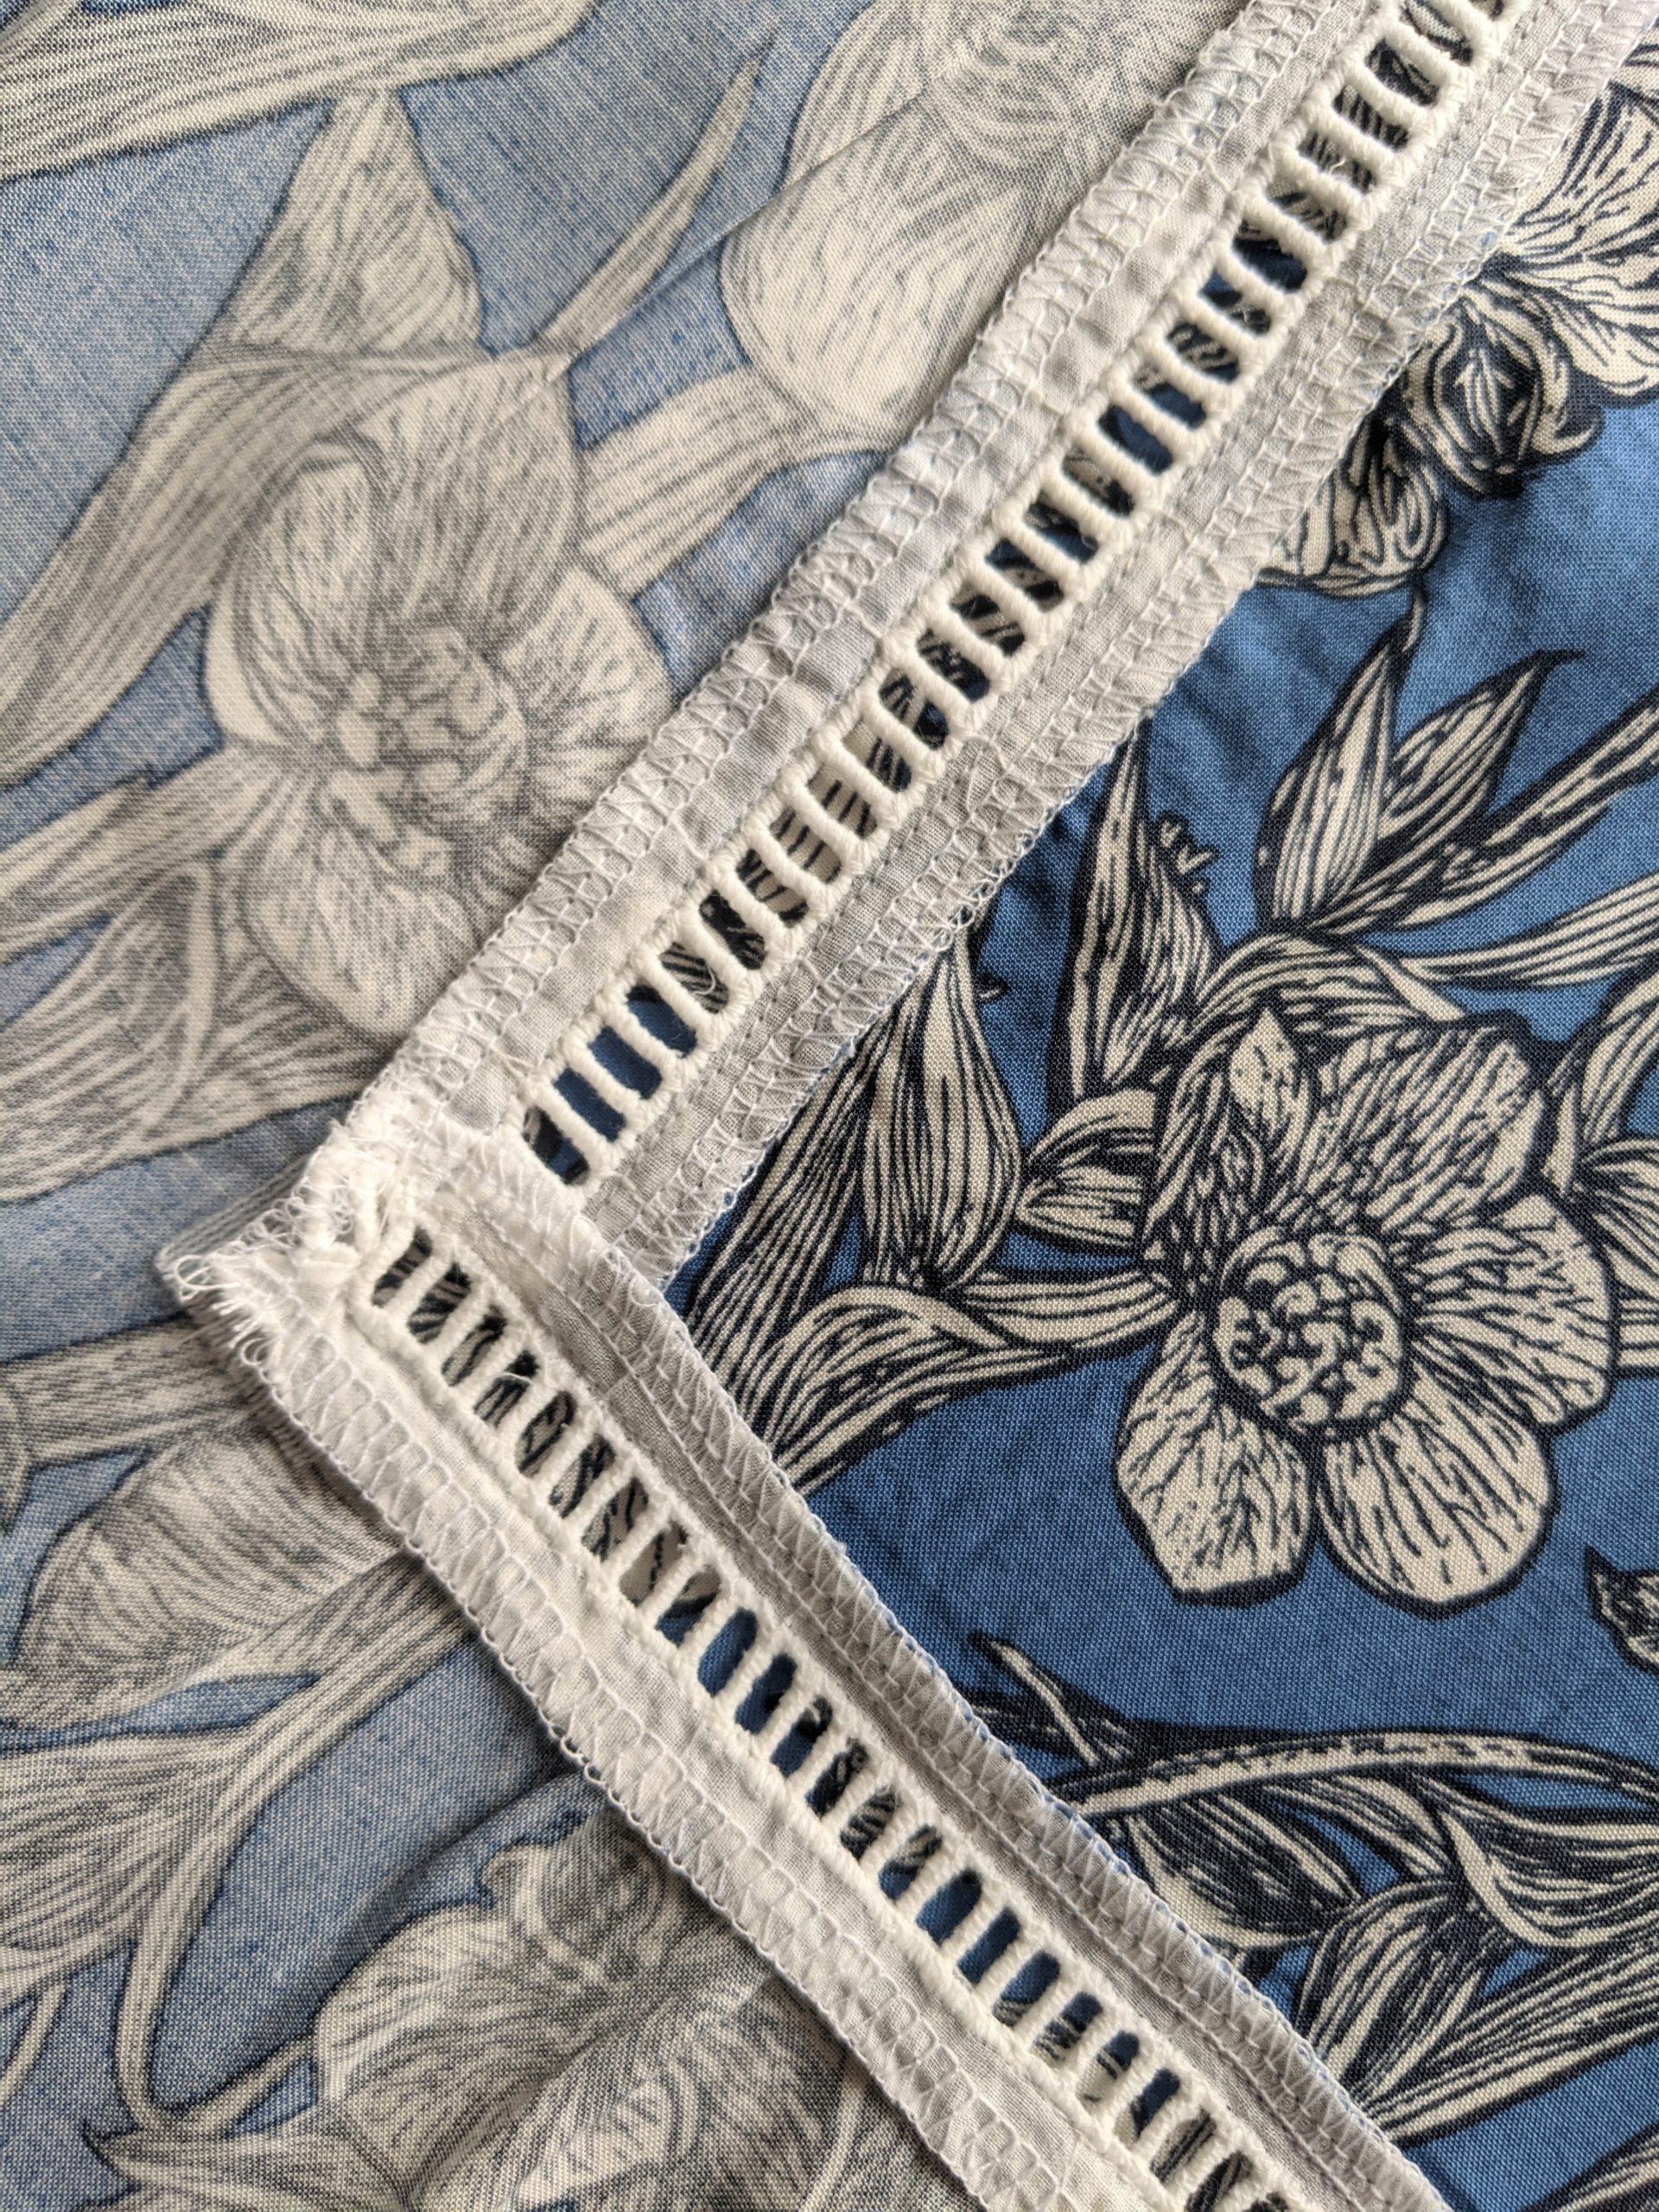
In terms of the small amount of skin showing through the trim, I found that to be a complete non-issue. Wearing a nude bra makes it completely invisible (remember that nude = whatever matches your skin tone). In fact, in these pictures, I’m wearing a black bra due to reasons of laziness and I don’t even think that is very obvious unless you’re hardcore staring at my chest, as undoubtedly you all are now, lol. Basically, this is just another golden opportunity to practice not overthinking it.
(If you prefer not to wear bras, though, just note that the cut of the yoke seam means that it is intended to go very close to your nipple, so do with that information as you will.)
And that’s it! I really appreciated this easy modification this summer, as I’ve been taking a very long hiatus from work and sewing in general. It was simple enough that I didn’t have to calculate anything ahead of time and could get right to the sewing part, which is always a good thing in my book.
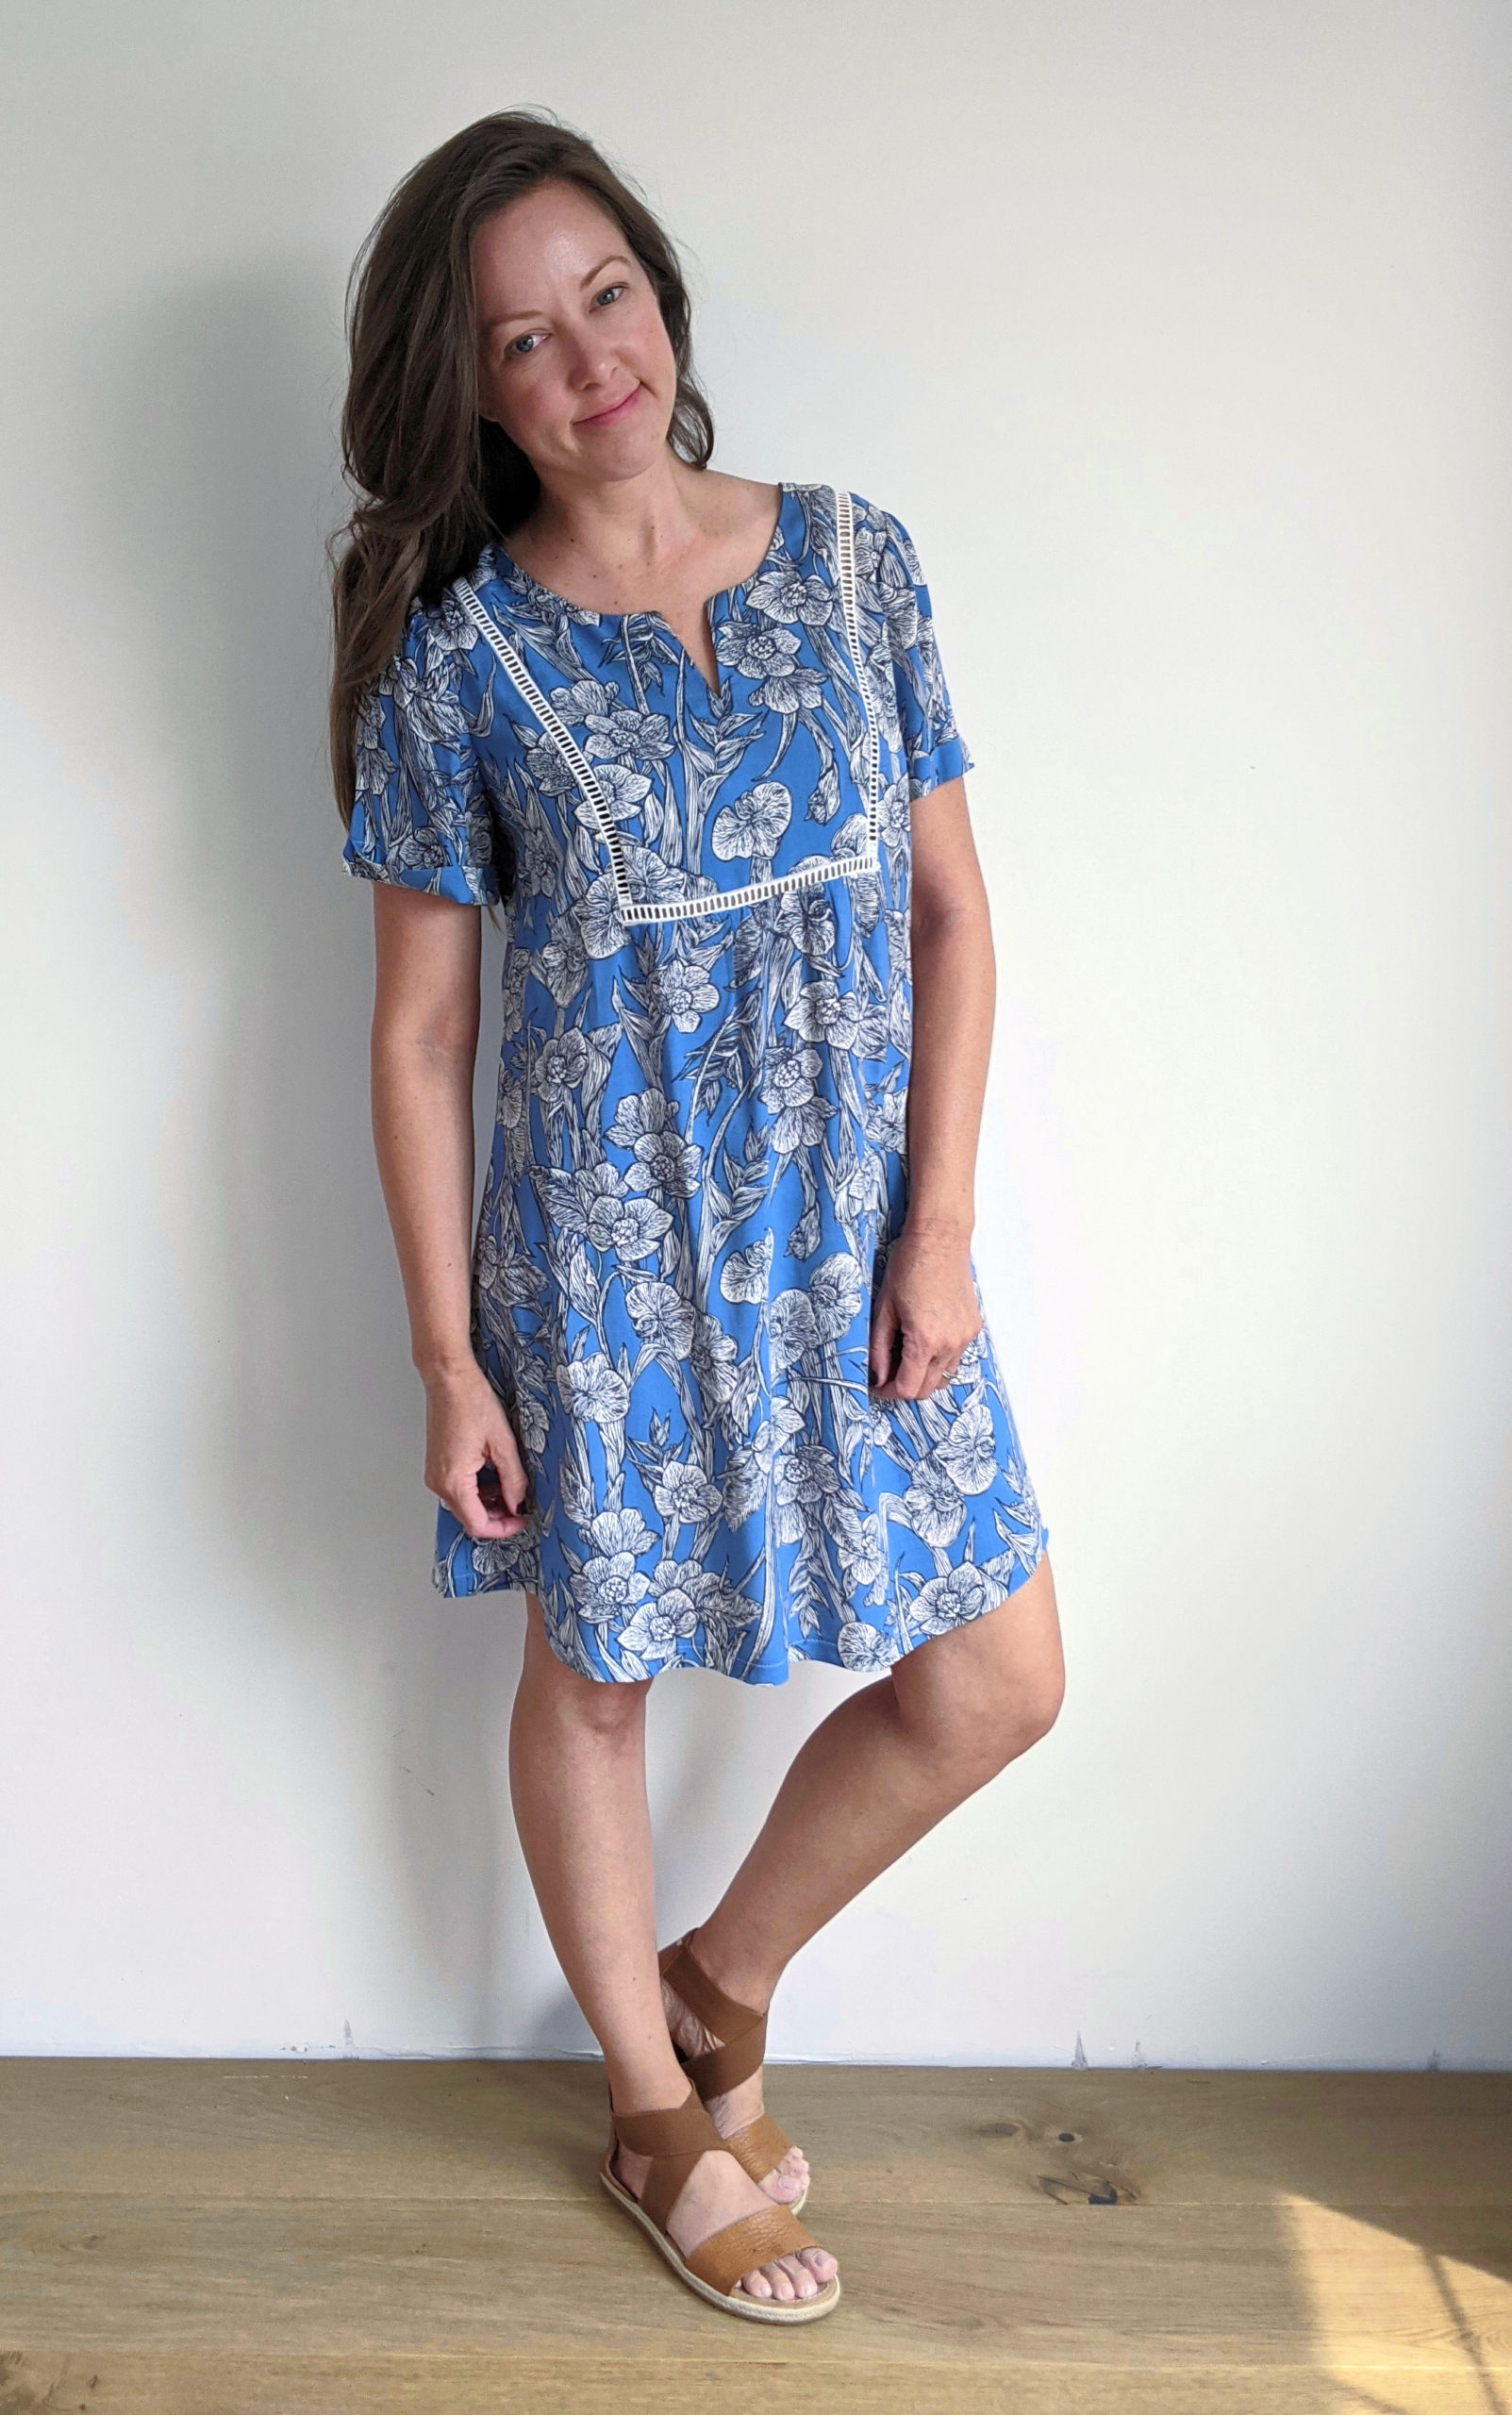
The breeziness and soft rayon fabric of this dress make it perfect for looking cute but feeling like I’m in my jammies. We recently (well, I guess it was Spring of 2019 WHAT YEAR IS IT?!) joined a new church where I don’t feel weird wearing a dress like this. Our old church was great, but if I showed up in this people would probably assume I was getting married or going to the opera or something. I like that this new place gives me a reason to have a couple feminine dresses in my wardrobe (and I really love that I wouldn’t feel weird wearing my jeans and Broncos jersey on a Sunday morning either – best of all worlds). It was just the motivation I needed to add a piece like this to my closet. With my WFH lifestyle, having a place to wear anything nicer than jeans and a sweatshirt is kind of a treat.
Sources:
Pattern: Phoenix Blouse

I love this! I’ve made the top several times, but now this could be a good transitional dress for Autumn with longer sleeves. I’d really like to make balloon/gathered/bishop(?) sleeves but can’t work out how to reshape the bell sleeve that comes with the Phoenix – ant chance you could do a tutorial on that please? 🙂
I know a few people have done this by just gathering the bottom into bias!
Thanks so much for advice on converting bell sleeve to cuffed – I’m just about to insert the sleeves and am not so keen on big flouncy ones. Have already cut the sleeve out with curved shape but have enough left over fabric to make this adjustment.