
Happy Friday y’all! I’ve got such an awesome treat for you today. Emily is going to show you how to hack your little old Lane Raglan hoodie into this amazing colorblocked version! If you’re on the internet, you’ve probably encountered Emily at some point, even though she doesn’t have a blog YET, ahem. She’s all over FB sewing groups and really active sharing her sewing adventures on Instagram: @enjoyful_makes. Her hack is so clever and yet simple, and her tutorial had me snorting. Out loud. In public. So take it away Emily!
Hello my fellow Hey Juners! It’s Emily here, sharing one of my favorite hacks I’ve ever pulled off. First off, let me just say, I’m not a blogger, nor a professional seamstress, nor a writer…. So why Adrianna is having me share a tutorial is beyond me. 😉 But, I will tell you this… I AM a professional Lane Raglan maker. It’s true. Here’s proof.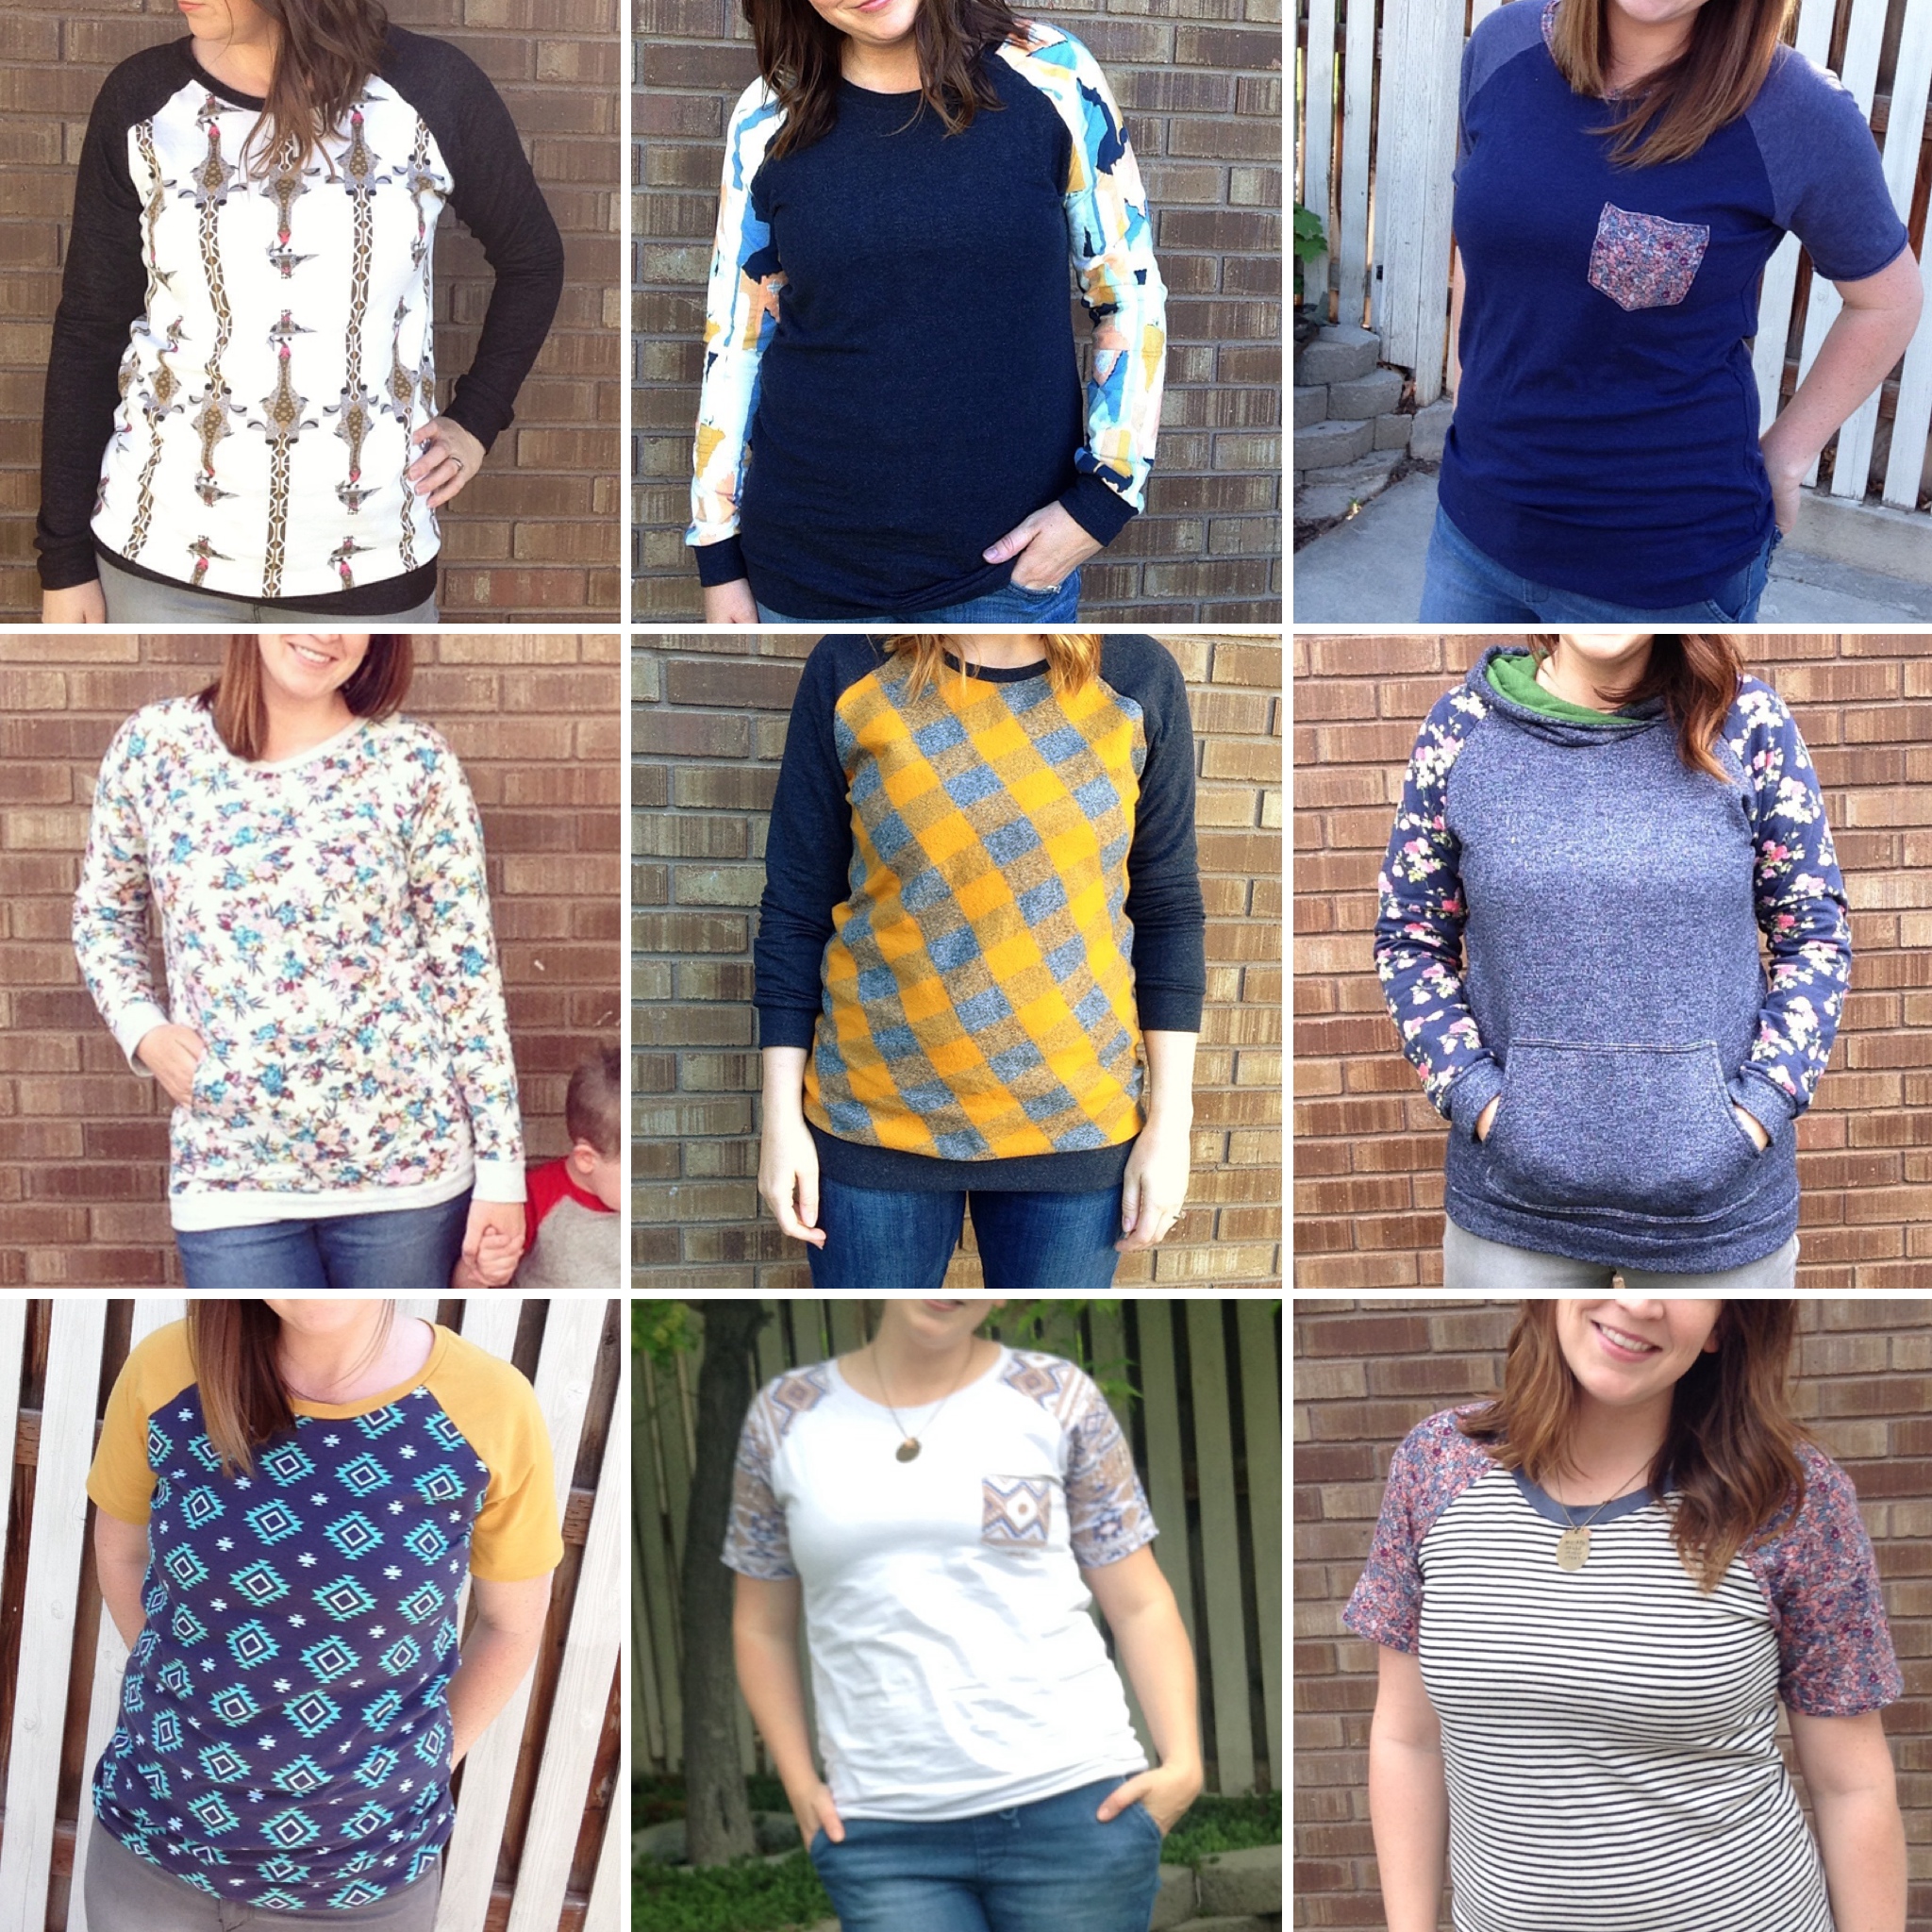
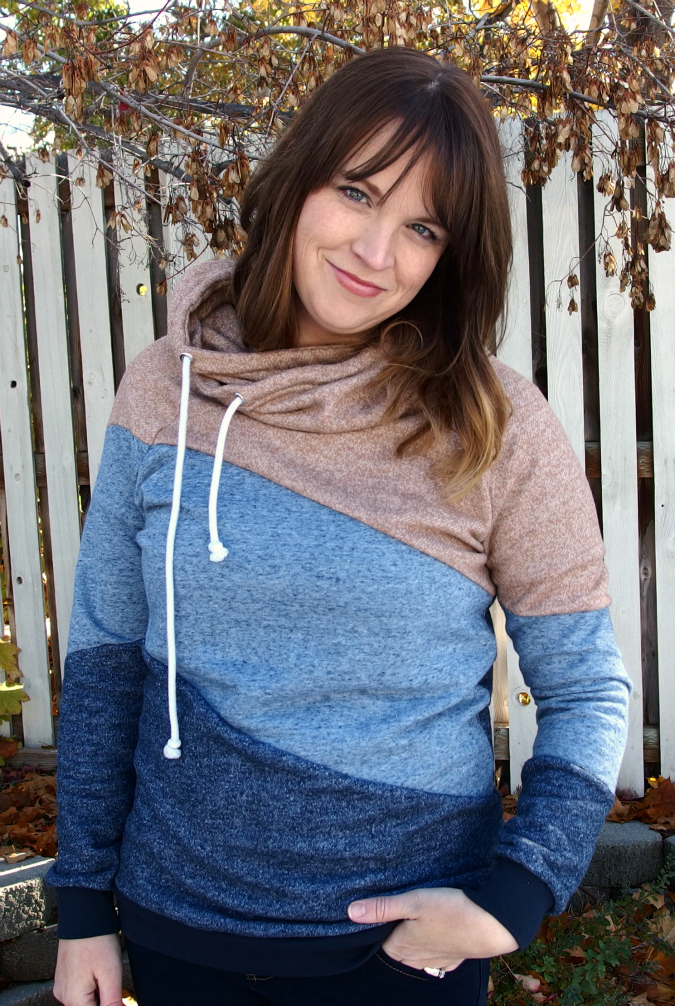
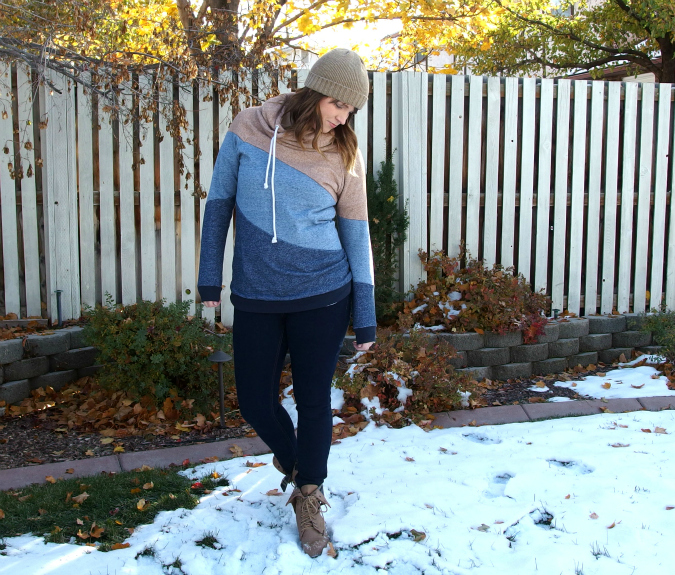
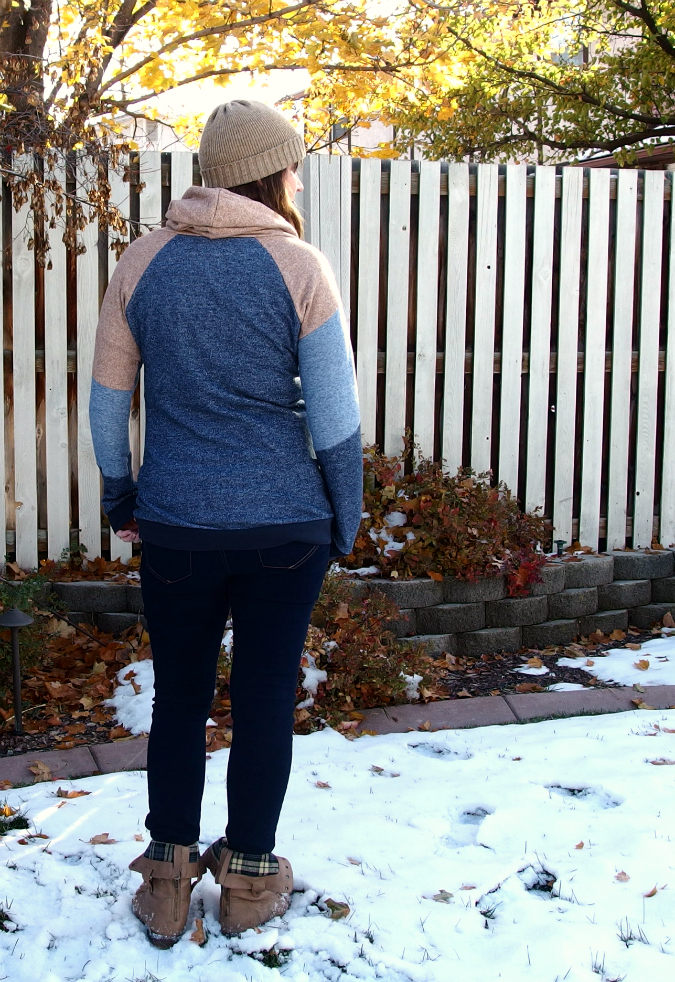
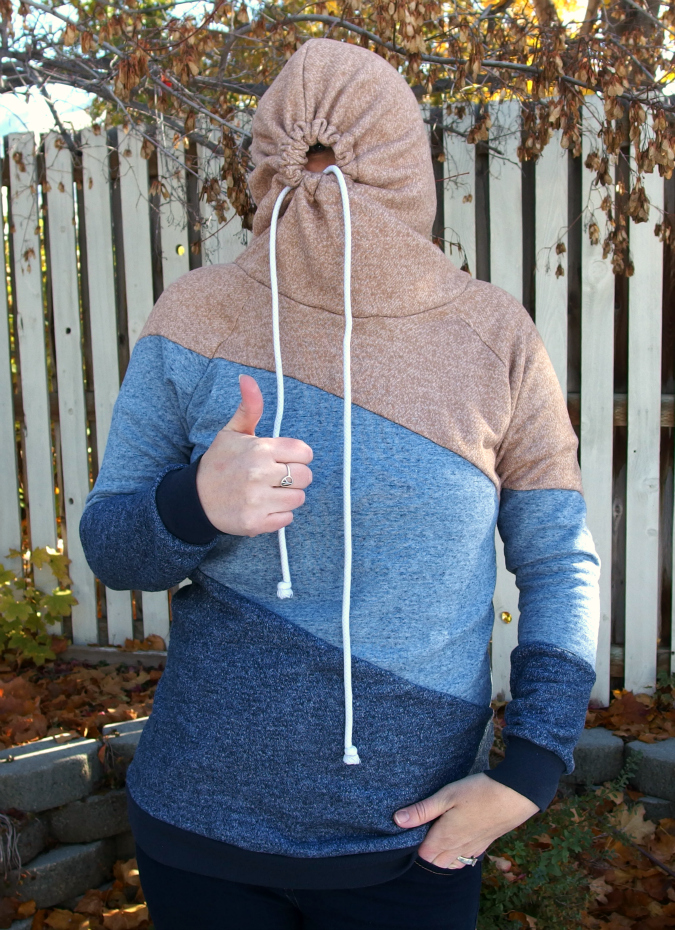
I also consider myself a professional pattern hacker. 😉 (ok, that might be taking it a little too far) I do love to pattern hack though and I REALLY love to pattern hack Hey June patterns. They are my go-tos! This Lane Raglan sweatshirt hack was born because of an inspiration picture that’s been going around Facebook land for a while. I loved it and had put it on my “to-make someday” list. Well, it sky rocketed to the top of my list when I got a message from my ‘non-sewing’ sister showing me the same sweatshirt saying “here’s a cute hoodie style for you to make”. I took that as a sign that is needed to happen and it needed to happen asap. So enough of my yapping and on to the tutorial.
Supplies:
Lane Raglan pattern and all other requirements listed in it. Fabric for this tutorial and a whole bunch of other drool-worthy fabrics can be found at Raspberry Creek Fabric.
Tracing paper
Pencil
Ruler
Your awesome pattern hacking skills
We will be making adjustments to the front, right sleeve, left sleeve, and hood pieces. The back and bands are untouched.
Body:
Make your pattern pieces (via printing or tracing) for a right sleeve, left sleeve, and a full front (trace on side, flip and trace the other or print 2 and tape together down the middle)
It would be a good idea to mark sleeves right and left (as worn) so you don’t mix them up.
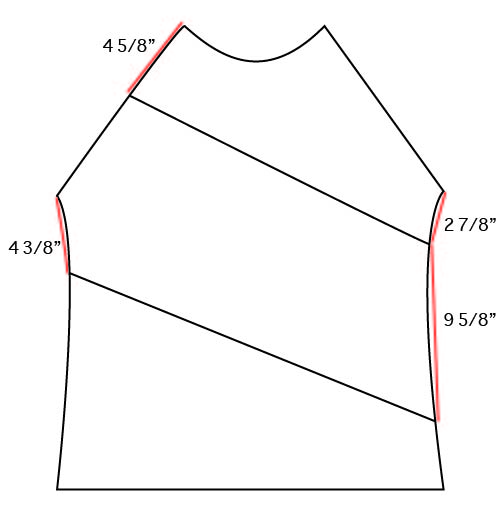
Now for some fun. Use a ruler and pencil and draw your hack lines. The picture refers to how I did mine. Keep in mind this is a hack. You can make your stripes thicker, thinner, only have two stripes or go crazy and do 4. It’s up to you. Don’t stress on getting your lines exactly like mine. After you draw your lines line your pattern pieces up and see if you like how they line up. The only line I really worried about with mine was the right side where the raglan sleeve met the front. The rest I didn’t care if they lined up perfectly.
Front:
Left sleeve: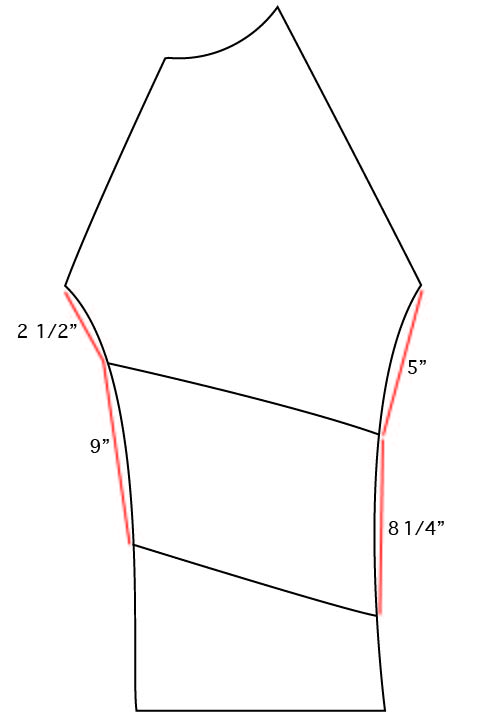
Right sleeve: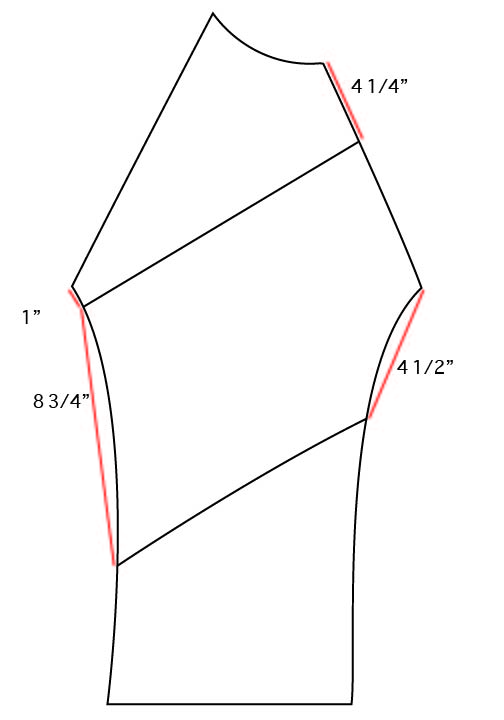
Slice up your pattern pieces- making sure to label each piece so you don’t get confused. (this is speaking from experience… I may have cut 2 of my sleeve pieces the wrong way) Also it’s a good idea to mark the direction of the grain on each piece. Once you have all the diagonal pieces it gets a little confusing to remember what angle the grain is supposed to be going.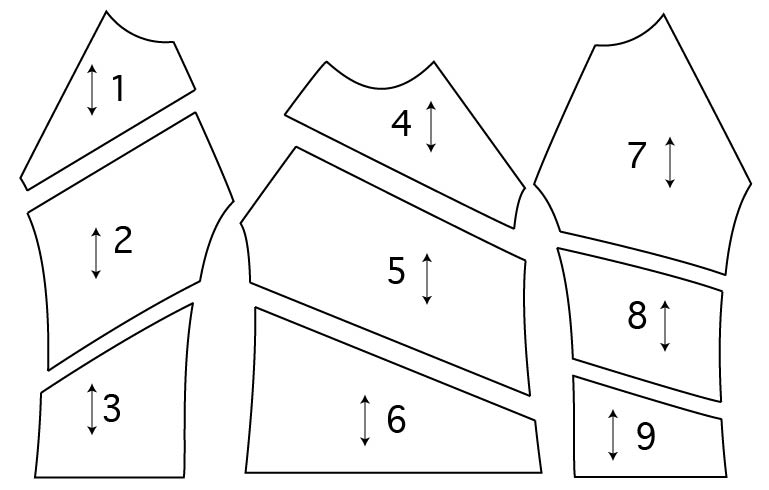
Now on each slice you do to your pattern you need to add ¼” for seam allowances. You could tape on paper and add the seam allowances if you want or retrace a new pattern piece with the added seam allowances. That was too much work for me so I just did it as I cut my fabric. Every time I got to a line I had hacked I just didn’t cut right to the edge of my pattern piece. I just eyeballed 1/4”. You could write on each hack line a reminder so you don’t forget.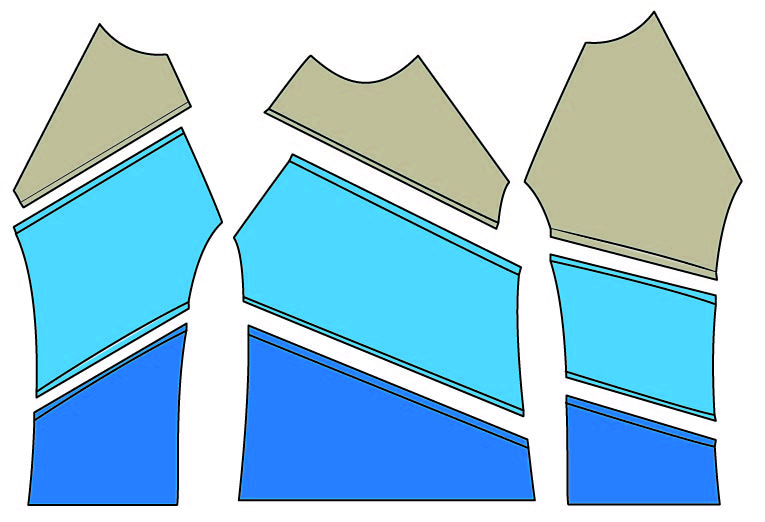
Cut out your fabric. Remember to pay attention to the grain and to add those seam allowances!
I like to lay out my shirt pieces to make sure I cut them all right and everything looks good together.
Start putting your puzzle pieced shirt and sleeves back together. Right sides together sew your pieces together with 1/4” seam. Press seams. (fyi I thought maybe I would topstich afterwards each seam but I tried one and I didn’t like it.)
Now you’ll have your pieced front and sleeves all back together. Continue making your Lane as per instructions in pattern.
Hood:
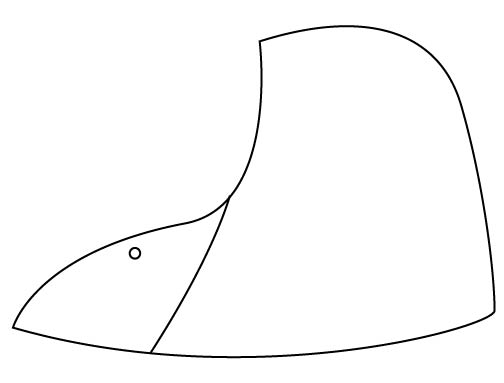
Trace corresponding hood size and add the additional wrap around modification by extending the botton line out about 5 ¾”. Then measure about 8 3/4” down from the top of the hood make a curved line to your bottom point.
Mark the button holes as shown.
Use your new pattern piece to cut your fabric. I lined my hood so I cut out 4 (2 right and 2 left). Mark on main hood where button hole/ grommets should go.
Sew your hood right sides together around the curved back edges on both the lining and main hood.
Place the lining hood inside the main hood right sides together. Sew together along outer edge.
Flip right sides out and if you want try the hood on and wrap the hood in front and see if the buttonhole/grommet markings are where you want them. The markings are where I placed them but really you can modify that to your personal preference. (Remember we are hacking here- don’t stress, have fun and make it your own.)
Once you’ve approved/adjusted buttonhole/grommet placement attach a scrap piece of fusible interfacing to the wrong side of fabric, covering your marking. Repeat on other side.
Apply grommet using manufacturers instruction, or sew buttonholes on right side of hood. Repeat for other side.
Turn right side out, press, and then topstitch 1” from front edge. This will make your cording tunnel.
Attach hood to shirt as per the pattern instructions (refer to step 5 in the Lane Raglan hood instructions for instructions and pictures) Otherwise I will explain briefly. Find center back of shirt and align with center back of hood. Pin right sides together. Continue pinning around the neckline. The left side of the hood with the lower buttonhole/grommet will go first so that it’s sandwiched between the shirt and other side of the hood. Sew together making sure to catch all the layers.
Thread your string/cording through and you are done!!!
Admire your creation because you just became a hacking ninja!
I hope this all made sense. If you have any question you can find me on Instagram: @enjoyful_makes or I am often frequenting the Hey June Patterns facebook group or just talk to Adrianna because, welp, she’s a genius (true statement. There is even a hashtag to prove it) I can’t wait to see what ya’ll come up with. If you do post a pic on insta tag me so I don’t miss any of your awesome creations. Have fun!
Thanks Adrianna for letting this amateur hijack your blog!
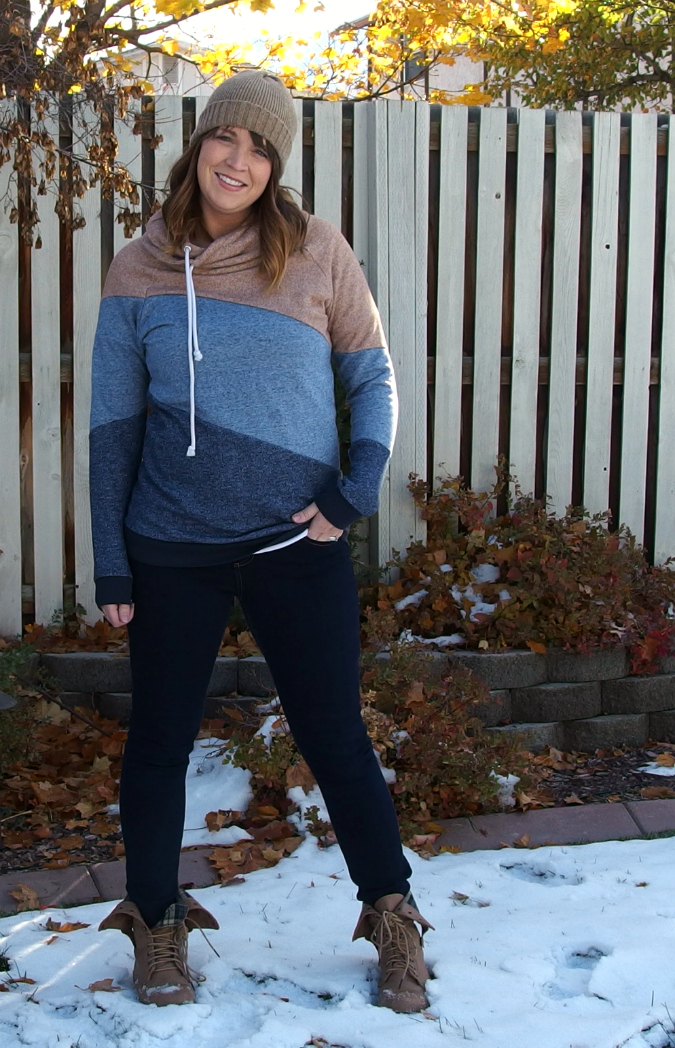
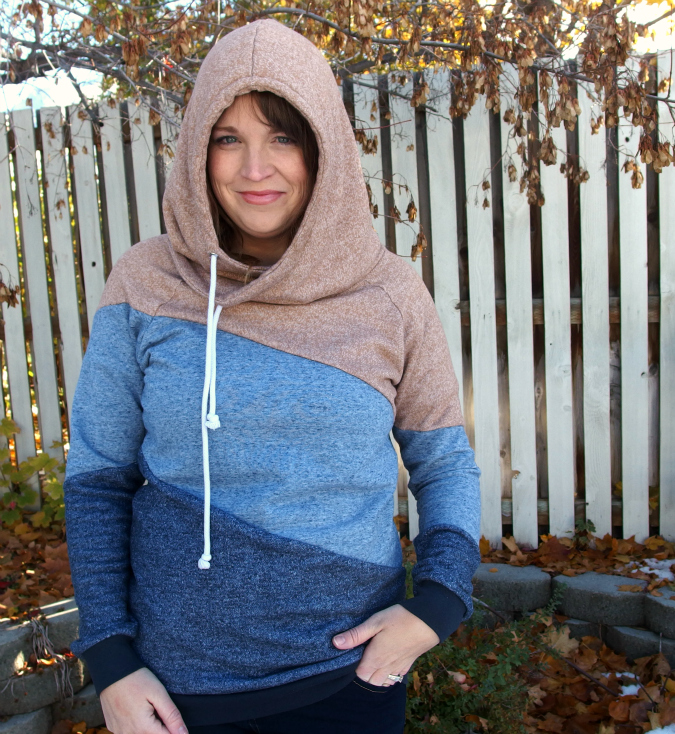
Oh and by the way, this hood is totally blizzard approved.
Did I not tell you she was awesome? I think it’s clear who the true genius is here. Thank you sooooo much Emily for this awesome hack. I think the hardest part will be figuring out what colors to use….
BRILLIANT! I love it when we can hack something cute from RTW by using a pattern we already love!
I know right? And boy do I love! ?
Oh that last picture. Just awesome. And a great tutorial too. ???
?? ha ha! Sorry, I’m a weirdo! Thanks! ?
Awesome tutorial, thanks for sharing! 😀
You’re welcome! ?
I am so doing this… Christmas gift for my sister. She is the queen of the hoodie.
Wahoo! I hope she loves it!
What fabric exactly was used? I went to the website but there are so many choices that may be possible. Thanks great information and I can’t wait to do this
I used the heathered camel (top), the middle was a one time by she doesn’t regularly carry and is sold out, and the bottom is the heathered navy. Any of the heathered or solid French Terry’s from the shop would work lovely. The textured ones are a bit thinner. They’d still work but would be lighter weight sweatshirt.
*buy not by. Curse the autocorrect!
What type of fabric did you use? Is it raspberry creeks French terry?
Yes it is. I used the heathered camel french terry, the heathered navy, and then the light blue was a one time buy french terry that RCF had that is sold out.
oops sorry i now see that question was just asked!! sorry!!
how much of each fabric did you need? would half a yard of the 2 top colours and 1 yard of the 3rd colour (and back) be enough?
Hi I was wondering how much fabric of each colour would I need and how much for the bands?