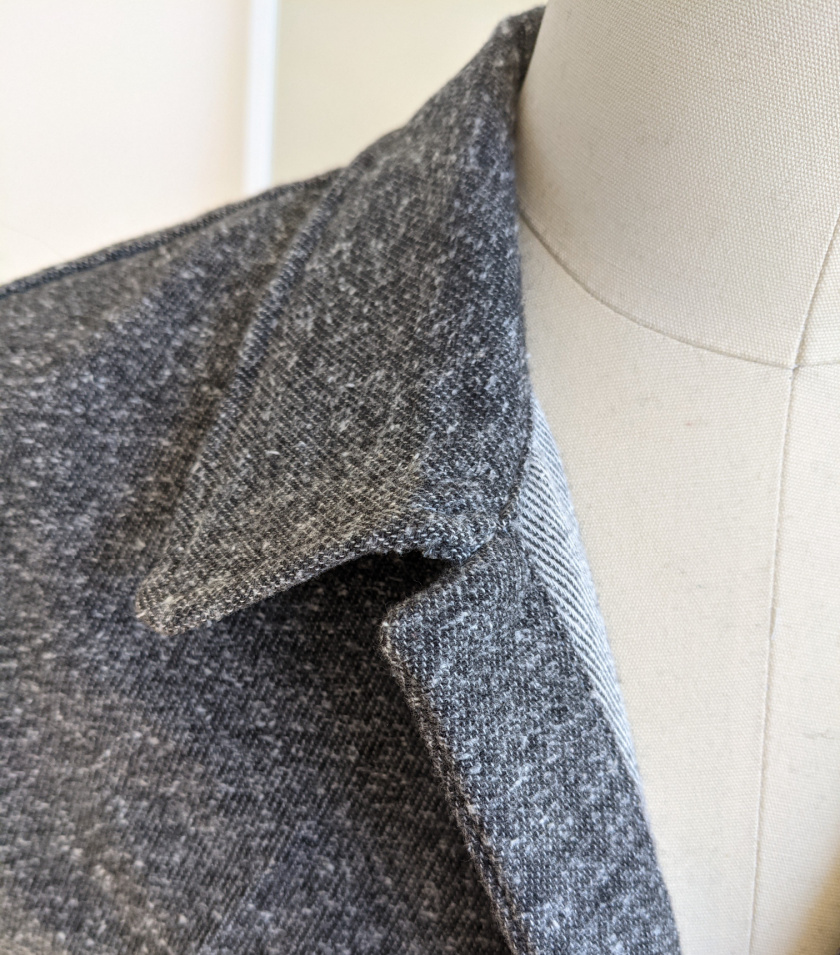
A convertible collar differs from a standard collar in that the stand is built-in, rather than being a separate pattern piece. This makes convertible collars easier to construct, and also lends them a more casual look. They’re usually found more on coats, jackets, camp-style shirts, and now, the shacket. The Fairmount Shacket features a convertible collar, so I thought it would be good to do a quick tutorial for those who are unfamiliar with this style. I recommend practicing on some muslin first, before sewing this collar on your fashion fabric. I will be following the steps and seam allowances outlined in the Fairmount Shacket, but all convertible collars are essential sewn the same way. As you can imagine, a convertible collar used in conjunction with a facing, like in the Willamette Shirt or Evergreen Jacket, is a much easier sew. But it only takes a couple extra steps to join this collar with a button placket for a neat finish.
Step 1:
After sewing the top and under collars together, align the front edge of the collar with the notch in the front neckline of the shirt. Pin in place. For the Fairmount, continue pinning at center back and on the other side of the collar just to make sure it is positioned correctly.
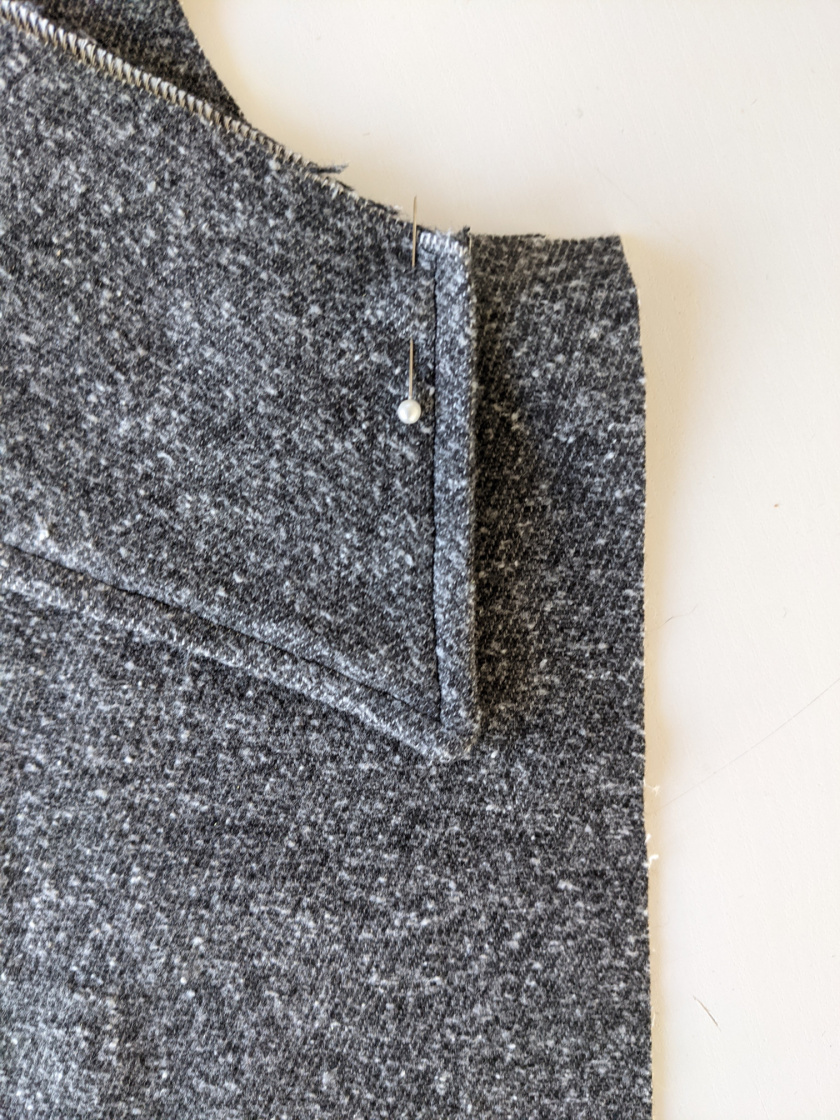
Step 2:
Place the button placket right sides together with the shirt, with the collar sandwiched in between. Simply remove the pin from step 1 and reinsert it to pin all three pieces together.
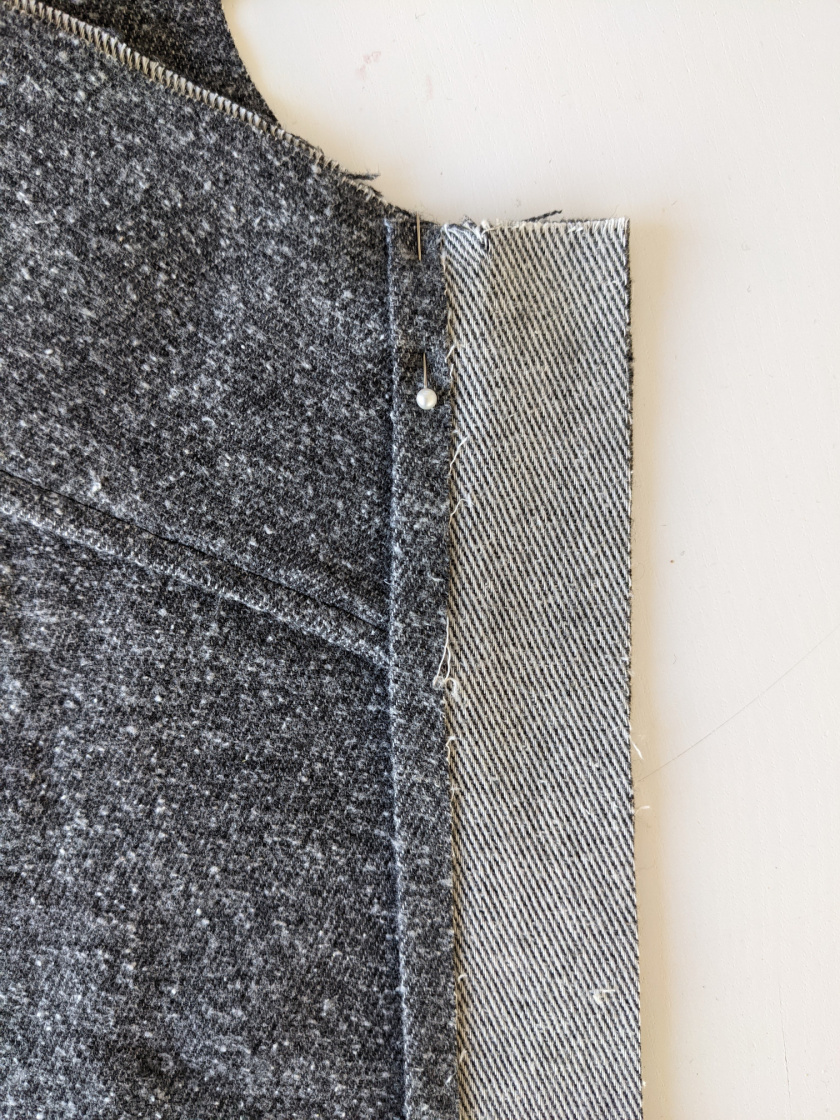
Step 3:
Sew the placket to the shirt as written in the pattern, catching the top of the collar in the horizontal seam. Be sure to keep the collar point away from the vertical seam as you sew down the placket.
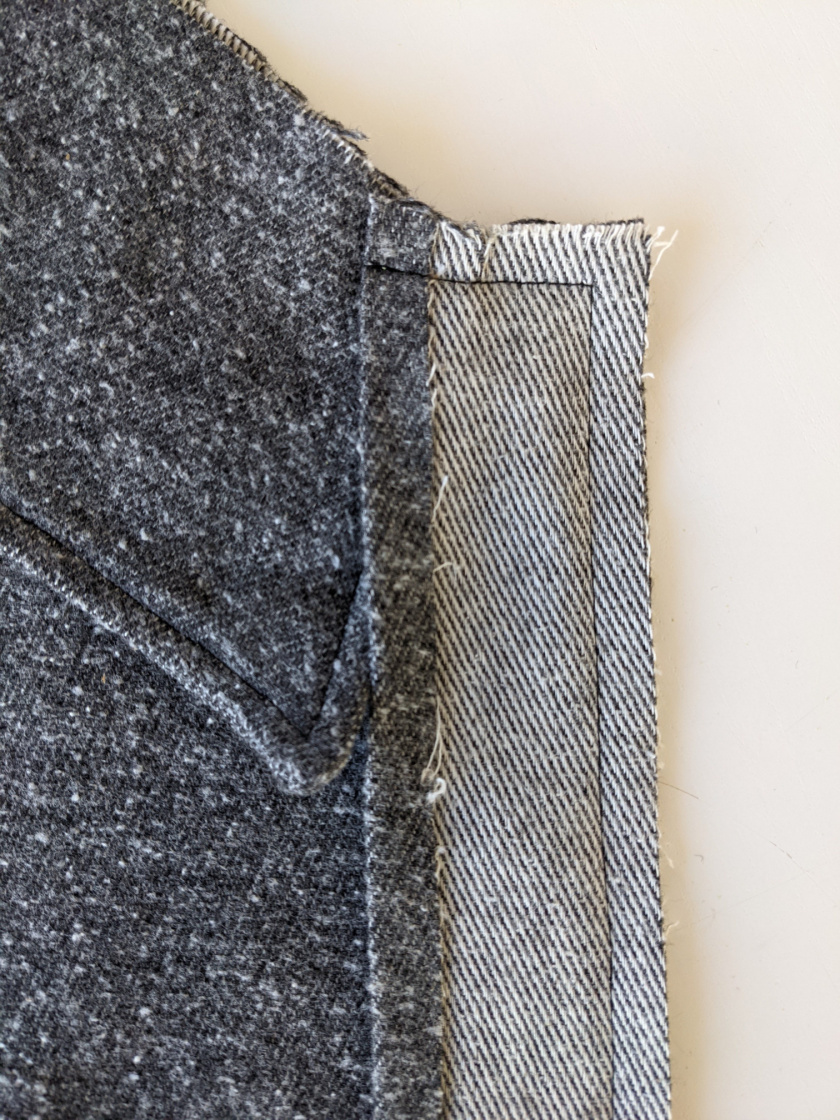
Step 4:
Turn the placket to the wrong side of the shirt, clipping and pushing out the corner at the top. Press well.
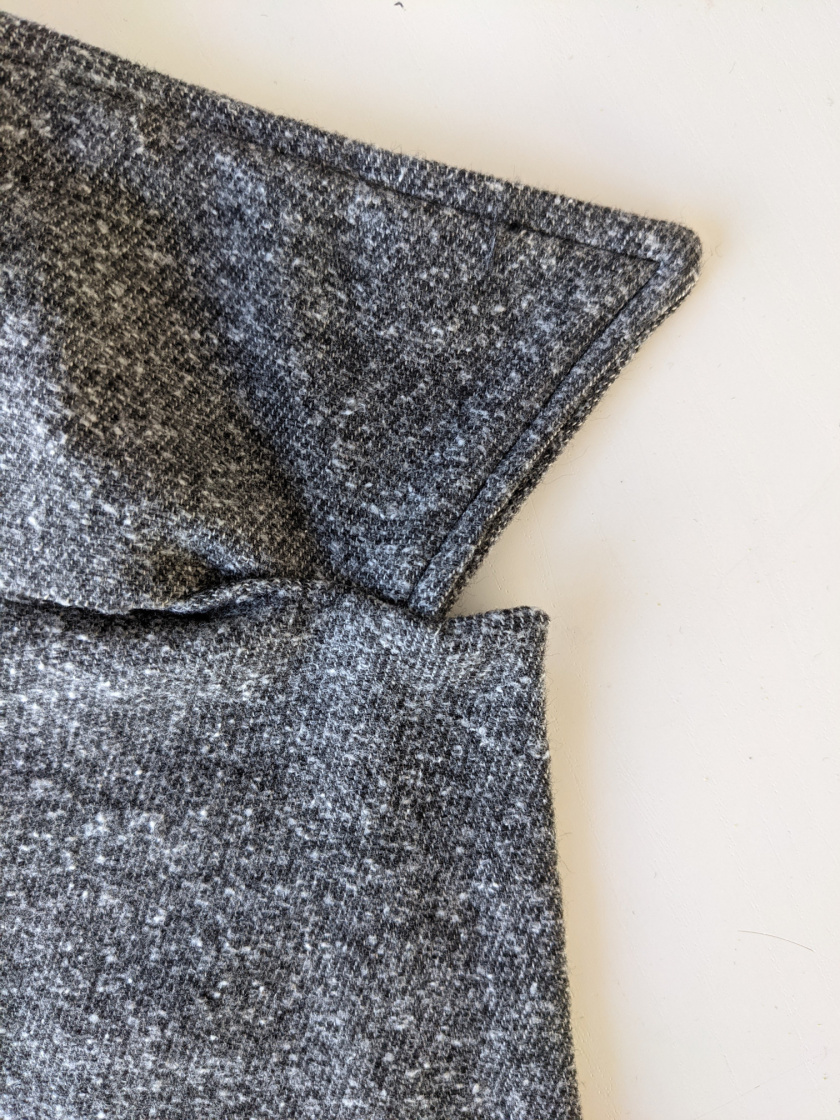
Step 5 (kinda):
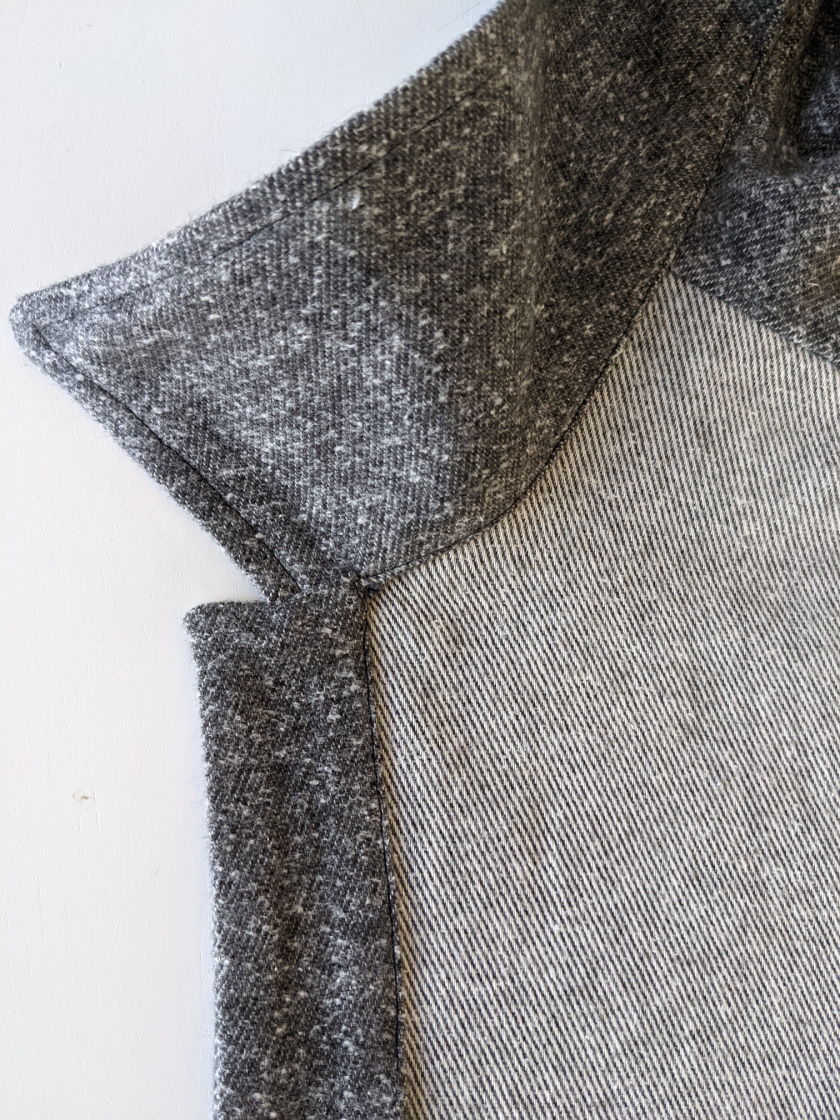
In the Fairmount pattern, you were instructed to sew a basting stitch on the top collar, shown in white on this image. Even if you skipped this step, the seam allowance is easy to eyeball because it will align with the top of the button placket.
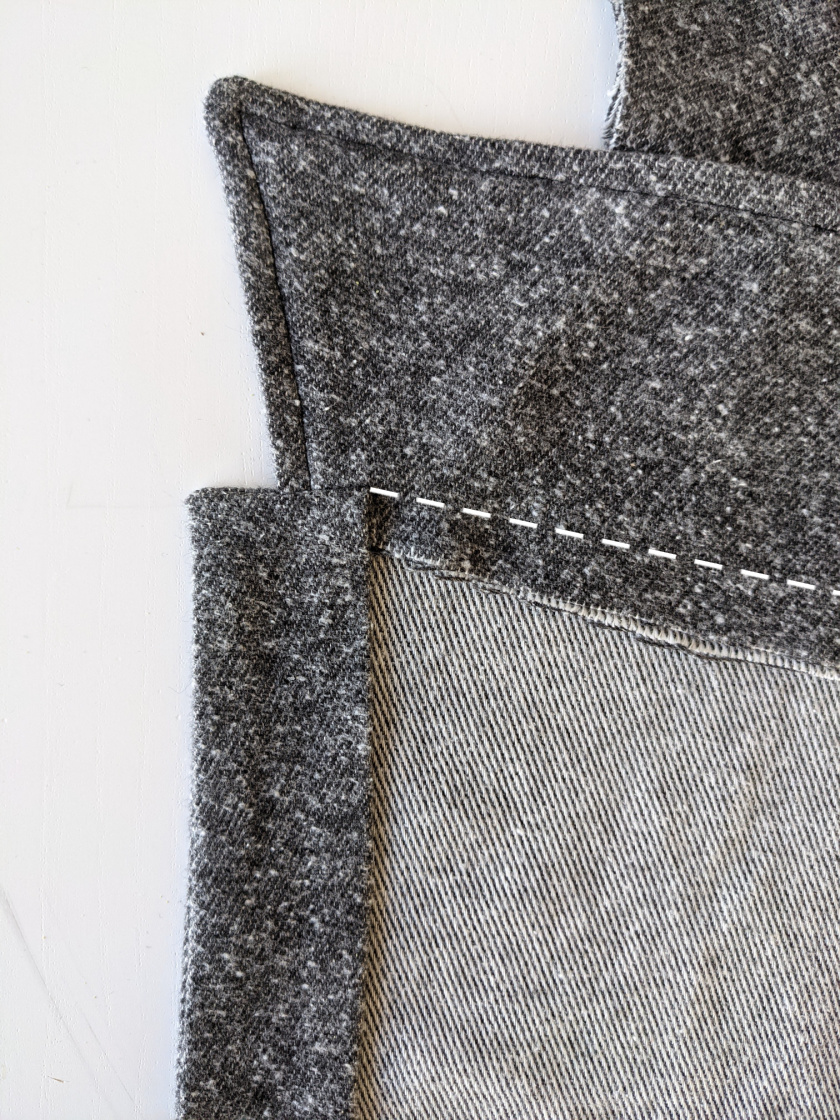
Step 6:
Use sharp scissors to clip the seam allowance of the top collar, lower collar, and shirt neckline up to the point of the seam allowance, or basting stitch. Cut as close to the button placket as possible, erring even slightly under it.
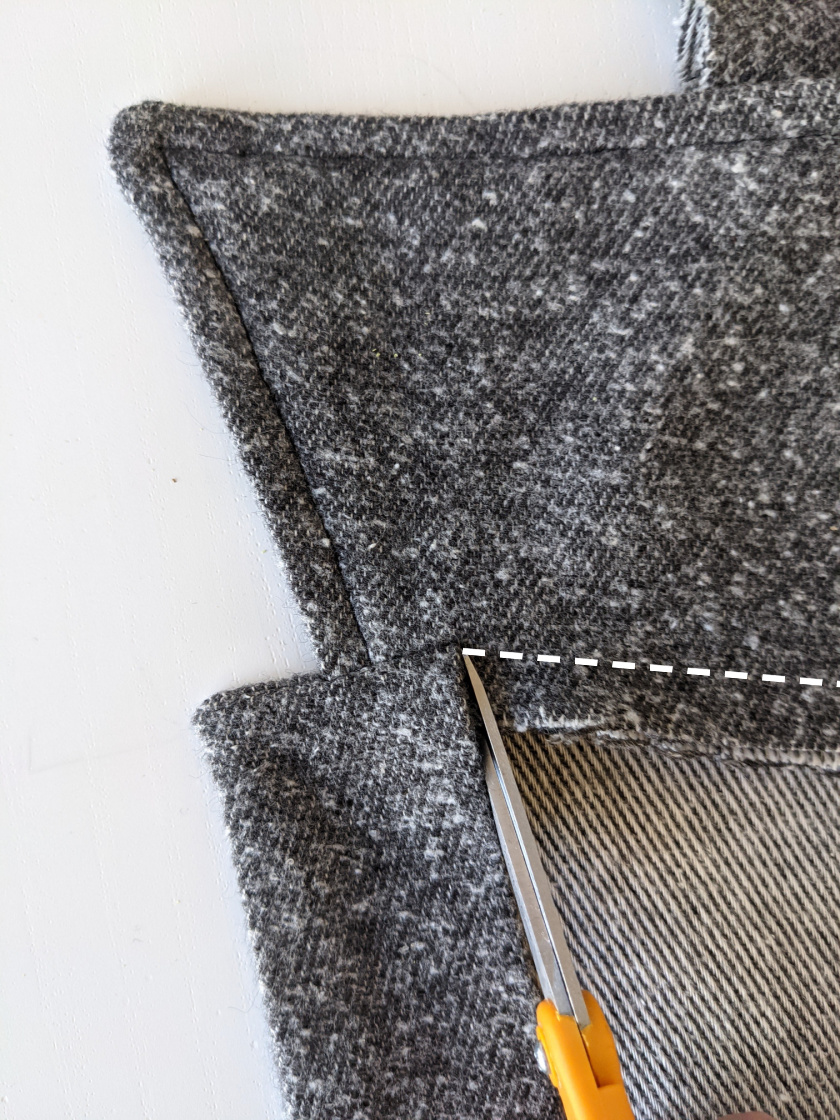
Step 7 (also not really a step):
Now you will be able to pull the seam allowances free of the button placket. In the Fairmount, the button placket has already been sewn down for this step, but stay tuned because I’ll show you a fun little trick in a second.
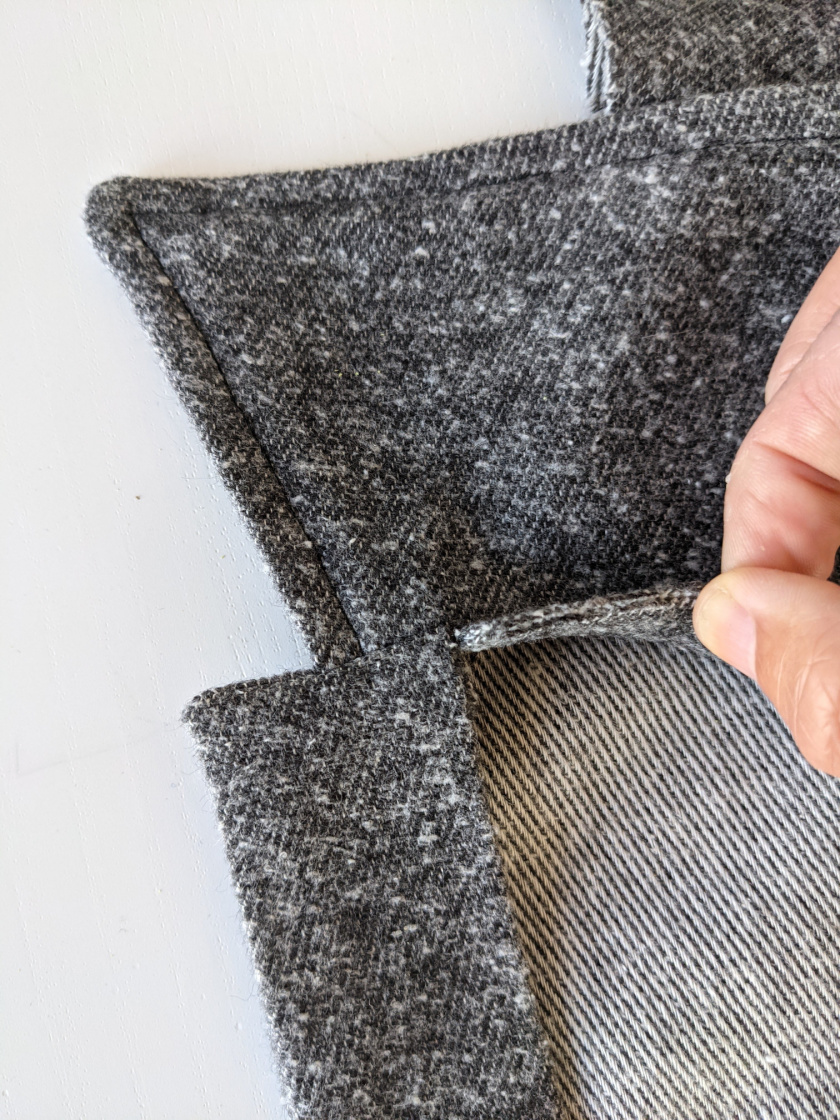
Step 8:
Move the top collar out of the way so you can access the under collar and neckline.
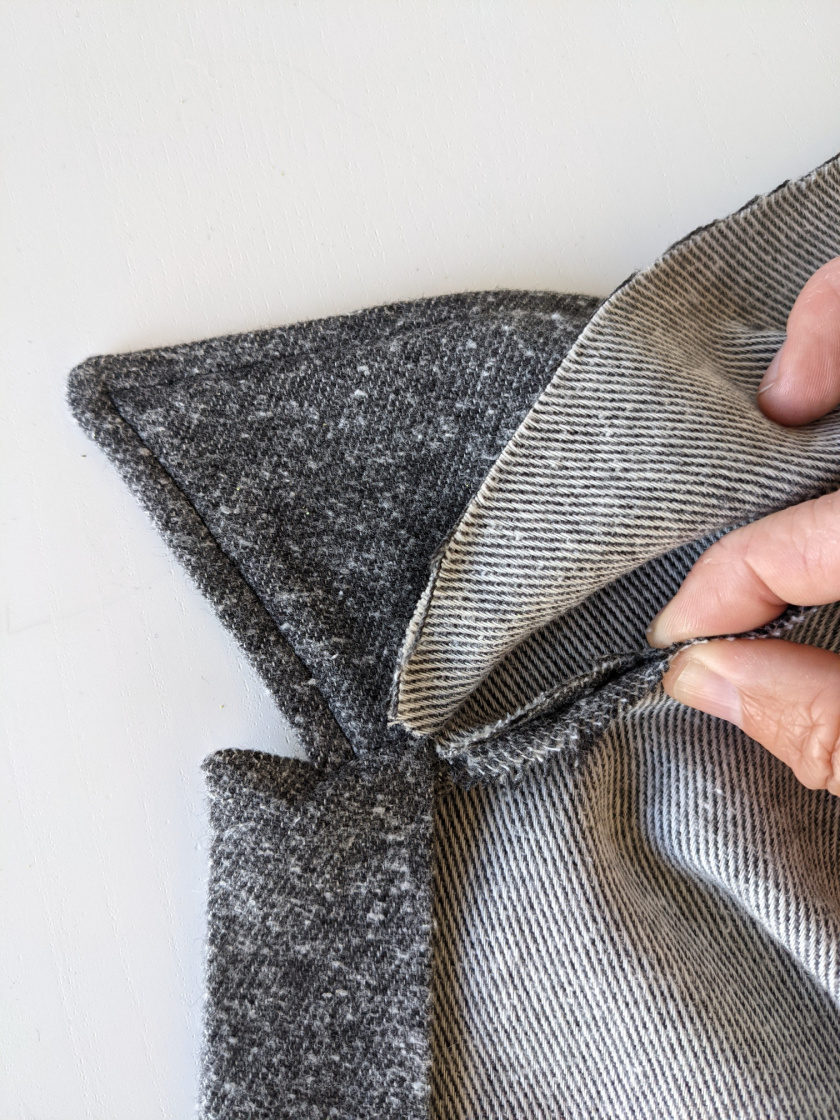
Step 9:
Sew the under collar to the shirt neckline. Start and finish this seam at the cut edge on each side.
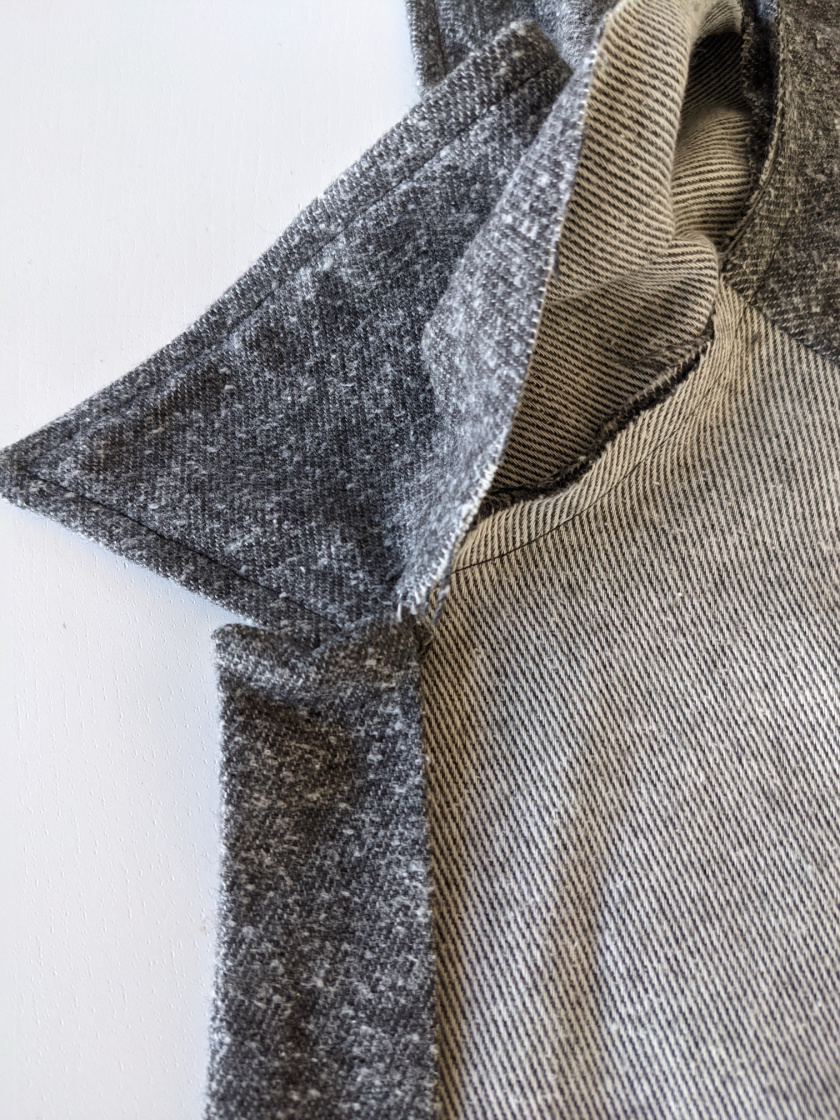
Step 10:
Press the seam allowances from the under collar and shirt up. Fold the top collar along the basting stitch or just eyeball it so the fold just covers the seam from step 9. Do this around the entire neckline.
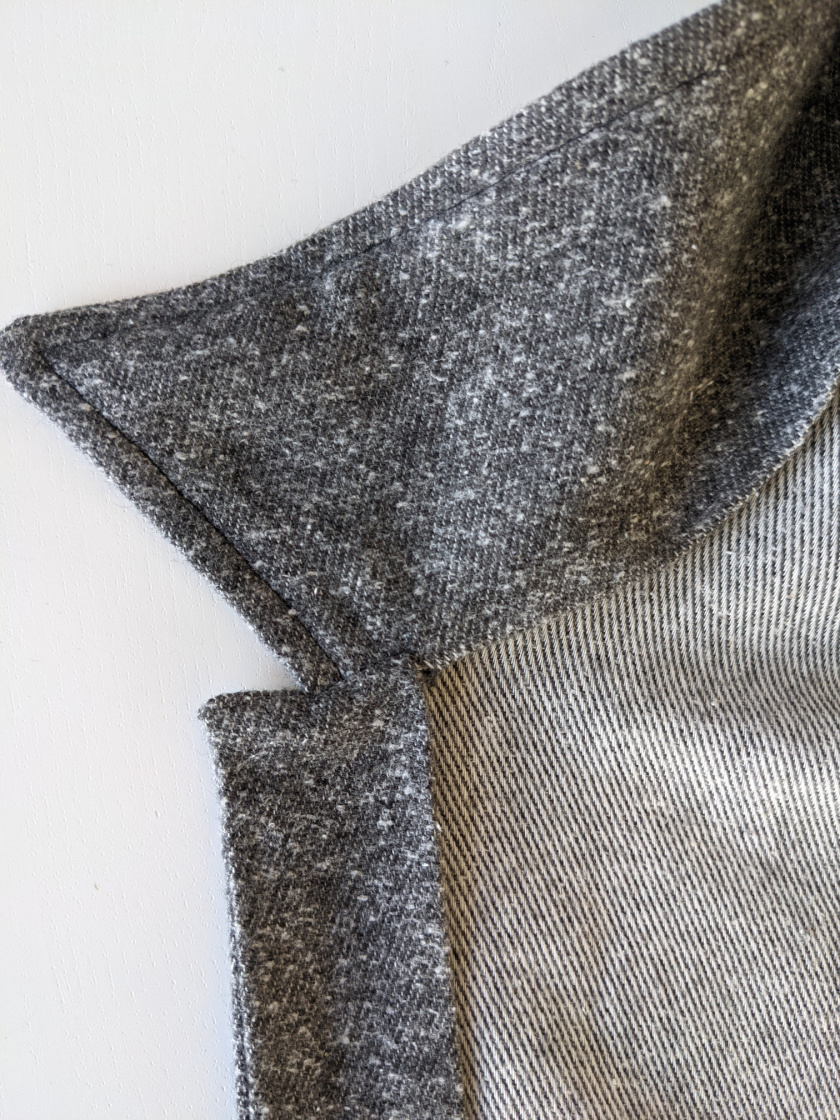
Step 11:
Pin the fold in place. I like to place these pins along the fold to keep it secure. Where the collar meets the button placket, you may have to use a sharp object like a chopstick or even the ends of your closed scissors to tuck everything under nicely and make it look clean. As soon as it looks good, press it really well.
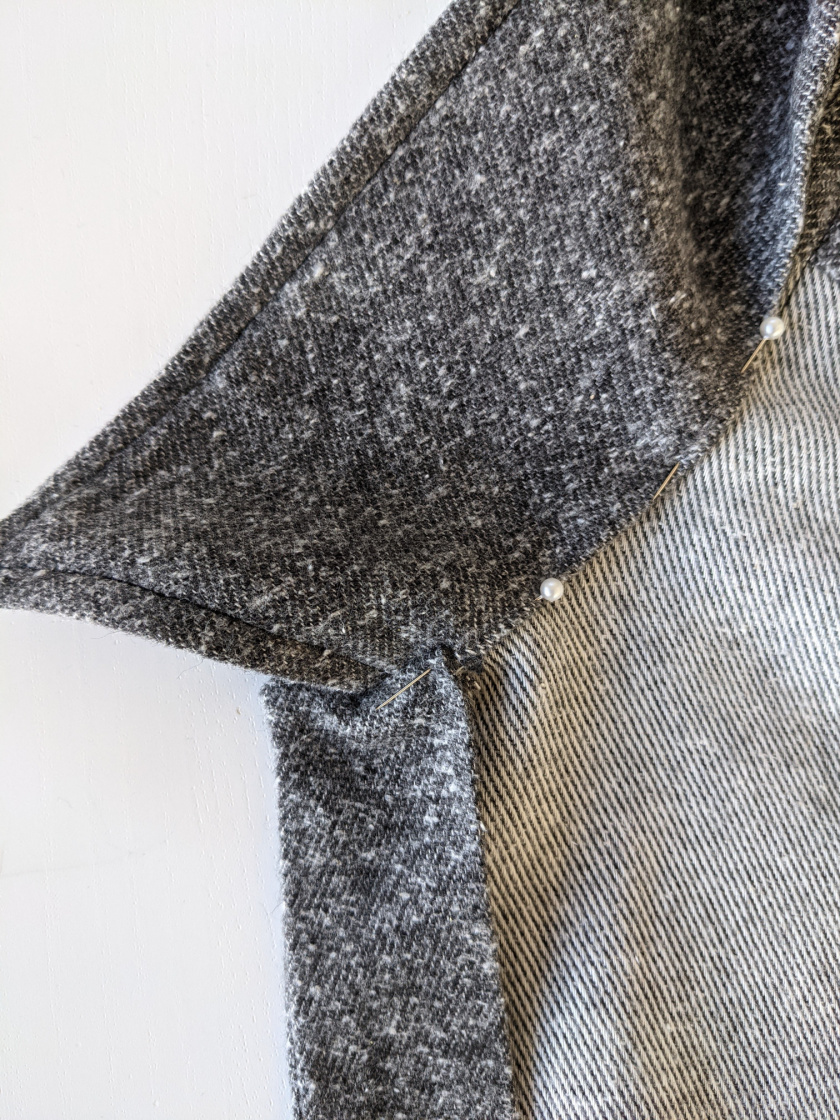
Step 12:
Use an edgestitch foot or just your mad skillz to sew the edge of the fold in the top collar to the shirt, going slowly to ensure that it just covers the seam all the way around.
Step 13:
And here’s the fun part. If you waited to sew the edge of your button placket, you can continue sewing from the collar, down the button placket, and even around the hem of the Fairmount Shacket all in one fell swoop. So cool.
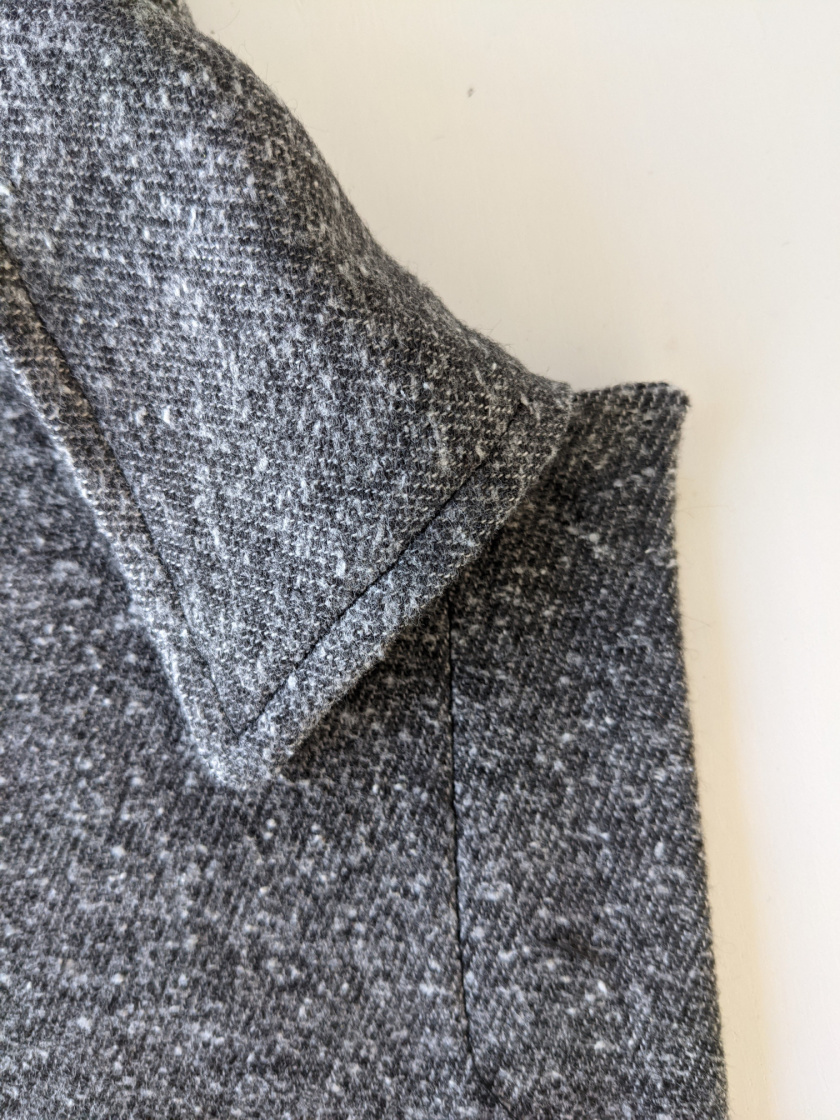
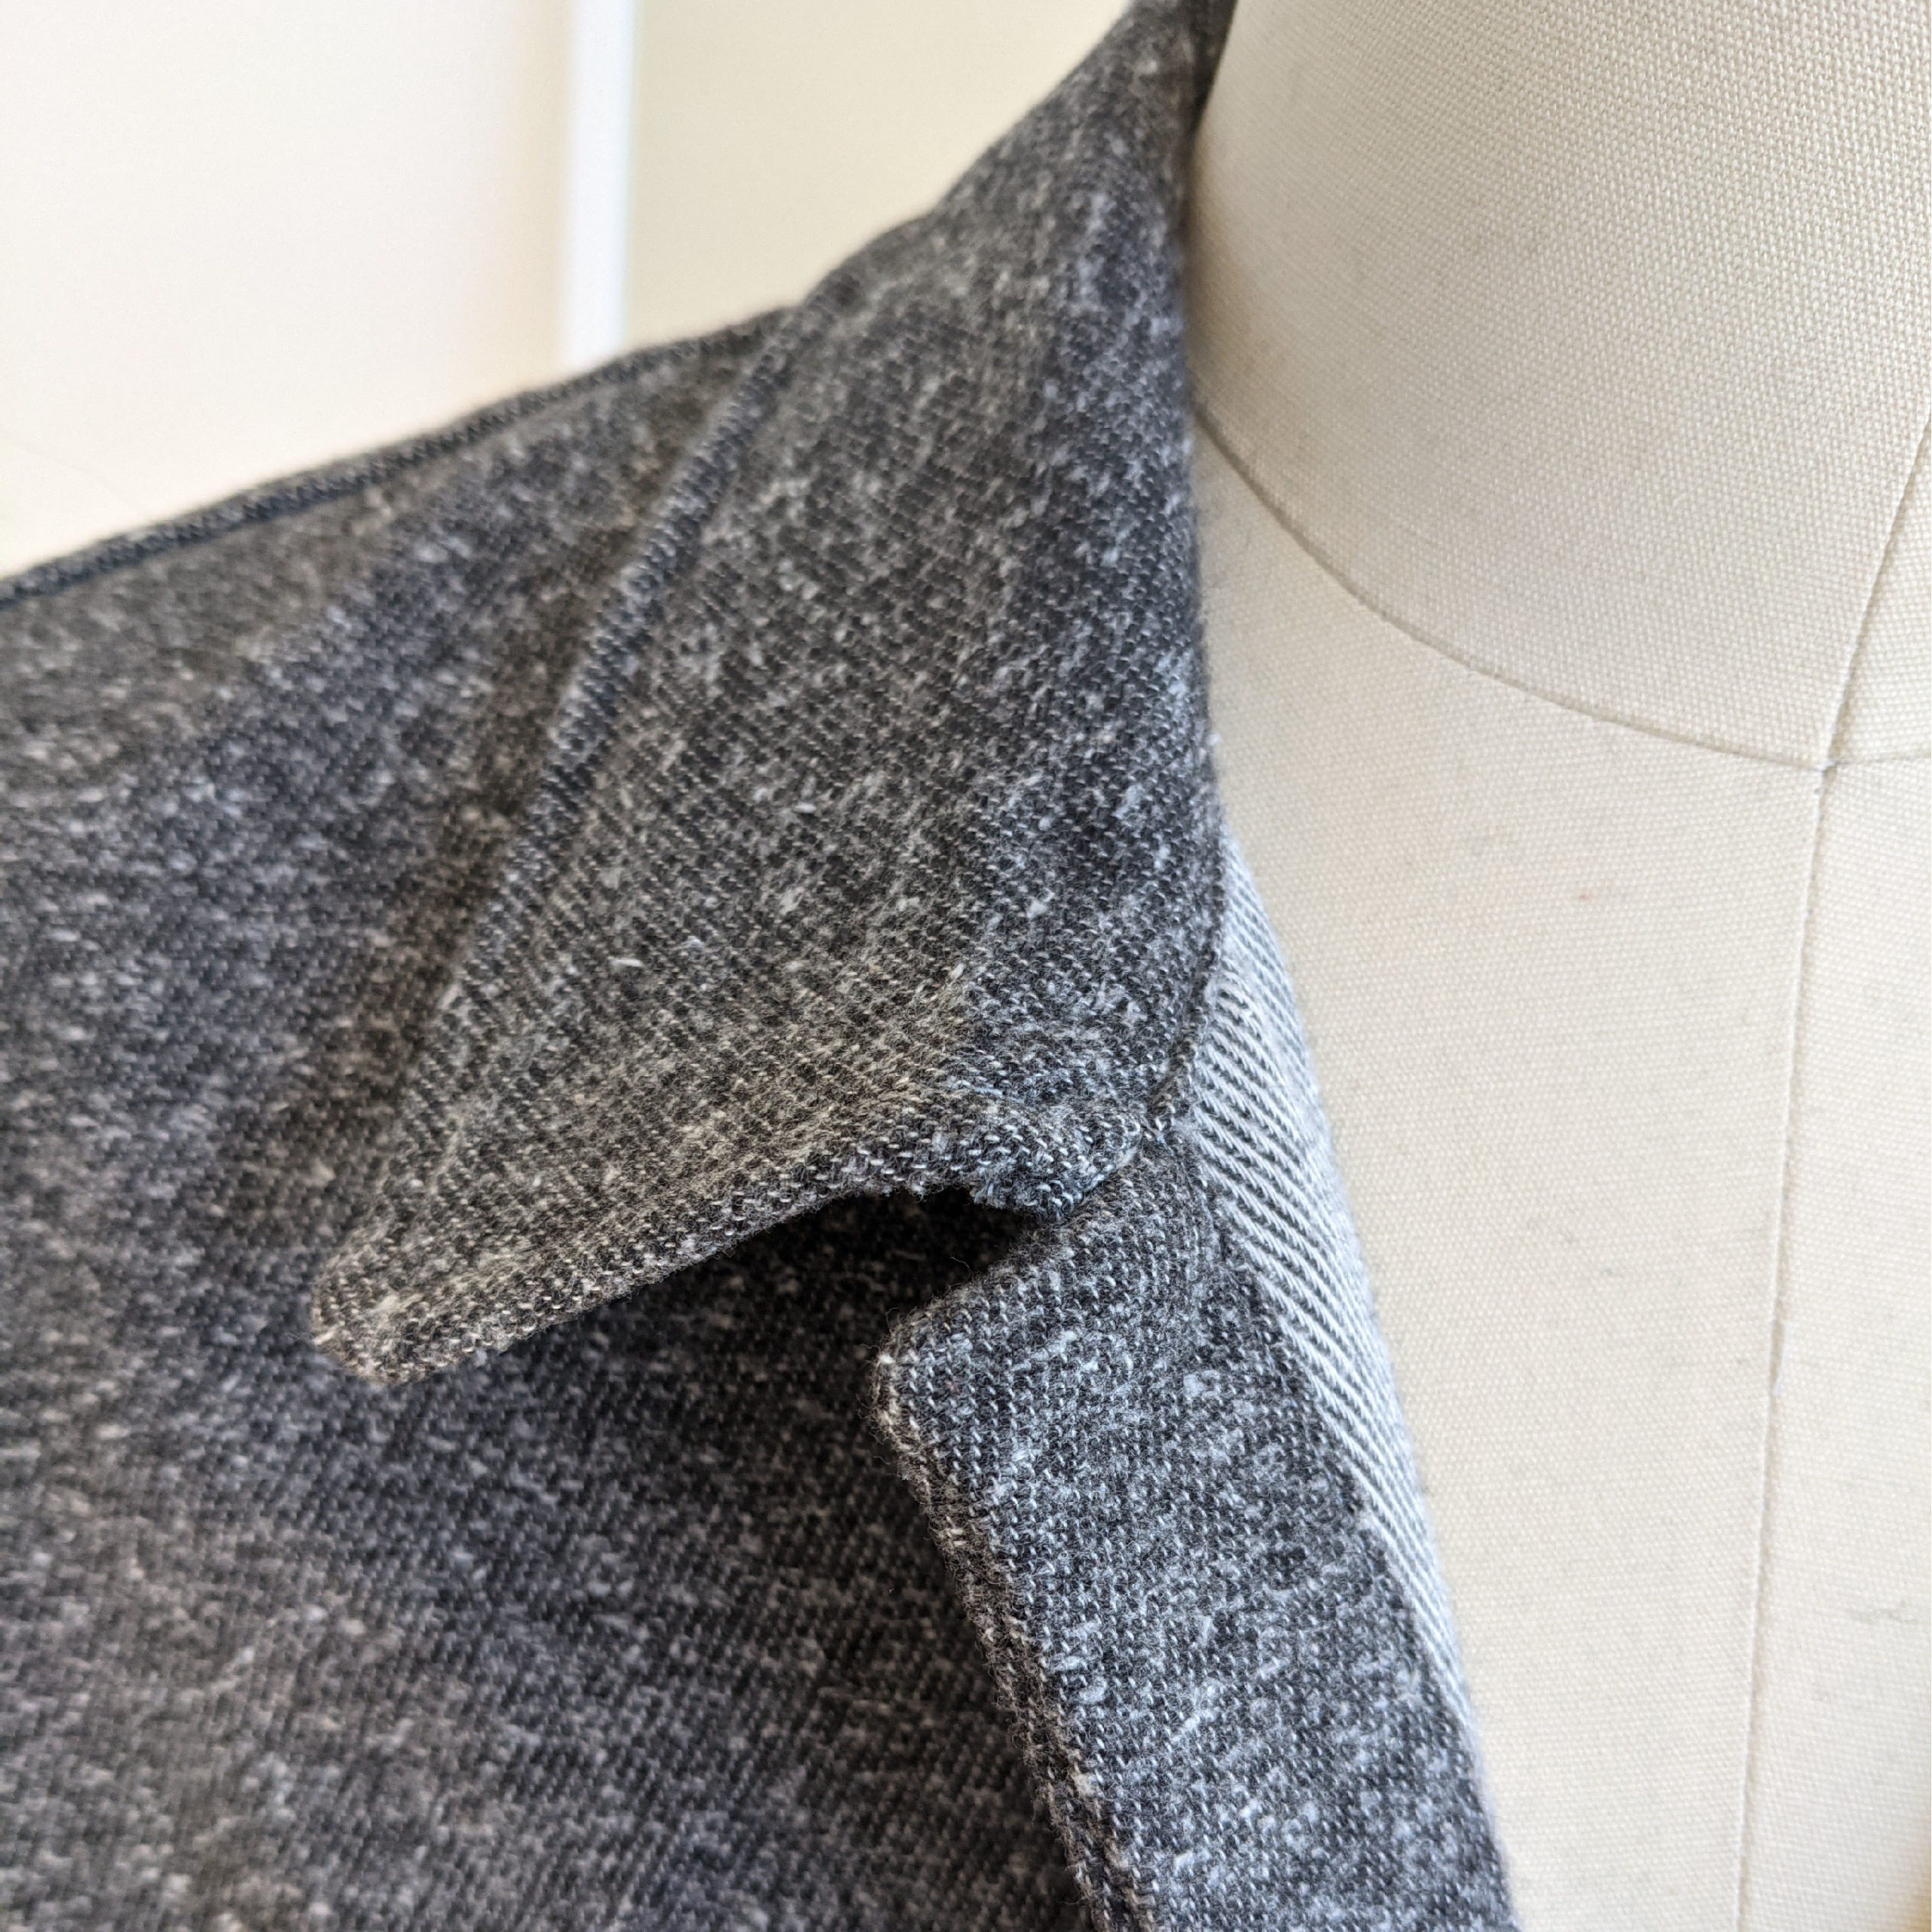
And that’s it! Just turn your collar to the right side of the shirt and steam the roll in place well. Once you practice this method a time or two, I think you’ll really love it. It’s no replacement for a beautiful stand in a more traditional shirt, but it really is fun to sew and wear for garments where it makes more sense to have a one-piece collar.

Okay…. but where is the pattern for this? Or is it me?
lol! You ladies are too quick! I had to post this blog post first so I could insert the URL in the pattern. It’s up now! I love the enthusiasm 🙂
We want the pattern! We want the pattern!
lol! You ladies are too quick! I had to post this blog post first so I could insert the URL in the pattern. It’s up now! I love the enthusiasm 🙂
Thank you for this tutorial! Reading through the instructions (weird thing for me to do, but anyway), I was rather perplexed. I’m sure it would have come together in the process, but this really helped me visualize the assembly.
Great tutorial! The clipping step makes so much sense seeing your pics and reading your descriptions.
I needed this again today, unlike how I needed a new shacket and a hole in the head.