You’ll all be shocked to find out that during testing, Loni sewed up no fewer than 5 different Greer Jumpsuits, including some fun hacks! This was a favorite for everyone so she agreed to share a full tutorial with us. Thank you Loni!!!
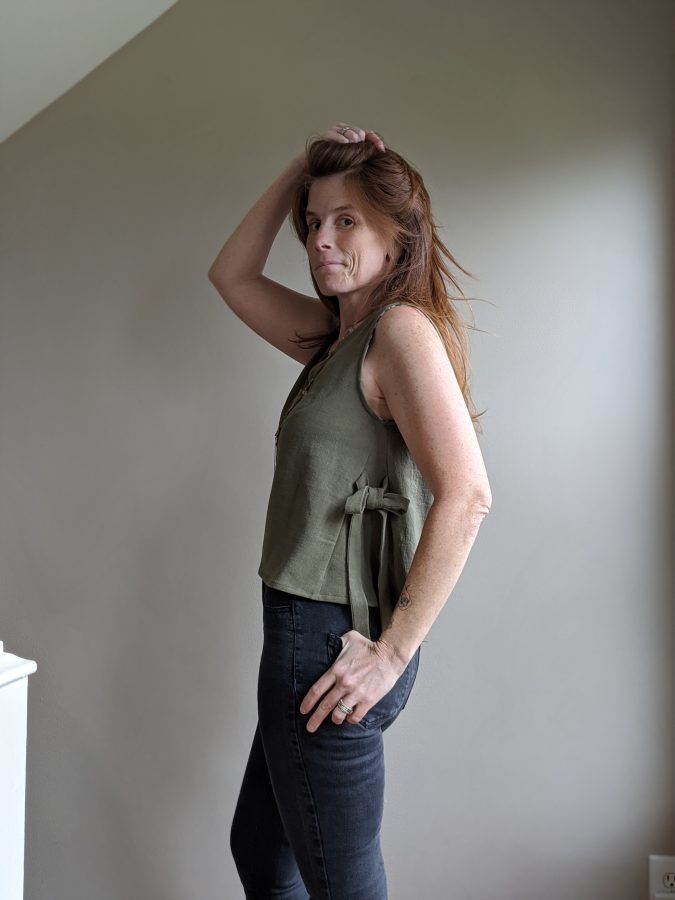
Hey, friends. I’m really excited to be back on the HJ blog with a pattern hack for you. My inspiration comes from a Madewell top I noticed while the Greer Jumpsuit was in testing.
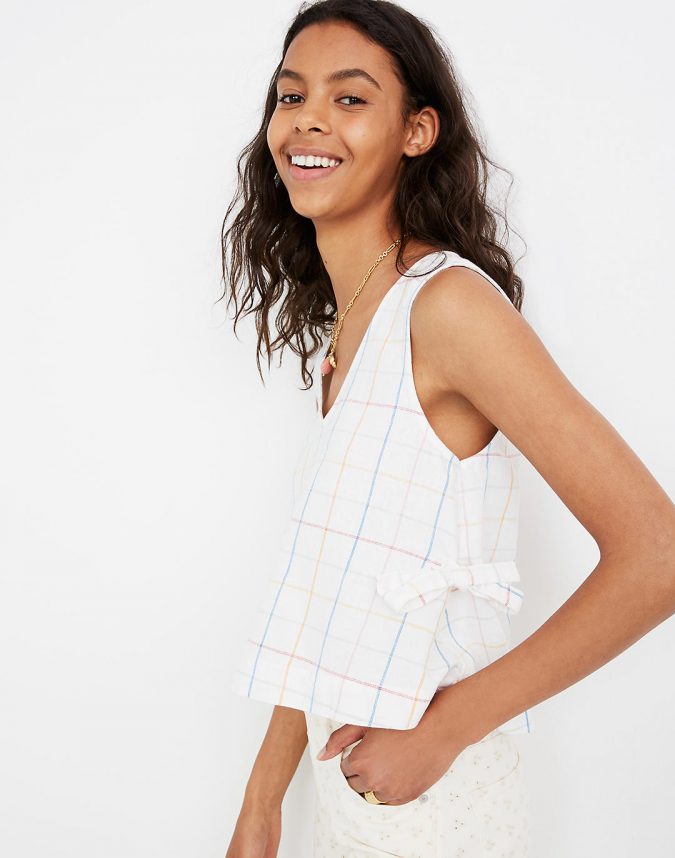
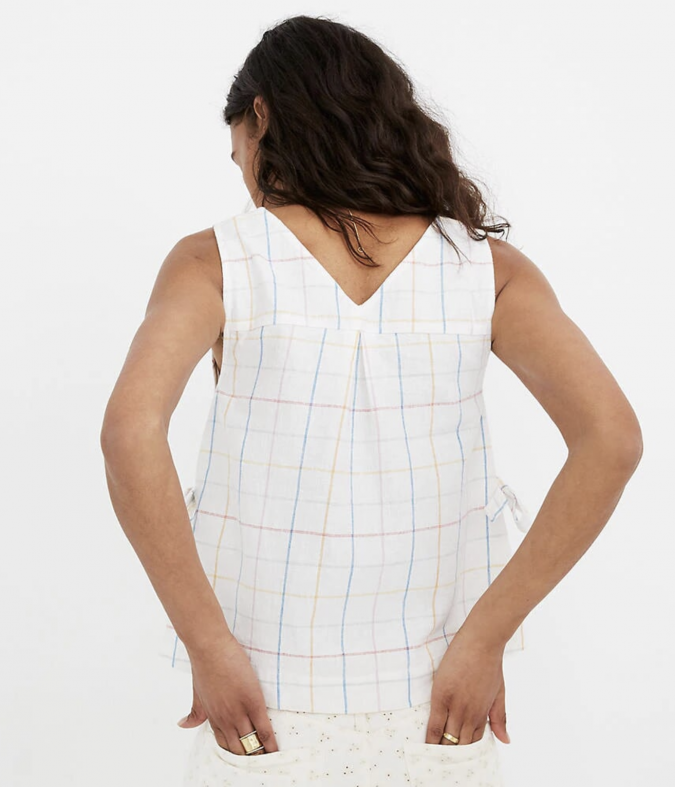
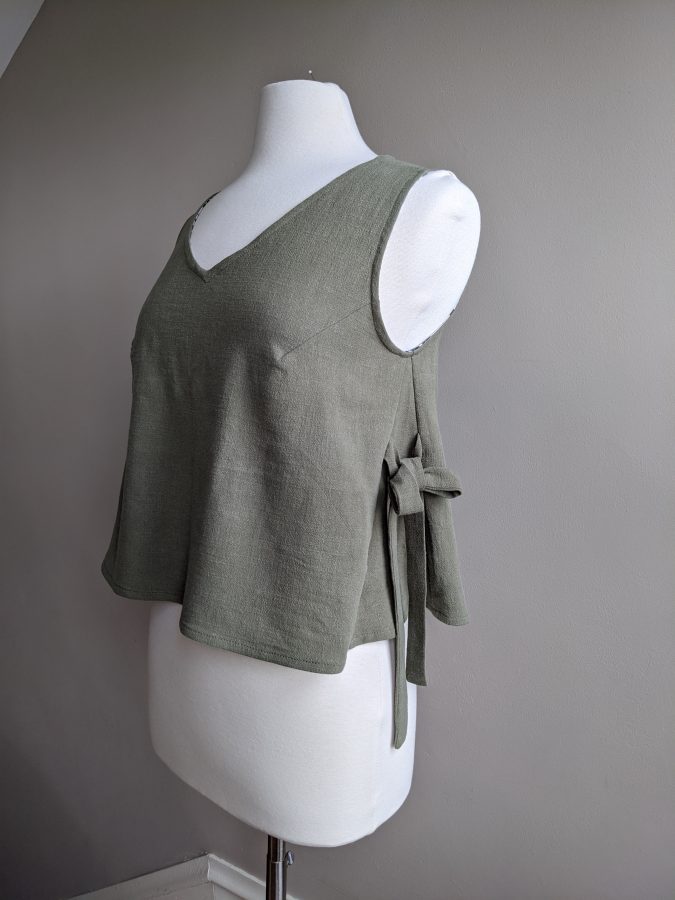
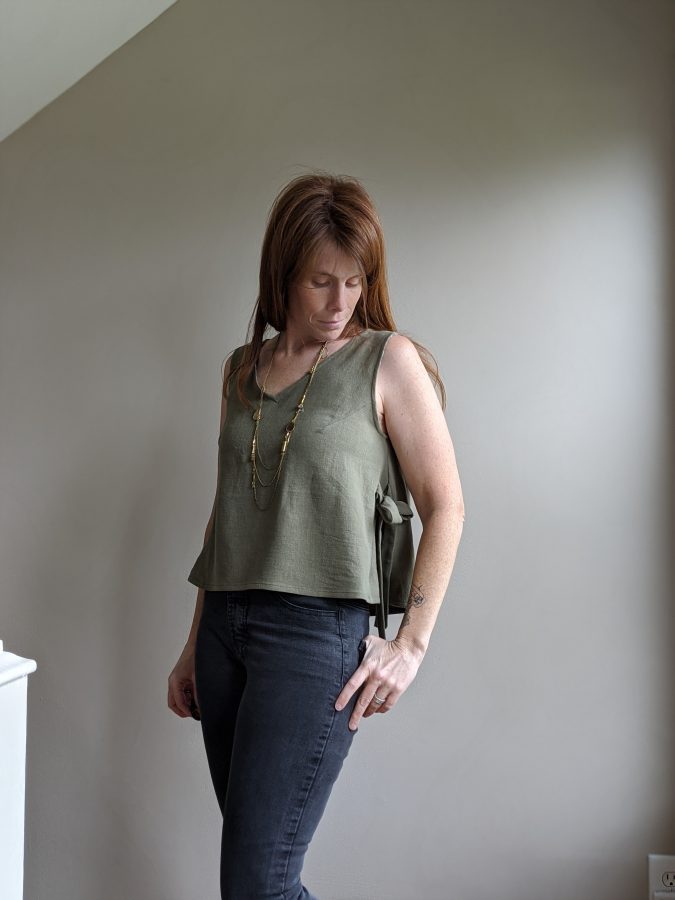
All we need to is straighten the side seams of View A’s top, eliminate the center front and back seams, design a back yoke, add a wedge shaped gusset, and create simple ties. I skipped the V shape for the back neckline (because I forgot) but that’s also a simple alteration if you want to include it.
Here we go – print out (or trace, if you’re old school) the top portion for View A. Determine the length you want. Include a hem allowance. For reference, I’m 5’5” and my top finishes at 19.5″ from shoulder to hem. This is a nice cropped length on me.
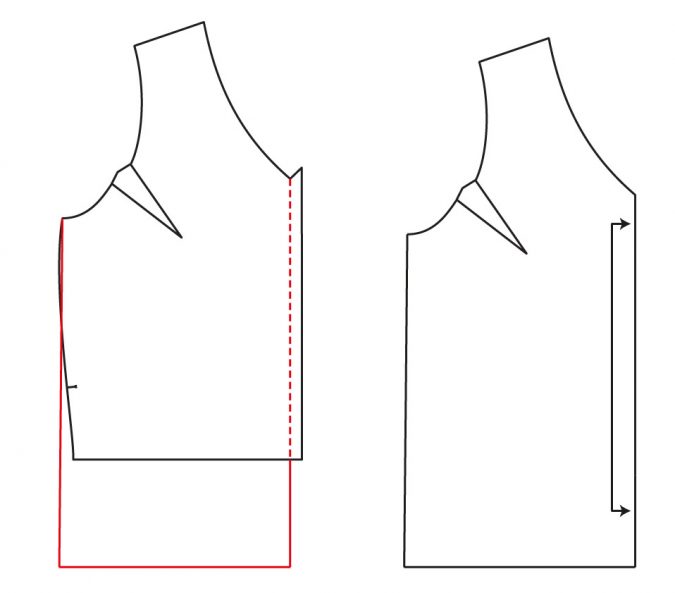
Straighten the side seams of the front and back from the underarm point, keeping the side seam lengths even. Remove the 1/2″ seam allowance from the center front and back (the back will just become a straight line). Draw a line mid-armscye across the back where the yoke seam will eventually be placed.
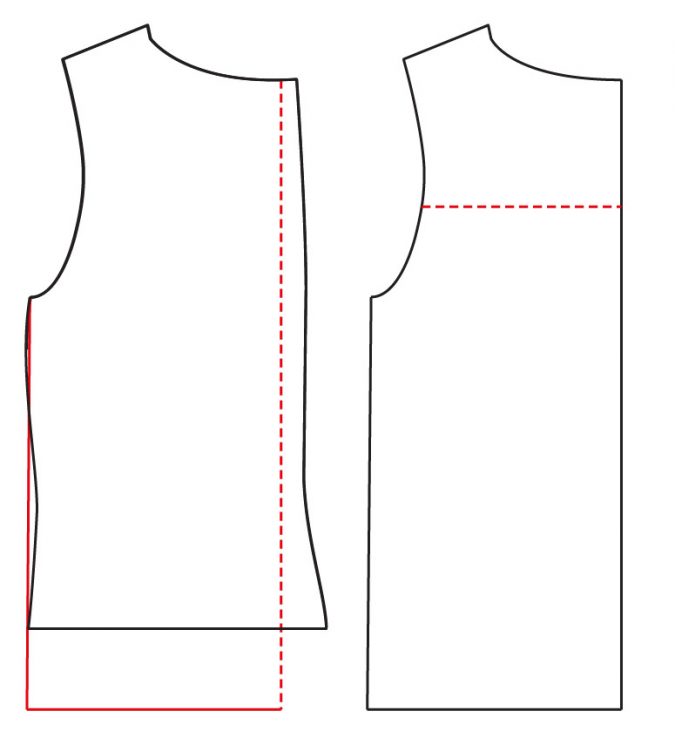
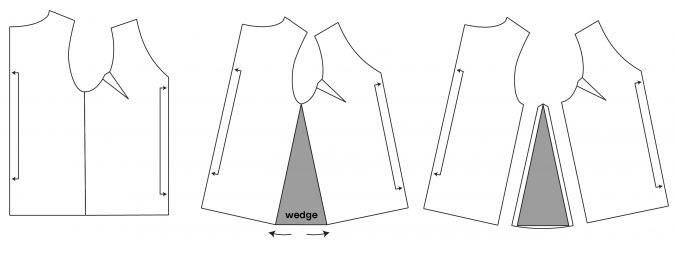
For the gusset we essentially slash and spread the area at the side seam and create a wedge. The wider the wedge, the swingier the top will be. The minimum amount of width including the front, back, and both wedges needs to have enough ease around your body where the hem hits. A minimum total of 6″ at the waist and 8″ at the hip is a good guideline, but for a truly swingy top you’ll want to add more. Experiment by measuring the hem and comparing it to your body or holding the pattern pieces up to your body to get a good idea. Note that you will also be adding width to the back hem with the pleat later. Create a gusset pattern from the wedge. Add seam allowances to the side of the gusset and curve the bottom slightly.
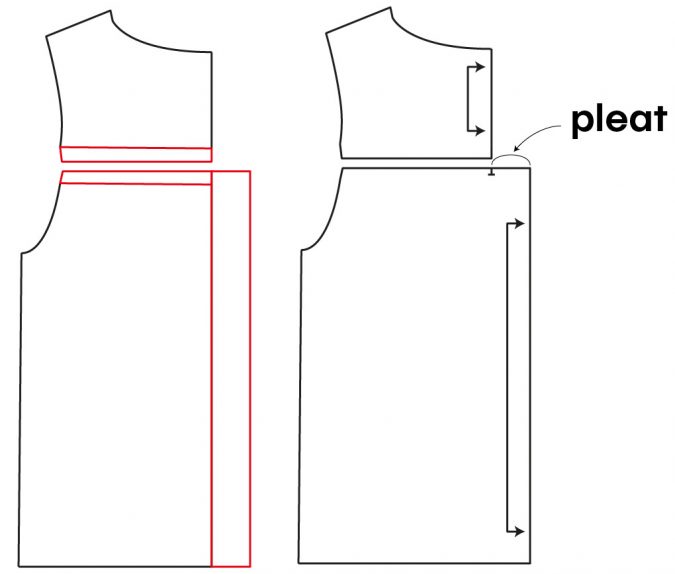
For the back, create the yoke by cutting across the horizontal line from the mid armscye to the center back. Add the seam allowance above and below this line. Often a yoke has 2 layers; the yoke and its lining. Since we’ll finish the armscye with bias, I choose to keep the yoke single-layered so as not to add bulk. Add as much width as you want to the lower back for the pleat. I suggest 1-2″ from the center line depending on how much ease you like. Both pieces will be cut on the fold.
The fabric for the ties I created measure 4″ x 19″ (cut 4). Fold these right sides together along the length and sew across one short end and along the full length. Turn and press. Top stitch if desired.
Sew darts as per the directions.
Place the open end of a tie 4 inches down from the armscye between the front piece and the side gusset. Stitch and finish this seam. Repeat for the other side.
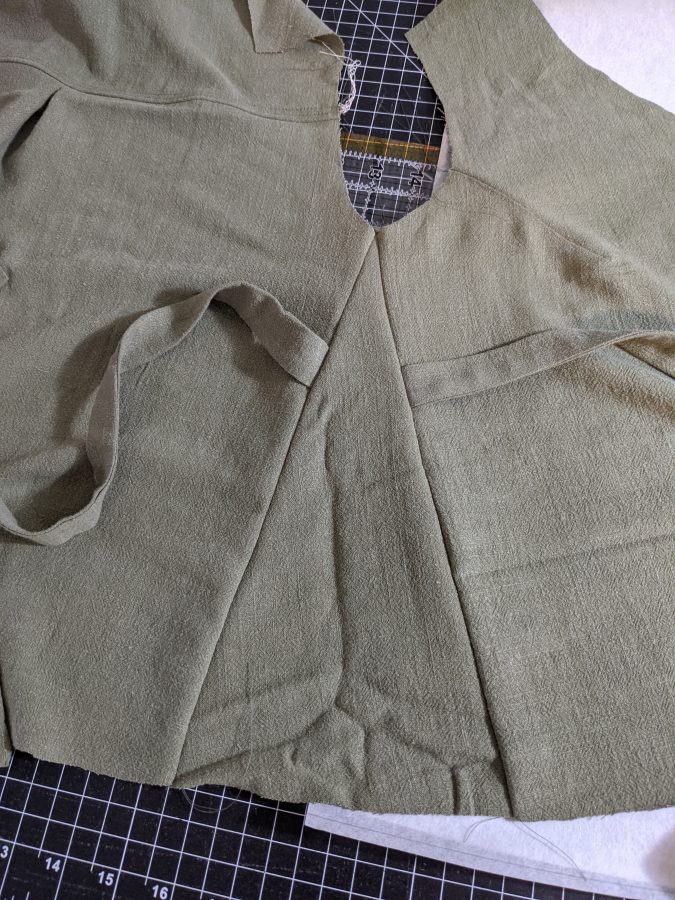
Create a pleat from the added ease in the lower back. Sew the yoke to the lower back and finish the seam.
Join the back to the gusset with another tie placed as above. Repeat for the final side and tie.
Join the front and back at the shoulders and finish the seam.
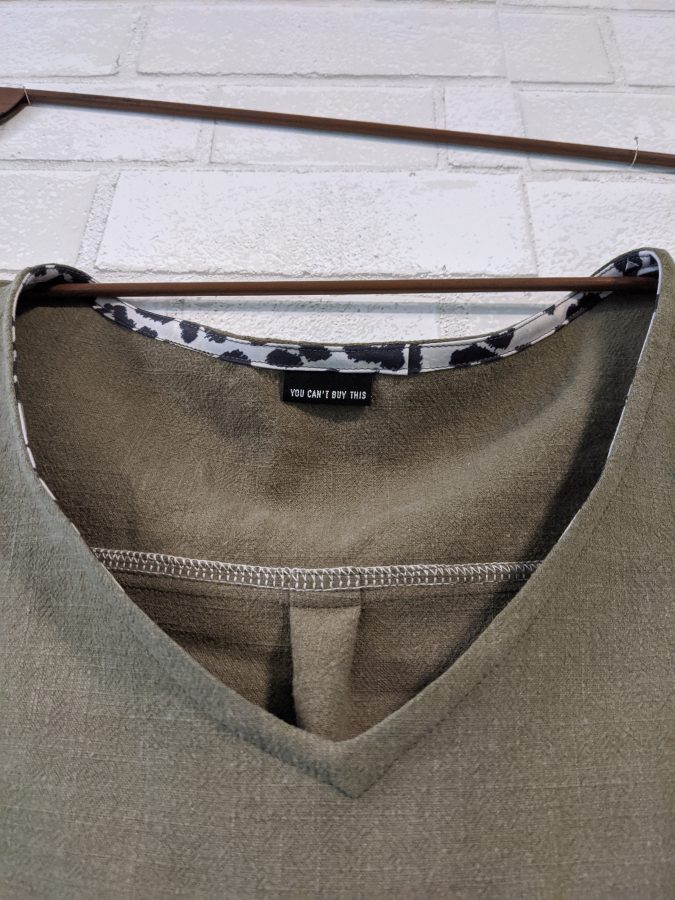
The neck and armscye bindings follow the pattern instructions as written.
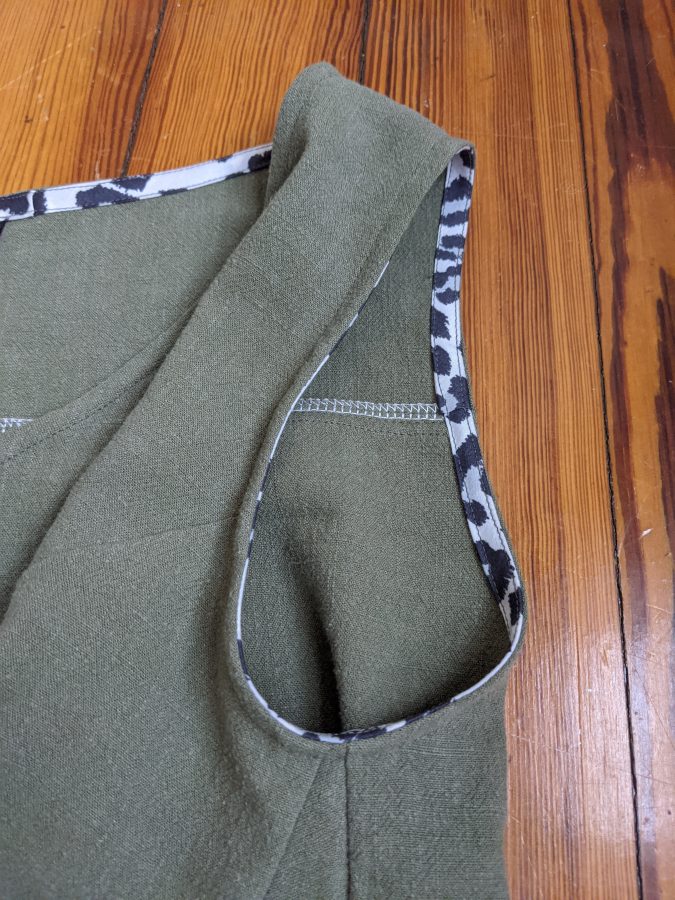
Hem and you’re done!
Do a nice little twirl in your swingy new top.
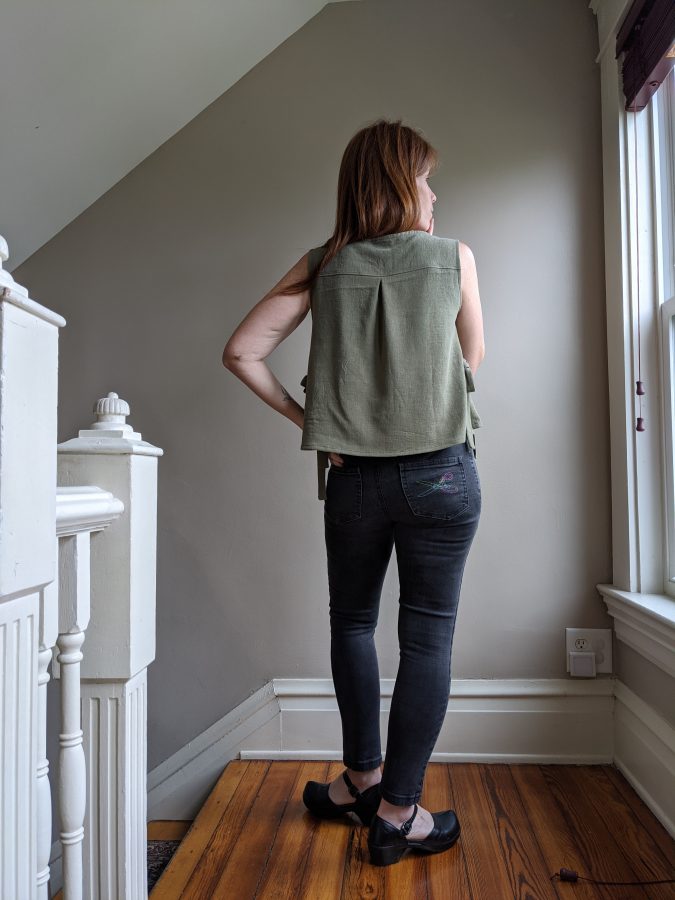
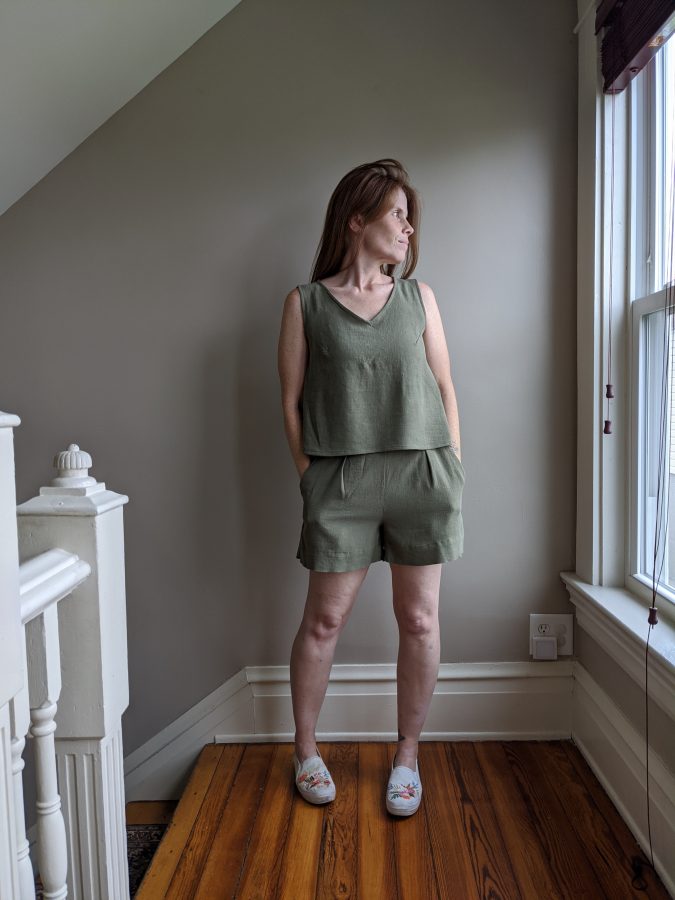
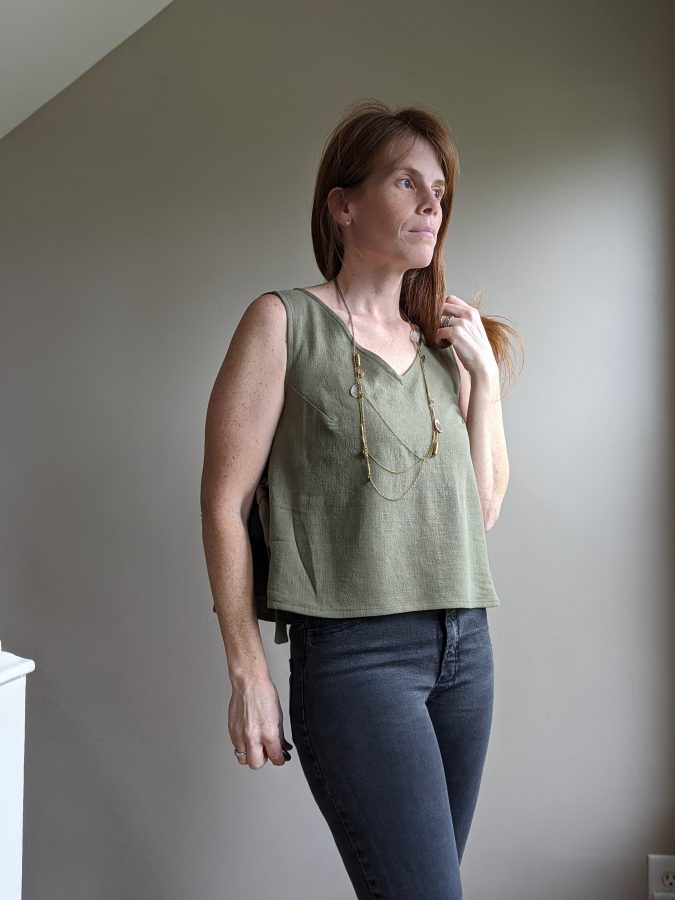
She’s great styled with “hard pants” like jeans or a coordinating pair of shorts for lounging.
Follow me on Instagram (www.instagram.com/havinsewmuchfun) for more sewing fun and probably beer.
Best, Loni
Loni used the delicious Telio rayon linen slub for her Greer tank, and I love the way it drapes and flows! You could also use a 100% linen or lightweight cotton to achieve the body from the Madewell version, just note that it won’t fall the same way around your body. As Anna Maria Horner taught us – it’ll drape like air, not like water 🙂
Thank you so much, Loni!

Lovely website. I just found it, and now it’s bookmarked! Keep wearing and sharing your beautiful works of art!
Love your pattern instructions. Nice seeing how clothing looks close up. Great details