
People who say that online friends aren’t real friends just have no idea what they’re talking about. I first “met” Leslie of Threadbear Garments online because she kept sharing gorgeous sewing projects and I was immediately a fan, but since then I’ve met her in real life 3 times, and she even let my entire family stay at her house during a last minute road trip! You couldn’t ask for a sweeter and more talented friend. I’m so excited that she agreed to be a part of the HJ blogger team, and you should be too, because today she’s sharing the cutest ruffle yoke hack for the Cheyenne Tunic! Perfect for those of you who are already sewing for Spring.
~~~~~~~~~~~
I was overjoyed when I was asked to be part of the Hey June Blogger Team. It’s no secret that I love these patterns and have a special place in my heart for the Cheyenne Tunic. So much that if anyone in the sewing community were to be given a word association test and opened it with “Threadbear Garments”, I’m pretty sure their answer would be “Cheyenne Tunic”. I live in (and rave about) the ones I’ve made. I credit this pattern for teaching me how to sew….and hack!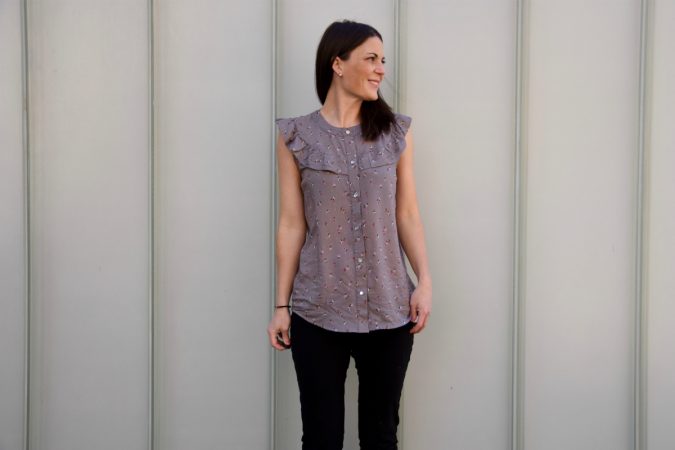
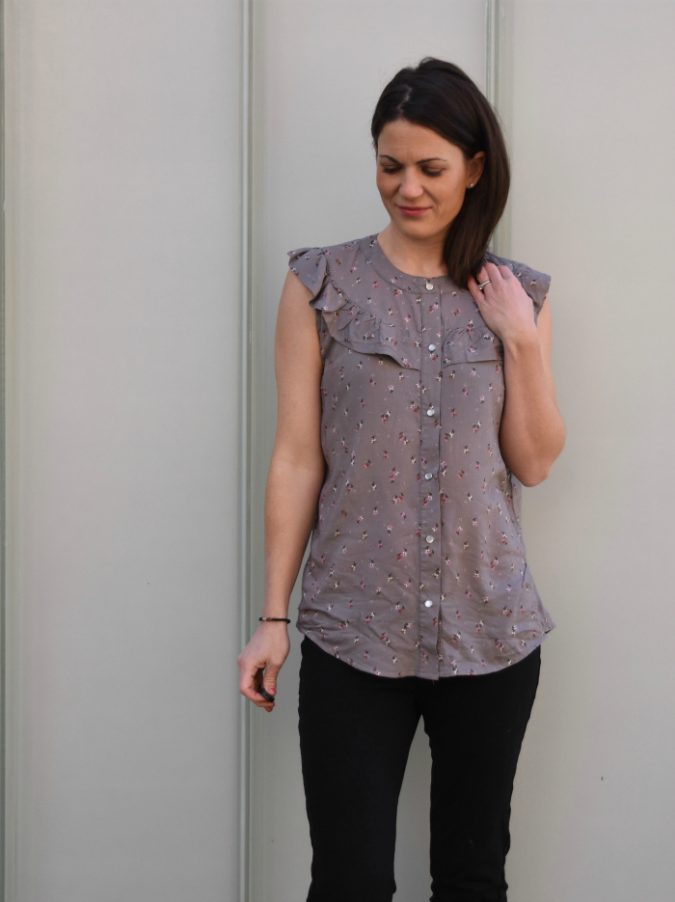
Okay, so, are you ready to transform the rugged, yet chic, Cheyenne Tunic into a ruffly sleeveless blouse? Let’s do this!
Drafting
- Print your size of the Cheyenne Tunic View A. You will only need to print the Front, Yoke, Back, and Collar pieces.
- Tape the yoke and back pieces together, overlapping by 5/8” so that you have one continuous back piece.
- Trace all of your pattern pieces to drafting paper.
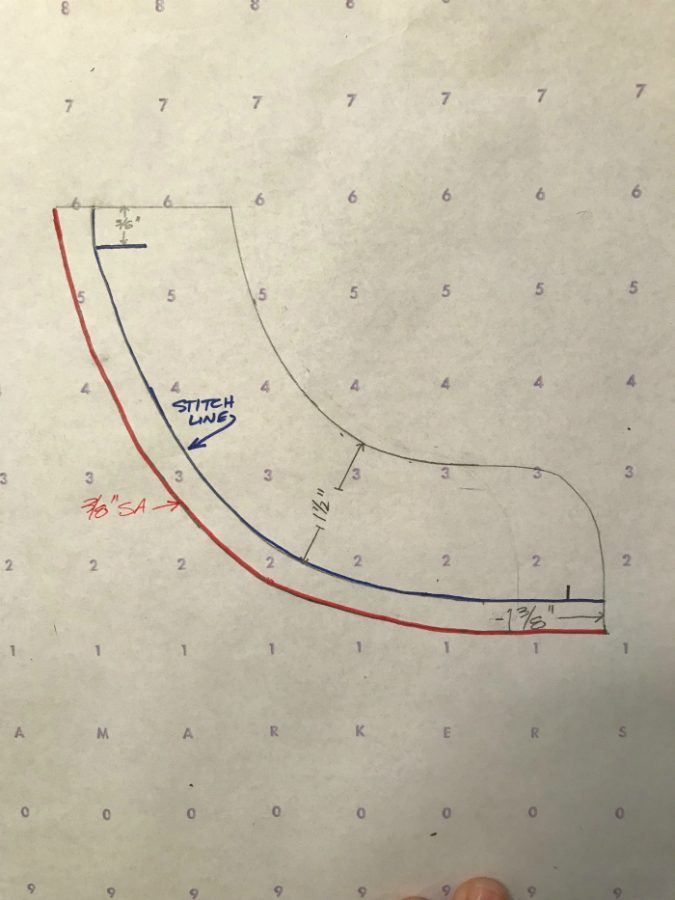
- The Cheyenne was not drafted to be a sleeveless top and so there is some added ease at the bottom of the armscye. I removed 5/8” from the bottom of the curve.
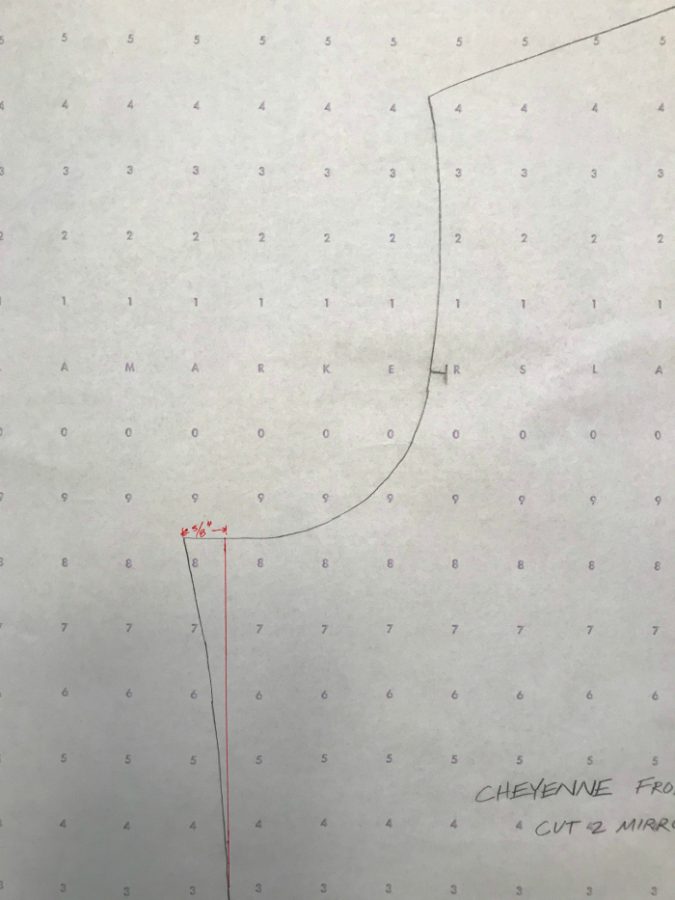
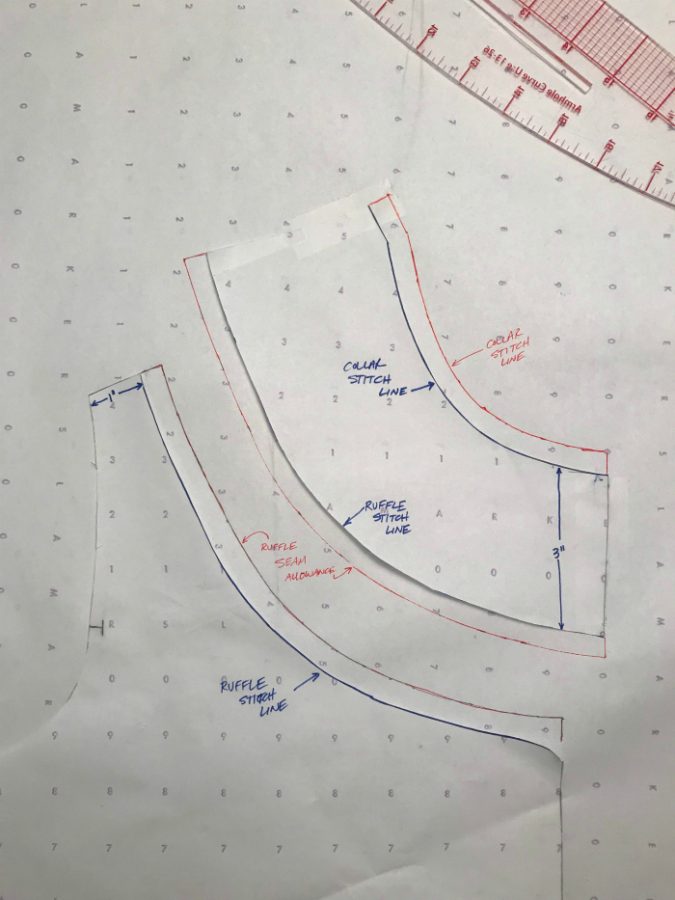
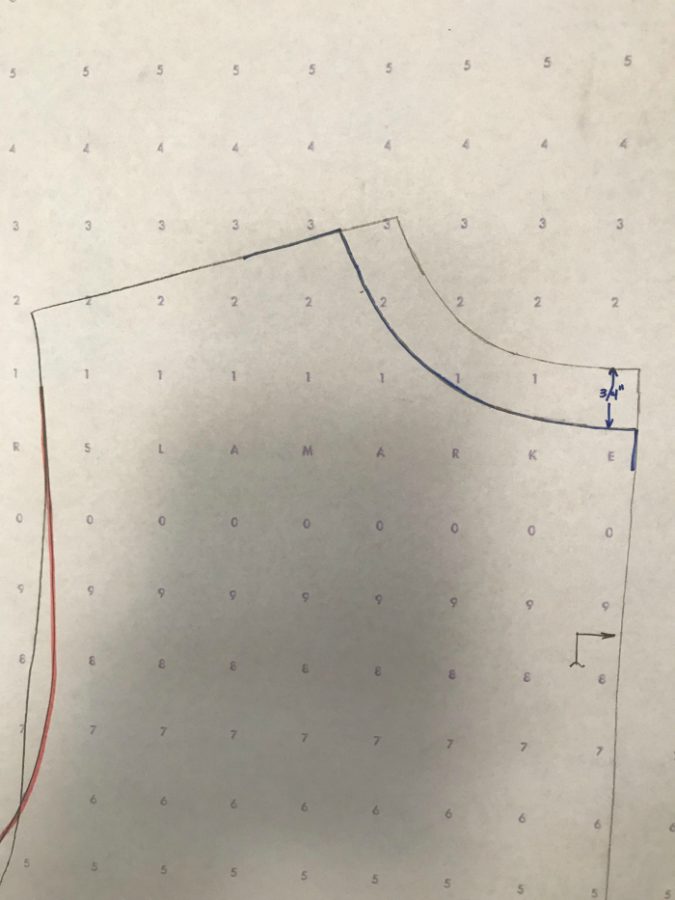
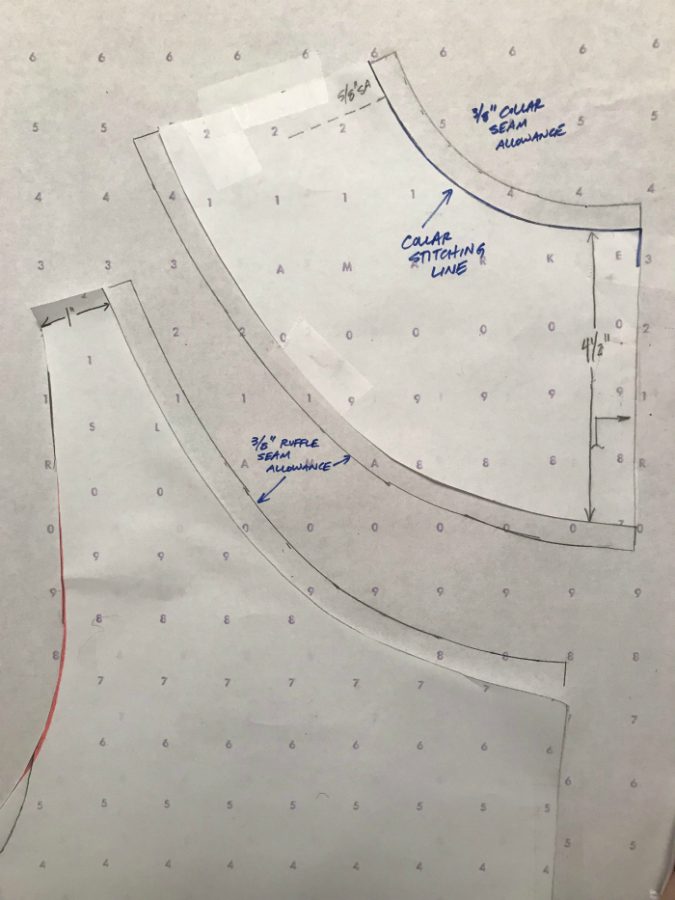
- The neckline needs to be made larger so that the collar stand lays flat instead of standing up. Lower the neckline of the front piece by 3/4”. Add 3/8” seam allowance.

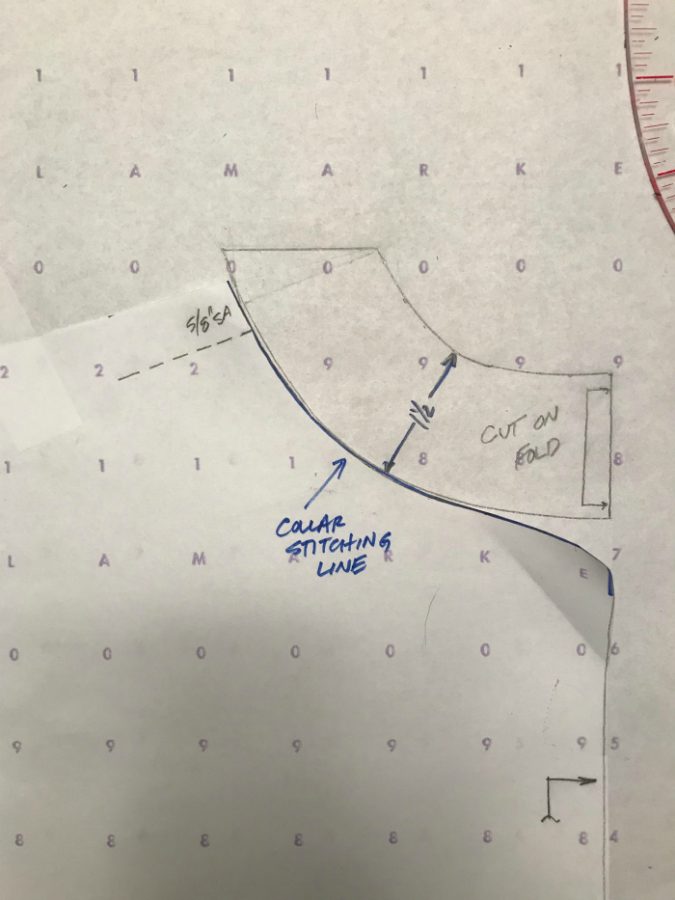
- The collar will be a three piece collar, much like the collar used for View B of the Cheyenne. Use the stitch line you just created for the new neckline to draft the bottom edge of your new collar. Extend the line by 1-3/8” to account for the placket and seam allowance of the collar.
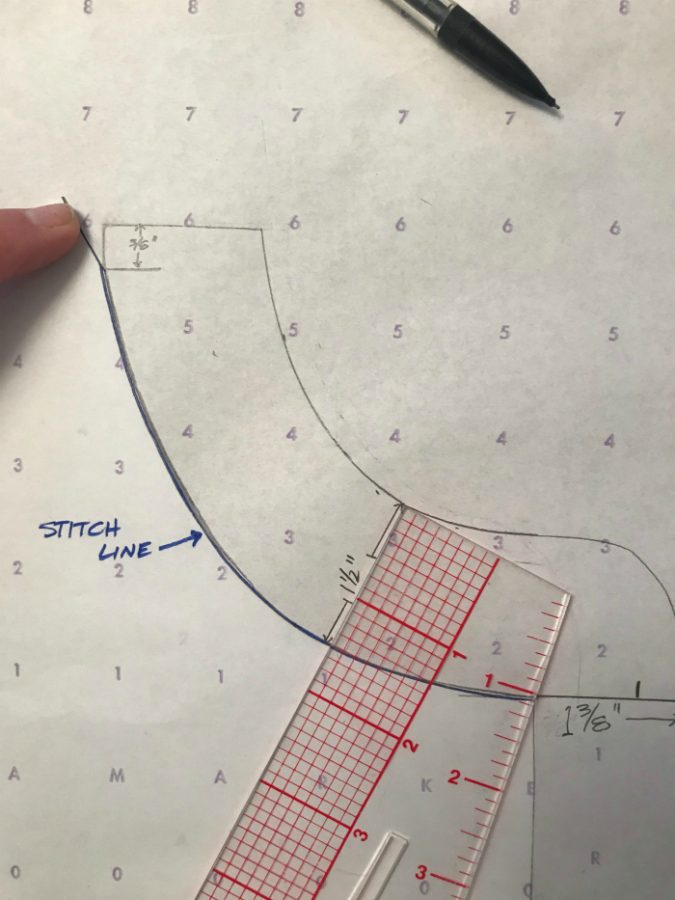
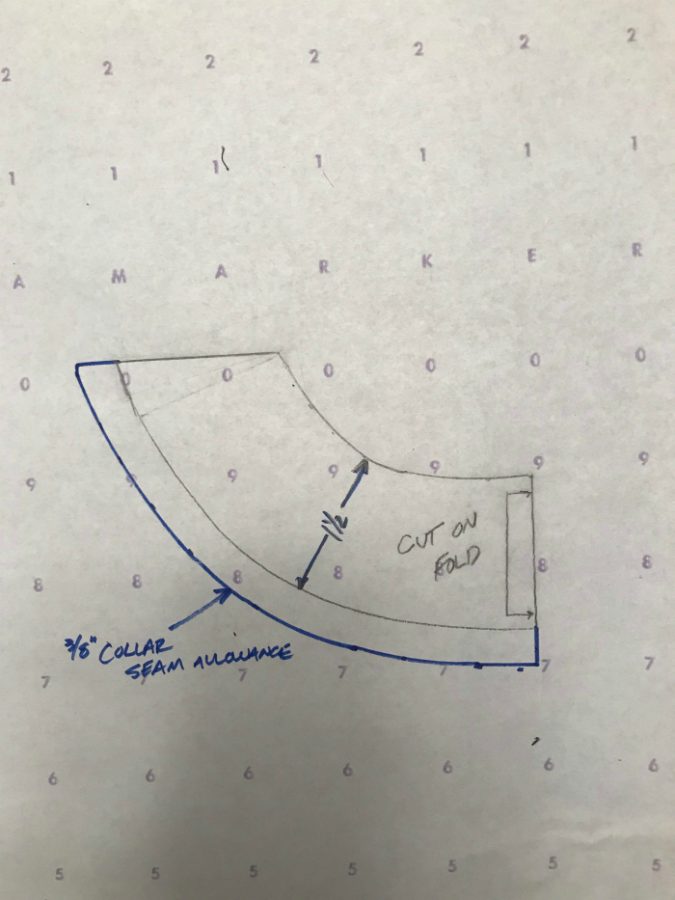
- Use the curve of the Cheyenne collar as a guide for the curve and make the new collar stand 1.5” wide. Add 3/8” seam allowance to the bottom curve.
- Draw a curve for the ruffle placement. On your front pattern piece draw a curved line beginning at 1” from the outer edge of the shoulder slope and ending at 3” from the top of the bodice. This ruffle curve is subject to change and should be checked in relation to your bust point. You probably want the ruffle to fall above your bust point.
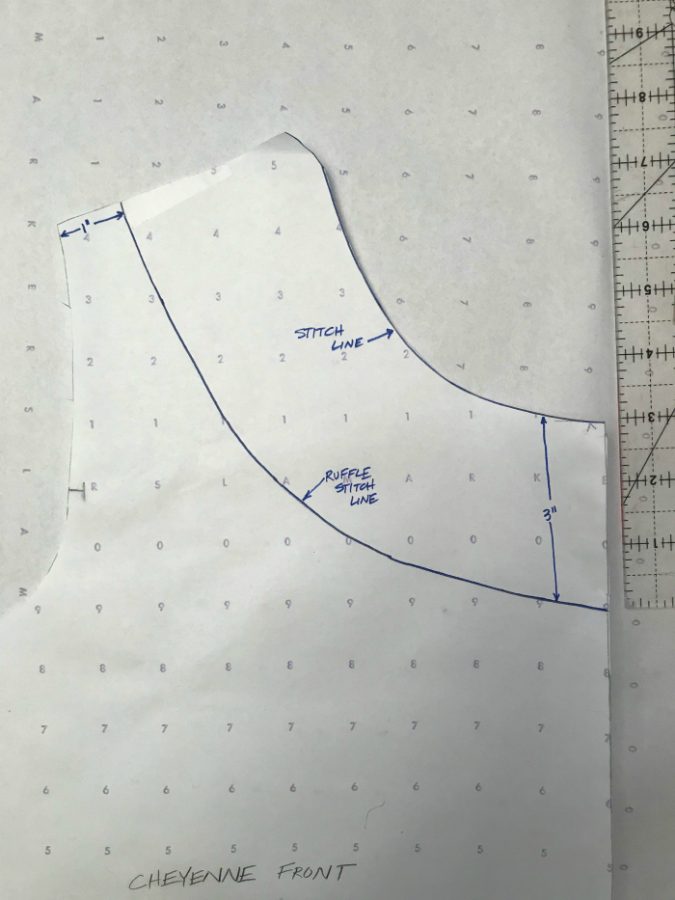
- Cut along the ruffle curve and add 3/8” seam allowance to both pieces.
- Adjust the armscye of the back piece by bringing it up by ¾” and in by ¼”. I also adjusted the curve to come in a bit. This is up to you and optional.
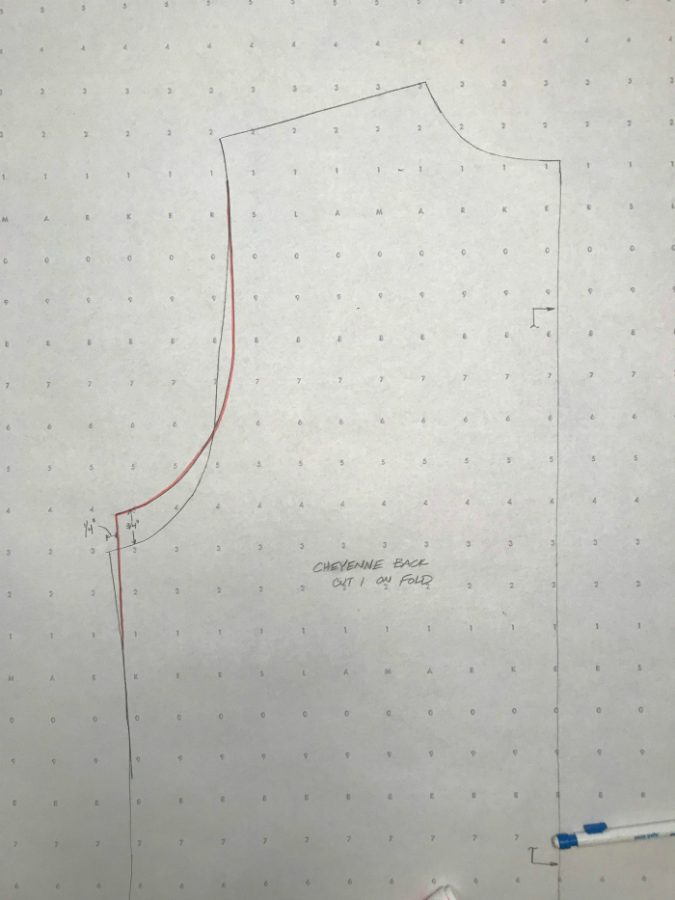
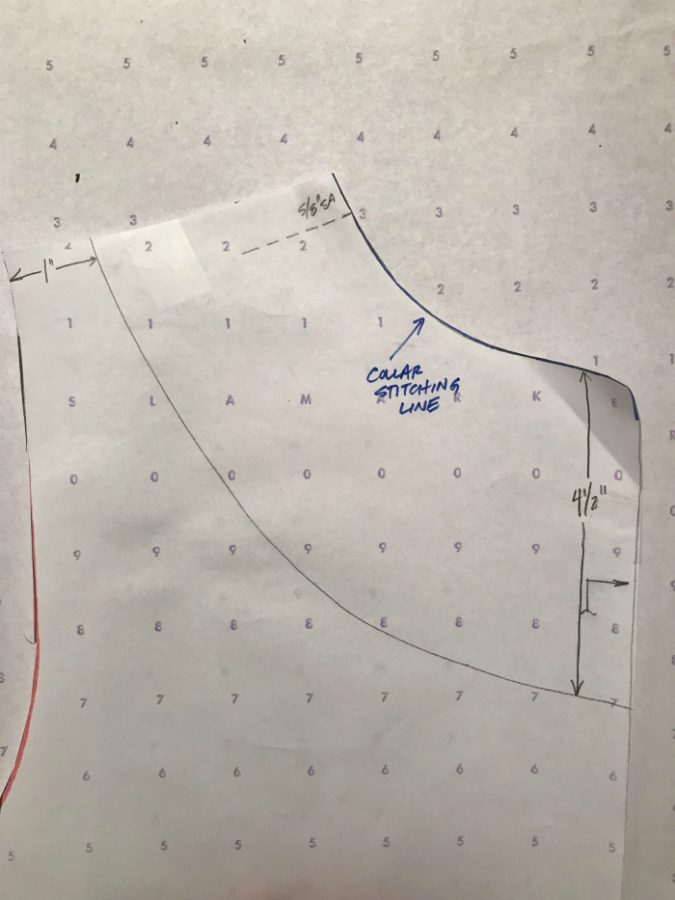
- As you did for the front piece, lower the neckline by ¾” and add 3/8” for the seam allowance.
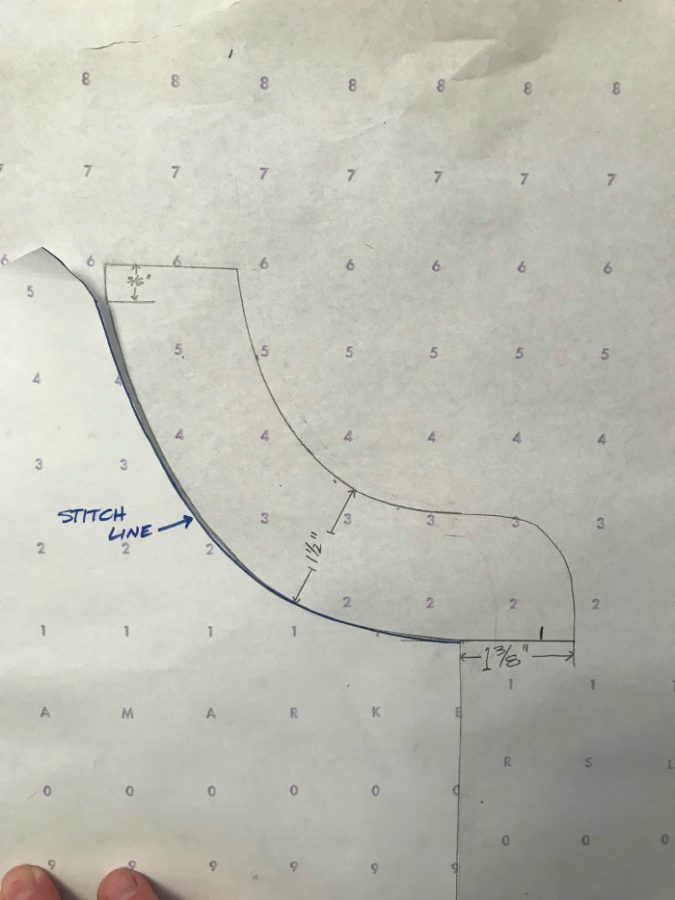
- Similar to how you made the front collar piece. Use the new collar line to draft the collar curve. This will be 1.5” in width. Add a 3/8” seam allowance to the bottom edge.
- Take your back pattern piece and add a curve for the back ruffle. Start the curve from the same distance from the outer edge of the shoulder slope that you used for the front piece. I took my curve down to 4.5” from the top of the neckline.
- Cut along the curve and add 3/8” seam allowance to both pieces.
Construction
- Wrong sides together, sew the lower front and lower back piece together at the shoulder seams using a 5/8” seam allowance. Trim to 3/8” and serge. Press towards the back.
- Wrong sides together, sew the upper front and upper back piece together at the shoulder seams using a 5/8” seam allowance. Trim to 3/8” and serge. Press towards the back.
- Using the pieces you just sewed together. Measure the total distance of the curve for the ruffle. Multiply by 1.5 for the length of your ruffle piece.
- Determine the width of ruffle that you’d like. Mine had a finished measurement of 2”. Whatever length you want, multiply this by 2 and add ¾” for seam allowance.
(Alternatively, you can do a double rolled hem on the bottom of the ruffle. For this the ruffle width would need to be: Desired ruffle width + ½”rolled hem + 3/8” SA.)
- Fold ruffle in half lengthwise and press. Serge the two raw edges together. This will help when you’re gathering and attaching the ruffle.
- Sew a gathering stitch at a scant 3/8” from the serged raw edges. Gather the ruffle to fit the ruffle curve.
- Starting at the center front, working around the back curve and ending at the center front, pin the gathered ruffle to the lower bodice pieces and baste into place.
- Sandwich the basted ruffle between the lower and upper bodice pieces. Pin the pieces together and take care to match up the shoulder seams. Sew together at 3/8”. Serge to finish the seam and press towards the top of the bodice.
- Follow the instructions of the Cheyenne pattern for construction of the placket. A small portion of the ruffle will get sewn into the placket. I just made sure there wasn’t any ruffle in this part to avoid bulk.
- Follow the instructions of the Cheyenne pattern for construction of the collar.
- Sew side seams together at 3/8”. Serge to finish and press towards the back.
- I bound the arm holes using the method in the Trevi Top and Dress pattern however, feel free to bind them any way you like!

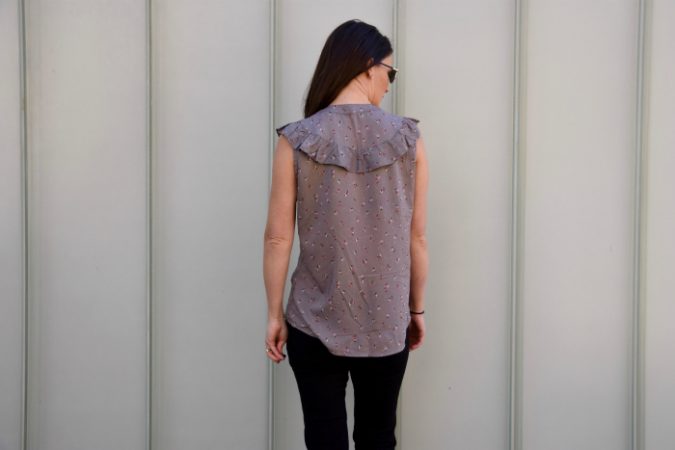
Woo, I think that’s it! It’s actually an easy hack once you get going on it. I’d recommend that you do a muslin of this though and make sure your arm curves are where you want them and the collar is at a good place too. The changes made above worked for me, I just want to make sure these steps work for you as well. Feel free to tweak seam allowances and measurements as you see fit!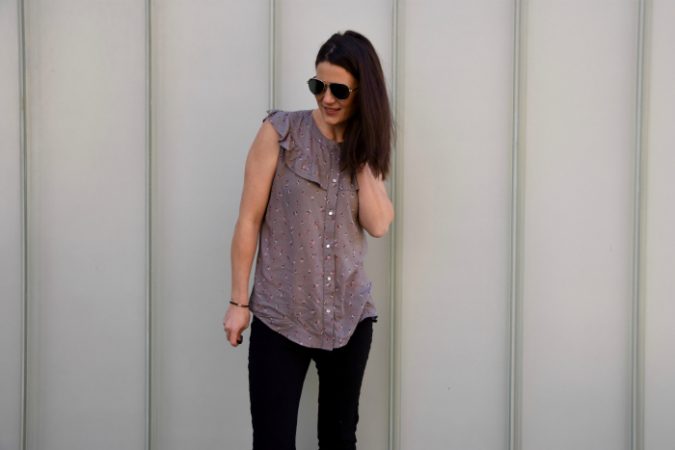
Happy Cheyenne Hacking!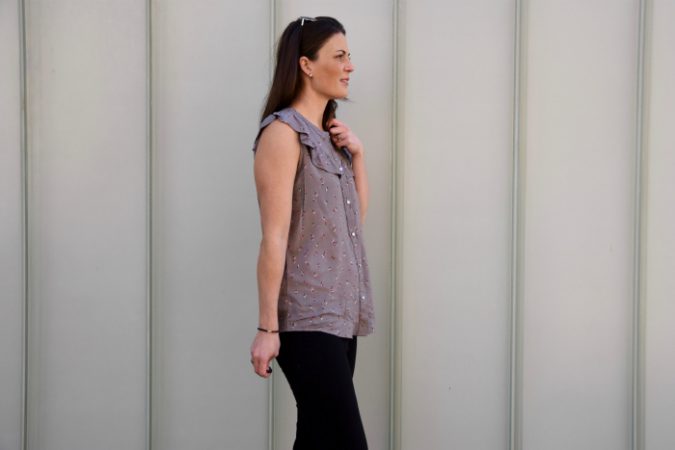
~~~~~~~~~~~
How GORGEOUS is that hack?! I can’t believe it started out as a Cheyenne! Thank you for sharing your hacking skills with us, Leslie!!
Totally loving this Cheyenne hack. Not sure how these ruffles would look with my bust, but I’d like to try this.
Asking questions are genuinely pleasant thing if you are not understanding anything completely, except this paragraph offers good understanding even.
Great information. Lucky me I ran across your site by accident
(stumbleupon). I have saved it for later!
Toss on your smartphone and/or wireless AirPods and transfer on along with your
day.
I was wondering if you ever considered changing the structure of your site?
Its very well written; I love what youve got to say. But maybe you could a little more in the way of content so people could connect with it better.
Youve got an awful lot of text for only having one or two
pictures. Maybe you could space it out better?
I was wondering if you ever considered changing the structure of your brain? You have an awful lot of opinions for only 1 or 2 brain cells.