
Happy Monday and I feel like I should add Happy Amalfi Day! Today Lara from Handmade by Lara Liz is sharing her tutorial to turn the brand new Amalfi Dress into a cute peplum top, in the new Amalfi fabric, no less! She was so speedy getting this tutorial out to us just after release, and I know from your comments on social media that many of you were looking for this tutorial, so thank you Lara!
~~~~~~~~~~~
Hi Everyone! As soon as Adrianna was sharing sneak peaks of the Amalfi Dress, I knew that I wanted to hack it into a top. Truth be told, you almost never catch me in a dress – unless I absolutely have to be in one. But a nice top and jeans? Could basically be my uniform (If I didn’t have to wear work clothes….).

The Amalfi Dress is just so feminine and beautiful and is super easy to convert into a fun ruffle top! As I normally am I non-pattern hacker, I was pleasantly surprised how easy it was to sew up the vision I had in my brain.

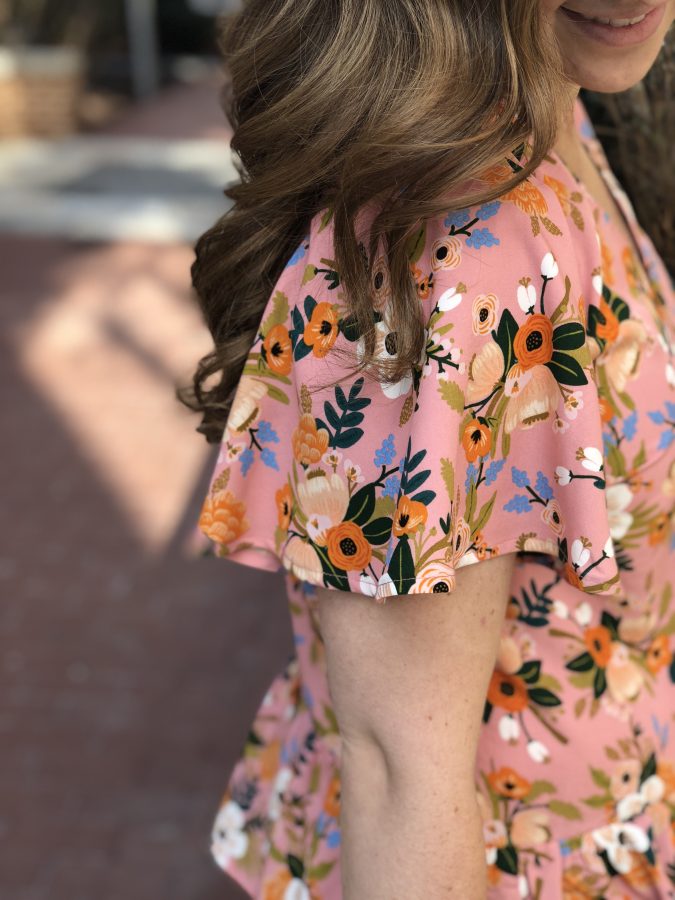
To start, I printed off only the pages that related to the front and back bodice, front and back facings and sleeve of choice. I chose to use the flutter sleeve so the pages I had to print were: 22-25, 28-31, 34-39, and 42-45. If you wanted to make a short sleeve version you would need to print pages 22-37, and 44-45. Once you have the pattern pieces cut out, the next step is to cut out the ruffles. As I didn’t know how gathered I wanted the ruffles, I cut two rectangles on the fold 2x the length of the front and back bodice pieces. This resulted in much longer pieces than I actually ended up using, but it allowed me to have some flexibility in gathering.

Because of the way that the Amalfi is drafted with the elastic waist, the bodice piece as drafted hit me exactly where I wanted the ruffles to begin which made assembly really easy. I would recommend sewing up a quick muslin or measuring out where the bodice would hit you to make sure you don’t want to add or remove length. Now you’re ready to start sewing! You should have the following pattern pieces:
Front Bodice cut on fold
Back Bodice cut on fold
Front Facing + Interfacing
Back Facing + Interfacing
2 Flutter Sleeves (or 2 Short Sleeves)
2 Rectangles cut on fold for the “skirt”
Before you start sewing, make sure to staystitch the neckline! I staystitched mine and it still stretched a bit – don’t skip that step!
Sew steps 1-18 as in the instructions – at this point you have a complete bodice minus the side seams. I chose to sew the skirt portion at this point to give me the most flexibility on the gathers.
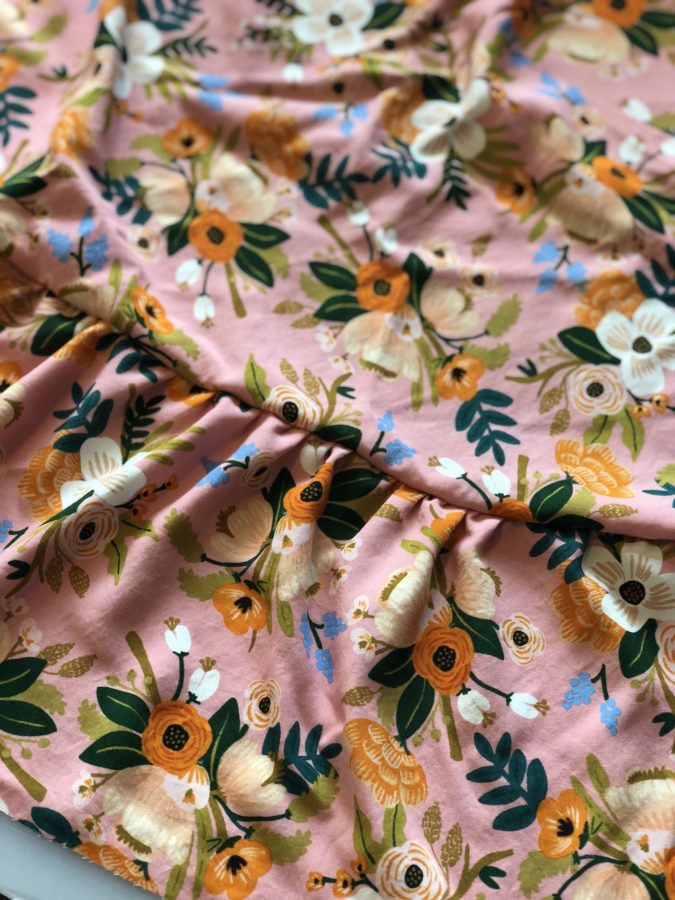
I used a gathering foot at a stitch length of 4.50 to gather both the front and back skirt pieces. I have never used a gathering foot until I sewed this top – I feel like I was missing something
magical! It made sewing very even gathers a breeze. Once I was happy with the gathers I pinned the front and back piece to the front and back bodice and trimmed down the excess skirt pieces.
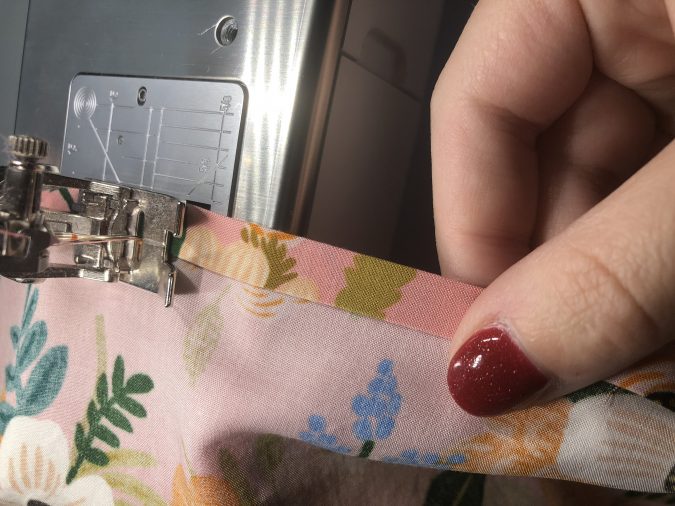
The final steps were to sew up the side seams and hem the ruffle portion. I used a ¼” hem turned under twice. Alternatively you can use a rolled hem on the serger (another baby hem favorite of mine!).
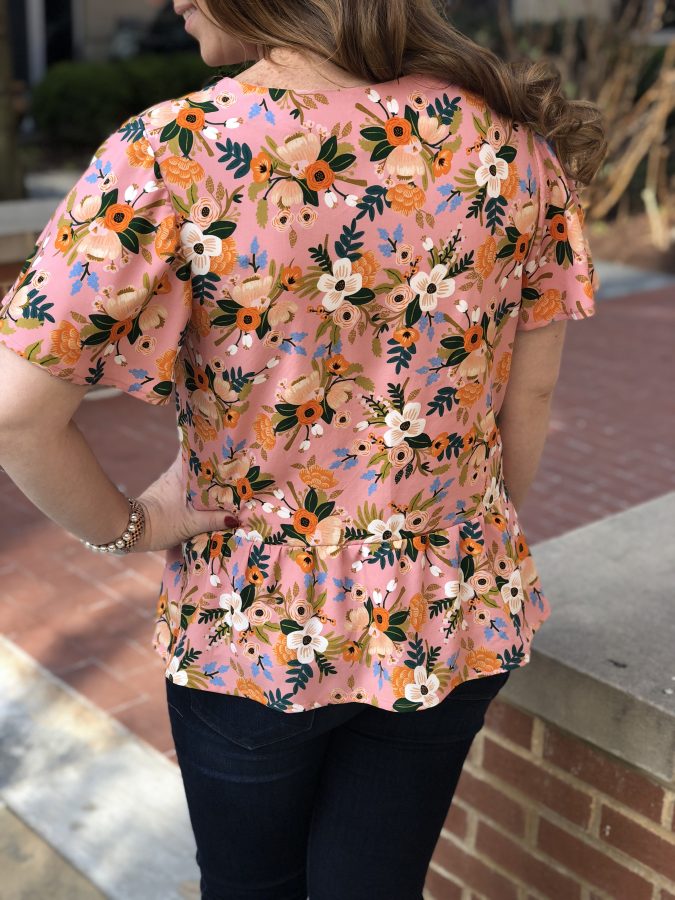
Ta da! You have an Amalfi Peplum Top. Also, I couldn’t help sewing up the Amalfi in the new Amalfi fabric from Rifle Paper Co – An Amalfi in Amalfi? Done! (Did I set a record with the number of time to use the word Amalfi in a paragraph??)

Thanks for stopping by today!
~~~~~~~~~~~
Thank you so much for this very timely post, Lara! I know we all appreciate it!
I absolutely am doing this. I don’t wear dresses much (nursing mom problems) but give me allllll the peplums! Yours is so cute!