
We are all in so much luck because today Melissa from A Happy Stitch is sharing her tutorial to turn the Biscayne Blouse into a dress! As far as I know, nobody has done this modification before and I now find that unbelievable because it is SO great! I need at least 2 of these in my wardrobe – one in a fancier fabric like rayon and one in chambray for every day wear with sneakers!
~~~~~~~~~~~

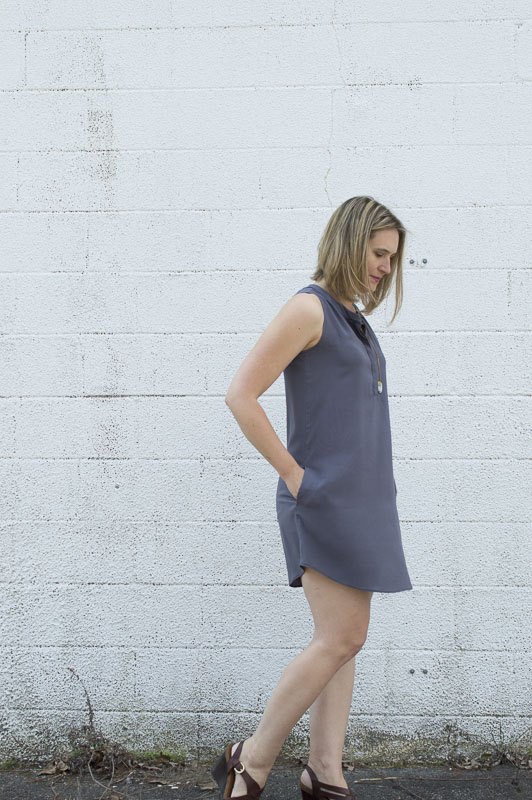
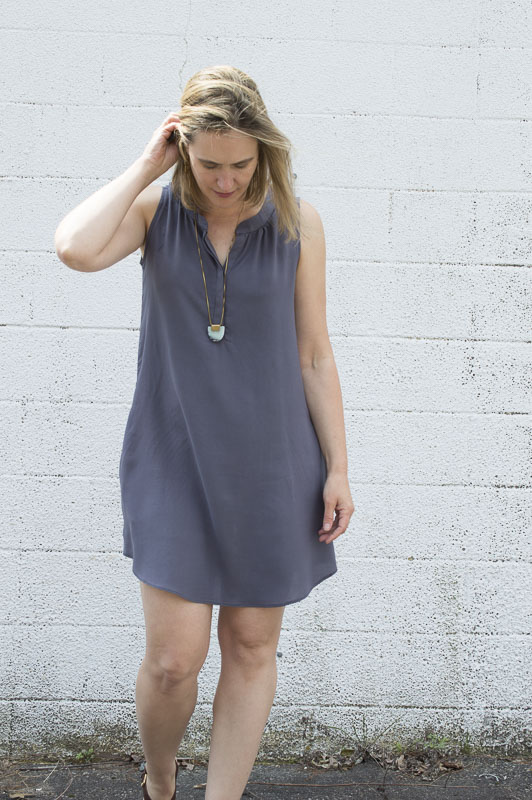
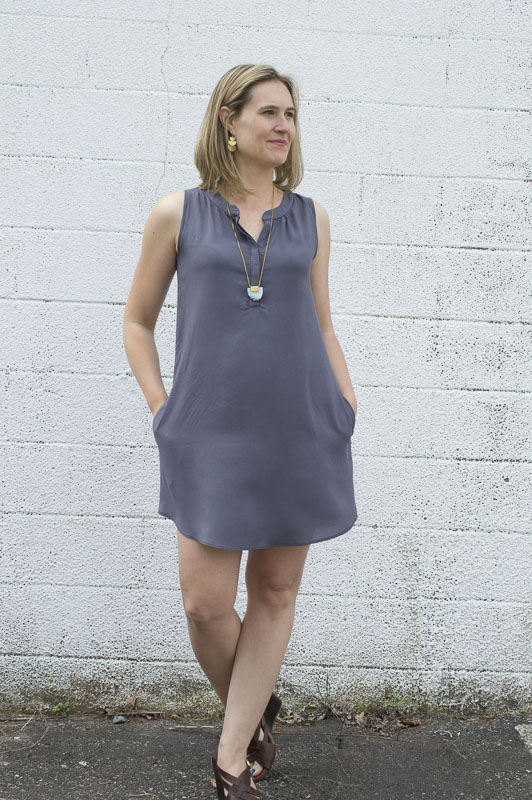
Hey friends! It’s me, Melissa from A HAPPY STITCH, and I’m so happy to be back on Hey June Handmade. This time I am here to share how to lengthen the Biscayne Shirt to a dress and add in-seam POCKETS (with French seams)! This is a pattern hack I am especially excited about because we are planning a vacation to France this summer and I plan on wearing this dress there. Doesn’t it look so ooh-la-la? I’m pretty sure it’s going to be perfect for France because it is comfortable but also classy and I feel like the French are always so dressy while still looking effortless. You know what I mean? This Biscayne dress fits the bill. I made mine in a lovely, washed charcoal rayon and I love how it flows without billowing or clinging.
So, let’s dig into my pattern hacking on this dress/tunic version of the Biscayne.
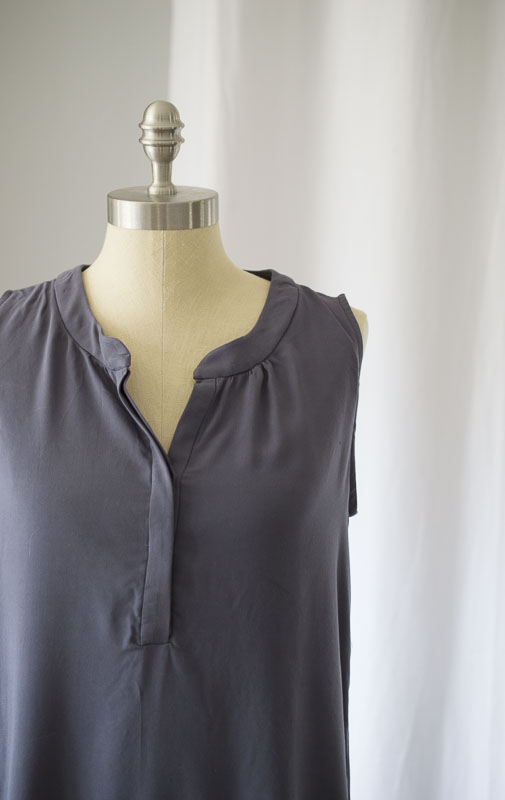
+ First, I wanted to alter the neckline to allow it to gape open a little bit more and I discovered the SIMPLEST way to make this happen. I simply prepared the pattern piece for the neckband one size smaller than the rest of the dress and then added more gathering on the dress body when I went to attach the neckband. Isn’t that easy? Sometimes pattern hacking is so sweet and simple.
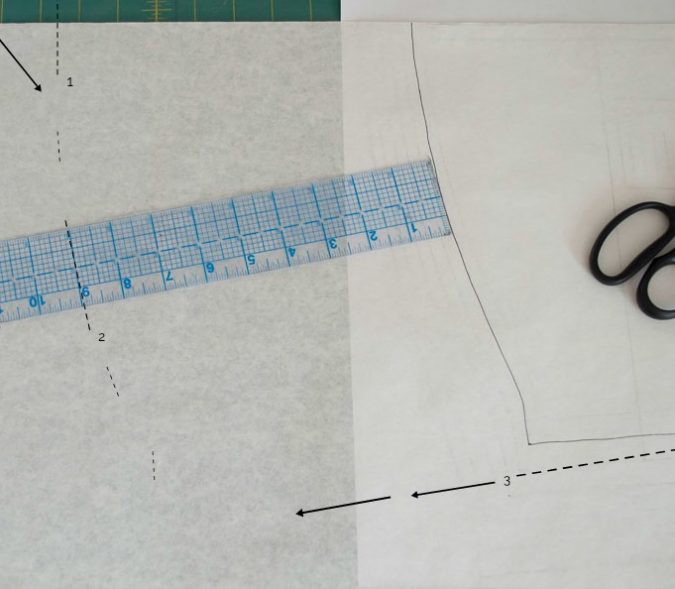
+ Now we need to lengthen this top to a dress. Here is the thing, it can seem like it should be so simple….just make it longer, right? Well, for some people (with small hips) that is truly the case but not for me and not for many of us. I have much wider hips than my waist or bust so as I lengthened I also had to grade out two sizes to accommodate my hips. Secondly, you need to add the same amount of length around the perimeter of the hem. For the Biscayne, this means maintaining the integrity of the curved hem as you add length. To accomplish these things I added 9 inches to the Biscayne at the hem (indicated in #1 and #2 in the photo) while grading out two sizes (indicated in #3). By doing this for both the front and back of the pattern I created my new pattern pieces. A quick note: I have a tendency to want my dresses at what others might consider ‘tunic’ length so if you want your dress longer, definitely add more than 9″. The trick to adding the length is to carefully measure with a ruler along the perimeter of the hem, moving bit by bit (again, this is illustrated by #1 and #2).
+ I also feel that pockets are very important but I knew I wanted the dress to have French seams and I wasn’t sure how to put in in-seam pockets and keep the French seams. So, I’m exceedingly proud to share with you that I was able to sort out how to have both pockets and French seams.
- First, print out my quick and dirty pattern for pockets and in addition to all your new pattern pieces cut out 4 pockets. Available Here.
- Sew the front placket and neckband, and as directed in the pattern.
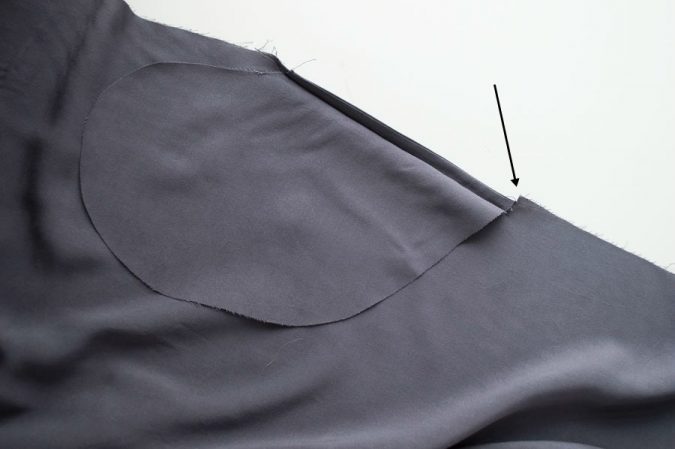
- Attach the pockets, with French seams, to the dress at the point most comfortable for you. For me, pockets are most natural at 13″ down from the bottom of the armscye so you might want to try that placement first. (If you haven’t created a French seam before, there are instructions in the pattern itself and you can follow that as guidance to attach the pocket. It is the same technique that Adrianna uses for the shoulder seams. In short, however, the idea is to stitch the pocket to the side seam at a 1/4″ seam allowance wrong sides together. Trim the seam allowance and fold around the seam such that the fabric is right sides together and sew a 3/8″ seam allowance. It will enclose all the seams.). Attach pockets in the same place on both the front and back of the dress.
- Snip the dress fabric, at the side seam, below where you attached the pockets as indicated in the photo.
- Sew French seams on the shoulder seams just as the pattern indicates.
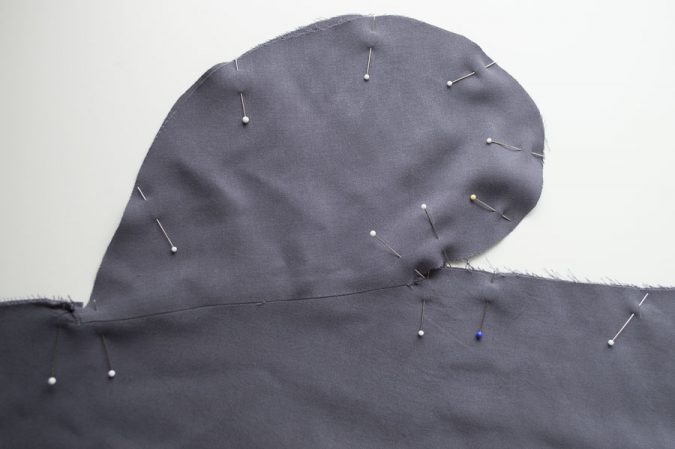
- Now we can begin creating French seams for the dress, working around the pockets. Begin by sewing the dress front and back including around the pockets, wrong sides together, with a 1/4″ seam allowance. Be sure to catch the portion you just snipped.
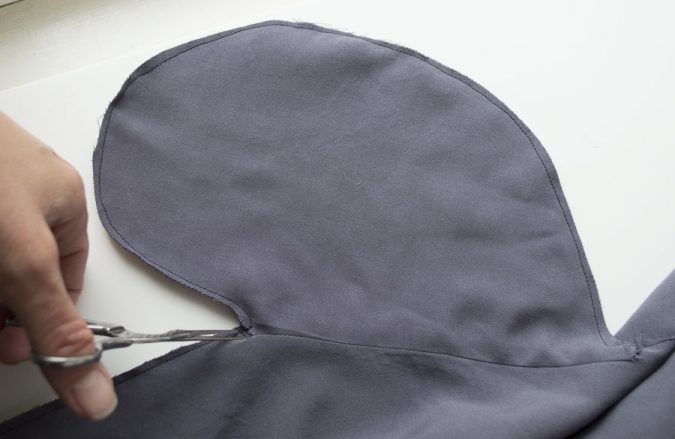
- Trim all of the seam allowance in half, creating a deep snip at the corner where the pocket meets the dress.
- Turn the side seam such that the right sides are together and carefully press along the side seam.
- Now, stitch at 3/8″ seam allowance to enclose the seams. When you reach the pockets sew so that your stitch lines up with the stitch from the pocket French seams, pivot and sew around the pocket. Repeat on the other side.
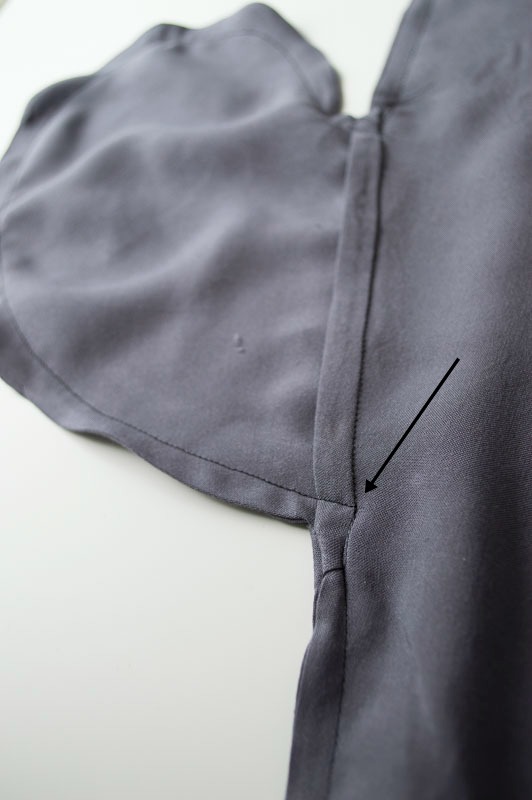
- You have created in-seam pockets with French seams, you smarty pants! Be sure to press your side seam and iron the pocket in place a little bit.
Now, you can continue with the pattern like normal. All that is left is to simply hem the dress and add the armhole bias binding. You are done.

~~~~~~~~~~~
Absolute perfection, Melissa! I think this dress is going to be amazing for your trip to Paris too! I’m not jealous at all.
You can get the Biscayne Blouse pattern in both pdf and paper formats in the shop!
Thanks for having me Adrianna! Don’t be too jealous, it’s going to be wicked hot. Hot enough to take the ooh-la-la out of my step. Ha!
So chic! The dress looks beautiful! Thanks for the french seam pocket tutorial! Have a wonderful trip!