
Happy holiday season! If you follow me over at my personal instagram, you know that although I am no chef, I really love to cook and bake. It’s probably tied with sewing and reading for my 3 favorite hobbies. Well, and sleeping. Actually, sleeping is my number one hobby. Mmmmm….sleep.
But, much like my sewing habits, I am not a tidy cook. I walk away from the kitchen with it looking like a mild tornado has passed through, and I am usually wearing a bit of every ingredient. My first tip for this situation is that dish soap gets out grease stains, every time! My second tip – always wear an apron!
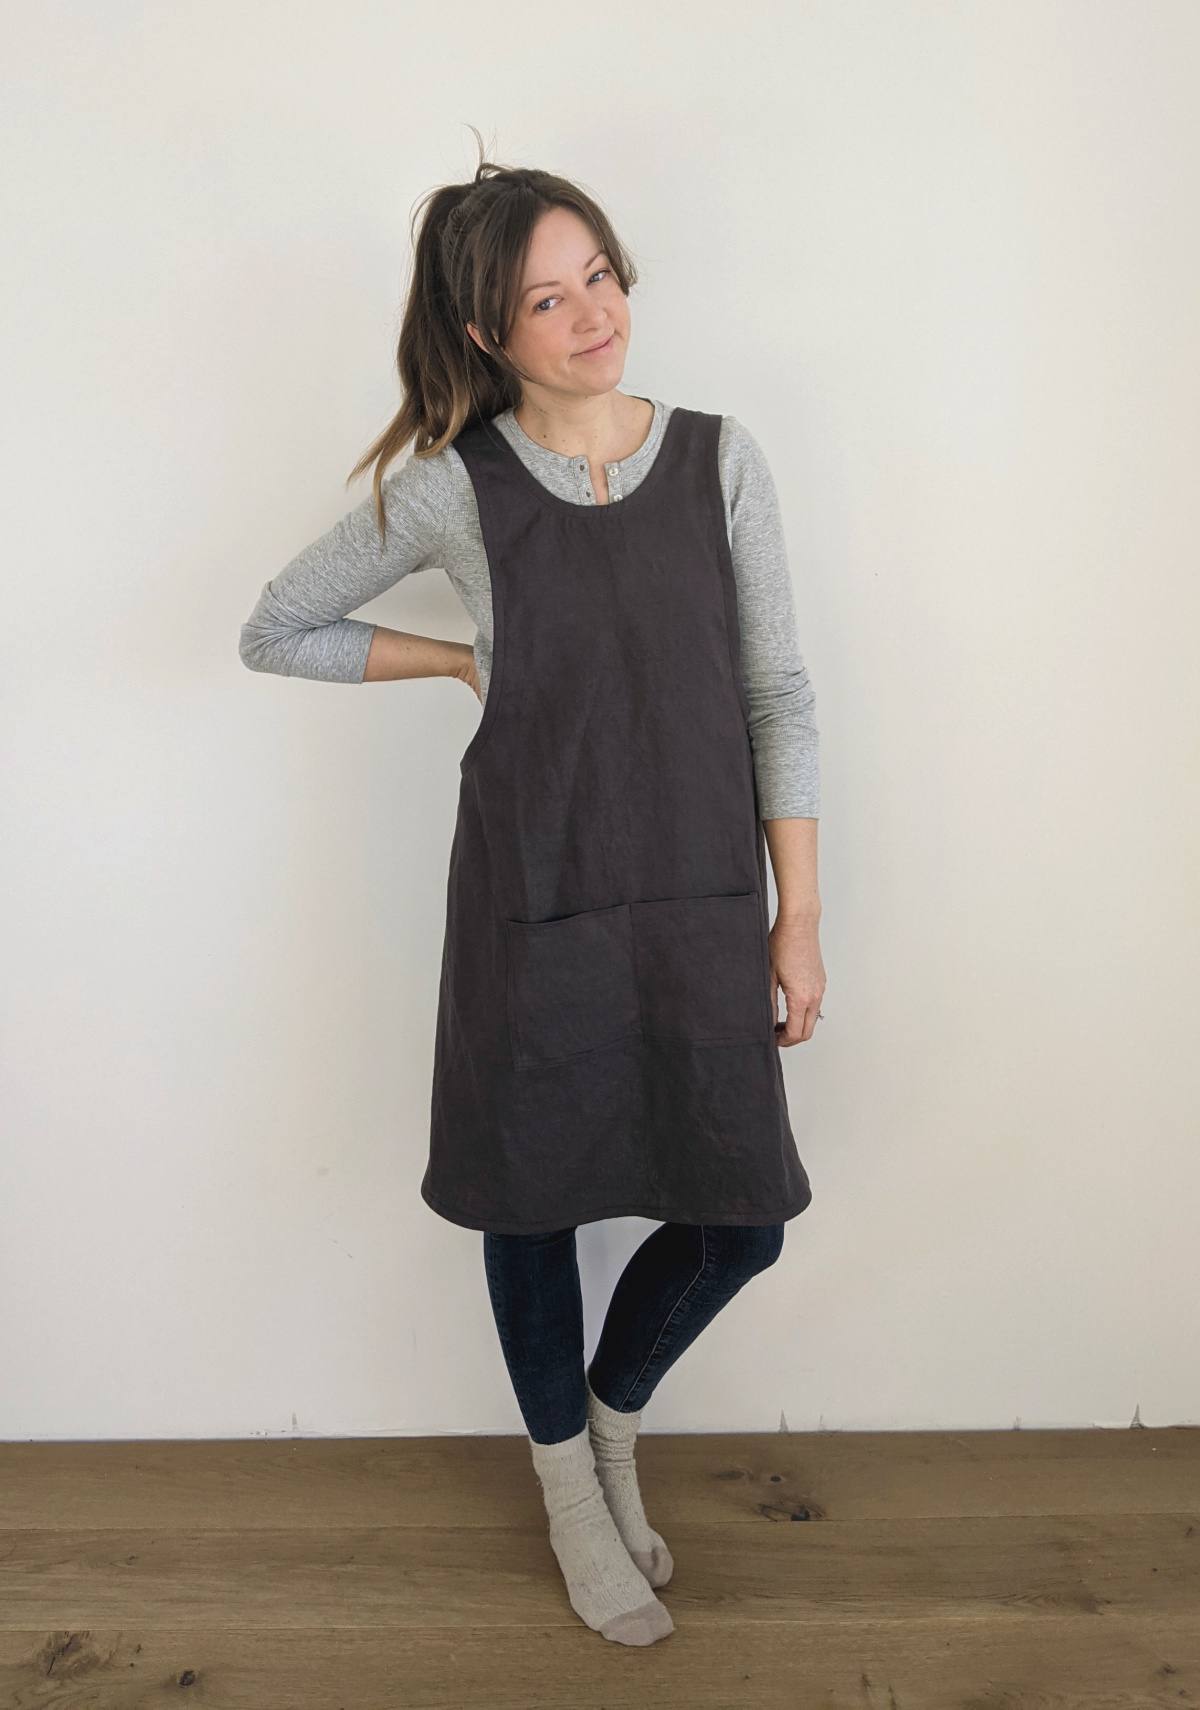
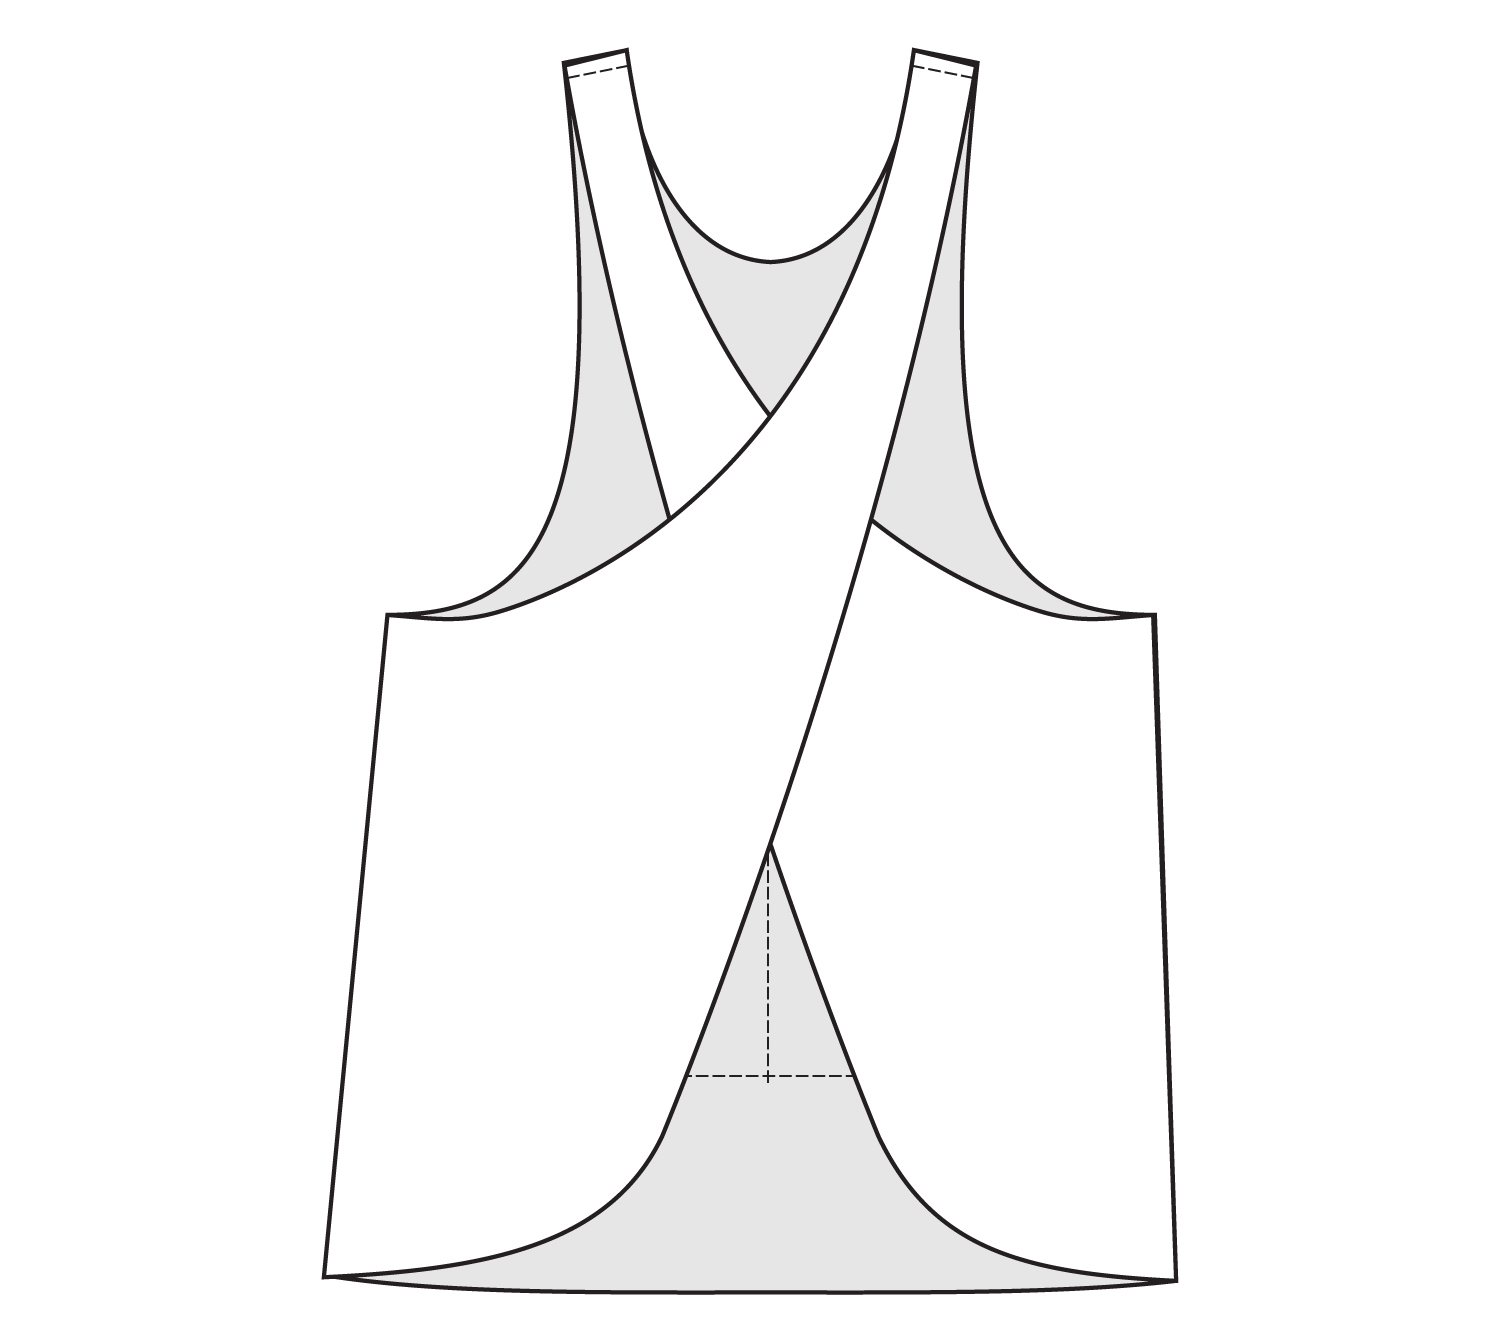
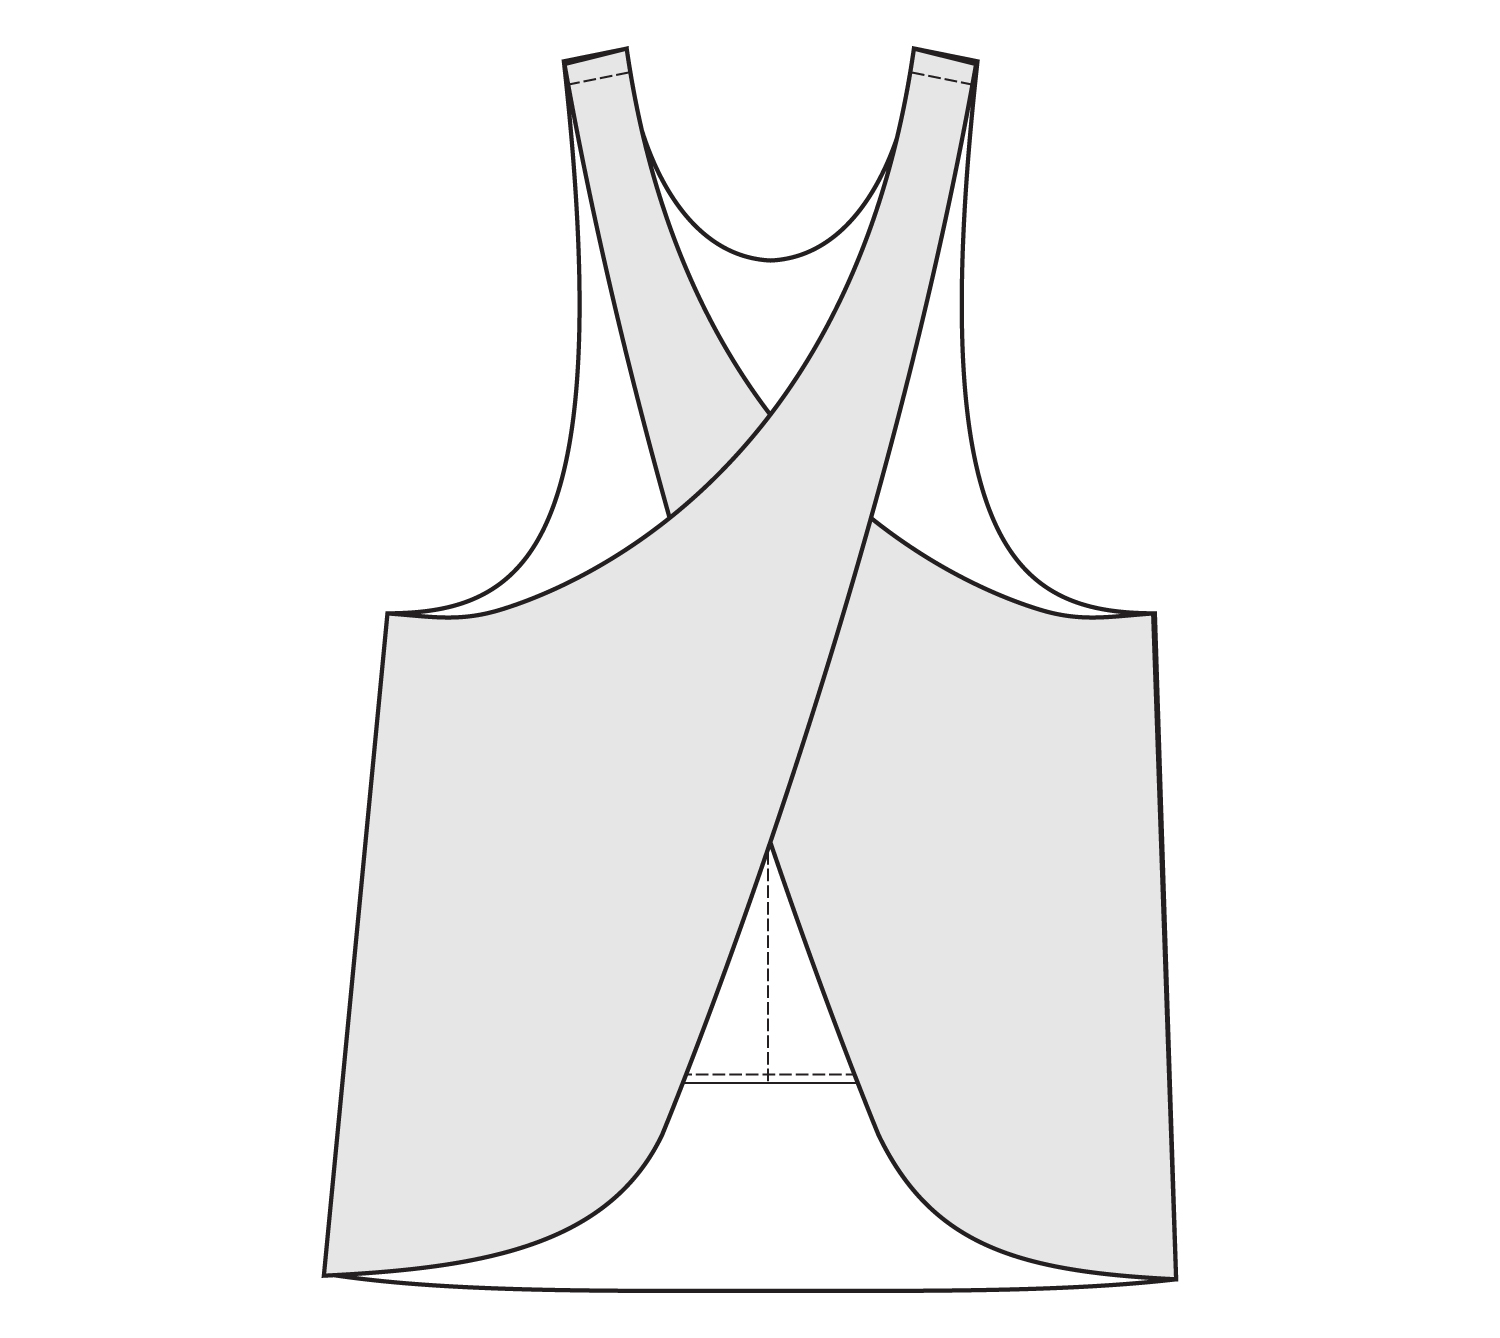
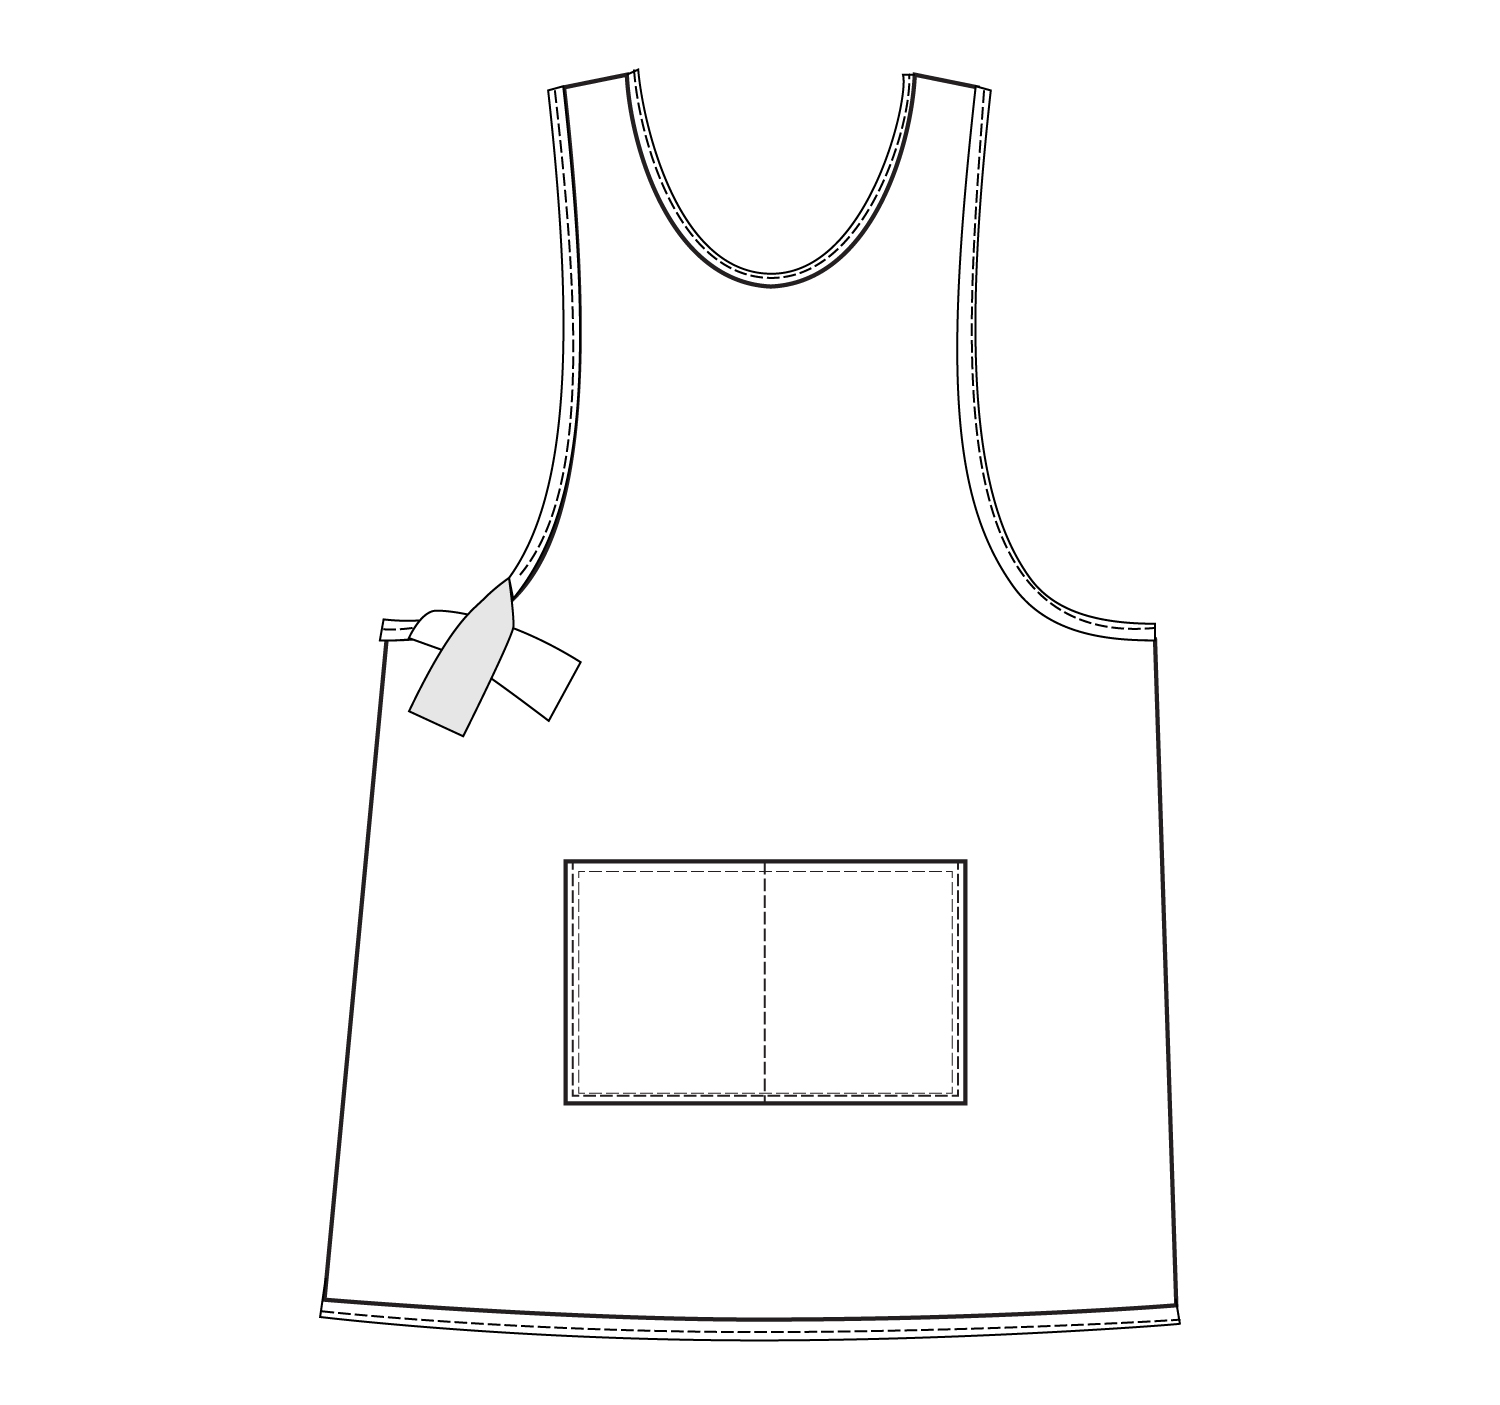
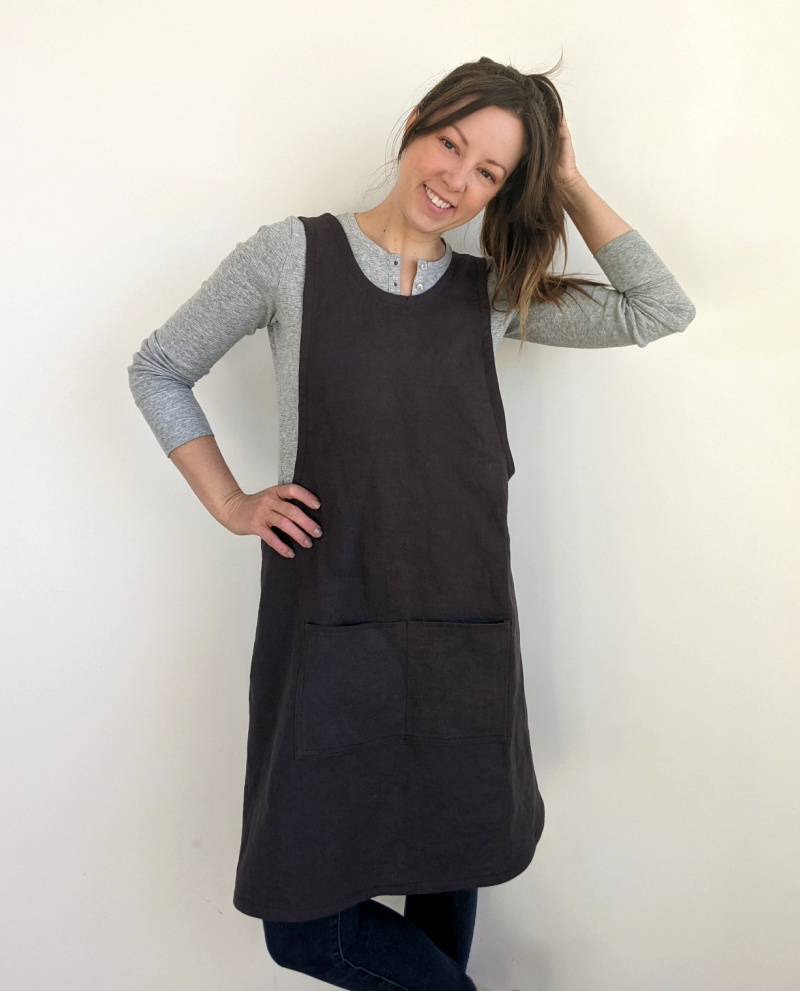
I’ve been wanting to make myself a wrap-style apron like this one for awhile. For one, they’re just so darn cute. And for two, I usually remember to put on an apron after I’ve touched raw chicken and the frying pan is spitting everywhere, so it was important for me to have one that I could slip over my head one-handed, without having to tie. I’m nothing if not practical.
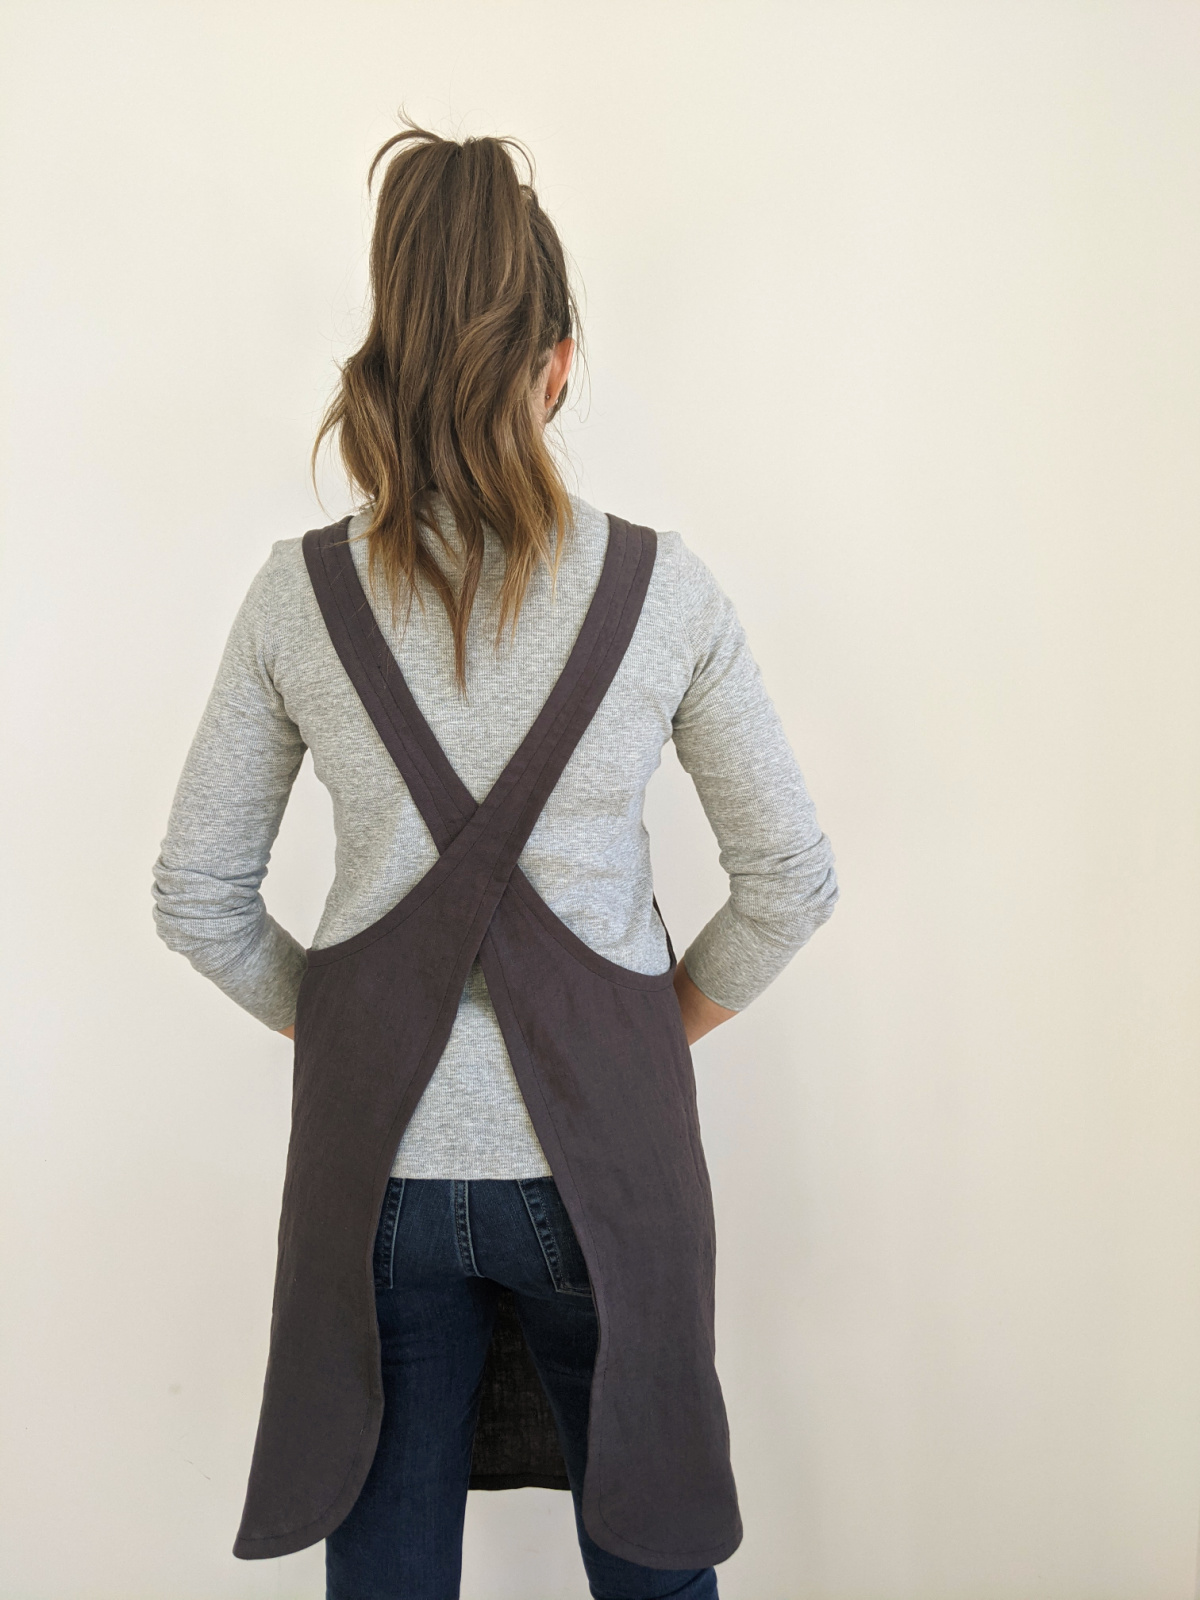
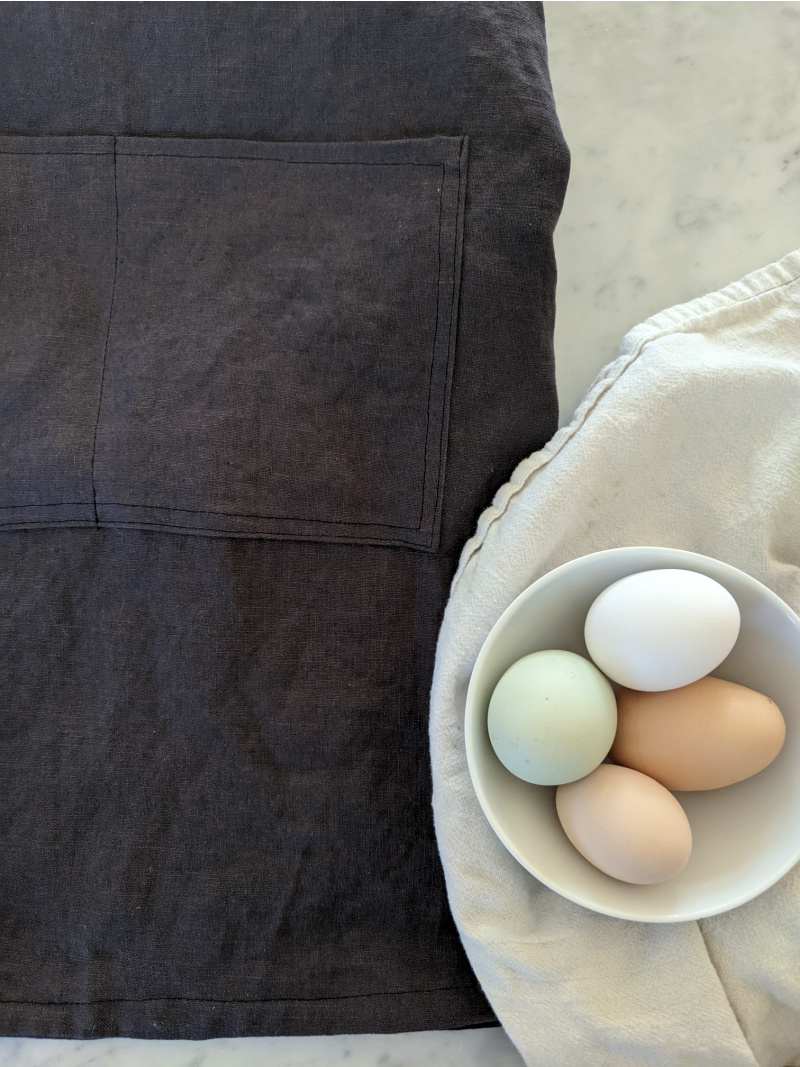
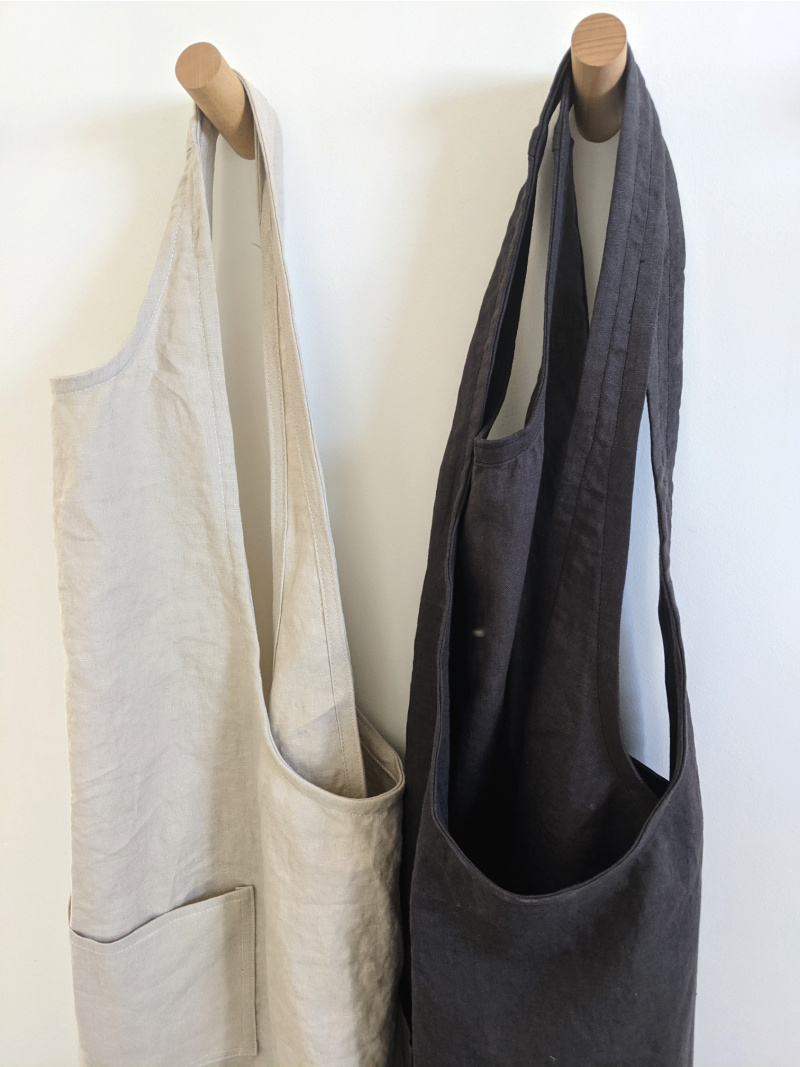
Funny story, I bought my fabric for these aprons from Fabric Wholesale Direct, and while I was developing this pattern, they reached out to me and offered some of their fabric for a project! So this post is not sponsored, but they are sending me some more fabric for another great gift idea that I’ll share soon! For this project, I gravitated toward their linen because there is just nothing like a well-used, wrinkly linen apron in your kitchen. Their linen is described as “medium-heavy weight with a strong yet soft body and a pristine drape” and I couldn’t say it better myself. It’s just as good for garments as it is for home goods. And the price can’t be beat! I picked out the charcoal and natural colors to go with my neutral-toned house, but they have a rainbow of gorgeously saturated colors for any palette!
Allspice Apron for you, and you, and you!
I figured while I was making myself one, I’d make a pattern for all of us to share! I think the Allspice Apron would make a really lovely gift too. It’s a great handmade item to combine with some baked goods for a fully DIY gift, or you could pair it with another kitchen-related item. A few of my favorites:
- Perfectly minimalist salt and pepper grinders
- A pretty marble lazy susan for stylish countertop organization
- A fantastic recipe book
- A great set of gourmet spices or oils
- A magical (ridiculously cheap) chef’s knife (seriously, I bought mine for $5 seven years ago and I’ve used it every single day. I’ve never sharpened it and it still works like butter. It’s the best kept kitchen secret, in my opinion! It’s also the only knife I use for pretty much everything except bread.)
Sizing and Fabric
With gift-giving in mind, I made this apron multi-sized. It’s really a one-size-fits-all style, but I wanted to really make it look best on each person, so I’ve graded it from XS – XL, covering hips from about 32″ to 60″. This apron is for adult heights (approximately knee length for someone who is 5’6″), but you could also reduce the hem length and strap length and use the XS for children starting at around 8 yrs old. In the spirit of last-minute gift giving, I also designed this apron to fit on narrower fabric and only use 1.5 yards/meters. The largest size will require a full 42″ width of useable fabric, so just be aware that if your fabric is printed and has really wide selvages it may not work for the XL. Otherwise, 1.5 yards of any width fabric 42″ and wider will work for all sizes!
The Allspice looks fantastic in the FWD linen, but can also be made with just about any woven fabric (or, heck, any knit! Do you, boo.)
Size Chart
| size | XS | S | M | L | XL |
| hip measurement | 32 – 36 | 38 – 42 | 44 – 48 | 50 – 54 | 56 – 60 |
The aprons shown in this post are a size S on a 38″ hip. If you need to guess about your recipient, a S or M is technically a one size fits all, it just won’t have the same coverage around the back hem or at the chest width if the wearer is larger than the size chart indicates.
Materials Required:
- Free instant download pdf pattern (choose between the print at home format or A0 format above)
- 1.5 yards or meters of any woven fabric 42″ wide or wider
- matching thread
- 6.5 yards or meters of 2″ total width bias tape (or just use storebought double fold and apply it using the traditional method) OR a 24″ square of fabric to make your own.
A note about bias tape:
These instructions are for finishing the edges with single fold bias tape using the French method. This is hands down the easiest way to apply bias tape. However, it will require you to open up store-bought single-fold bias and re-press it to only have one fold, and the total width of the bias tape needs to be 2″ for this method (yes, you heard correctly. Manufactured “single-fold” bias tape actually has two factory folds, and double fold has 4. I understand that they’re referring to each side individually, but it doesn’t change how I feel about it.) Alternately, you can make your own bias tape by piecing together several strips or using a continuous bias tape making tutorial and cutting to 2″ wide. (hot tip: I don’t even press it in half, I just align the two raw edges as I sew. You have to work slightly slower to make this work, but it’s still faster than pressing 200+” of bias tape.) If you are using the continuous tape tutorial, you will need a 24″ square of fabric to get enough bias tape for the largest size with a little extra.
If you prefer to purchase and apply double fold bias tape, that is also totally fine, but it is not included in this tutorial. Lastly, you could also just do a narrow double fold hem on all edges and skip the bias altogether. There will be tips included for that method in the instructions.
Print and Assemble the pattern
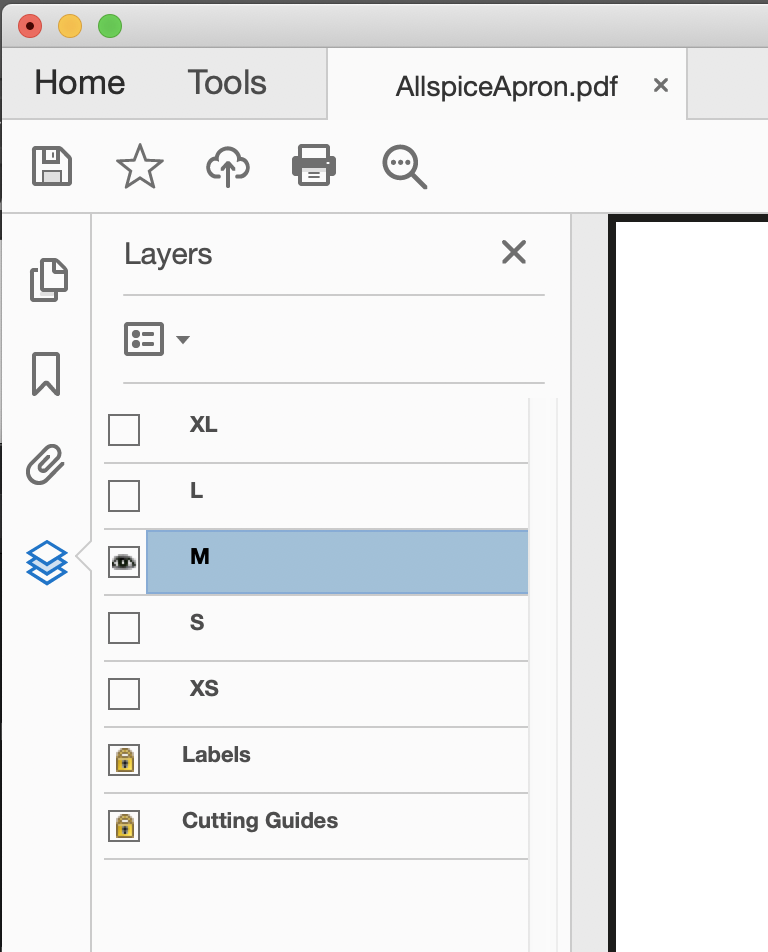
The Allspice Apron pattern prints on 13 sheets of letter or A4 paper on your home printer. I recommend printing from the free program Adobe Reader on a computer so you can access the layers functionality. If you do this, you will see the following under your layers menu (the overlapping diamonds on the left side). If you need more info about layers or how to reveal the layer option in your side menu, do a quick google and there will be a ton of info to help you.
Then you can choose what size(s) you want to print so you don’t have to print all of them. This example shows just a size M being printed.
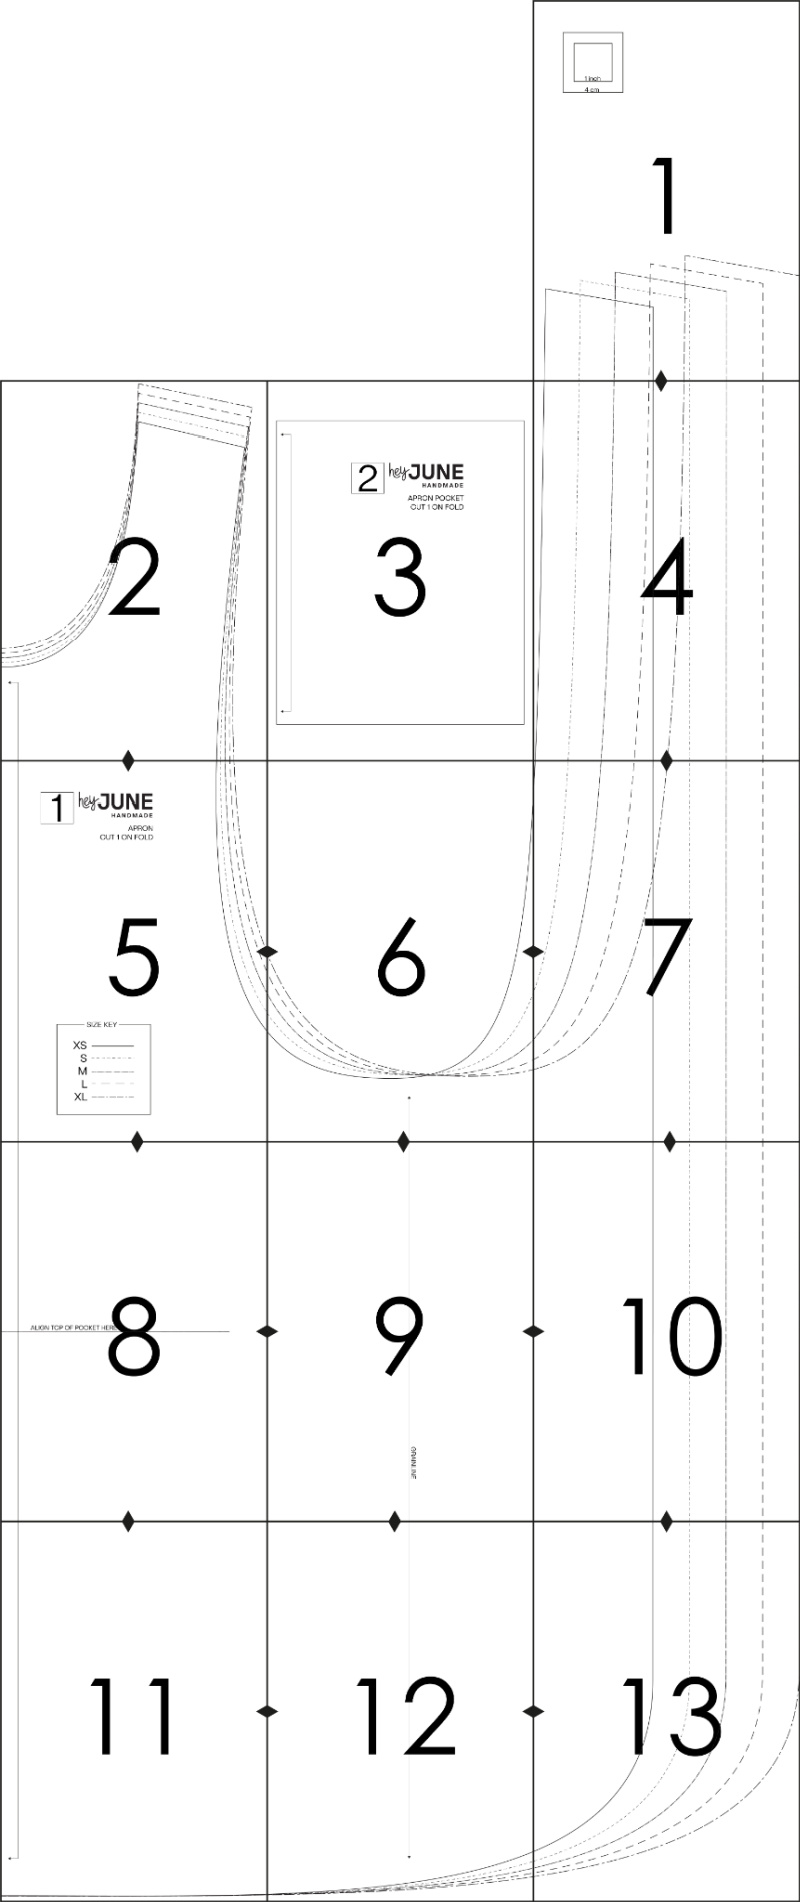
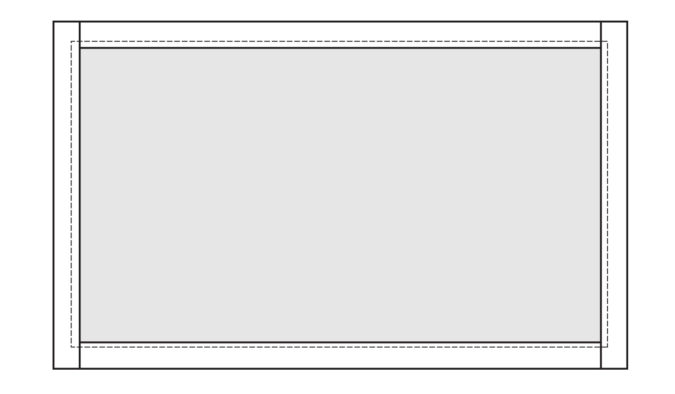
Print at 100% (no scaling) and make sure that your orientation is set to “auto” (not landscape or portrait). If you’ve printed correctly, each page will have a 7″ x 10″ frame centered on the page with the pattern printed within that frame, and the reference square on page 1 will be the correct size. If you want, print page 1 by itself first to check that it’s printing correctly before printing the rest of the pages.
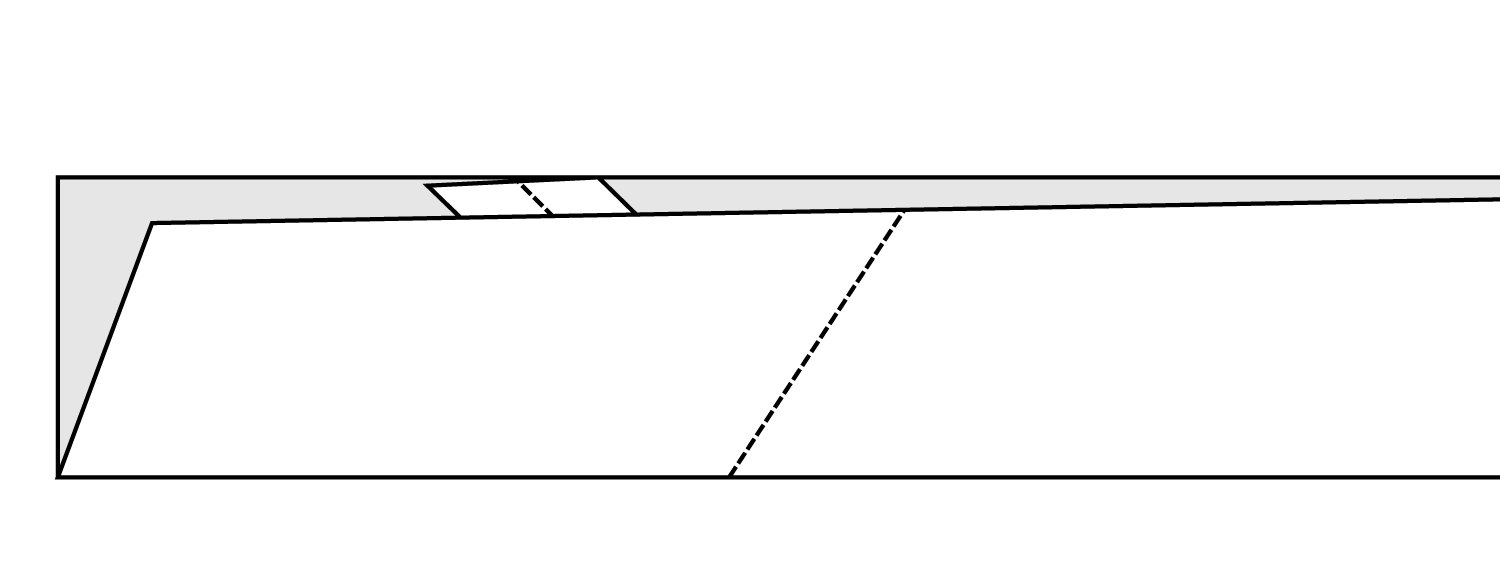
After printing, you will need to tape the pages together. If you want to make it really neat and tidy, trim off the top and left margins from each sheet of paper for easy assembly. If you don’t care how neat it is and want to tape it together in about one minute, just overlap the margins and align the pages along the frames so the triangles match up to form diamonds (the triangles are only on edges that will need to be connected to another page). This is my method 100% of the time. Some people compromise and fold back two of the margins. If you do overlap, the margins will cover up parts of the pattern. This one is so simplistic that you’ll have no trouble connecting the lines with your scissor or rotary cutter as you cut out the pattern, but for more complex patterns I just go in with a pen and trace the pattern onto the margins where it’s covered up. Here is the diagram to show you how to tape the pattern together:
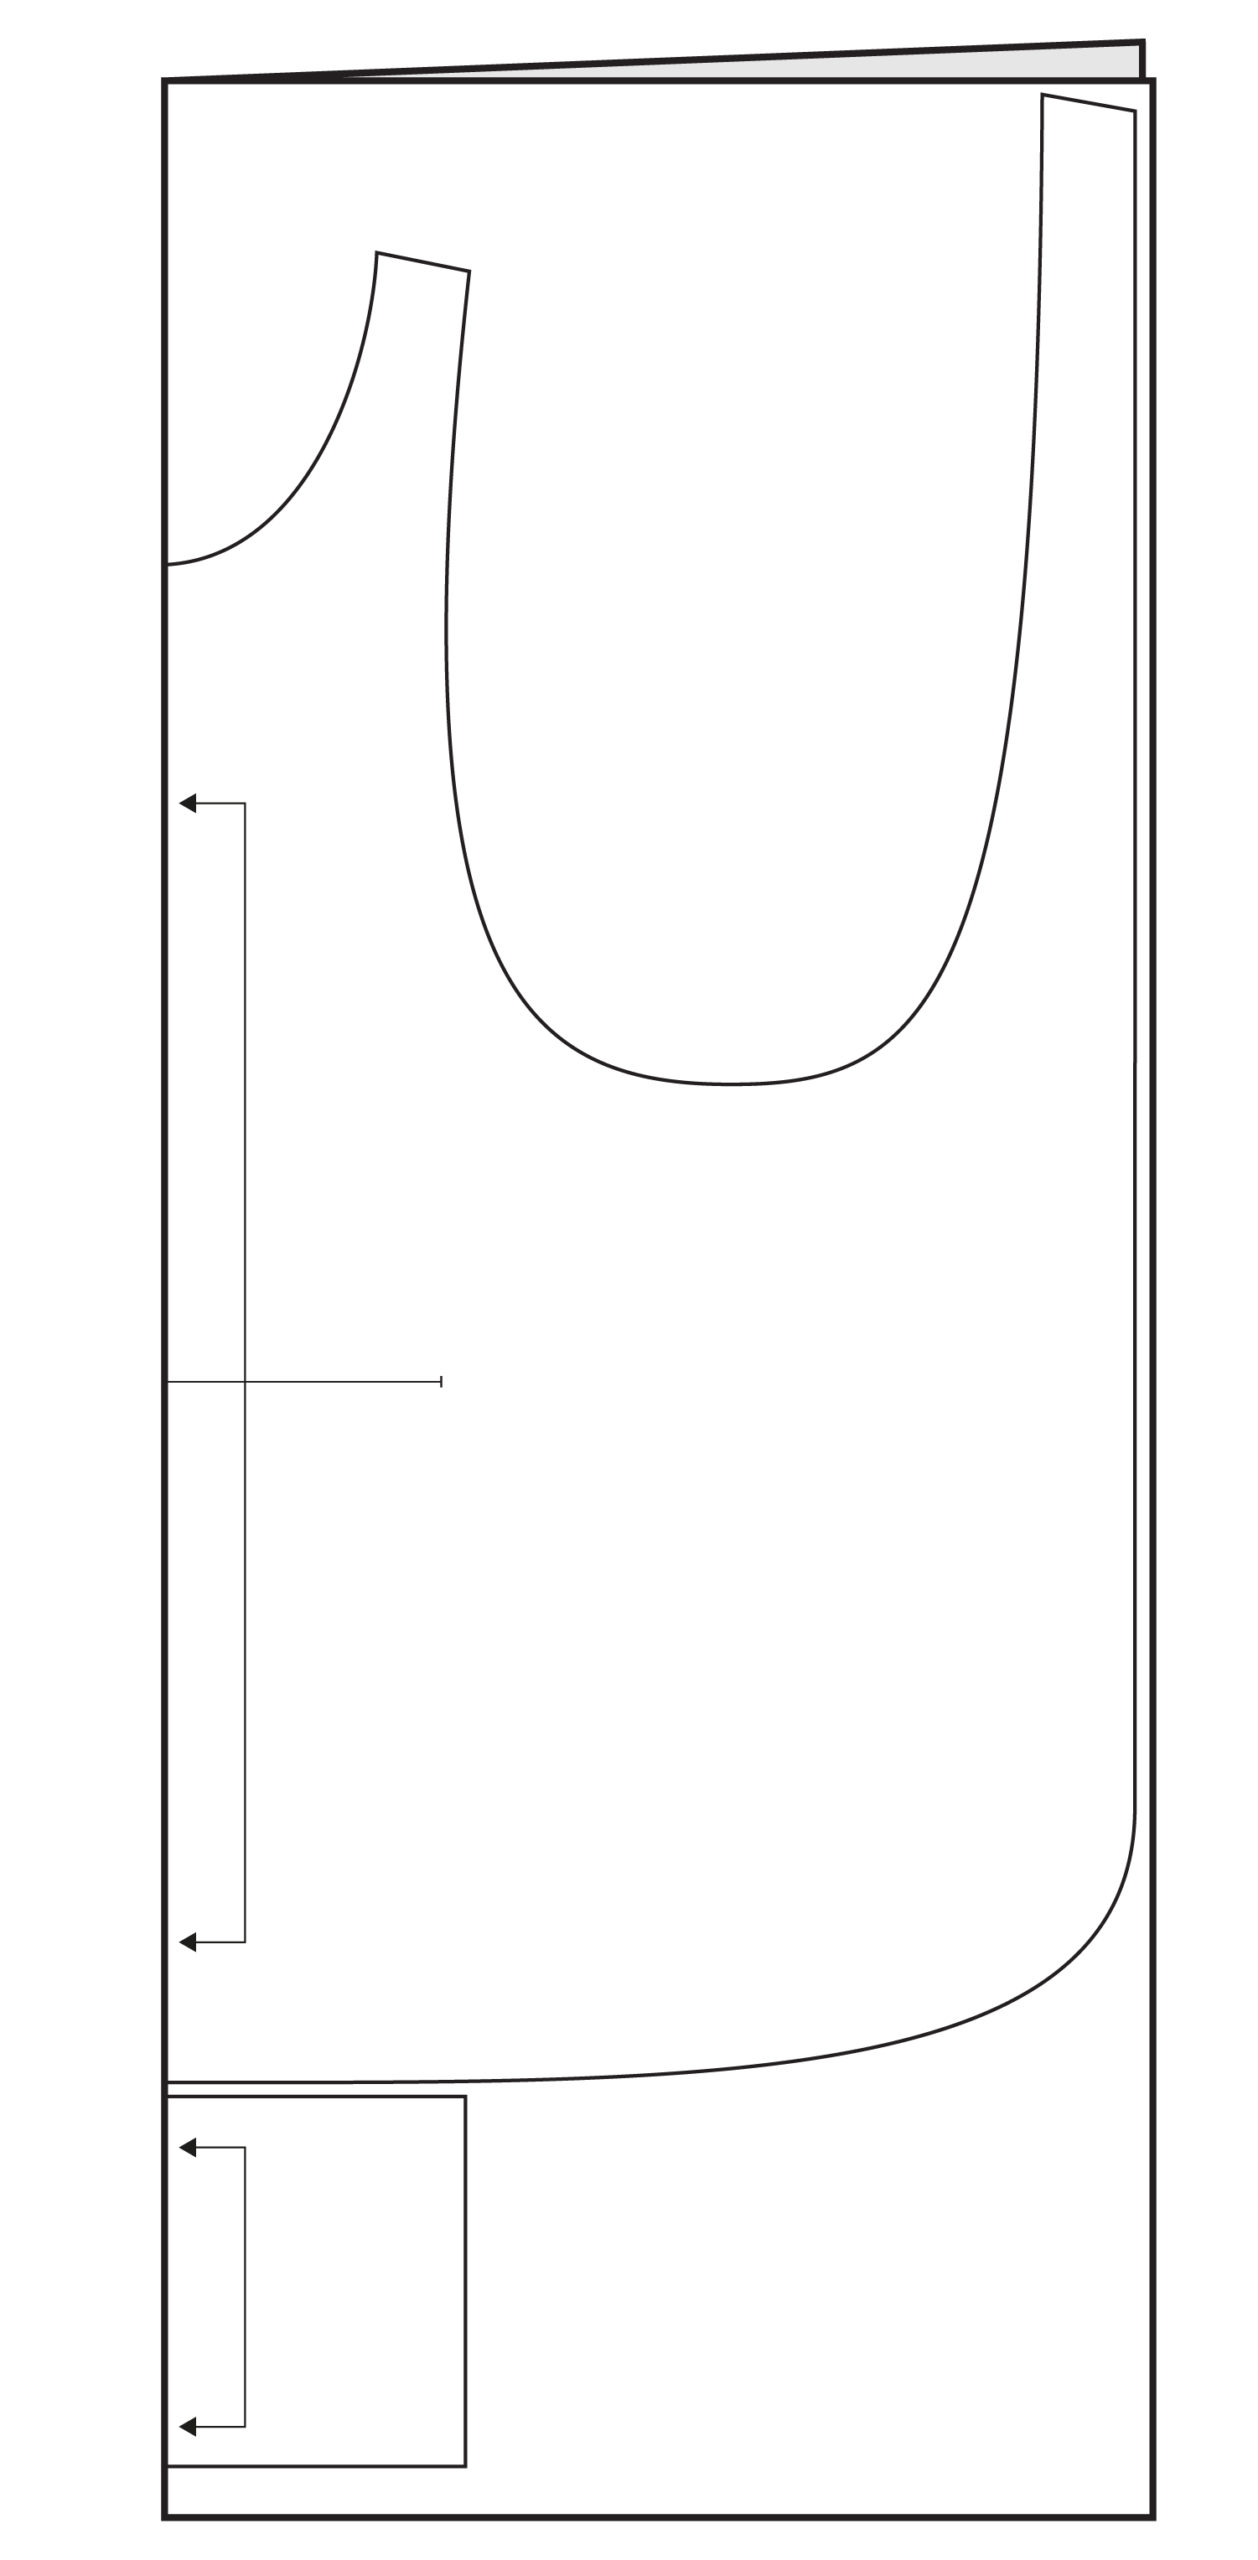
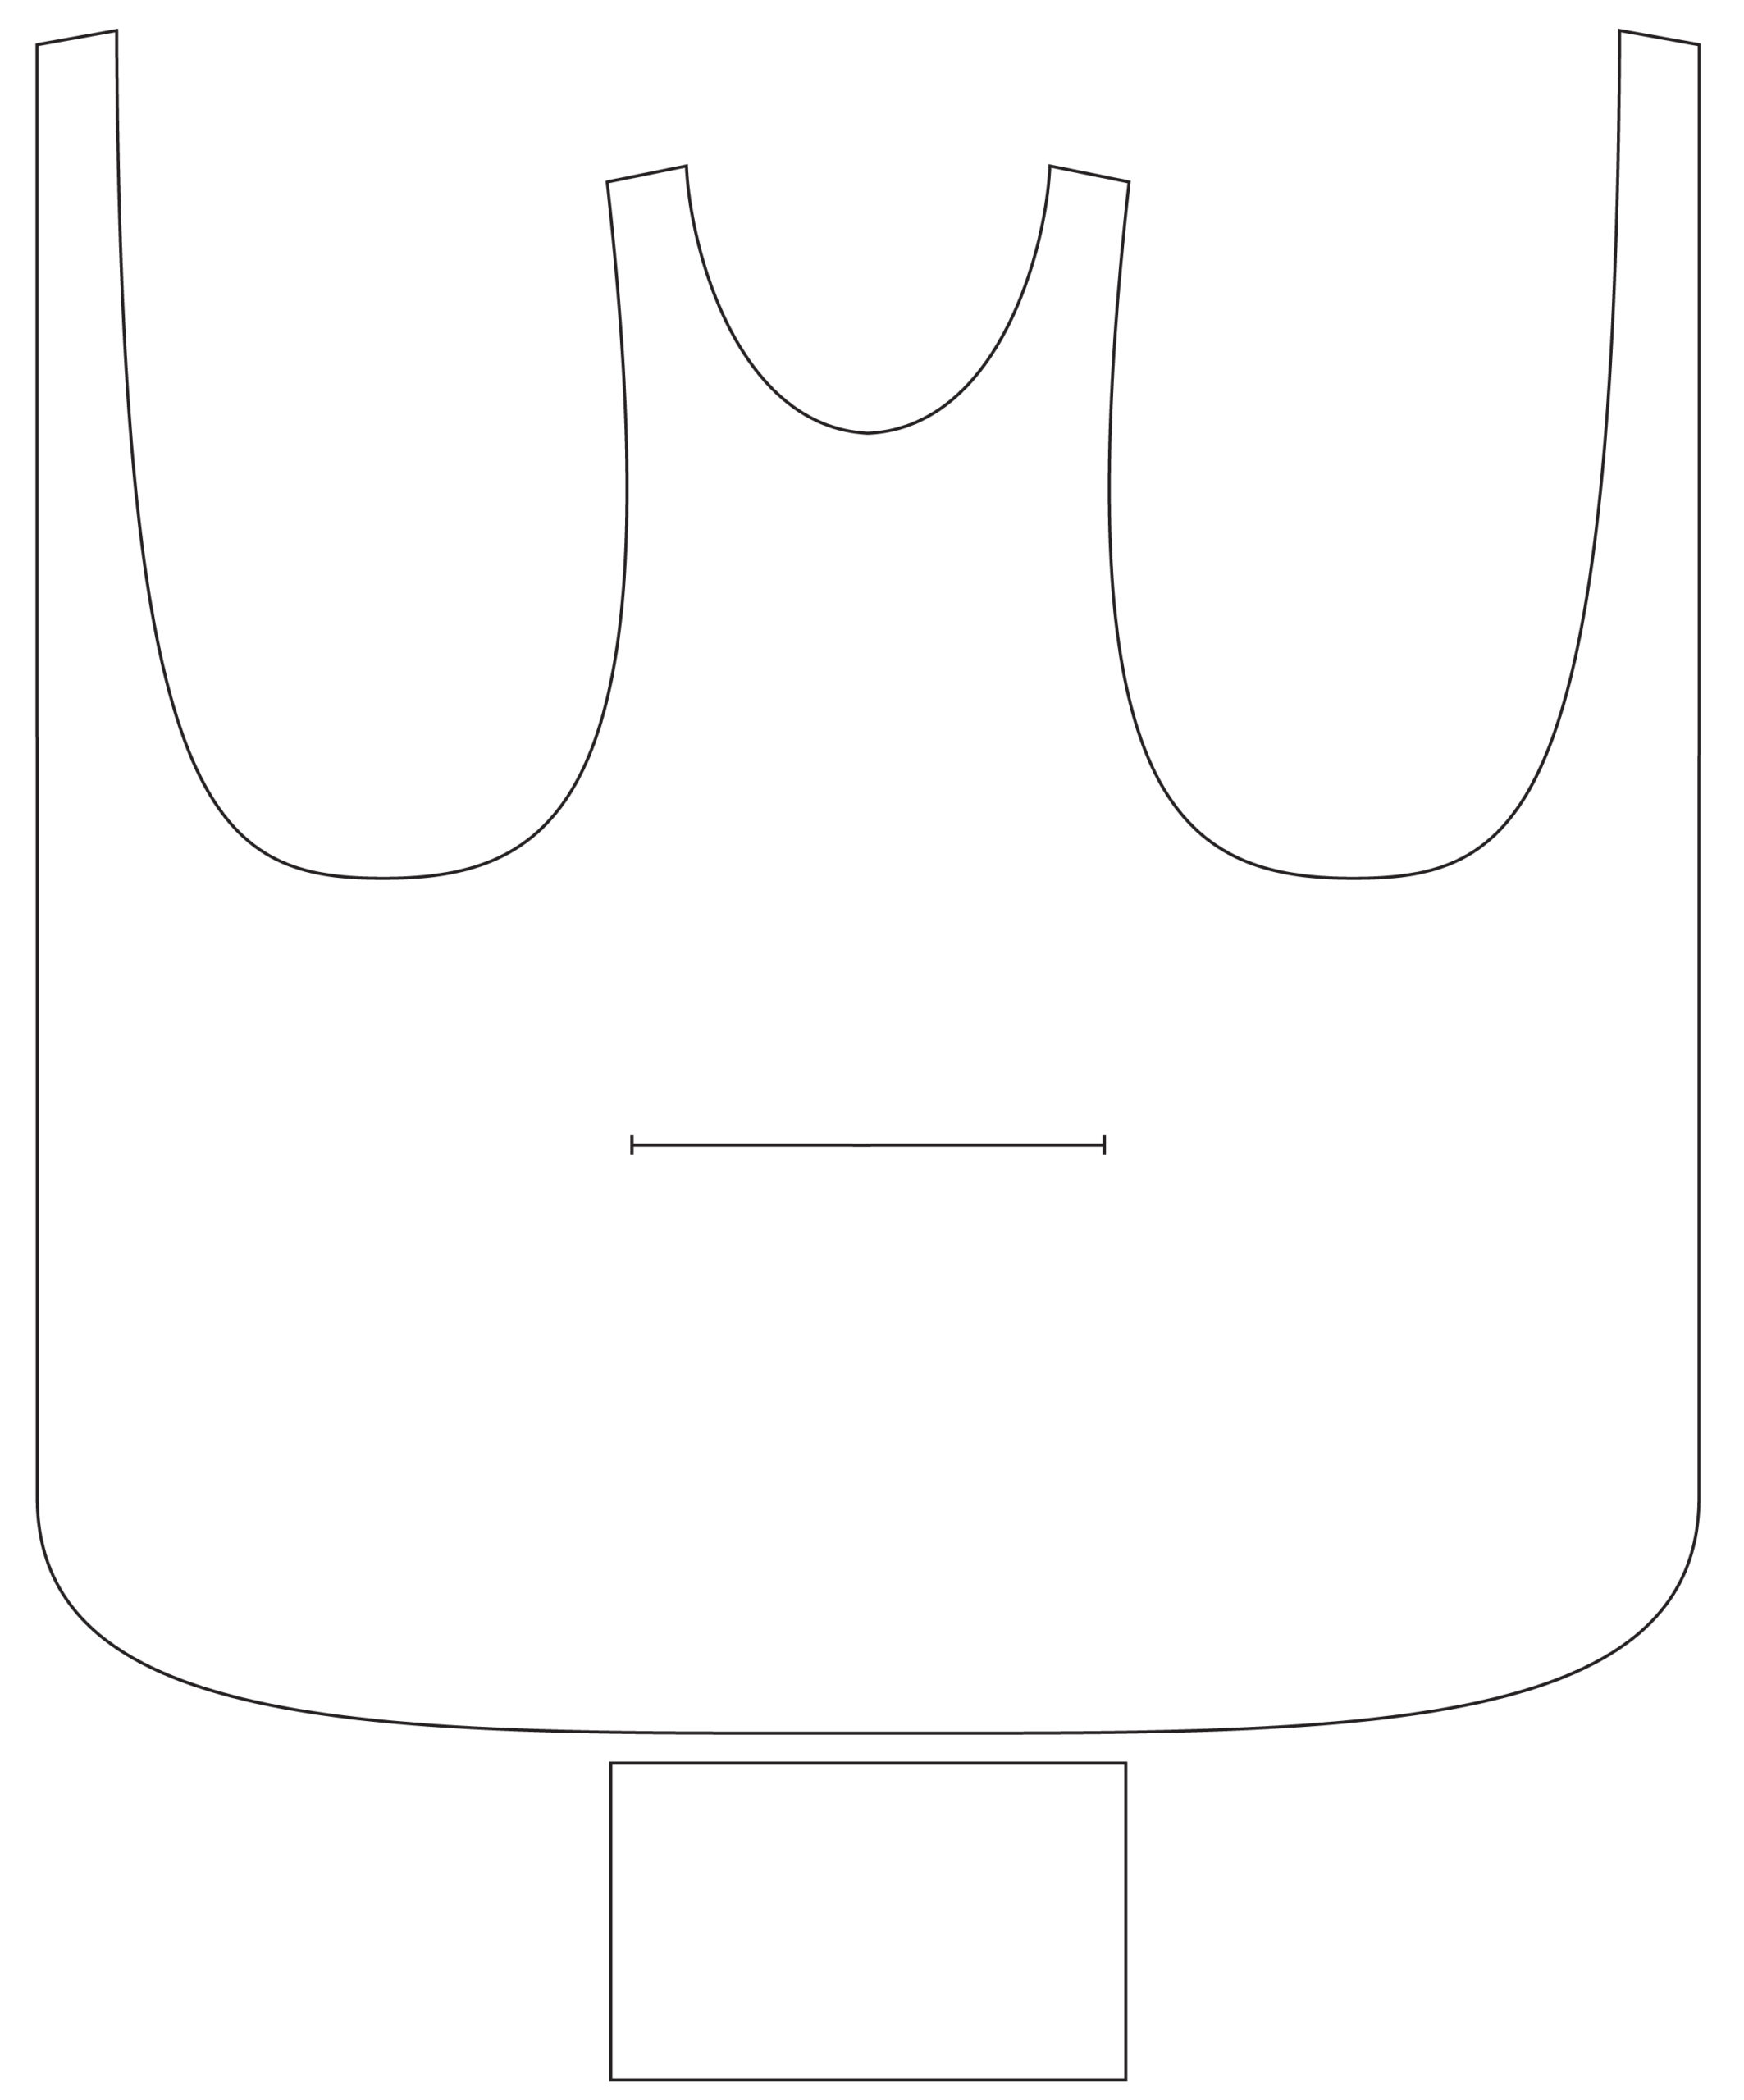
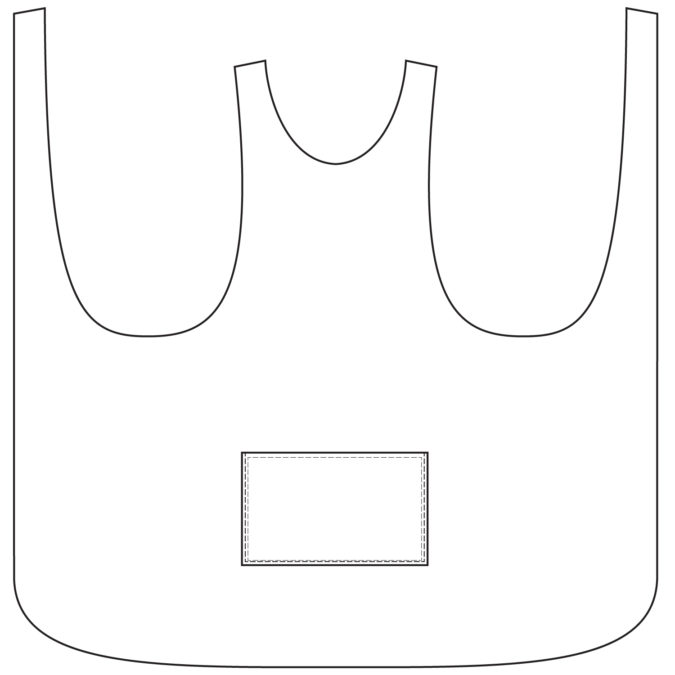
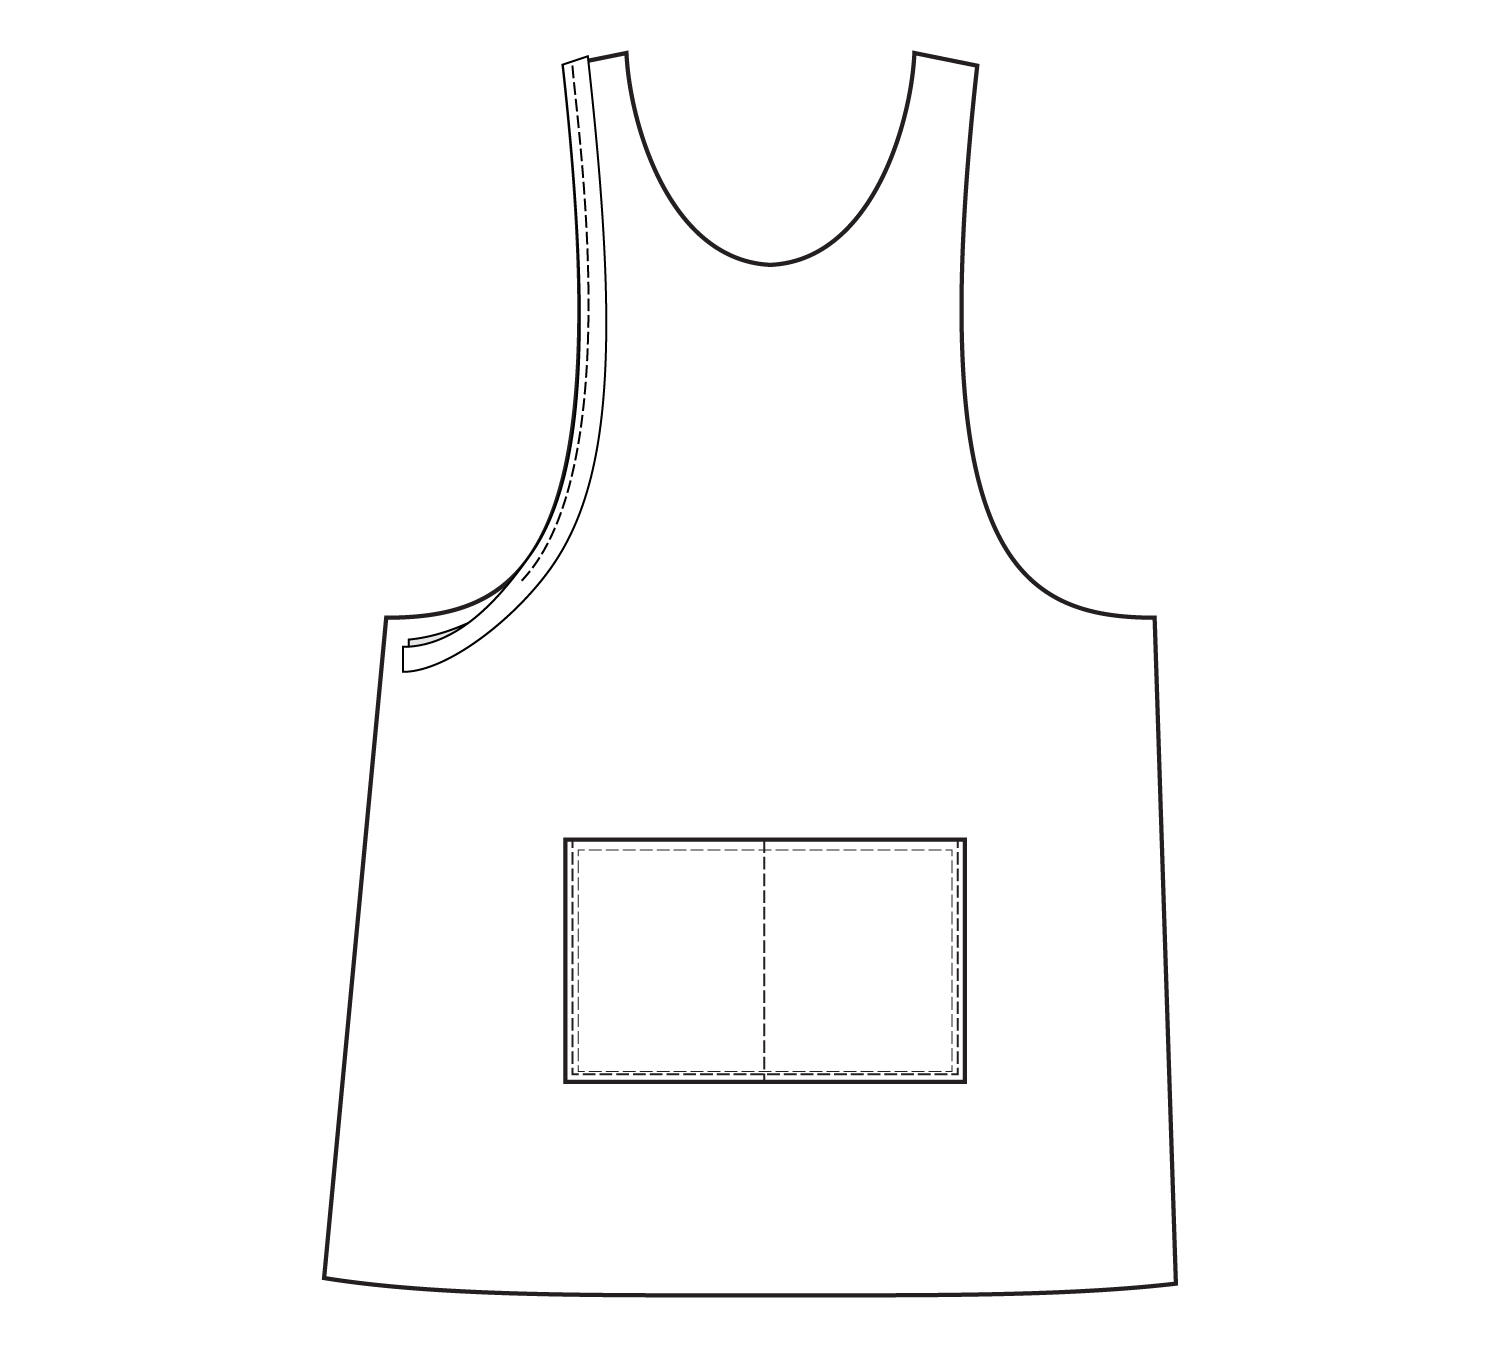
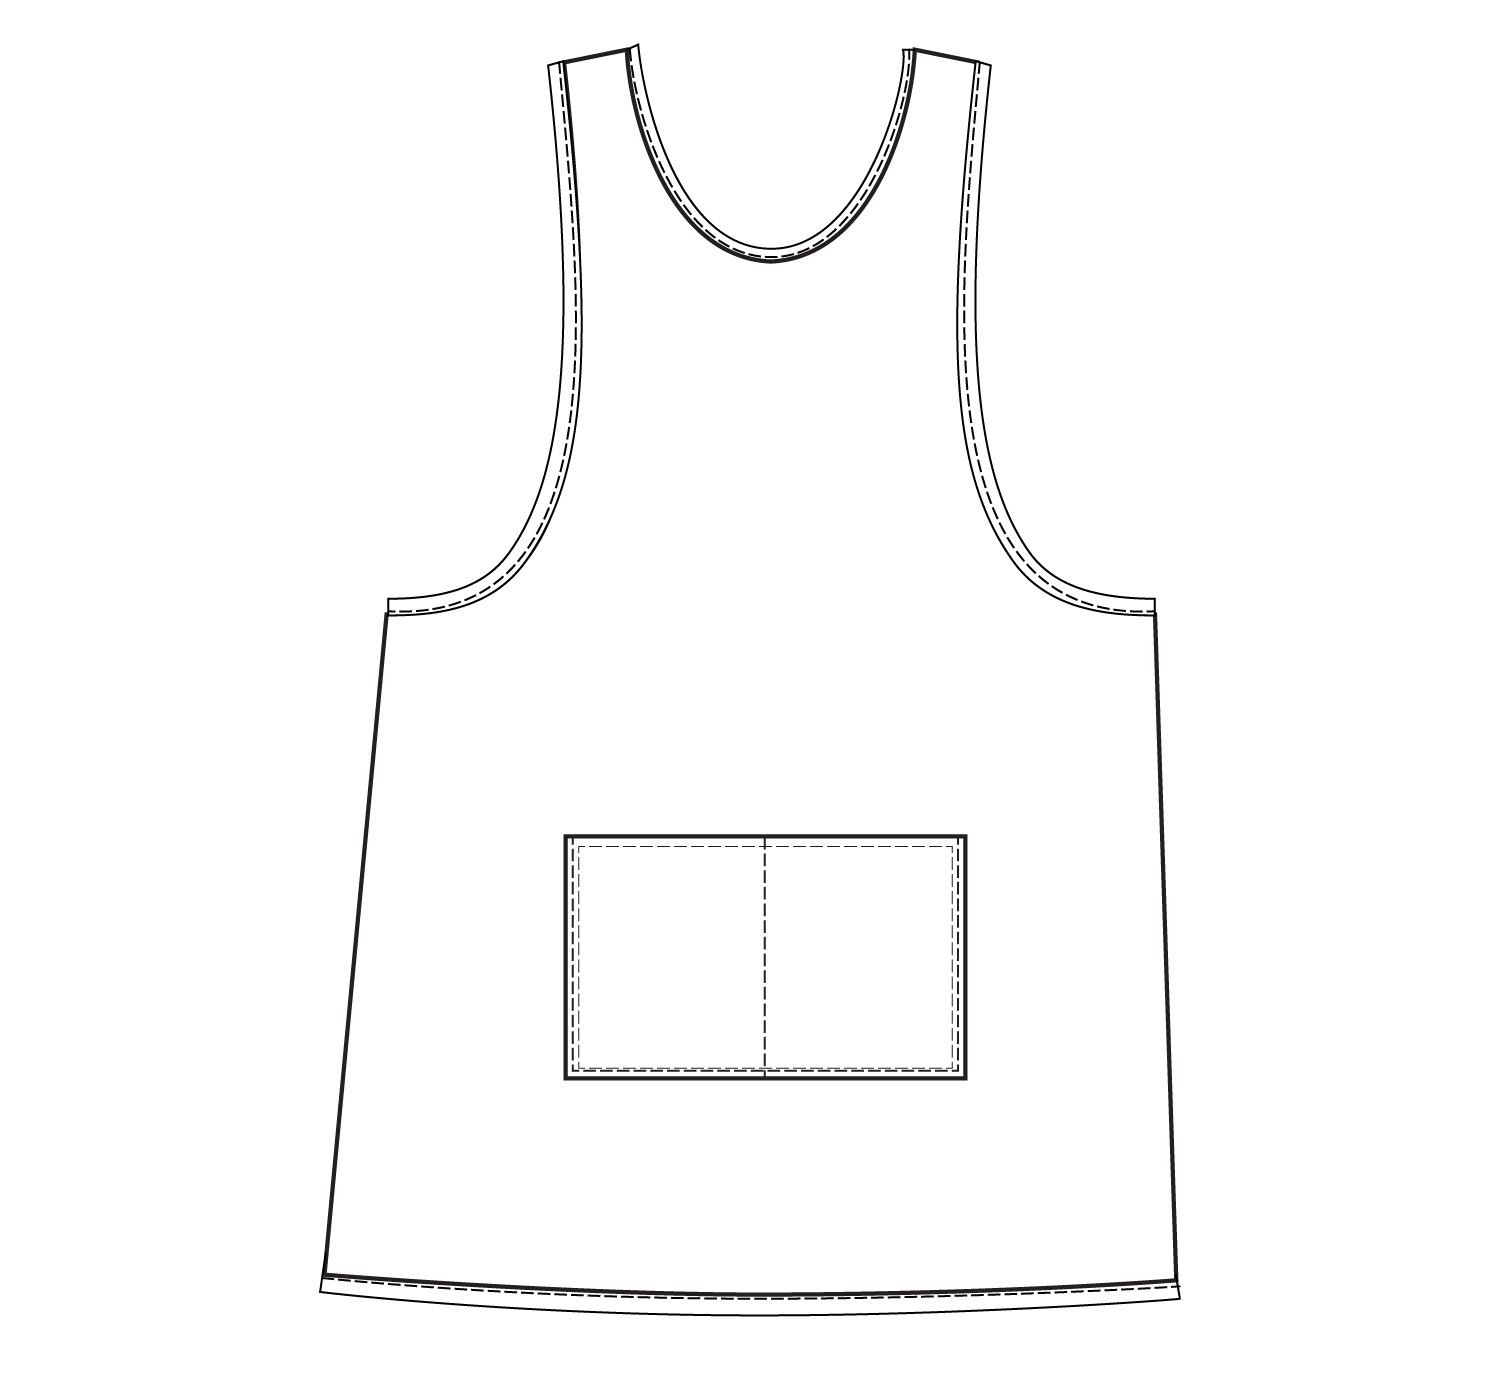
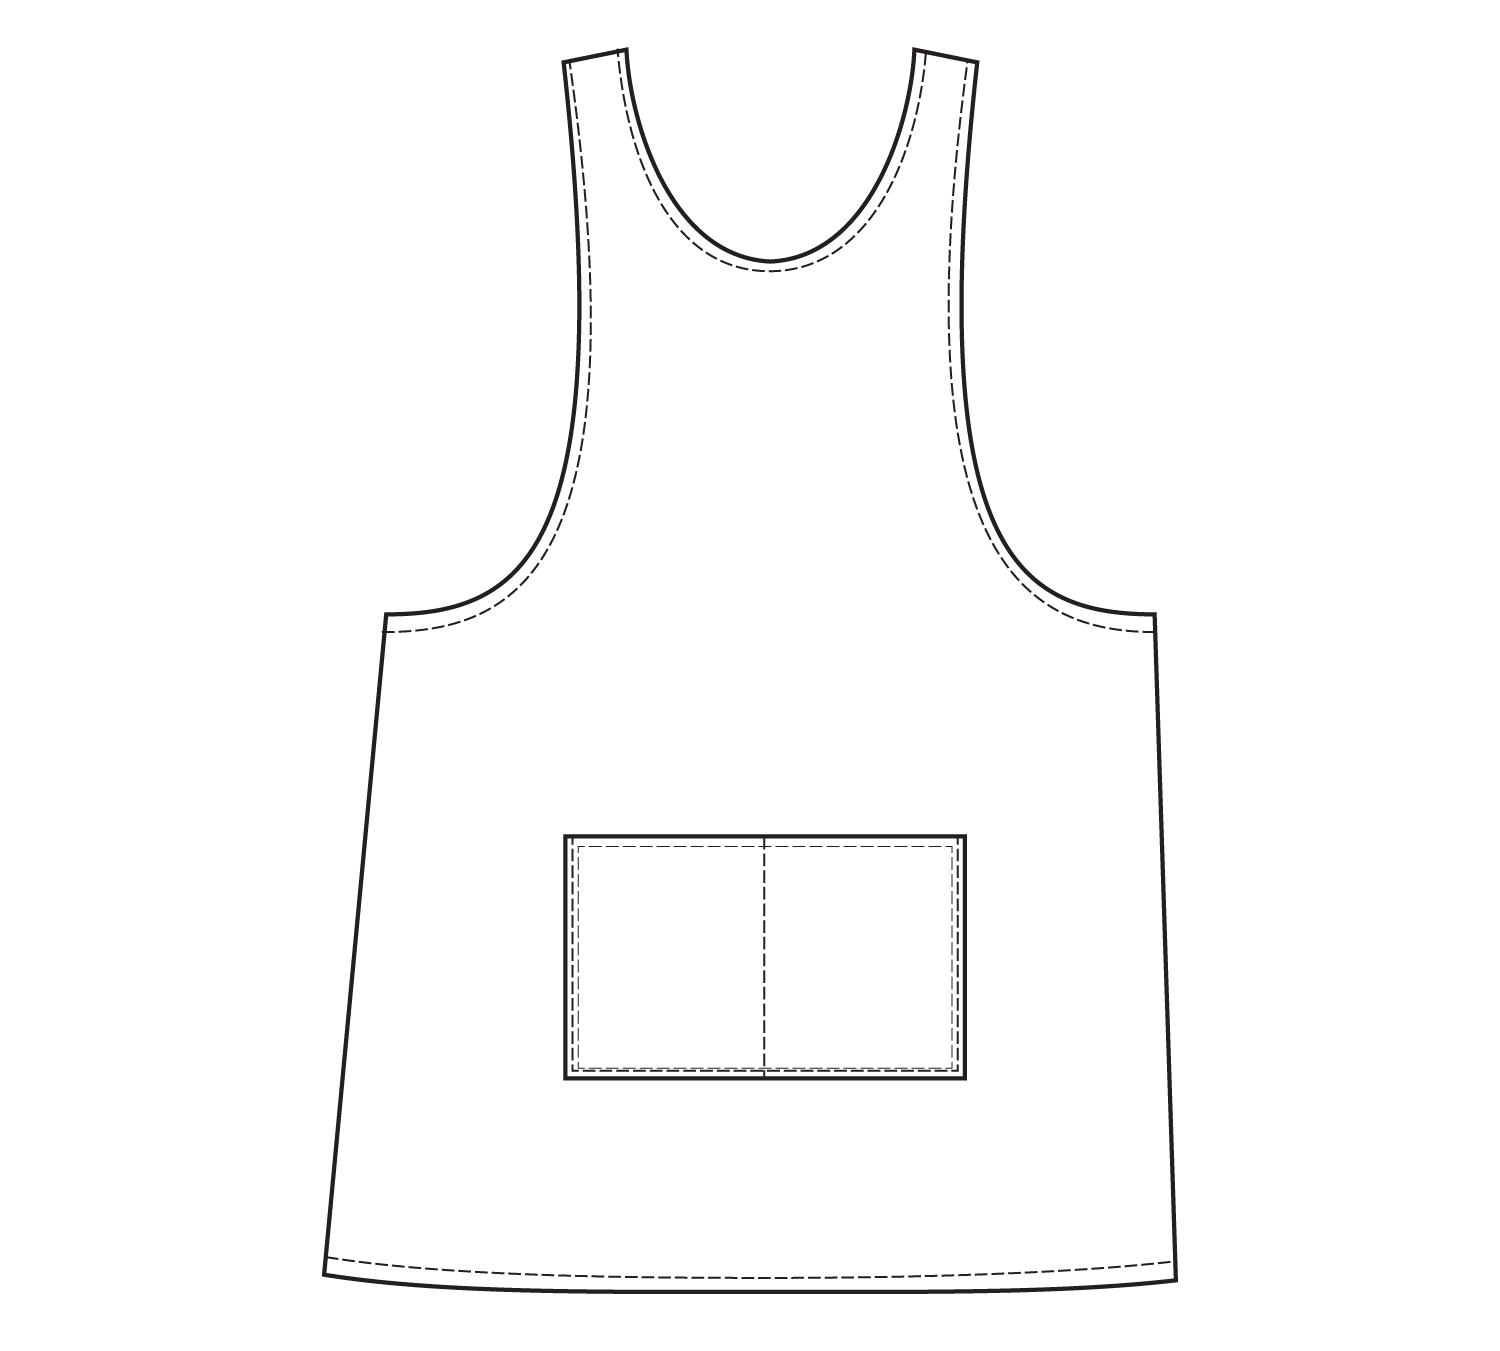
Once your pattern is assembled you can cut it out (I use a separate rotary cutter just for paper!). You will have one piece that is the entire apron pattern to be cut on the fold, and the second piece which is the front pocket, also cut on the fold.
Cut and Mark Your Fabric
Fold your yardage so the fold of the center front of the apron is on the fold of fabric along the grain. Place the pocket on the fold just below the apron. Cut around each piece. Open them up and you’ll have two full sized mirrored pieces.
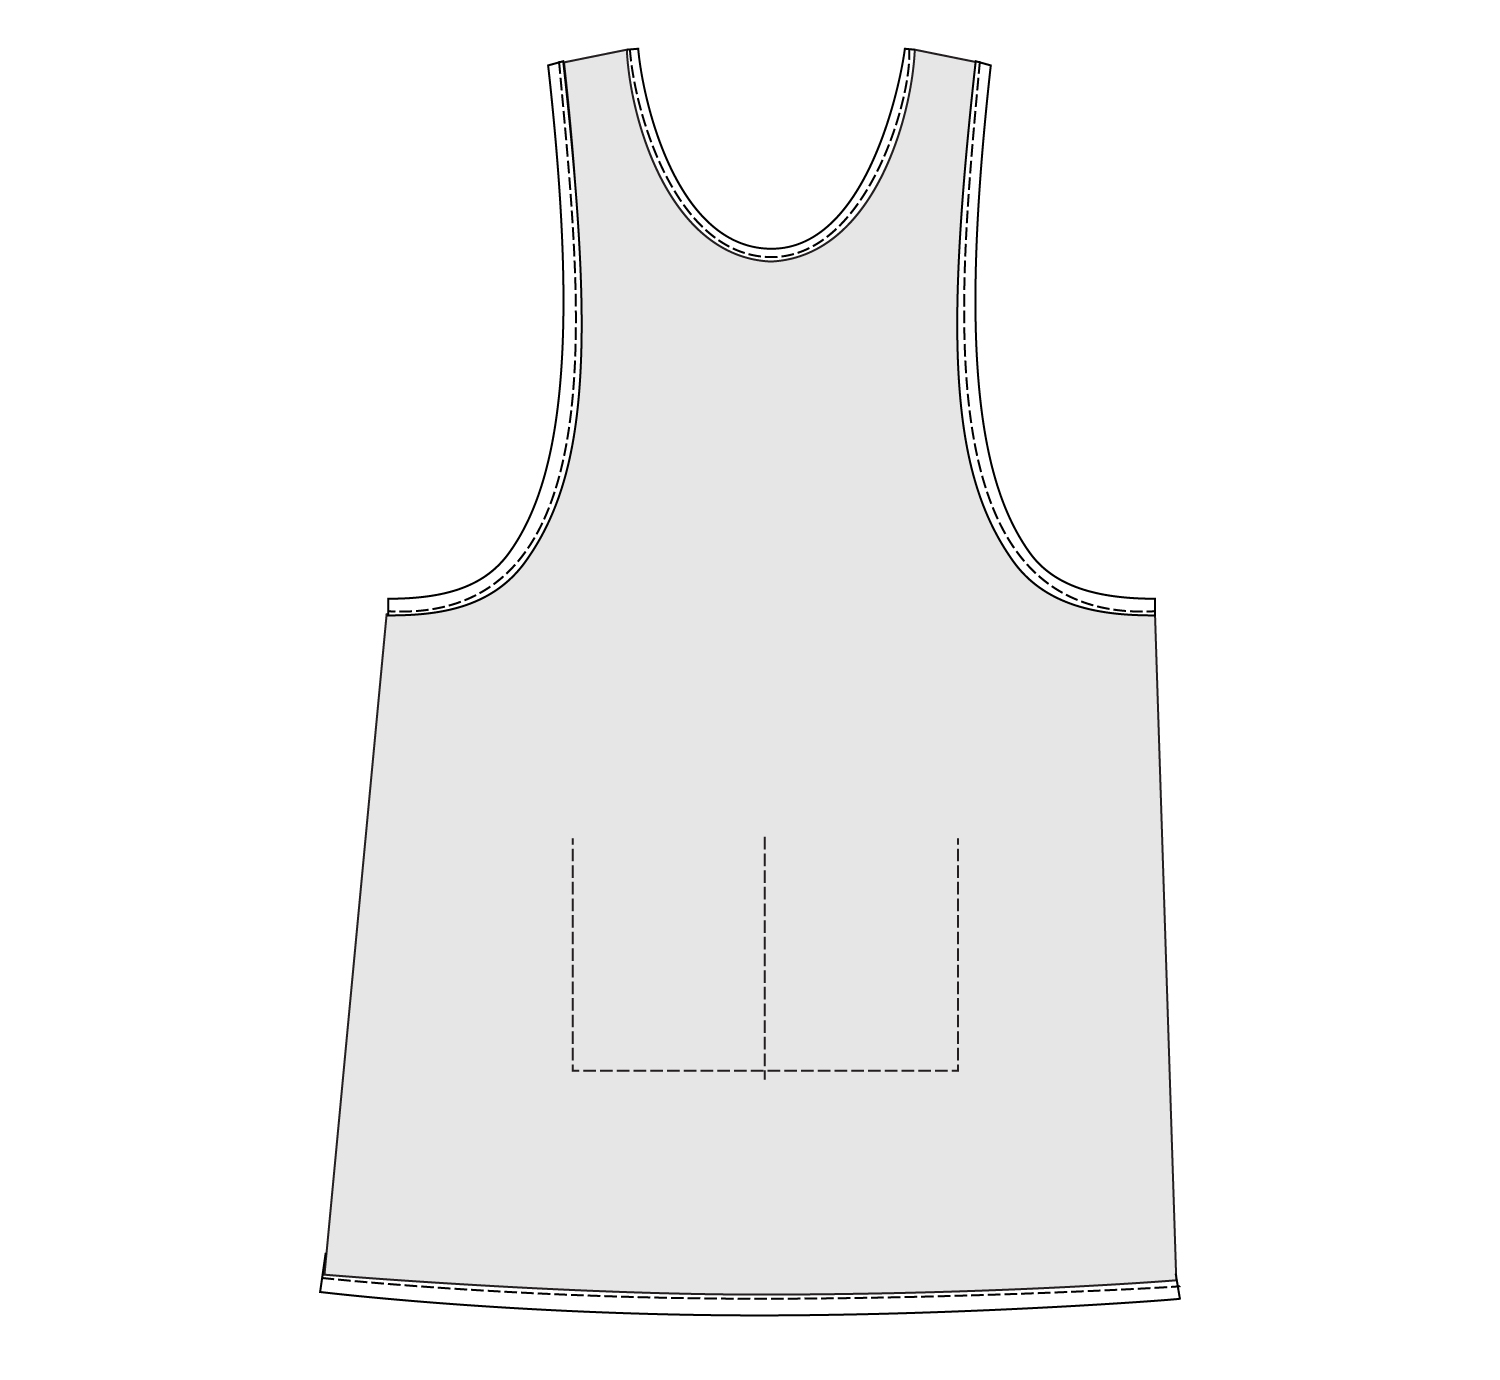
On the front of the apron, mark your pocket position line using tailor’s chalk, a washable or disappearing marker, or by simply marking each end of the line with a pin.
Sew the Apron
Step 1:
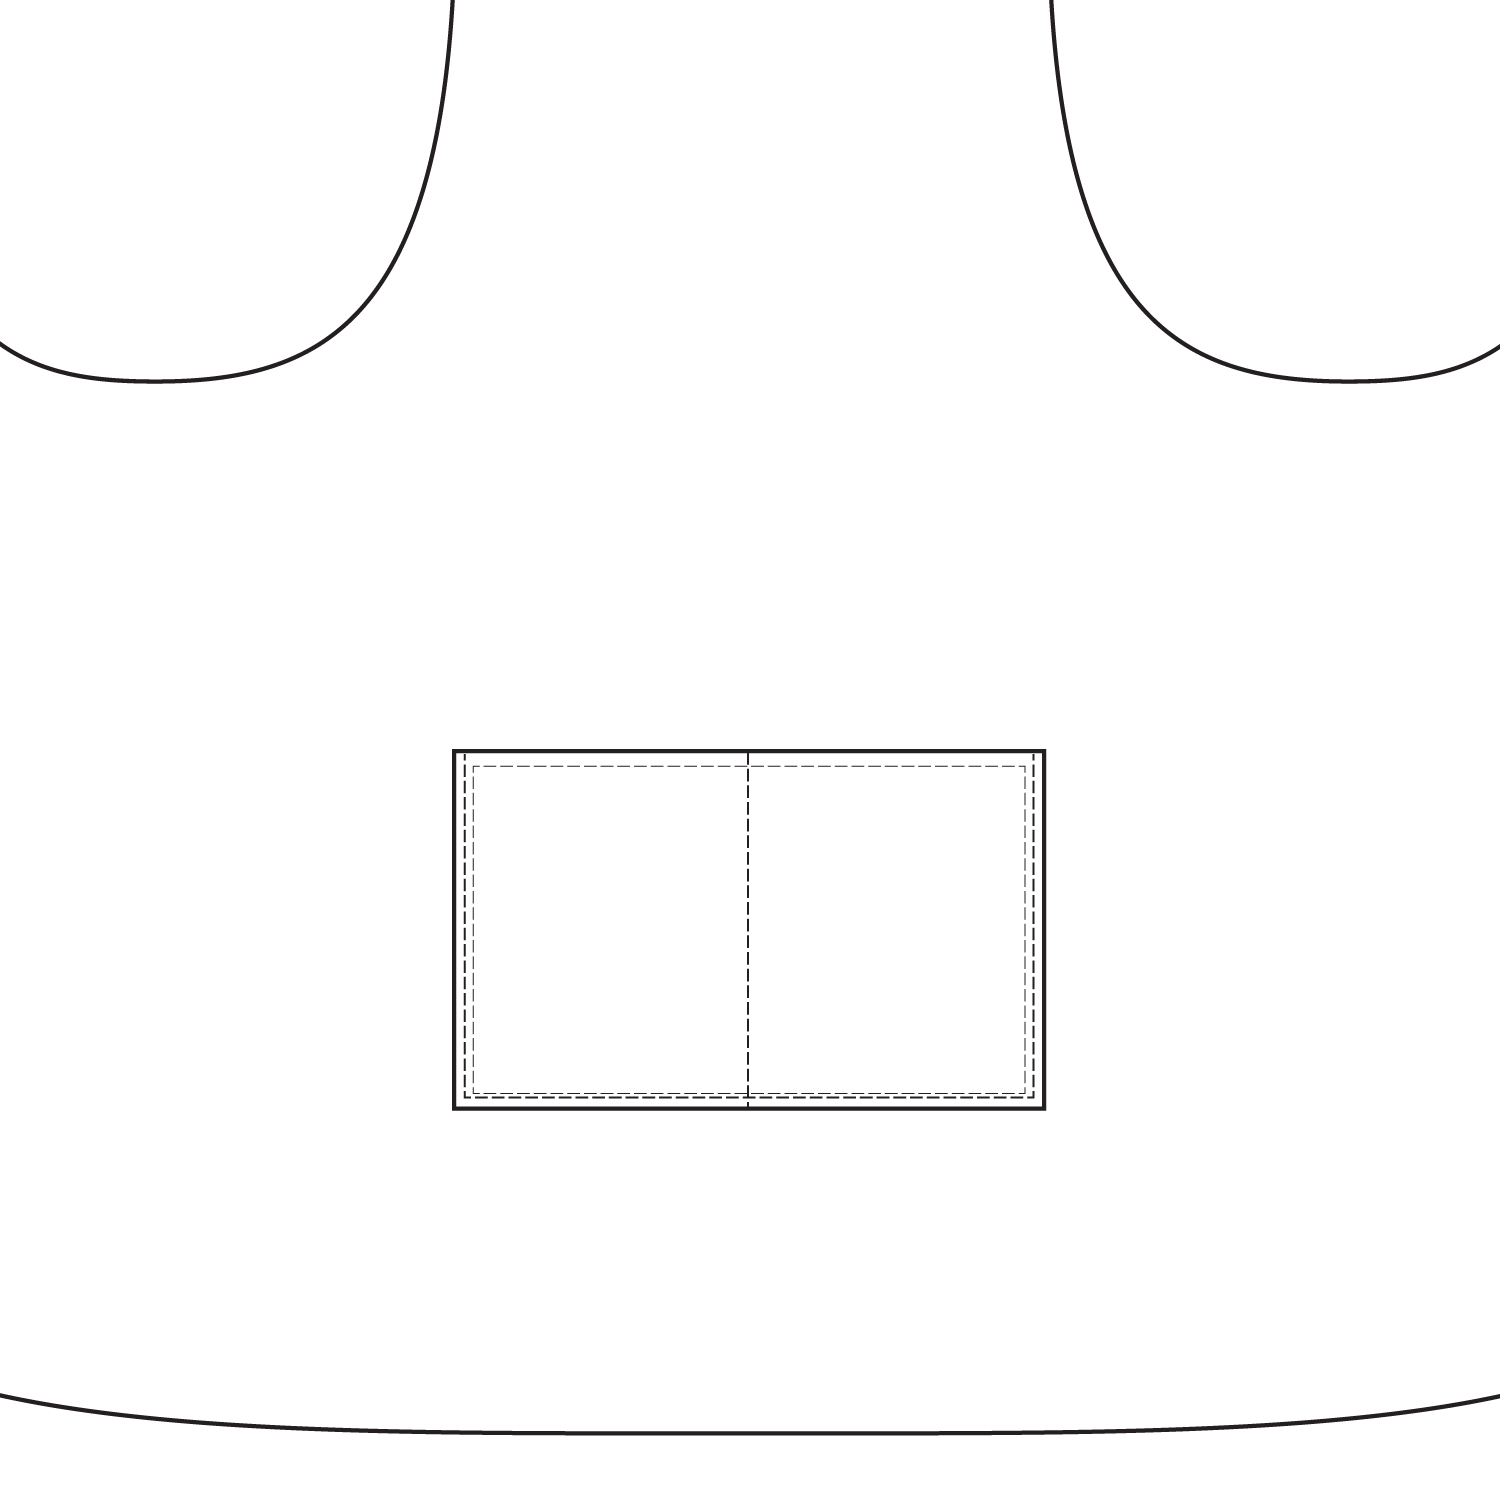
Hem all 4 edges of the pocket piece with a double 1/4″ fold. Use an edge stitch as close to the fold as possible for a clean finish.
Step 2:
Align the top of the pocket with the pocket marking on the apron and pin it in place. Then edge stitch around the sides and bottom of the pocket to secure it to the apron. If desired, sew a second line of stitching 1/4″ away from the first for extra security and detailing.
Step 3:
Sew a line of stitching straight down the center of the pocket. Alternately, leave it open as one large pocket, or divide it up into 3 sections or uneven widths. This is a design decision that is all yours!
Step 4:
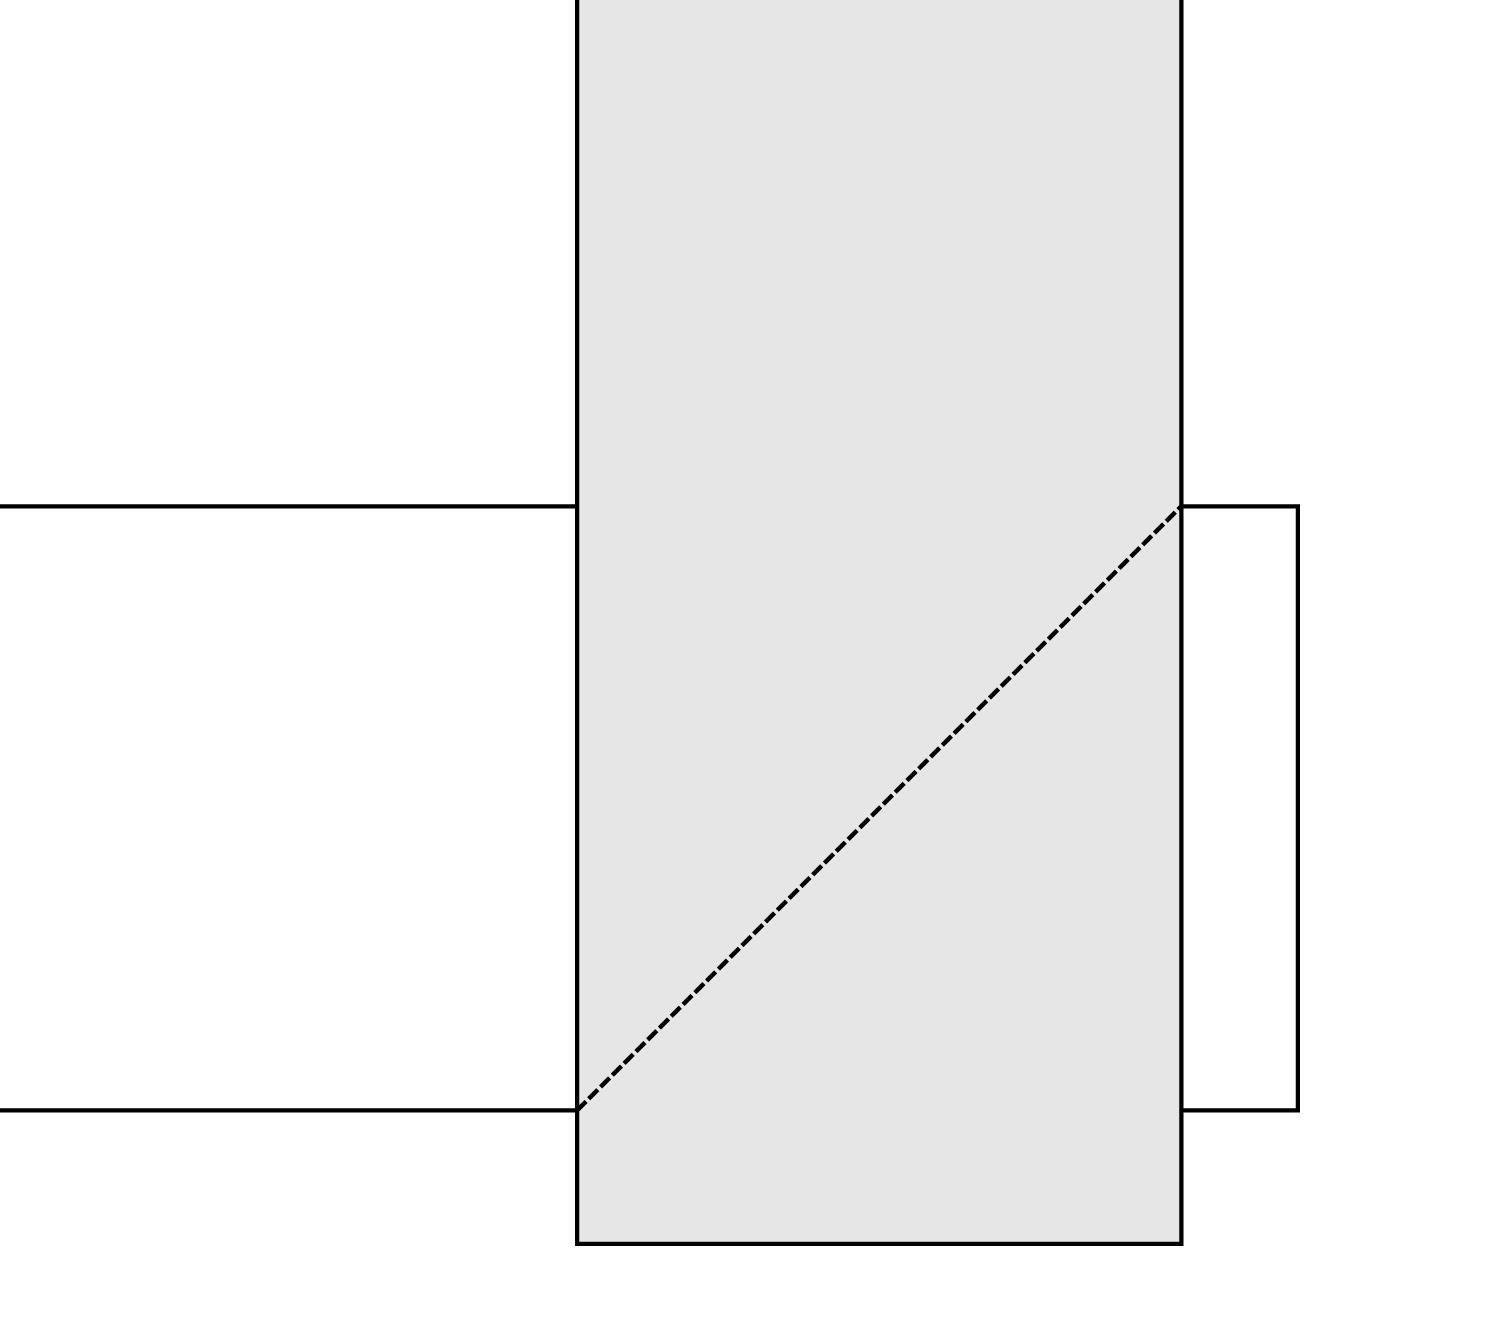
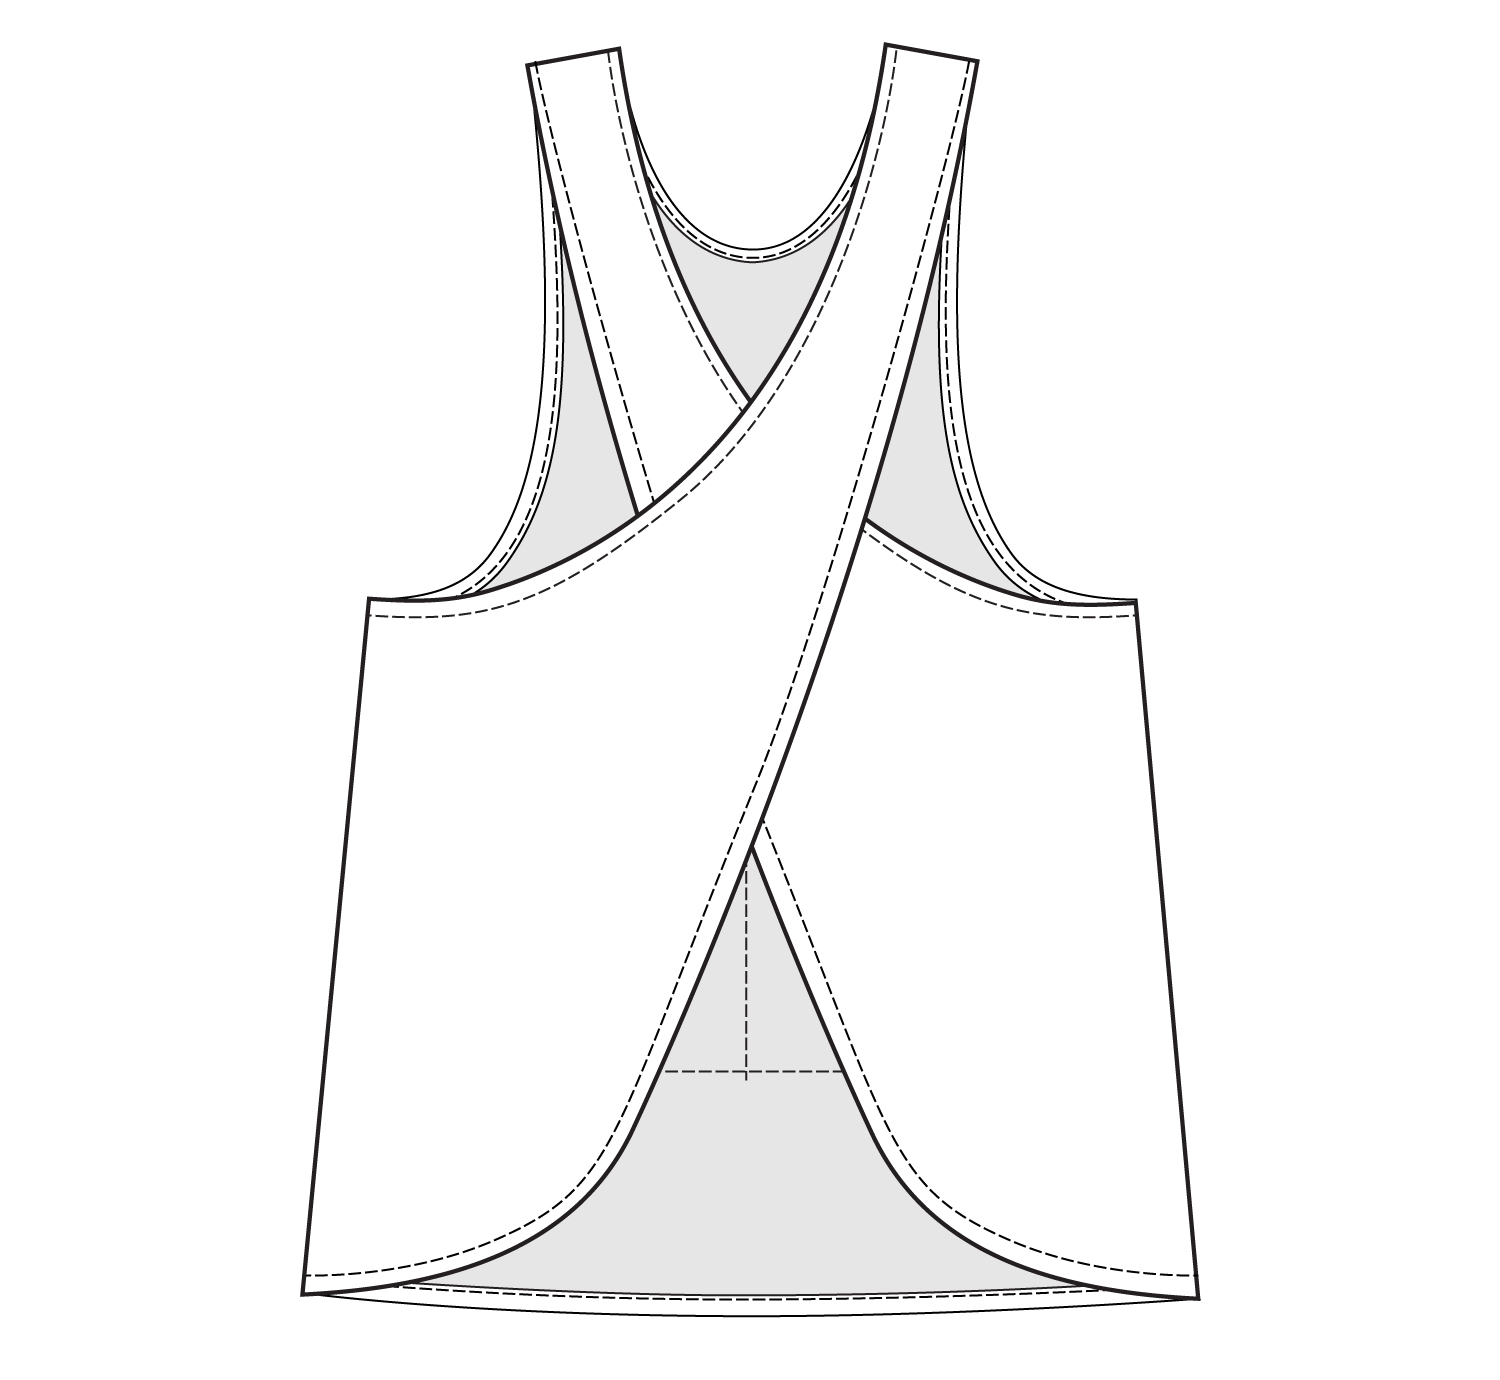
Lay the apron right side down. Bring the back strap up to align with the opposite front strap, wrong sides together. Pin them together and then sew with a 1/4″ seam allowance.
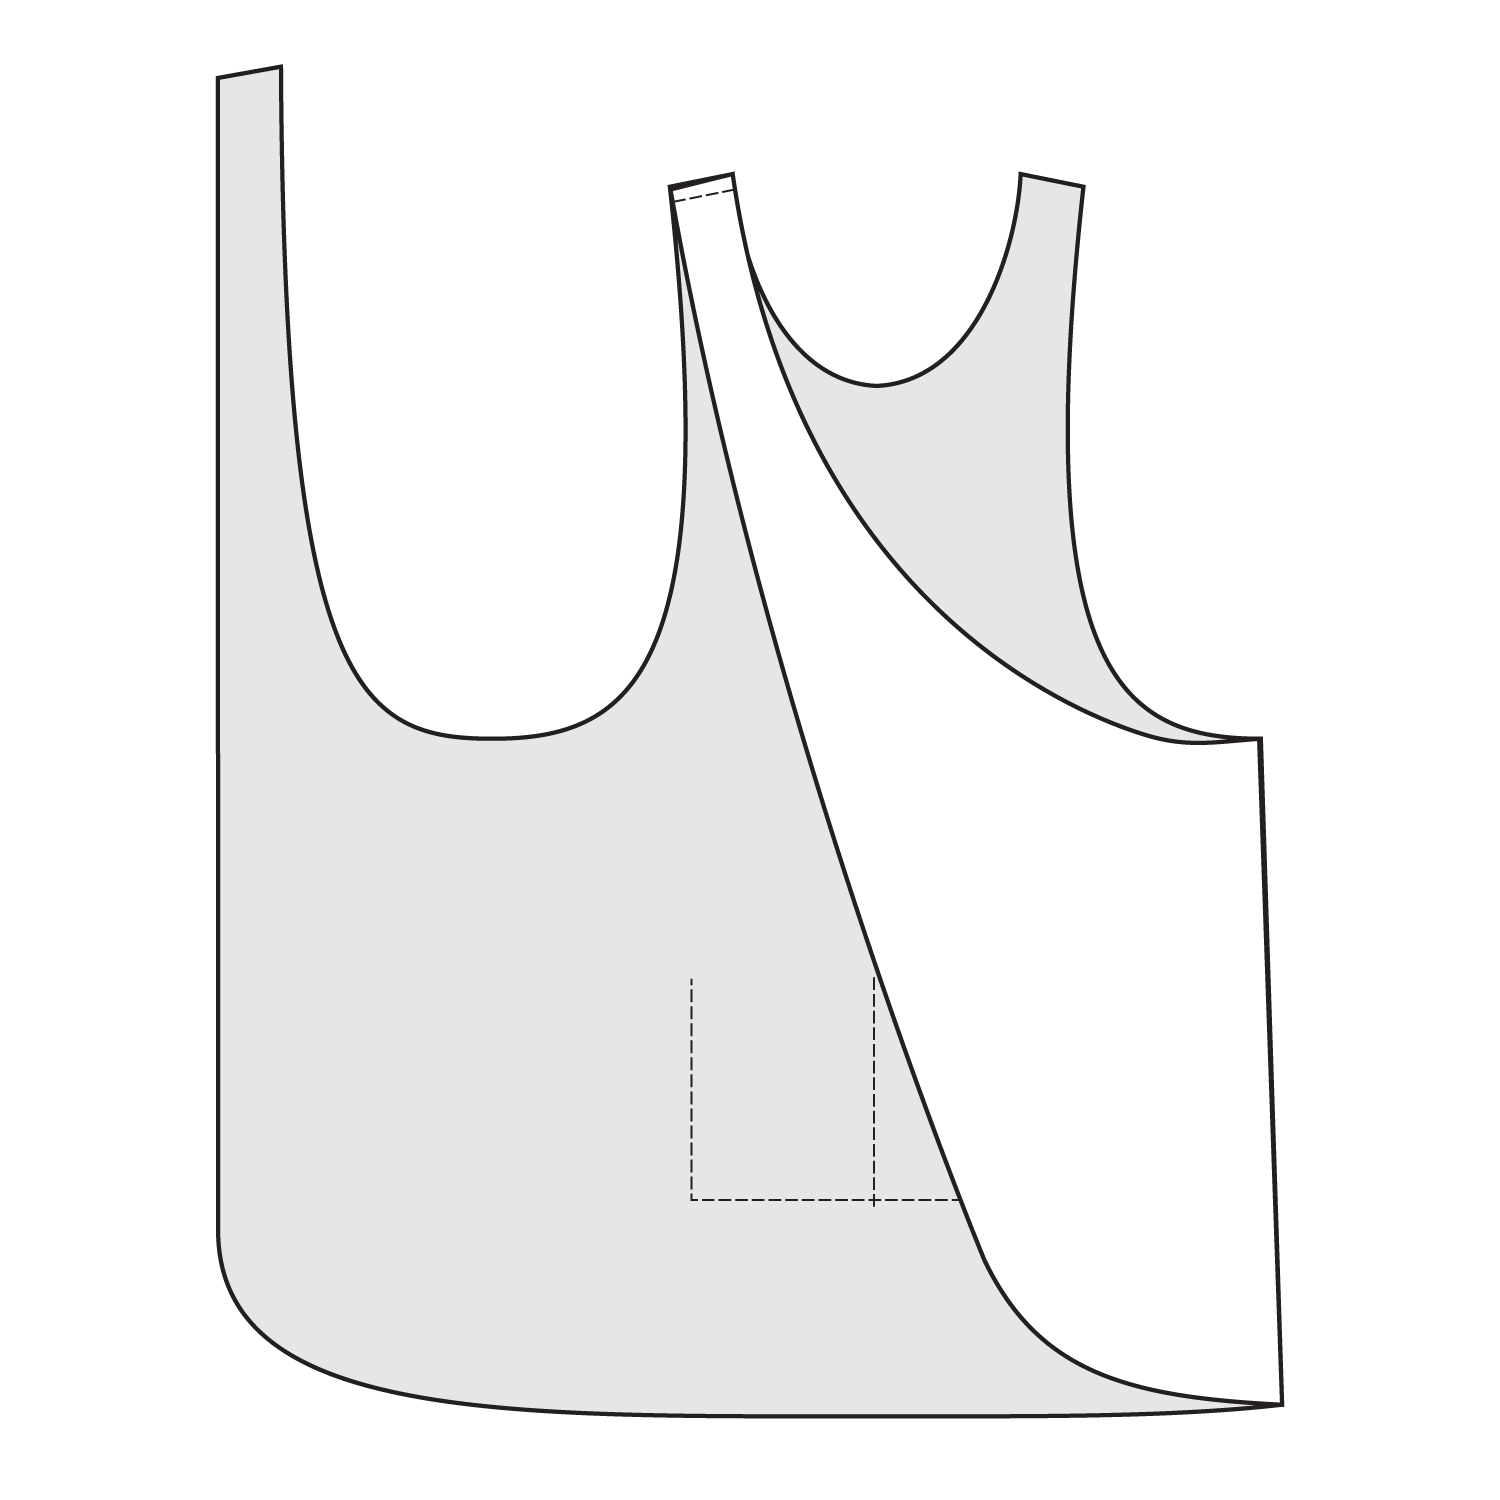
Repeat for the other strap.
Step 5:
Turn the apron wrong side out and press along the shoulder seams so they lay flat. Then sew both shoulder seams once more, this time right sides together, using a 1/2″ seam allowance. This seam will enclose the seams from step 4 and form a French seam finish. Press the seam allowances toward the back and topstitch them down, if desired.
Step 6:
The apron construction is finished! Now you can finish all the edges with your preference of single fold bias tape, double fold bias tape, or a simple double turned hem. If you prefer to just hem, I recommend first sewing long gathering stitches around the convex curved areas at the lower center back to help with turning and pressing later. When you press your hem in place, first press at 1/2″. Pull the gathering stitch thread tails around the curve to help bring the edge in without causing the fabric to bunch up. On the concave curves, like the neckline and underarm areas, you may need to clip up to the fold in a few places to get the hem to stay in place. After pressing at 1/2″, go in and tuck the raw edge down into the hem for a total hem width of 1/4″. This is visually the same as doing a double 1/4″ folded hem, but it is easier to do it this way on curved areas with such a small hem allowance.
To finish with bias tape: Make sure your bias tape is only pressed once, wrong sides together in half (see an example in the pic below). Align both raw edges of the bias tape with the raw edge of the apron (anywhere) on the right side. Leave about 6″ hanging free and then start sewing the bias tape to the apron using a 3/8″ seam allowance.
Step 7:
Sew alllll around all edges. They are all connected in one huge loop at this point, about 230″ of loop for the largest size, so just keep going. Stop sewing when you get about 6″ from where you started. Now you will need to connect the two ends of tape and trim any excess before you can finish sewing the bias to the apron. You will connect these two ends, right sides together, exactly the way you’d do a quilt binding. First lay the loose ends of the bias tape over the unfinished edge and mark where they need to be sewn together. Then lay the right piece over the left piece so they align at a 90 degree angle, right sides together. You’ll need to open up the ends of the bias tape so they are not folded for this step.
With the two ends laying right sides together at 90 degrees, sew from the bottom left corner to the top right corner of the box they form. Tip: I always just hold the two pieces together where this seam will be to double check that A: the final length will perfectly fit the unsewn apron edge, and B: the bias strips are turned correctly. The “left” strip, or the one that is right side up in this pic, needs to be turned over in a specific way for this to work, and it’s nearly impossible to explain in text but very easy to see when you’re holding the pieces. So, double check before sewing. If you just can’t visualize what’s about to happen, baste this seam first so you can be sure it works before sewing a permanent seam and trimming.
Trim the seam allowances and press them open.
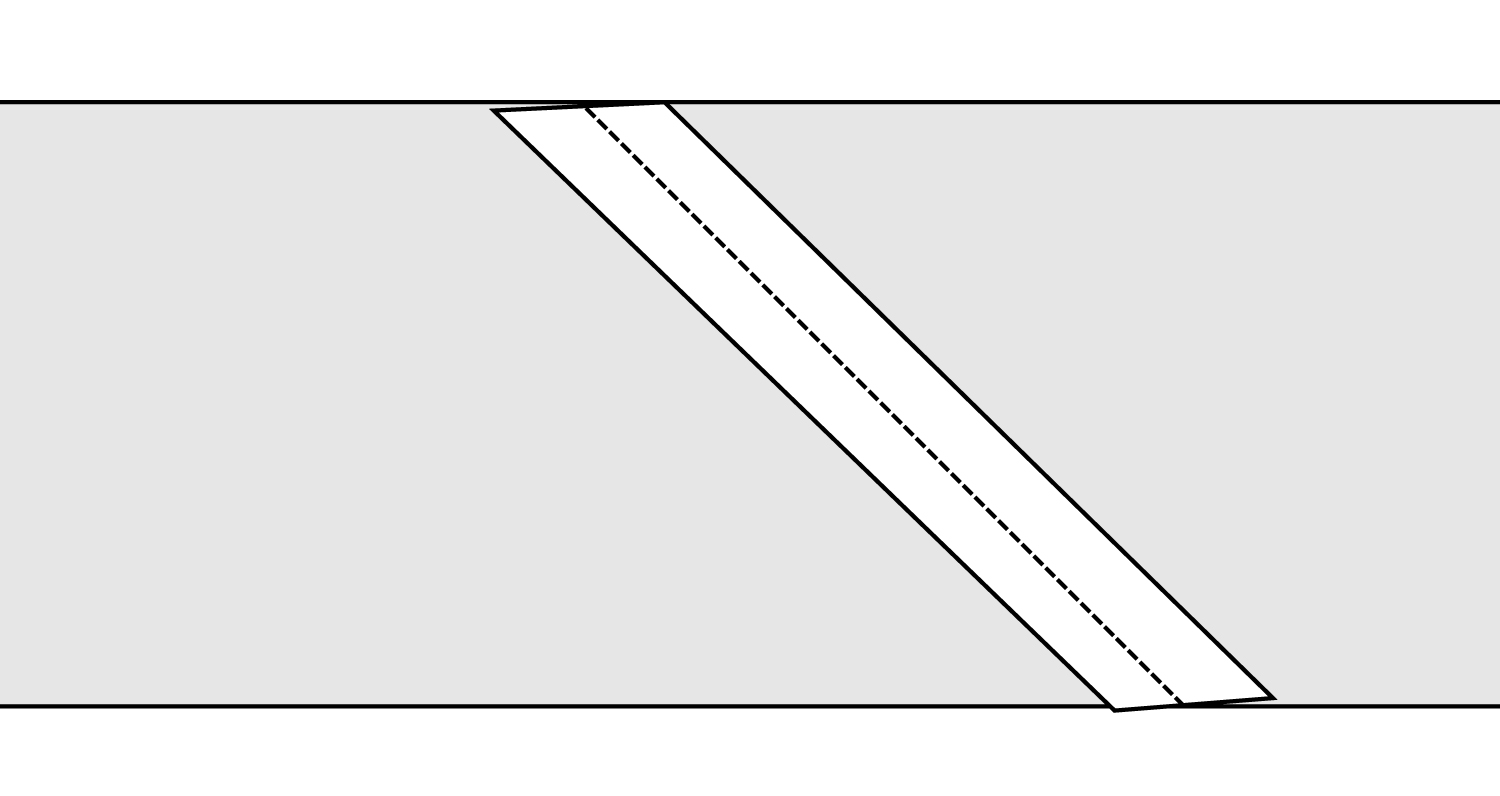
Then press the bias tape back in half, wrong sides together. (this image shows the end of a piece of bias tape folded in half to give you a visual, but obviously you won’t have an end showing at this point)
Then finish sewing the bias tape to the raw edge of the apron.
Step 8:
Trim the seam allowances all around the apron to 1/4″. Press the seam allowances and bias tape away from the apron. At this point, I recommend you understitch the bias tape to help hold it down. However, this step just makes the apron extra professional and sturdy, it is not necessary for construction. To understitch, top stitch along the bias tape near the edge where it is connected to the apron, catching the seam allowances underneath. This stitch sews together the bias tape and 3 layers of seam allowance. The apron is NOT caught in this stitch.
Step 9:
Press the bias tape fully to the wrong side of the apron. It should not be visible at all on the right side. If you understitched, that line of stitching will keep the bias tape from rolling to the right side. Edgestitch around the bias tape close to the fold to secure it to the wrong side of the apron. In effect, this is your third time sewing all around the perimeter of the apron. (If you understitched, the bias tape will now have two visible lines of stitching on it.)
Step 10:
Press and steam your apron really well, especially around any wavy edges. Don’t skip this step! And you’re finished! Admire your beautifully constructed apron that will last years and even generations with care.
If you make an Allspice Apron, I’d love to see it! Tag us on social media with #HeyJunePatterns and #AllspiceApron!
Happy sewing!
I’ve been wanting to sew an apron like this and the allspice is perfect – and beautifully named! Gorgeous free pattern – thank you.
Great pattern and it printed out and assembled perfectly matching the diamonds. I’m planning to sew a matching lining so not to deal with bias tape. Thankyou for making it easier without having to purchase a pattern.
Sewing a lining is a brilliant idea. I would rather do that than deal with that much bias tape. Thanksfor sharing your idea.
I made an apron as per instructions, but would like to try with double fabric or lining. How would you add a matching lining? Cut out two patterns and sew them right sides together and turn them after?
Double fabric would be cool…..actually a little heavy so make it out of lighter cotton. Yes just cut 2 except for the pocket and you’re good to go.
I love this style! Thank you so much for sharing!
Aside from stocking, small projects and a dress for my daughter’s 1st birthday, this was one of my first big sewing projects. The steps are easy to understand, and I learned a lot! Thank you!
Wow! What a lovely gift—from you to your readers! I’ve learned quite a few things just reading the instructions and, you’re right, these aprons will make really nice gifts. Thank you!
This is great – thanks so much! Looking forward to making (and wearing!) one.
Thank you, Adrianna! This apron is sooo cute! And, it will definitely take care of my gift giving dilemmas !
Such a generous gift- thank you so very much! Wishing you a safe, healthy and happy holiday season!
How to download the pdf and print off of an iPhone please
Thank you! How generous of you, you have clearly put a mot of tine and effort into the pattern and instructions, all for free! I will be making one for my woodworking partner who gets distracted by the strap round the back of his neck of his current apron.
*Lot of time and effort* 🙂
Thank you for this pattern! I’ve been wanting to make a similar one forever and this is just the push I needed. Beautiful photos, btw.
Thank you for this pattern, my daughter asked me to sew one just like it. She’s going to love it!!
How kind of you, dear Adrianna! It is a lovely pattern and multi sizing it is so extra kind. Thank you, and happy Christmas to you and your family. Keep safe and well.
Thanks for this pattern! In order to avoid bias tape, etc. could i cut out two in Separate fabrics, attach the shoulder seams and then sew the 2 right side together leaving an opening to turn right sides out? And make it reversible? My only fear would be the straps getting entangled. I made my sample using a rolled hem foot instead of bias tape, worked great but we all know how fun working with this foot is… thx!
Hi Kelly – I’m wondering how your reversible apron turned out… I’m going to try it myself, with pockets on both sides.
Thank you so much for the pattern – just finished my apron today and haven’t taken it off yet! Made it reversible with two scraps from my stash and it worked fine. Sewed both pieces together except the shoulder seams, leaving a 5 inch opening at bottom to turn. After pressing I sewed the shoulder straps together by machine on right side and hand stitched lining sides after. Then edge stitched all the way round using blind hem foot which gave very neat finish. Oh, also used variegated thread for fun! Turned out very well. Love it!!
I make them reversible, I leave the shoulder straps un-sewn and use one of those to pull the whole thing inside out through. Real fiddle but it works. I then sew the tops of the outside straps together, the same for the inside ones and then line up the sides and sew those shut.
I utterly love this apron, I put it on and that is me for the day, no fiddling, retying etc.
I have made a few of my friends one and they all love them.
Thank you very much for this free and very nice multi-sized pattern. This is just what I needed. Nice Christmas gift.
Thank you for the pattern, I aim to sew aprons for my friends for NEXT Christmas! Merry Christmas to you
Thank you for this pattern! I just finished making the apron, and it’s my first sewing project using a pattern. Great instructions for a beginner. I’m so excited.
Beautiful! I can’t wait to make this! Can you tell me where you found your bias tape? It coordinates so well with the fabric.
Hi Melissa,
it’s self bias tape, using a continuous bias tape method from the link!
Thanks Adrianna!
This is REALLY Awesome! Thank you so much for sharing your knowledge!
Thanks so much, I have been looking for a pattern like this. My cooking daughter will love it, so will I. I can make for friends too.
Not able to download the apron pattern through the link provided in email. What am I doing wrong?
Such a satisfying, quick sew. I have a pattern, similar to this already, but after looking at the direction it seemed so over-involved that I started looking for another! Thank you for sharing this. I made it for my daughter who requested a cover up for when she is in the studio painting. I raised the sides up little higher because just to cover a little more of her clothes.
I love this pattern! If I wanted a bias tape edging that would be more like quilt binding and visible on the right side, would I simply apply the binding as the instructions suggest, but on the wrong side so it folds to the right side? I’m also trying to imagine how I would make a reversible apron with two layers of quilting cotton. My guess is I would wait to join the shoulders until I’ve turned everything right side out? Has anyone tried this.
Thank you so much for this free download!
I made an apron from this wonderful pattern and did put them binding so it shows on the right side. I simply reversed the instructions and used a coordinating quilting cotton to make the bias tape. I probably selected a linen that is too light for an apron, but it will still work, I think, and the FO looks really lovely. The binding was a little stiff right after I applied it, but I threw the whole thing back through the washer and it softened back up. I’m very happy with the results, overall, and pleased that the pattern works very well.
Correct, I make these and sew two sides together, right sides facing eachother. I then turn it inside out. Lineup the outer shoulder connections (remembering to cross-over), sew them with the machine on the right side. Sew the inside shoulder connections by hand. Works for me, a lot more fabric but no bias and I also find the apron falls nicer and does not leak through as quickly
Hi, I just came across this pattern. What a lovely gift. I will use it often, and who knows may make gifts for friends too. Thank you very much.
Loved the pattern. I decided to make a facing for the top rather than turning the edges. Worked great
So excited to make this. Thanks so much for the great pattern.
Just curious did you wash your fabric prior to sewing?
Always, with all fabrics and all projects, every time.
When I printed the pattern, it didn’t print all the way to the bottom, so there is no diamond to connect to the next row. How far do the pages overlap to connect the rows? I have been looking for a pattern for this kind of apron for awhile, so happy to have finally found this!!! Thank you!!! Ilene Baumert
Hi,
It sounds like it wasn’t printed with the correct settings. We have a link to a post on the main page entitled “A comprehensive overview of digital patterns” that will show you the specific printer settings required.
Thanks for sharing this pattern, exactly what I was looking for! I cut 2 out of a heavy rustic natural toned linen, and just finished one of them. I may do the second one a little differently in terms of fabric and pockets. A few thoughts:
1- I made mine for working in my garden, so I added a couple of loops for tools and a carabiner on either side of the pocket.
2- This apron could easily be made with two lighter-weight fabrics and quilted. Would be beautiful! And… it would eliminate the need for bias tape, right? (which I think would save time, I found making and working with the continuous bias tape slowed me down).
3- I would like to use my second apron for working with paints and dyes, so thinking I might try 2 layers, one of them water-proof so the dyes do not penetrate the apron and stain my clothes. Same with grease. Not sure what fabric would do the job and not be roasting hot…
4- Comments re closing the binding!
Thanks for the warning! It took me 9 trys before I got it right. Glad I basted!
I’ll attempt to put what I learned from that odyssey into words:
– Unfold the left-hand piece and twist it away from you until the RIGHT side is up again.
– Then pin the unfolded right-hand piece at a 90 deg. angle with the WRONG side up (so the 2 right sides are pinned together).
– Stitch on diagonal as per your diagram.
Also, make sure you check to make sure the length matches up with the length on the edge of the apron And especially… before trimming edges and pressing!
I make it with two layers, not quilted, no edges to bind as I turn it inside out (same system as for a vest/gilet). It also allows you to wear it either side (not if one side is dirty of course….).
The fabric I would use for waterproof would be PUL. Experience in using this fabric but never tried it on an apron though.
Thank you so much! 🙂
I don’t know what I did when I put my pattern together but the straps don’t seem to be long enough. The front neckline was way to high. Do you think I can correct this? Could I make an extension to the straps? I’m sure it’s not your fault as everyone else loves the pattern.
This is exactly what happened with me. I, too, don’t know where I went wrong. Can anyone explain this? Please and thanks!
Thanks so much for this lovely free pattern.
I had the same problem with the first time I printed the pattern. My apron turned out child size. I went back in to my computer and did a thorough check of the print set up, did some adjustments so that I could clearly see the full page and the border in each page preview and reprinted. The result was perfect.
Thanks sooo much for this pattern. It is such an easy make and I’m so happy with my apron. I’ll be making many more.
Thanks so much for this wonderful pattern! I have been looking for this style for a long time. I used a heavier material like duck plaid so it is the same on both sides and it is stiff but I think with washing it will soften up. I made a medium but think I could have made a large due to heaviness of fabric. I also want to make one for gardening and love the loop and carbonator ideas to hang tools. I also like to have my cell phone in a pocket while gardening that is deep enough so it doesn’t fall out when you bend over. Thank you so much for designing this plus making it FREE.
JAN
I had been looking at this style of apron for awhile but couldn’t find my size in a material that I liked. Viola…XL in a nice linen blend! I have not sewn for quite awhile so the simplicity was helpful to get me back in the groove and remind me of the nuances of my old Simpsons machine! Thanks so much for the pattern and getting me back in the groove. Now to find a pair pattern for balloon crop pants with some inserts. I’ll leave a photo if I can