I’ve been wanting to have this conversation for a long time and I’m happy to say I’m finally sitting down to share some thoughts and notes about ease!
I have a lot of conversations about sewing, as you’d imagine, and issues relating to ease are definitely in the top 3 subjects that come up. Ease is such a huge factor when it comes to choosing a pattern and understanding how it will fit. A lot of times people confuse it with choosing a size, and it’s so important to know how sizing and ease relate to one another and why size shouldn’t be chosen based on finished ease.
When you understand ease in garments, you’ll have so much more success in choosing the right pattern, the right fabric, and in knowing how to make alterations without affecting ease negatively. This post is just going to be a broad overview, but I hope it gets the conversation started and encourages you to move forward with your own research on the topic!
There are two main types of ease in all garments. I’m going to be mainly focusing on style ease in this post, but let’s do a quick rundown on wearing ease just to distinguish the two.
(Remember, ease in a garment can be calculated by subtracting the body measurements for each size from the corresponding finished garment measurements.)
Wearing Ease
Wearing ease in a garment is the difference between your body measurements and the garment’s measurements that allow you to move – raise your arms, sit down, flex your biceps, breathe, etc.
In garments made with woven non-stretch fabrics, wearing ease is almost always a positive number and it varies based on the type of garment and the part of the body it covers. For example, you need very little wearing ease at your waist to accommodate motion. However, hips need relatively more ease to accommodate actions like sitting down or crouching. Measure the fullest part of your hips/butt when you’re standing vs. sitting down and you’ll immediately see why that area requires some room to move.
Close fitting garments don’t have very much wearing ease (think of a sheath dress with a pencil shape in the skirt), and thus need shaping mechanisms like darts and pleats to fit around your body’s curves and closures like buttons and zippers to get on and off your body.
In garments made with stretch knit fabrics, the line between wearing and style ease is a little more blurred and can be a negative number, zero, or a positive number. For this reason, the argument could be made that all ease on stretch knit garments is style ease. This depends on the type of garment, where it is worn on the body, and the type of knit used. A knit camisole or leggings will have negative ease because they are meant to stretch to fit tightly against your body. Closer fitting garments like fitted tees or pj pants may have zero ease. They don’t stretch to fit around the body, but they fit your curves closely. And some knits have positive ease, such as hoodies and joggers, because they are meant to be worn as layers or be looser on the body.
Style Ease
Style ease is not the same as wearing ease. When drafting a pattern, the pattern maker will first use a block that contains wearing ease. From there they will make decisions about style ease based on the intended fit of the garment. That can involve removing ease (for tight knits) or adding ease. The important thing to remember is that this ease is not adjusted to make it possible to move in the garment, that has already been done. It is adjusted to create the intended style.
There is really no limit to style ease depending on the garment type and current fashions. A large caftan style dress will have enormous amounts of style ease. A pencil skirt will have reduced style ease (usually reduced to the minimum amount of wearing ease). Here are a couple examples using Hey June Patterns:
Positive Ease
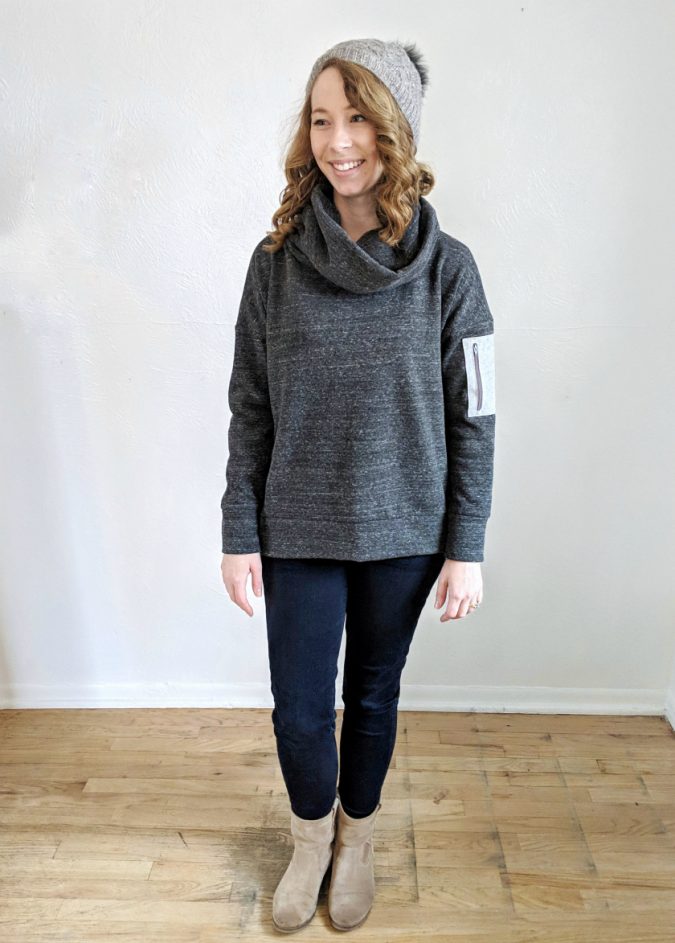
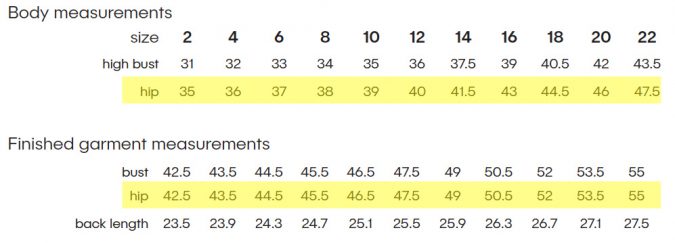
The Brunswick Pullover is on trend with today’s styles of cropped, boxy tops. Thus, it has generous positive style ease. It is meant to truly look like a rectangle when the arms are held out at the sides. Looking at the difference between the body and garment measurements on the pattern, you can see that the intended ease at the hip is 7.5″. That is the total amount of ease so you can assume that some is wearing ease and the rest is style ease. Knowing how that much ease will fit and look on your body is a combination of measuring, math, experience, and looking at the garment on other bodies on social media and the blog. It can be helpful to measure yourself against some of your ready to wear garments to figure out how different amounts of ease will look on your body (but be very careful to pay attention to the fabric type and stretch too, as that has a huge impact!)
Zero Ease
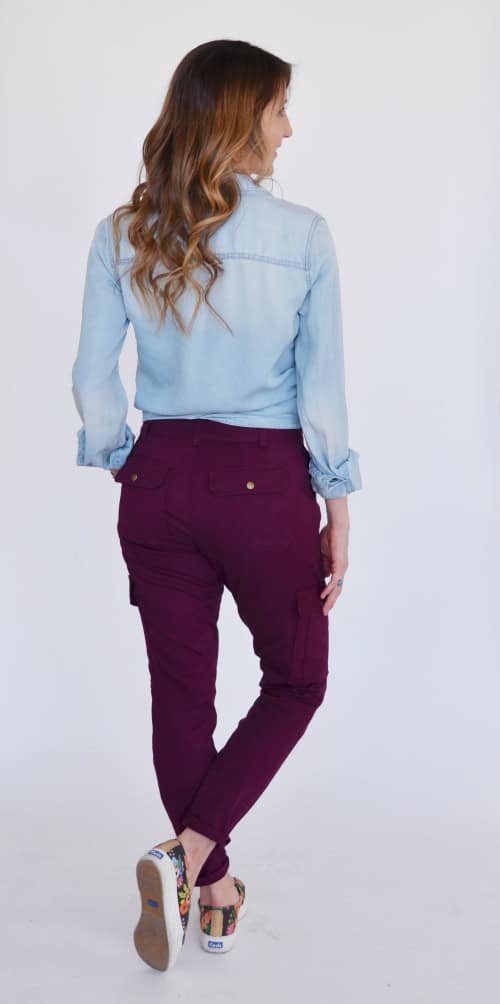
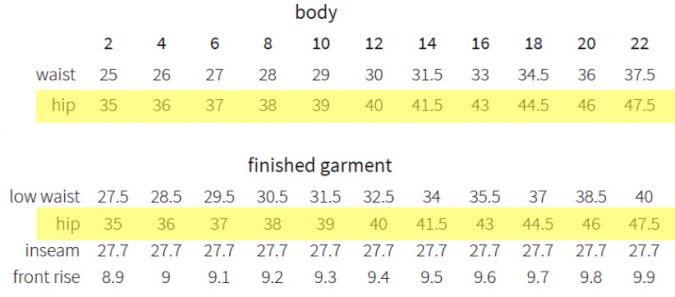
The Bryce Cargo Pants have zero ease at the hip. They can get away with this in a woven because the fabric requirements are for a stretch woven with at least 10% stretch, which accounts for the wearing ease that was eliminated when the pattern was reduced to zero ease at the hip. As you can see, this creates a fitted but not tight garment. The fabric stretch also means that the garment will loosen with wear and movement to some degree until it is washed again.
Negative Ease
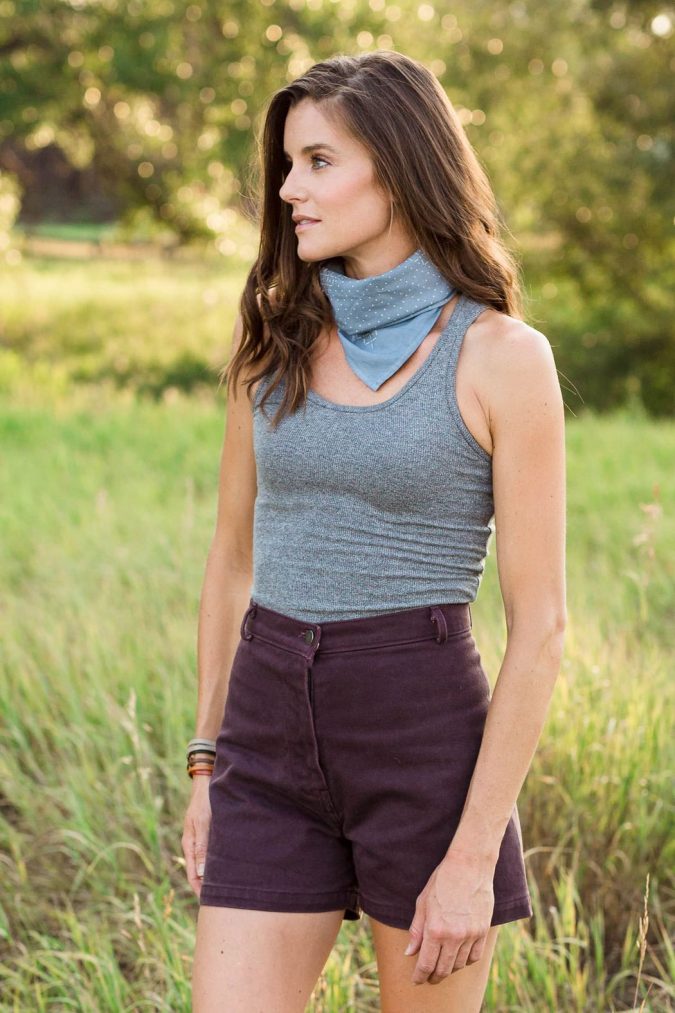
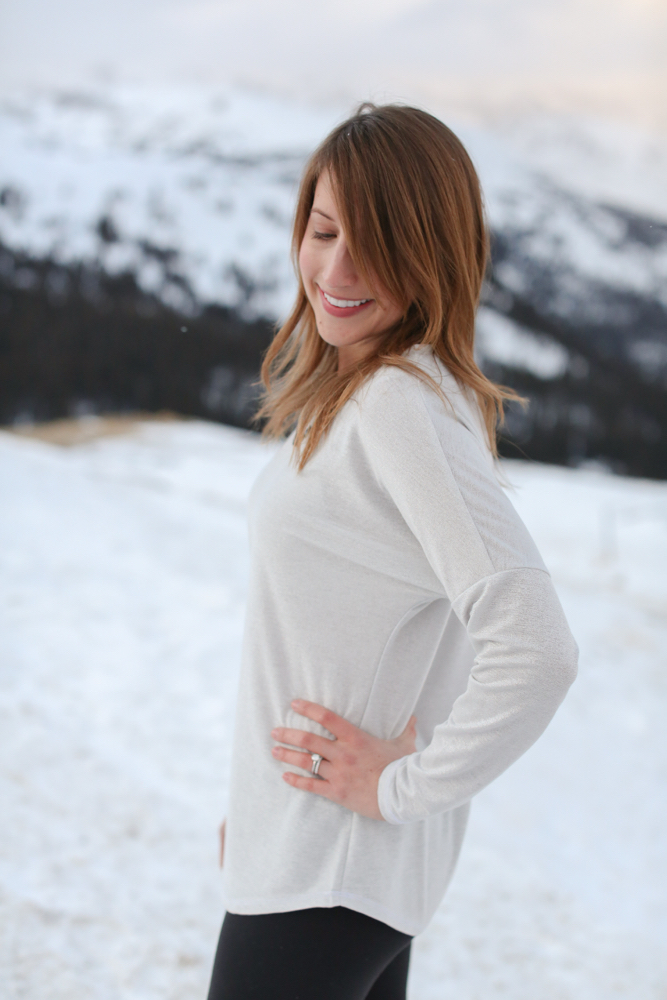
I don’t generally make super fitted garments, so I don’t have very many examples for negative ease. The Kila Tank from Allie Olson Patterns (pictured above) is a great example though. This is meant to be a very close fitting garment for warm weather or layering. It has 2.5″ of negative ease at the waist and 6.5″ of negative ease at the hip for the smallest size. Patterns like the Kila with such important negative ease will also give very specific fabric requirements based on fiber/substrate/stretch percentage and disregarding those requirements can also greatly impact the wearability of the finished garment.
Combinations of negative, zero, and positive ease
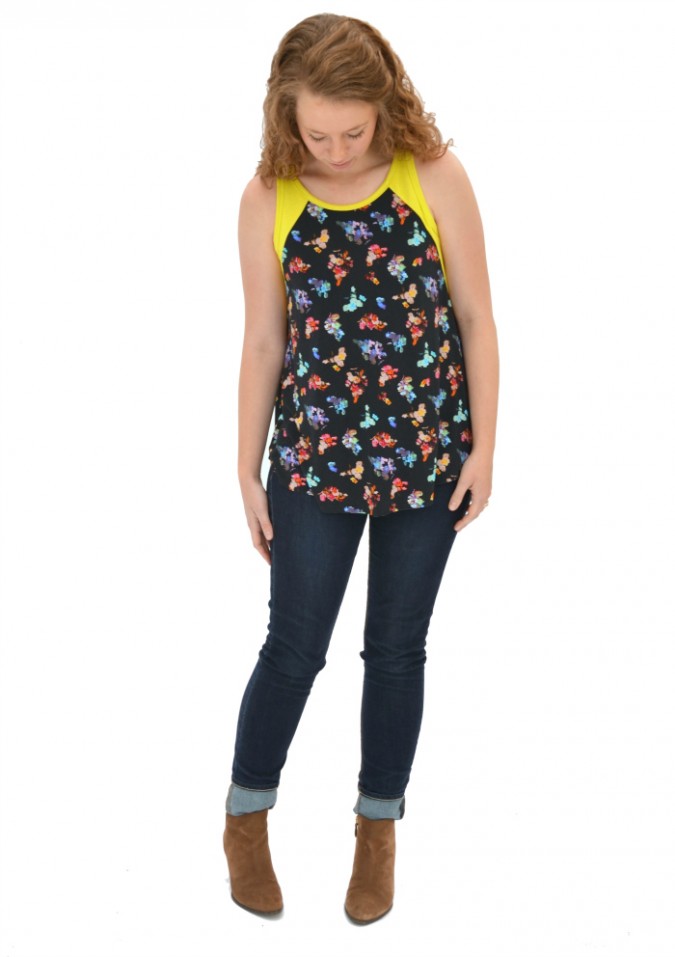
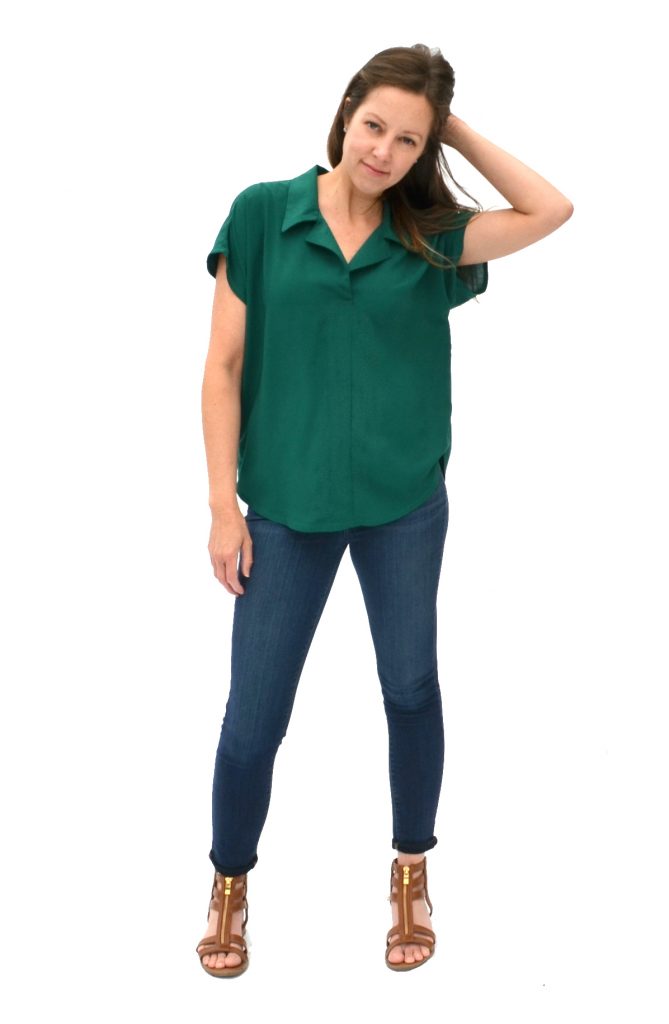
A lot of garment styles will have different percentages of ease on different parts of the body. For example, a fit and flare knit dress could have negative ease at the bust and waist but it will have large amounts of style ease at the hip. The Santa Fe Top is a good example of this. The tank top versions have negative to zero ease at the upper chest but the trapeze style means the hip has a large positive style ease. This is the intended fit of the garment. I see a lot of comments regarding the Santa Fe where people say it is “way too big” at the hip. This subjective statement is really just a description of ease, which is information that could’ve been discovered by reading the pattern information. Which leads me to…..
Why can’t I say something runs big?
When it comes to reviewing patterns and ready to wear clothing, using the terms “runs big/small” is incredibly misleading and factually incorrect. It discounts the purpose of style ease. For example, the Brunswick is a style that has a lot of ease and is meant to have a very boxy fit. It does not “run big”, it is the exact finished size it says it is. The only way a pattern could truly “run big/small” is if the pattern pieces do not measure to the stated finished garment measurements on the pattern. That would be a mathematical or technical error that would need to be resolved (remember to allow for seam allowances and rounding, usually to the nearest 1/2″).
It is dangerous to use words like “runs big/small” when describing a pattern or sharing your makes on social media because it creates the idea that the pattern does not indeed fit as intended. With social media being the giant influence that it is, this information takes off like a brush fire and can create a mob mentality with people all declaring that a certain pattern is too big/too small without considering intended fit or even muslining it on their bodies. This is incorrect at best and damaging at worst, as it subtly implies that the designer made a mistake and can’t be trusted.
Subjective analysis of intended style vs desired fit
Be aware that the intended style and fit of a garment based on the listed ease in the pattern may differ from how you desire the garment to fit. The pattern may be the closest thing you can find to what you want and then you’ll need to do some grading or altering. But this information should be included in your pattern review or description and made clear that it is subjective. You can absolutely post about a pattern and declare that it was “too short/too low/too loose/too tight/etc”, as long as you include the words “for me” at the end of those sentences. Those are subjective terms based on your personal desires, not based on pattern errors (choosing the correct size and fabric are huge factors here as well but not part of today’s topic). If someone following you just sees you declare that the pattern was too big, they may size down without muslining and then wonder why it doesn’t fit as intended. Words have power, use them well!
What can I say instead?
I love when I see people describe the way clothing fits with factual, mathematical terms. This is the best way to disseminate any information, especially when talking about something that has a technical aspect, such as sewing patterns. Consider saying something like, “This pattern has 7″ of ease at the hip. I wanted a closer fitting garment so I graded down to 5″ of ease.” This is extremely helpful to everyone reading because it includes the objective facts about the pattern as well as the changes you made to achieve the fit you’re sharing.
The dangers of changing size to change ease
If you see a roomy dolman style top and want it to be more fitted, you may be tempted to just size down to achieve your desired fit. Sometimes this works out just fine. However, the problem with doing this with every garment is that oftentimes patterns have areas with lots of style ease but also areas that need to fit well. In essence, this is confusing style and wearing ease and treating them as if they were the same. A good example of this with a dolman top is the cross back and cross front measurement. Sizing down to remove ease in the body of a dolman also removes length from your cross back and front and reduces range of movement in the sleeve. This often leads to pull lines extending up from the underarm. Today’s discussion isn’t a tutorial on how to solve that issue, but I wanted to use a common example of how simply changing size isn’t always the answer. On tunic-length woven shirt patterns with several inches of ease at the hip, like the Cheyenne Tunic, people are tempted to remove some of the hip ease (or ignore the need to grade out at the hips). However, that ease has been calculated to fall smoothly over your hips while sitting or standing and while wearing pants under the shirt. Removing that wearing ease makes the waist area of the garment blouse out in an odd way and creates the need for a swayback adjustment and/or fisheye darts through the body. This is one of the reasons why it’s so important to understand the purpose of ease and how altering it will affect the fit in other areas of the garment.
A final note about ready to wear garments
Don’t think that this issue only exists in sewing patterns! I follow so many influencers on social media who constantly recommend that their followers buy this garment but size up or down because it “runs big/small”. I can think of one influencer in particular who constantly shows off her boyfriend jeans but tells everyone to size down two sizes. Indeed, they fit her like skinny jeans. She has completely ignored the fact that boyfriend jeans have an intended loose style ease and is recommending that people remove that ease by sizing down. Can you do that? Of course! But it’s not what was intended by the designer, and the boyfriend jeans do not “run big”. They ARE big. On purpose. The size issues I mentioned above also still exist when picking ready to wear clothes, like how loose jeans still generally fit snugly at the waist and sizing down will reduce leg ease but also make them too tight in the waist, but that’s an eye roll for another day 🙂
I hope this has helped you differentiate between wearing and style ease and given you a better understanding of the terminology so you can share your makes with accuracy! Knowing about style ease can also help you make better choices about the patterns you choose to sew or alter to recreate rtw looks so you get the best intended result. Thanks for reading!

Great post! Thanks for clarifying the terms.
Lovely clear post. I especially like the caveat that some patterns do run big/small – ie they have technical problems that mean the finished garment measurements are not as they should be. I have found Hey June patterns to be among the best of the indie patterns in this regard – when I make the size corresponding to my measurements (grading as needed), I’m pretty much guaranteed a good fit. This just isn’t true for all pattern companies though, so I really appreciate it when the designer has measured carefully and ensured all the sizing details – and the ease! – are correct for the garment.
Excellent post very clearly stated
Very clearly explained, thank you. I’ll never use the term ‘runs big’ again, because it doesn’t really describe what is happening.
Great post! It always bugs me when I see term runs big, and I’m not a pattern designer/ maker. I think you should post this on your social media pages.
I agree with 99% of this, (and 100% with sewing patterns) but I think there are times when it is true of RTW clothes. If I buy all my clothes from a store in size x and they have a size chart (which can only be a guide if they are making clothes of all styles and shapes) and out of my 10 skirts in size x 9 fit my waist perfectly, but one of them falls off me, I would be tempted to describe it as running large and to advise sizing down. In rtw reviews these reviews are often correct because the reviwer will also be a regular shopper and therefore used to knowing they will always be a size x at this shop too.
I do look at rtw reviews for those sorts of comments and if there is a theme of ‘runs big/small’ I will usually take their advice if shopping online.
An interesting read, I particularly like that you suggest alternative language to use. I don’t see design and wearing ease differentiated between that often, and I think it’s useful.
I LOVE this post! And I will work hard to make sure I use the proper terminology in the future. And I will make sure I work harder at reading the patterns. I consider myself an intermediate sewist. So this information is very helpful. Thank you for helping me to understand!
Women’s sizing is all over the board! I hate mail order shopping cuz you never know what you’ll get — seems like every clothing designer/manufacturer uses a different fit model (and all kinds of “names” for unique “fits”). And the “big three” pattern companies have very strange size numbering — in RTW, I generally wear a 2 or 4, whereas in McCalls or Butterick, my measurements put me at a solid 12! What the heck? My limited experience with the new indie pattern makers has been more positive. I find that I’m looking at the measurements more (that they are faithful to!) as opposed to a pre-numbered “size”. Plus, I can make adjustments so it fits ME, not somebody’s fit model! I do love the posts of finished pieces on social media because they help me figure out what fabric to use and what looks good on a body similar to mine. Thank you for this informative article!
Annie – the disconnect between pattern sizing and RTW sizing is due to the advent of “vanity sizes”; RTW manufacturers decided to lower the numbering system so that women would feel less bad when they bought clothes in the correct size. The sewing pattern industry didn’t buy into it, so their system is the original size system from several decades ago.
Kudos to them for not buying into the vanity thing, but doesn’t help new sewers at all. Maybe something could be added to the sizing on the pattern envelopes to explain the difference? Indie pattern makers are the best! Look out Big Four!
Thanks for this clear explanation of all types of ease!
Another comment I think should be abolished is “this pattern fits great!”. Unless, if they add (as you mentioned) “… for me”. If it fits great, it’s a good match for your body size and shape (but maybe not for my size and shape).
To be fair, there are sometimes patterns where what seems to be the intended fit when looking at the cover art and what you get when making the size that corresponds to your measurements in the size chart do not match at all. Indie patterns mostly don’t do this, but the Big 4 absolutely do (burda doesn’t though). There is sometimes no way that the model is wearing the size corresponding to their measurements, which is extremely frustrating for beginners who don’t yet have a clear idea what x inches of ease look like and rely on cover art. Then you stand in front of a mirror in a sack three sizes too large looking nothing like the cover art and are absolutely justified in thinking it “runs big”, even if the finished measurements, if provided, are true. It takes some experience to be able to foresee this and know what ease is needed.
As I said, indies mostly don’t do this and some even state the model’s measurements and garment size they are wearing, which I LOVE. Such useful information, as is looking at pictures from other people who made the garment. I agree with your post that clear information, ideally the raw numbers, is really key in understanding what you will get.
Thank you for clarifying and explaining these terms. I am often frustrated by reading reviews and commentaries on sewing blogs where the writer does not understand these terms. I find I have to disregard the entire review because people confuse the intended fit of the design with achieving the particular fit she is looking for without regarding the design ease that is intended. Often the pattern is blamed (not only big four, Indies too) which is incredibly misleading.
I would like to ask sewing pattern designers to include on pattern descriptions the intended design ease in detail: a loose fitting shirt with 6-9″ of design ease intended (less for smaller sizes and more for larger ones). Also in sew-a-longs, in the first post on choosing your size, both the wearing and design ease could be explained in more detail, ideally with photos of people of different sizes wearing the garment in the size that matches their measurements.
Thanks for some good information about positive, negative and zero ease. You are so right that noting the ease and pairing the pattern with the fabric most suited for it can make a world of difference in how it turns out. Additionally, giving specific measurements you change to create a different effect in the garment is very helpful to other sewists who embark on making it. However, when a pattern does in fact, measure larger or smaller than the pattern maker’s indicated finished measurements for the size made….. then YES! In that case, stating that the pattern “runs big” or “runs small” is actually correct and possibly a nice way of stating the condition!! Ha! It does happen! Of course specifics like, “In making the size X of this pattern, I found it resulted in a waist measurement of 32 inches in the finished garment though the pattern states that the finished measurement would be 30.” – are certainly more tangibly beneficial. Fauke’s comments regarding misleading cover art are on point as well. Just my thoughts. Thanks for sharing yours.
Hi Adrianna!
Thank you for your blog post, which touches on topics very dear to me. I already expressed my thoughts on your post in my Instagram stories (tagged you, too), but I want to comment here also.
First of all, I really appreciated the parts of your blog post where you explain style ease, intended fit and how this should affect our choice of pattern. I 100% agree on that part: understanding style ease and intended fit is very important for us – mostly self-taught – hobby sewists and it is much appreciated whenever professionals try and educate us on these things in their pattern instructions or elsewhere.
What I definitely was not very happy about, is the overall vibe of your blog post. We might be hobby sewists, but I have to agree with Frauke here: a lot of us do understand the basics of ease, refer to the modeled pictures to get an idea of intended fit and pick our size according to our measurements and the sizing chart provided. And still we end up with a garment that is way off. This might not be true for your patterns, but it happens – and more often than you might expect. While I think I understand what you’re trying to say and where your blog post is coming from, I think it goes too far to say it is “dangerous and damging to use the term ‘runs big'” – because in fact this might be accurate feedback.
Yes, there might be a knowledge gap between formally educated sewists (as yourself) and hobby sewists without any education (as myself). We amateurs might not always get our terminology right, but I am absolutely convinced most of us are giving constructive and honest feedback to the best of our knowledge, without any mean intentions. Also, I think your expectations of the kind of feedback your average hobby sewist can provide is too high (ie stating exact measurements for ease in the hip of our finished garment etc, as you recommend in your blog post).
I’m all in for keeping an open dialogue between hobby sewists and professionals to exchange knowledge and give feedback. I actually think we all should strive to provide constructive, thoughtful and useful feedback with best intentions. This is so beneficial for both sides! And as long as I stick to general conversation and feedback etiquette, I definitely don’t appreciate being lectured on what I can or can not say on my personal social media account.
I’m looking forward to many more constructive exchanges,
X Melanie aka @thesewmelier
Melanie, are you serious? No one forced you to read this. And Adrianna is not lecturing you or anyone else. Also, how do you know she is a formally educated sexist? I don’t think she went to sewing college??. Apologies if you did, Adrianna…
Personally, I’m not a formally educated sewist, just someone who has learnt from experience, sewing books, and Burda. I am 100% in agreement with everything in this post. I’m so over seeing complaints based on bad choice of sizing or unnecessary sizing down, mostly because most people seem to be obsessed with showing their figure, or emphasizing their waist – maybe drom watching too many makeover programs…
For instance, when there are a multitude of fit and flare dress patterns, why do so many sewists instead make the Fringe dress, or Myosotis, size them down, put in extra darts, add ties and belts, etc etc? Some of these dresses end up looking cute, but I’ve seen a lot of badly fitting ones with drag marks caused by bad sizing, and comments about how the pattern was too big and it doesn’t look right . Why pick Paper Theory’s jumpsuit pattern which is meant to be baggy and size down so it looks wrong? There are so many other jumpsuit patterns. I could go on and on, but I won’t. Neither shall I go on IG to restate what I’m writing here, because life’s too short ??? But I have to mention the lovely Willamette pattern, why oh why do sewists make this in a smaller size and then complain it has drag marks on the underarms?
Thanks again for your post, Adrianna.
Well, I also thought “dangerous and damaging” was a tad dramatic ( personally, I’m not that easily discouraged from a pattern I like, it just makes me think more carefully about what size to make), that doesn’t mean that the whole post wasn’t interesting and good.
I think that what you describe in your third paragraph is due to some patterns trending and people wanting to make them even if they actually prefer a style with different ease. So they hack that pattern instead of looking for something closer to their vision to begin with… which is completely fine as a choice, but probably harder than it needs to be and not always perfectly successful.
Frauke, maybe a bit dramatic, true?, I’m a Mediterranean islander, so we tend towards dramatic☺️. I am like you, not easily discouraged…. yes, you’re probably right, “trending” is to blame for a lot of problems. God bless social media.
I agree with what you said in your previous comment. I grew up sewing from Burda, the fit was always as pictured. I always knew I had to downsize in the shoulders and upper back, but unlike one sewing book I own, I never blamed Burda, one needs to adjust for one’s build.
I grew up sewing from Burda magazine too! The instructions were a challenge at the beginning, but the fit was always good and very reliable. Now I lengthen 2cm in the waist, take 2cm out of the upper back and it’s perfect.