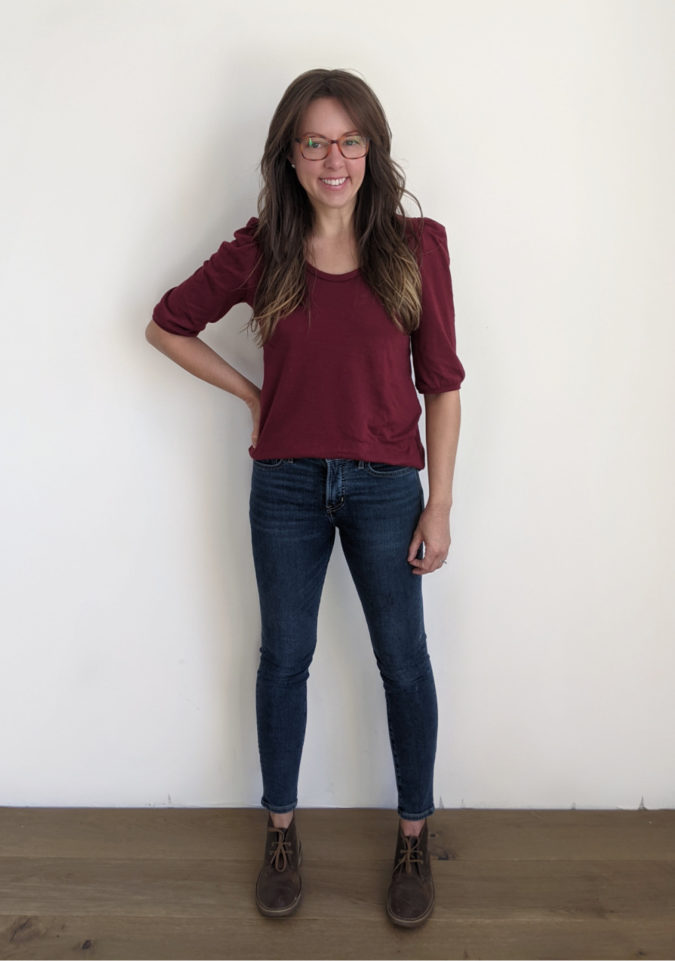
Today we’re going to apply a slight modification to the puff sleeve pattern we made yesterday to turn it into a short banded puff sleeve! The length of this sleeve is totally up to you, but based on current (2020) styles, I made it hit right at the elbow. Once again, I used the Union St. Tee for this top, but this time with the scoop neck option.

This tutorial could not be easier, so let’s get started so you can get sewing!
Short Banded Puff Sleeve Tutorial
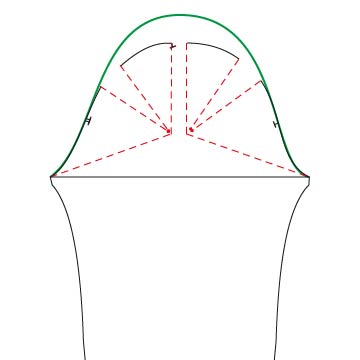
Step 1: Use this tutorial to draft the puffed cap sleeve if you haven’t already.
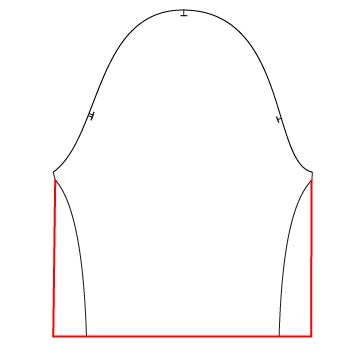
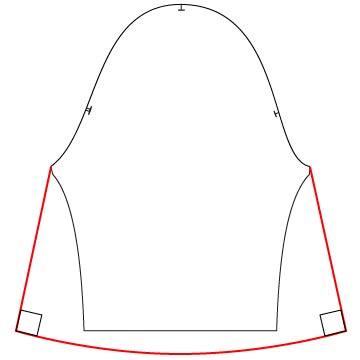
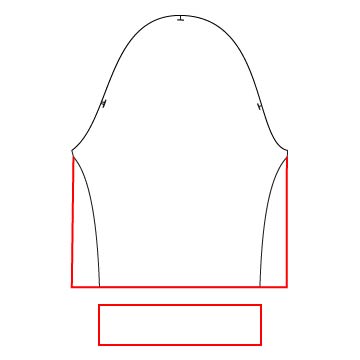
Step 2: Draw vertical lines straight down from the bottom of the sleeve cap to establish a wider bicep and sleeve. Note that a vertical line is the minimum you’ll need to add some volume at the hem. You could also extend these lines outward. The more obtuse the angle, the more volume at the hem. Just make sure the bottom corners of the hem maintain a 90° angle – this will cause the hem to be curved at the center. I used the first option for my top. The length is up to you, but for reference I cut mine an inch above the view B cut line on the pattern piece. I have very long arms, so if you want yours to hit where mine hits, measure yourself first. You may need to remove 2 inches.
Step 3: Draft a band for the bottom of your sleeve to establish the gathering at the hem. The band should be fitted around the circumference of your arm at the point where it sits. Use the width of the original pattern piece to draft a band that is fitted but not tight. I prefer this measurement because it creates a band that holds to your arm but doesn’t get “caught” on it when you raise your arms. Ie: if the sleeve gets pushed up your arm, it will fall back down to the appropriate place when you lower your arms. If you prefer it to be more fitted or looser, you’ll need to draft it appropriately. The height is also up to you, but I used a standard 2″ height for a 3/8″ seam allowance, for a total finished height of 5/8″.
Sew the band to the sleeve in the normal way you’d sew a wrist or waistband. If you need instructions, you can also use the ones included in the Union St Tee pattern for the neckband. I recommend running a gathering stitch around the hem of the sleeve before attaching the band to make sewing easier and to keep the gathers evenly distributed, but you could also just stretch the band to fit and hope for the best. Either way, be sure to steam it like crazy when you’re finished sewing to trigger the fabric’s stretch recovery.
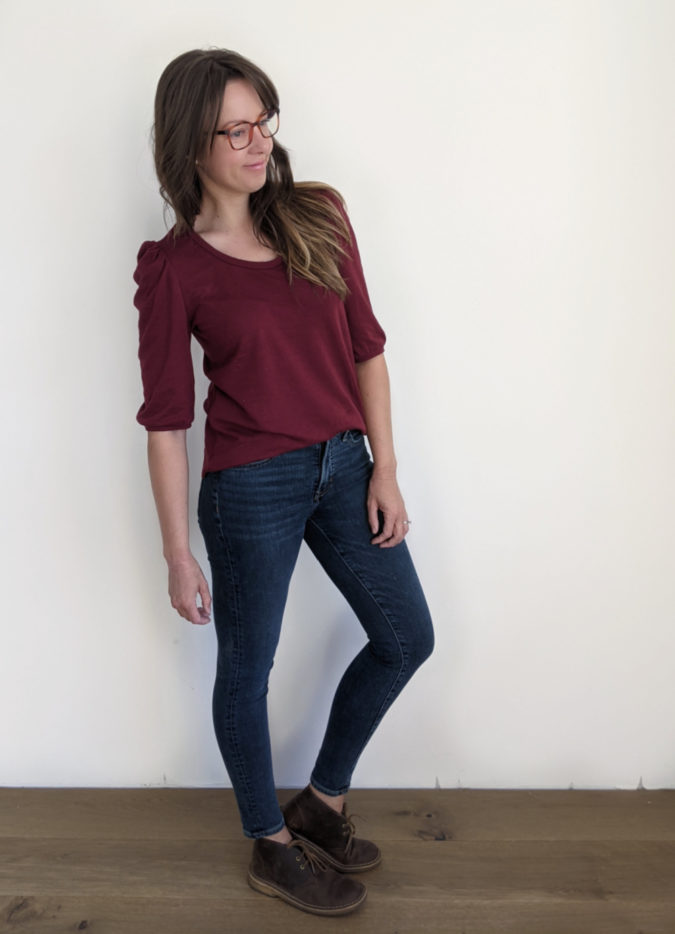
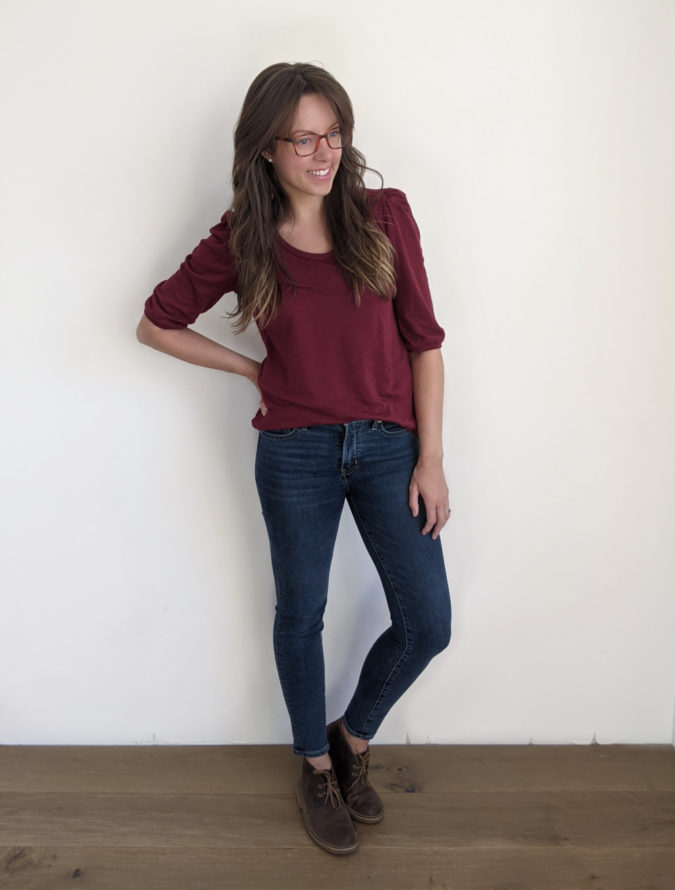
And that’s it! I’m SO in love with this top! It is the perfect mix of casual and pulled together and just looks so cute. I used a great soft, medium-weight sweater knit for my version and I highly recommend using this type of fabric. A micro french terry, ponte, or double knit would react the same way.
Sources
Sweater knit: gifted
Jeans: Revtown
Shoes: Desert Boots from Clarks
Glasses: Eye Buy Direct
