Hi pregnant ladies! First of all, congrats! You’re going to have a cute new little human to sew for soon! But in the meantime it’s time to take care of yourself, and that includes some much deserved selfish sewing. Just because your shape is changing doesn’t mean you have to ditch your old sewing patterns or buy new ones. Altering any knit tee pattern to be a maternity top is super easy and gratifying. And unlike buying a regular knit tee from Target, it might even be cheaper to sew one than to buy one! Maternity clothes tend to be inexplicably more expensive, especially when you factor in cost per wear.
There are several ways to do a maternity hack depending on your shirt pattern, the fabric you’re using, the trimester you’re sewing for, and your personal preferences in fit. I’ll go over a few of the options at the end of the post, so make sure to keep reading! Here’s what I did for my Lane hack:
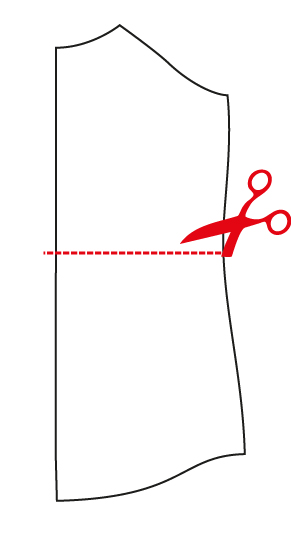
1. Cut across the front piece of the Lane at the narrowest point.
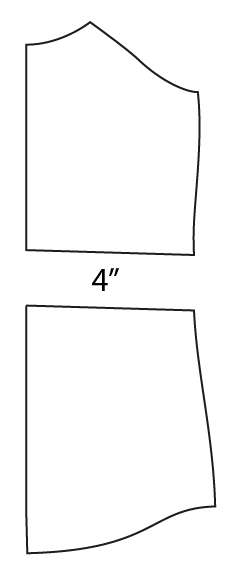
2. Separate the two pieces by the desired amount. 4 inches is what I suggest for average height (around 5 feet 6 inches), but you can add less space if you are petite or are only sewing for the first and second trimester. For reference, my model here is about 5’2″ so you can see that it’s a bit long on her. However it’ll also last for the next 10 weeks of her pregnancy without getting too short, so that’s something to consider as well.
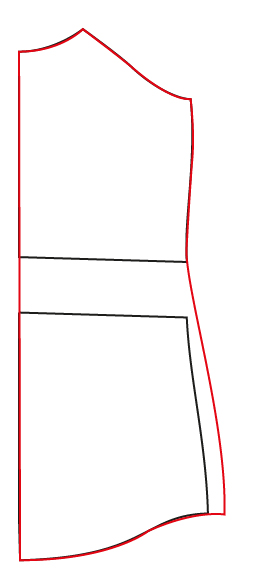
3. Draw in a new side seam. For this shirt, I graded out the hip to the next larger size. You can also make your regular size ungraded for a more fitted shirt if your fabric has good stretch (greater than 50%).
And that’s it! How easy was that? My friend remarked that I made this shirt faster than she could’ve driven to Target and purchased one (especially with all those bathroom breaks amirite? 😀 )
I promised a few more techniques for maternity-izing your t-shirts, so here you go:
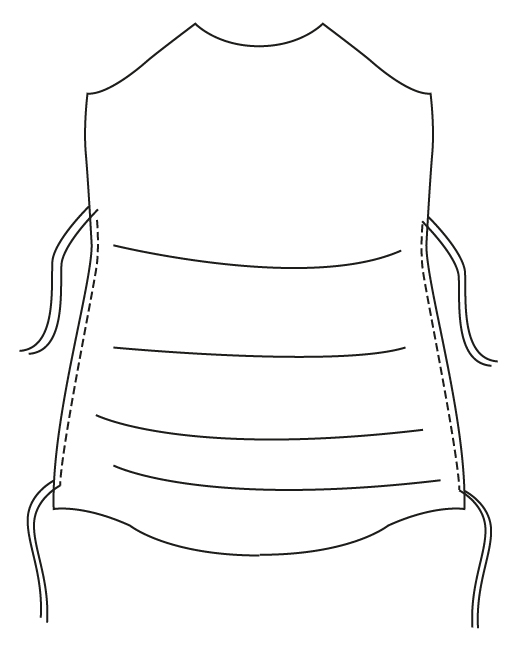
First up, you could use this tutorial to do the same treatment on the back and have gathering on the front and back. This would provide the most growing room of all the options.
You could also simply lengthen the entire shirt and leave out the gathering as long as your fabric has plenty of stretch (greater than 75%). This will make a cute fitted tee to really show off that bump!
Another cute option would be to grade the shirt out at the waist and hip and add a band to cinch it in under your baby bump. The Lane comes with a band option, but if you use it I would suggest lengthening the shirt first to make sure it sits under the bump.
Plenty of options here, just choose the one that you like best!
Happy sewing, mamas!


That’s super cute! I kinda want one and I’m not even pregnant!
I’m thinking that I shouldn’t lengthen it as much and put the gathers on the side to hide the extra pounds from the last kid! This is super cute, and way easier than my brain could come up with. Now to find some fabric and make one for my prego sister in law!
I’m going to try this on the key largo top!
I just made this and it really turned out well! If you’re the one with the belly, though, take it easy on yourself and don’t try to match stripes 😉
Yay for a shirt that’ll keep me covered right up to the end! Later, I’ll open up the side seams, trim it down, and have a regular Lane back, too.