
Please join me in welcoming prolific sewist and brand new mama Elisabeth from Stitching and Making. If you’ve been around the ‘gram or fb for awhile, you’ve surely seen this amazing maker. She sews, like, a LOT and her projects are always beautiful in fit and fabric. Today she’s going to share a great tutorial to turn the Union St. Tee (or any tee) into a nursing-friendly top!
After eyeing quite a few stylish nursing tops from those boutique stores I’ve seen in ads, I decided to tackle hacking one myself. This version has two front layers, with an opening in between the two layers in the top of each side seam for nursing access. The Union St. Tee is such a basic staple; it worked perfectly for this tutorial.


- After cutting out all pattern pieces as the instructions direct, cut another front bodice piece with the same neckline as your original bodice. However, measure 4”-5” (I did 5” though I think 4” would be good too) above the original hem line, and cut your new hem line here. This will be your top layer front piece. Be sure to copy over the notches on the pattern pieces for both layers onto your fabric pieces.
- Finish the side seam edges for the bottom layer front bodice piece with either a serger or sewing machine zigzag stitch. Make sure to stay within the ⅜” seam allowance.
- Hem the top layer front piece 1”.
- On the bottom front bodice piece (the longer one), fold and press the side seams on both sides towards the wrong side by ⅜”.
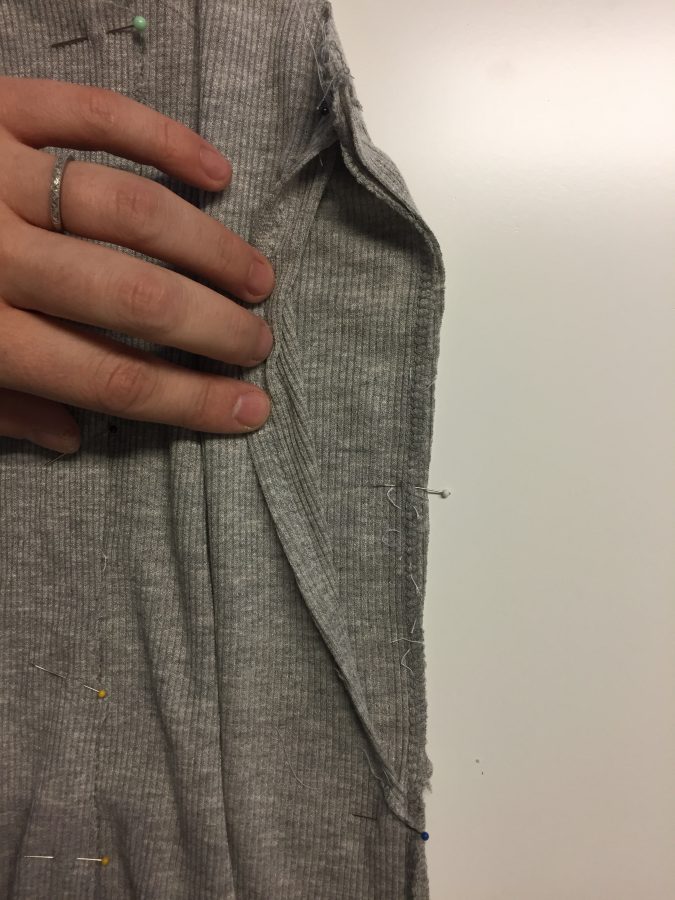
- On the bottom front bodice piece, starting ⅜” from the top, topstitch the flap you just pressed, stopping at the notch. Repeat for other side of the bodice.
- Now press the seam flat again above and below where you topstitched. These sections above and below will be caught in your side seam; the topstitched area will not. This will allow you to create the pocket opening in the side seam. Repeat for other side of the bodice.
- Lay this bottom layer down, right side facing up. Lay the top layer on top of it, also right side facing up. Align the notches.

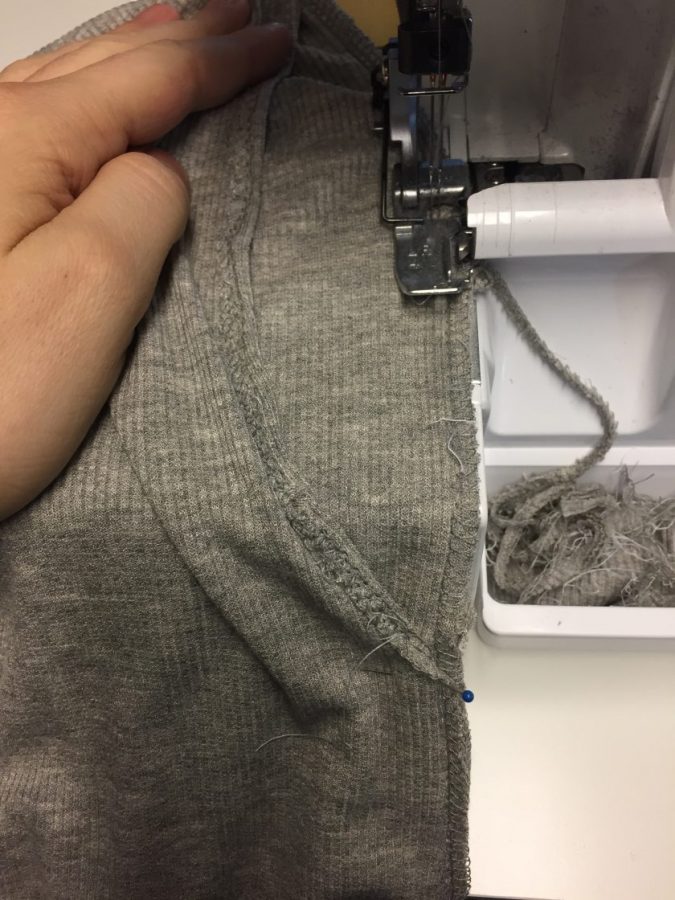
- Baste the top and bottom bodice pieces together along the side seams, only at the sections above and below your topstitching. This is where the pocket opening between the top pieces is created.
- Baste the top and bottom pieces together along the shoulder seams. Now these two pieces will be treated as one piece going forward.
- Place your bodice back and entire front right sides together. The top bodice piece will be sandwiched in the middle.
- Sew the side seams. Be careful not to catch the topstitched flap into the side seam; otherwise you will sew the pocket opening shut. You’ll only be sewing the ⅜” above the flap and the remaining amount below, but here you’ll be sewing all three layers.
- Remove basting stitches.
- Finish assembling the shirt as directed in the pattern instructions. You’re done!


I love how this modification turned out with the Union St. Tee! Just lift up the shorter front piece and pull the side seam pocket open to easily nurse your baby. Your stomach stays covered and so does everything else. 🙂 A few further ideas and notes:
- This pattern has a bit of ease already, which lends itself to this hack. However, I used a very stretchy rib knit which certainly added to the slouch factor. If you’re using something with more body, I’d recommend sizing up to ensure that you have enough room to fully pull open the pocket. Or, enlarge the pocket beyond the notch.
- Next time I think I will try modifying the hemline to a curved hem; I think it would look even nicer with the double layers this way.
- Consider the extra weight of the two front layers when choosing fabric. I’d suggest staying away from something heavy. Also regarding this, in hindsight I may have gone with the crew neckline instead of the scoop, since the does get pulled down a bit more.
That’s it! It’s awesome how quick these sew up – I’m off to make more. Thanks to Adrianna for the opportunity to guest post this one!
Thank you so much for this tutorial, Elisabeth! I know it will be so helpful to so many. It would make a great gift too!