
Please welcome Cassie with a tutorial that makes me want to drop everything and sew this up immediately! If it wasn’t a pattern release week for me, I’d be at my machine right now. I know my tween and teen would love this too! I think this would be an excellent gift for any teen or woman in your life!
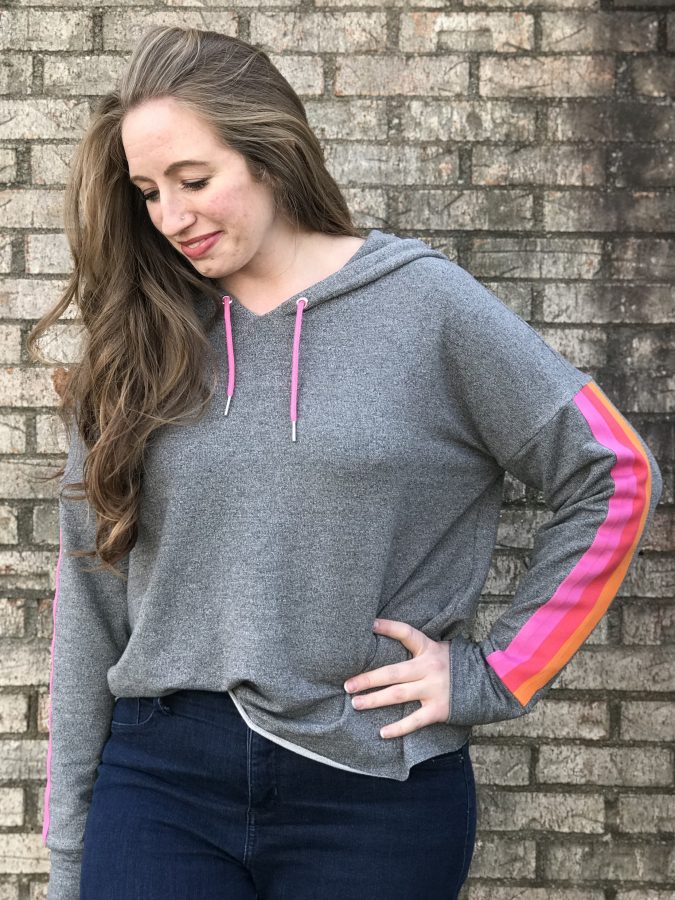
Hi there! I’m honestly delighted that something I made ended up on the blog of my favorite pattern company. I’m Cassie and this is my retro stripe Brunswick Pullover!
All I really want to wear the second there is even a slight chill in the air are cozy sweatshirts. That’s it. I barely need to own any other clothing options. And the Brunswick Pullover is ideal as far as cozy sweatshirts go.

I’ve made a few Brunswicks before and happily wear them all the time. I wanted to add a little something extra to this one for fun pop of color. This is going to be short and sweet; it barely counts as an actual pattern “hack” because it’s so simple! But I can share a few tips about how I made my retro stripe Brunswick.
Tips for Retro Stripe Brunswick Pullover
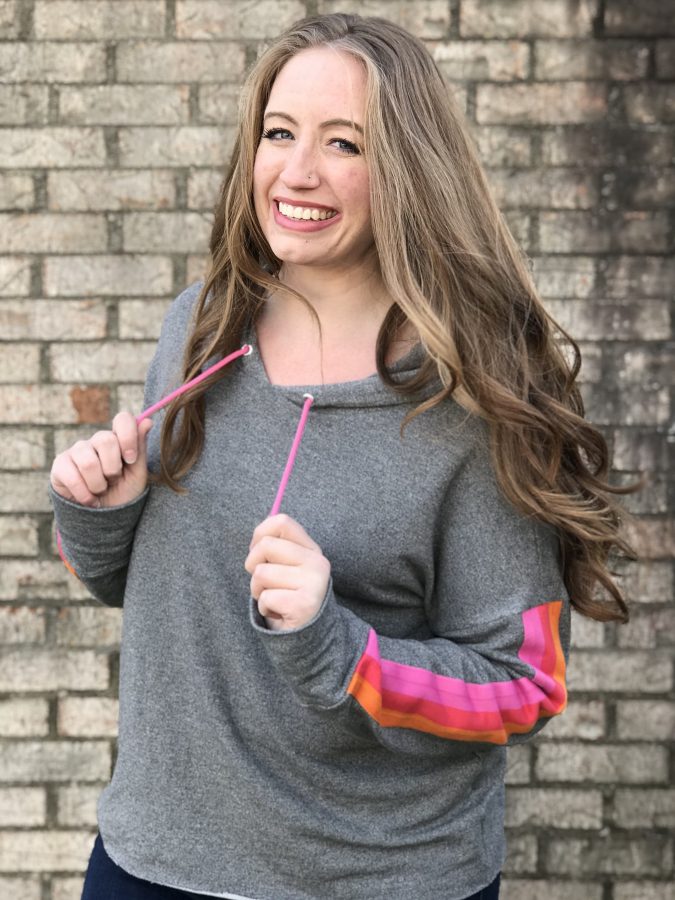
1 – Knowing I wanted to leave this top unhemmed (for maximum shirt-tucking success), I used drapier, lighter-weight fabric than the pattern calls for. My fabric of choice here is a light to medium weight 95/5 cotton/spandex blend that’s fairly stretchy and more flowy than stiff.
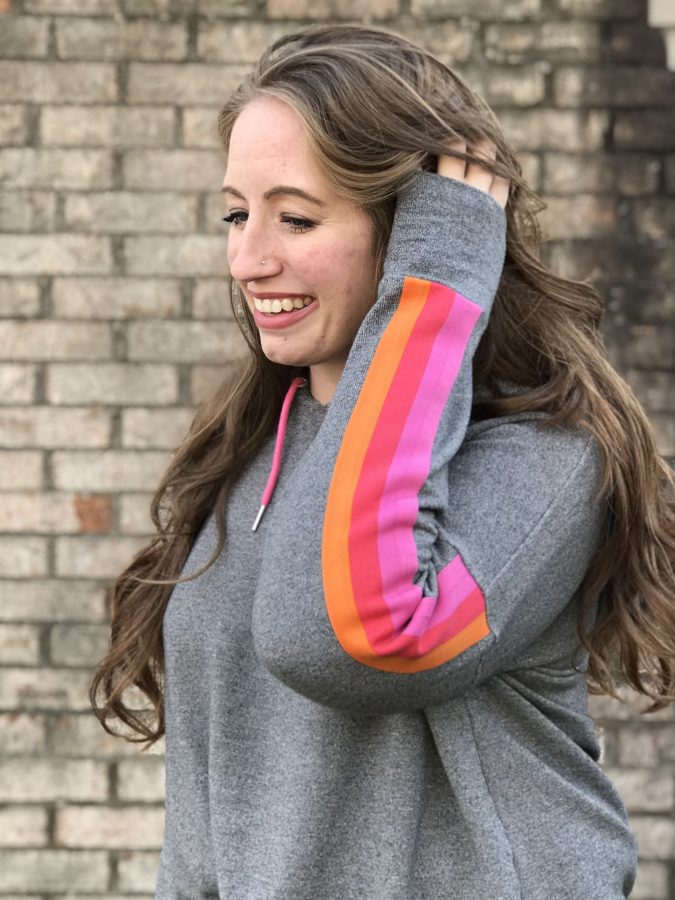
2 – I first considered sewing 3-4 individual stripes going down each sleeve out of different solid-colored fabrics, but then noticed a rainbow striped knit from my fabric stash and decided to take a little shortcut by just cutting a grouping of stripes. No regrets there!

3 – I lined up the center of the stripes with the arm hole notch to make sure they were in line with shoulder seam. I first used stretchy hem tape to fold the raw edges of the stripes under; then I attached them to the sleeve with stretchy iron-on fusible webbing and edge-stitched both sides. The top was intended to be loose, so a lengthened straight stitch worked just fine. (An edge-stitching sewing machine foot is my true love.)

4 – I cut the bottom edge of my pullover on the longer waistband line (so, not the cropped length) and then omitted the waistband because I liked the raw hem look. I’m really happy with the length.

The only issue I ran into while making this project came up when I was sewing the hood. I stared and stared at my hood and couldn’t figure out what I was doing wrong because the instructions were not making sense to me based on what I’d already sewn. After 15+ minutes of confusion, I realized I was reading the instructions for the Lane Raglan hood. I do not know how this happened as I was definitely reading the Brunswick instructions mere minutes earlier. But, anyways, crisis averted.

I love stripes and fun colors and very comfy things, so I’m going to wear the heck out of this sweatshirt. I have a few other ideas of ways to modify Brunswicks that I’m excited to try out too. It’s such a simple and quick project with the coziest results that keep me coming back for more!
Thank you so much for this great tutorial, Cassie!