
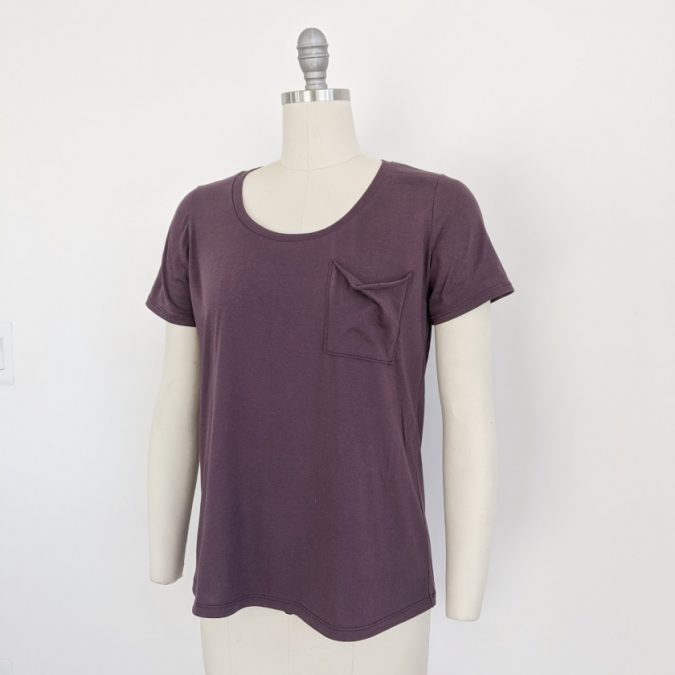
Here’s a super simple hack to add a little visual interest to any tee, handmade or RTW! A slouchy pocket is a fun addition to a tee, especially when made with fabric with excellent drape.
Fabric Selection:
I used Robert Kaufman Dana Modal for this tee, which is probably a hair too stable for this look, but it is really excellent in knits with bamboo, rayon, poly, or other blends that add slouch and drape. Because the upper edge of this pocket is left raw, it is important to pick a knit jersey that curls at the edge. Jerseys will always curl toward the right side of fabric, so look at the cut edge of any knit if you are unsure if it will work. You can encourage the curl by washing the garment after sewing the pocket or by steaming it.
Step 1:
Grab some scrap paper and a chest pocket pattern piece. If your pattern doesn’t have a pocket or you’re drafting your own, a good place to start is a 4×5 ratio. Size depends on your garment size and chest size, so I recommend cutting a sample and pinning it to your chest for optional size and placement. When you have that determined, add seam allowances.
Trace your pocket piece onto the paper.
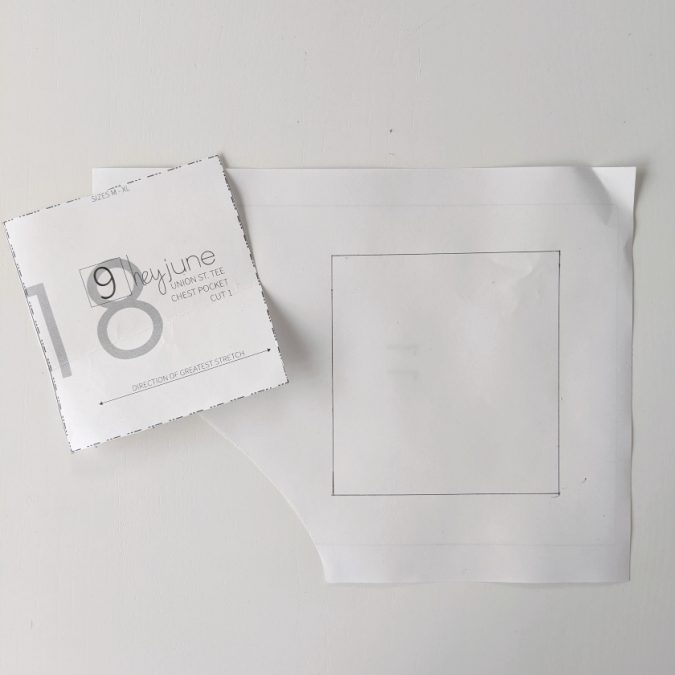
Step 2:
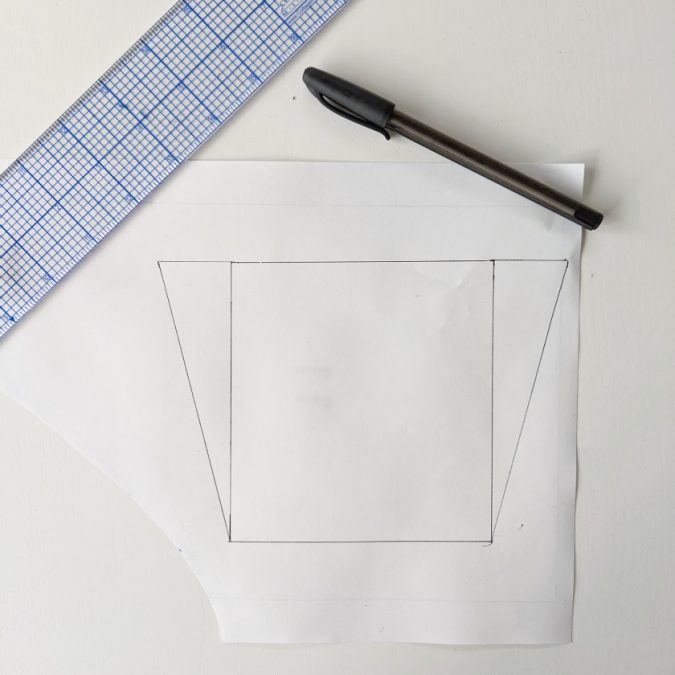
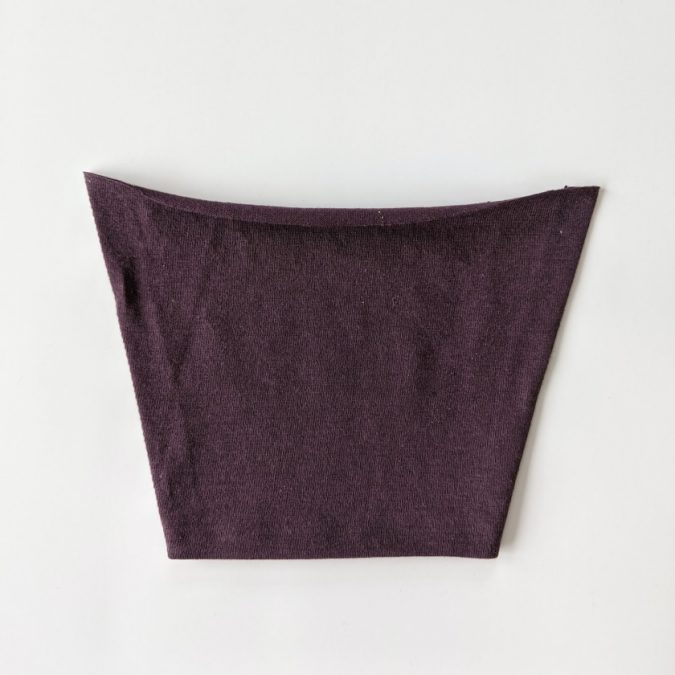
Add width to the upper pocket corners. Again, this is personal preference. The more width you add, the slouchier it’ll be. If your fabric has excellent drape, I recommend adding 1.25 inches, which is what I added for this tutorial. This is probably the max I’d recommend, and I’d reduce it for more stable fabrics. Trace a new pocket pattern, turning the piece into a trapezoid.
Step 3:
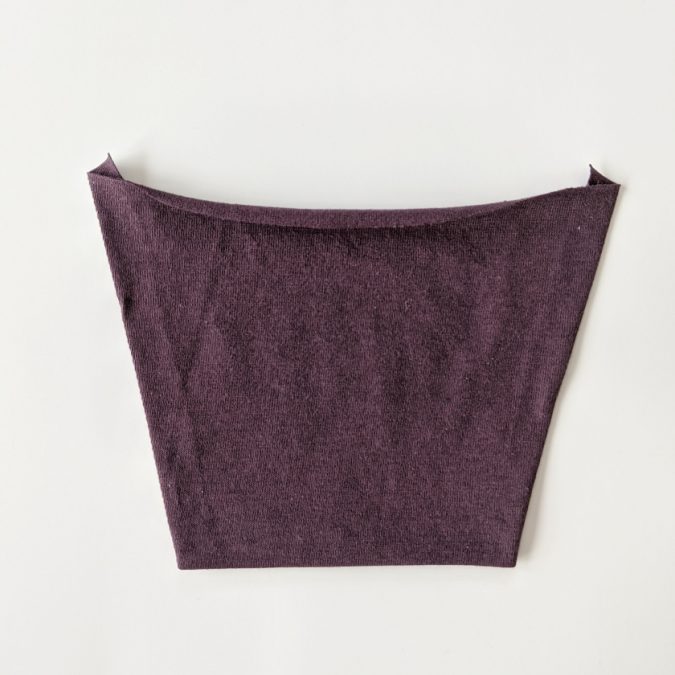
If you’re familiar with pattern drafting, you can true the pocket sides at this point, but that’s also very simple to do after cutting the pocket from your fabric. Cut the pocket piece out and press the seam allowances on the sides and bottom toward the back. I leave the upper seam allowance for a slouchy pocket because the height will be reduced anyway when it slouches. But you could also cut off the top seam allowance if desired.
Step 4:
If you didn’t true your paper pattern, go ahead and snip off the seam allowances from the sides that stick up above the top of the pocket.
Step 5:
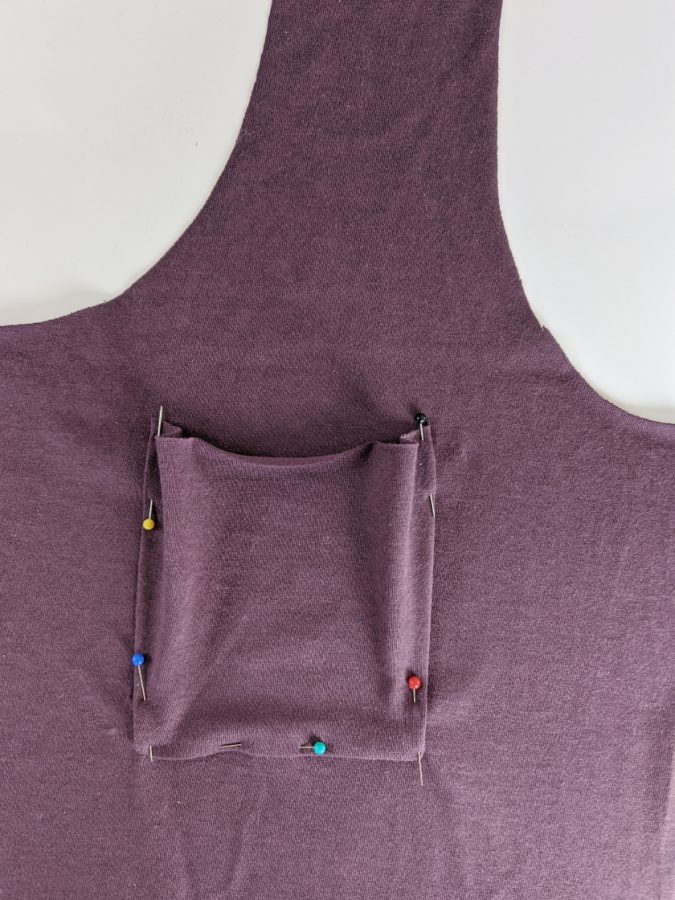
Pin the pocket to your shirt where marked (or where you determined best placement). The upper corners will still be pinned to the points marked on the pattern, and the lower corners will be directly underneath those points, so the trapezoid is forced into a rectangular shape.
Step 6:
Sew around the pocket, locking stitches on each upper corner. Use an edgestitch foot or sew as closely to the edge as possible for best results. If needed, trim more of the seam allowance from the upper corners so it doesn’t show when worn. You can also avoid trimming by sewing a reinforcement triangle stitch at the top of each side of the pocket.
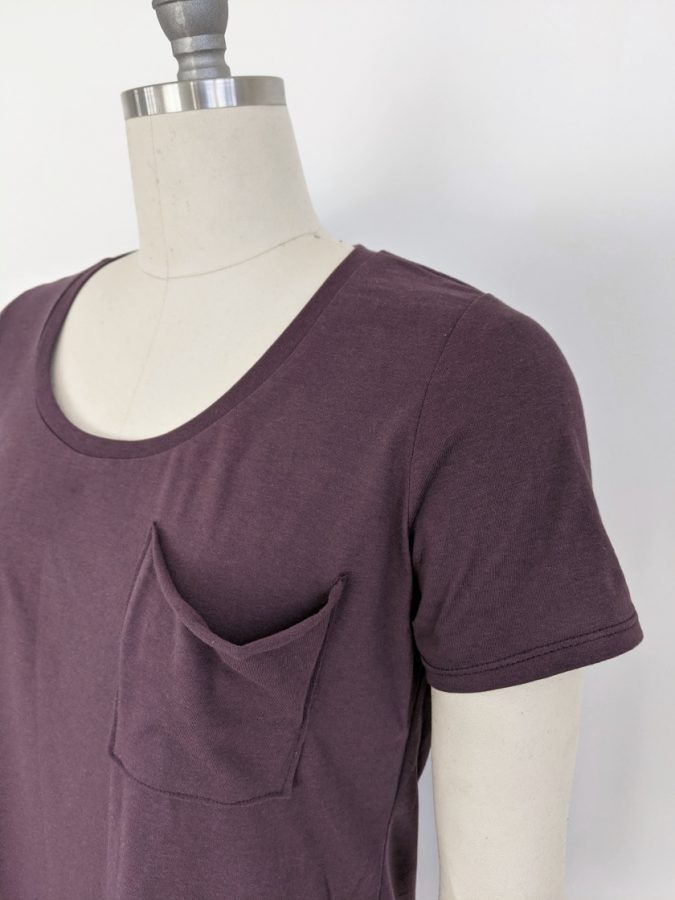
And that’s it! A simple alteration that produces a fun addition to any tee!
Shirt: Union St. Tee
Fabric: Robert Kaufman Dana Knit in Huckleberry (sold by many online fabric retailers, a quick google search is the best way to source)