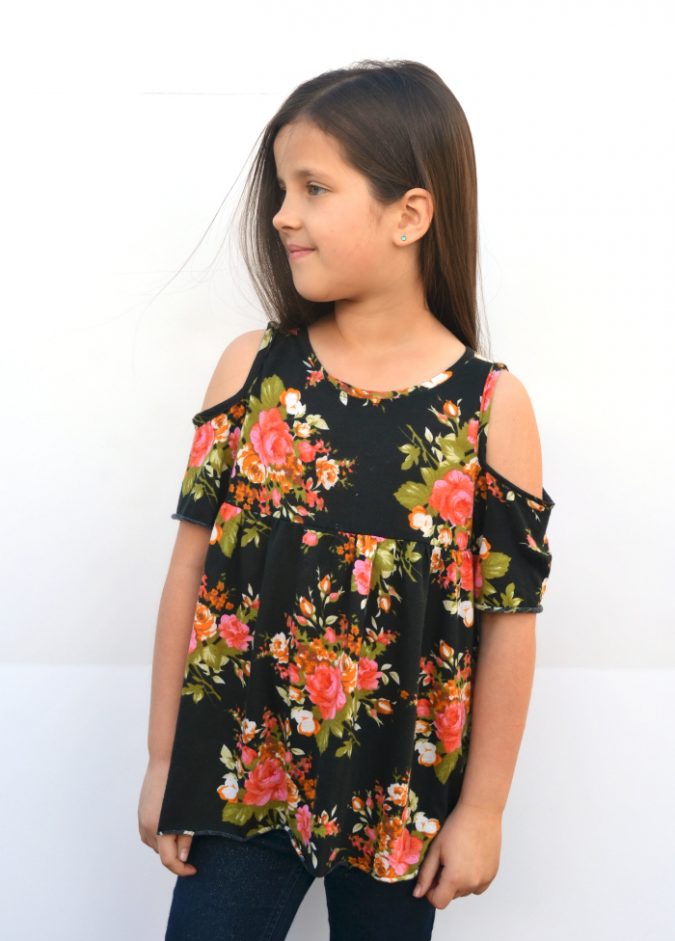
Happy Friday!! How about we celebrate with a fun tutorial? This girl has been begging me for a cold shoulder top since LAST summer and I am the Worst Mom Ever and only just got around to making her one. In fact, last week I was at a store with her and she pointed one out and I *almost* bought it, but we can do better ladies. Yes we can. Especially during Fashion Revolution Week!
So I’m here today to show you the cold shoulder top I made for her and to show you how you can make one with any pattern! Of course I depend on people buying patterns for my livelihood, so I do appreciate that you guys love new patterns. But sometimes you’re feeling adventurous and already have a pattern that is close to perfect in your stash that you just know you can hack. If that’s your current mood, follow along, because this hack is SO easy!
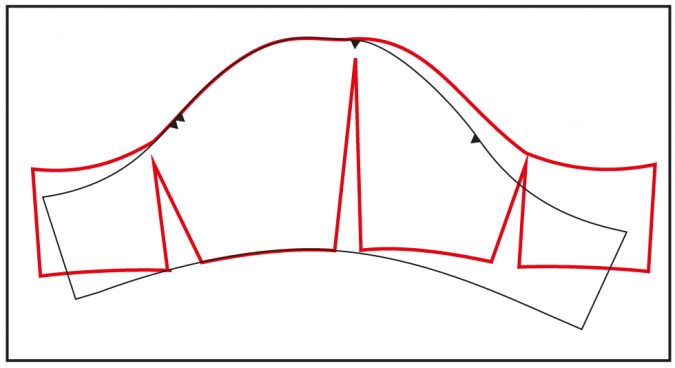
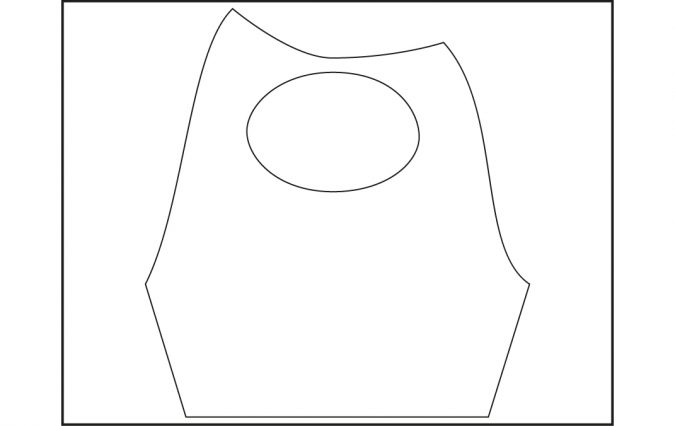
Ok, step 1. This part isn’t necessary, but I really wanted a butterfly style sleeve to lend this shirt a boho vibe. I started off with the Linville Romper and Dress as my base pattern, even though it’s a pretty structured garment and uses wovens. I used it because I knew it would fit well around the neck and shoulders and already had a sleeve. Anything that fits that criteria will work! I made the sleeve more fluttery by slashing it in 3 places and spreading it until the underarm seam was vertical. Then I traced around my new pattern, including the parts that got slashed and spread. I curved the hem slightly to give it a nice shape.
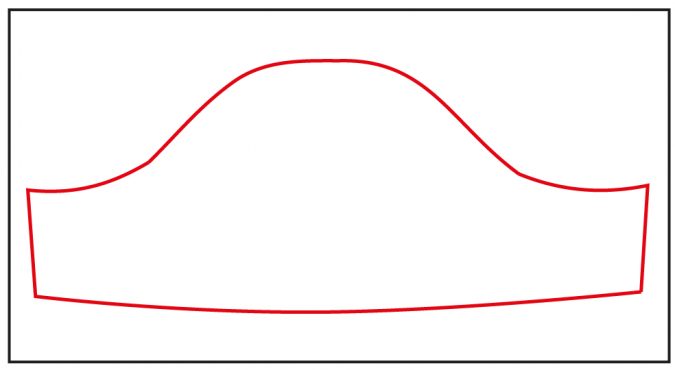
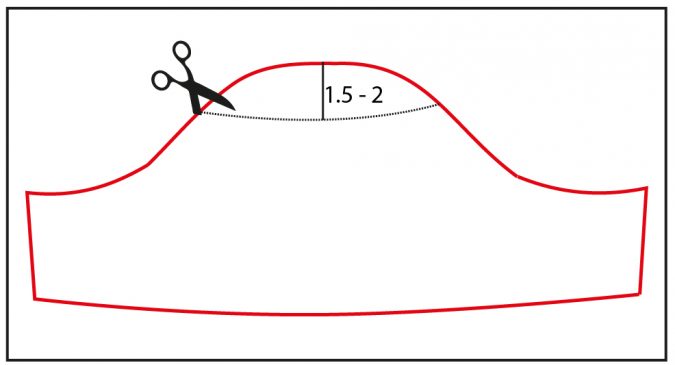
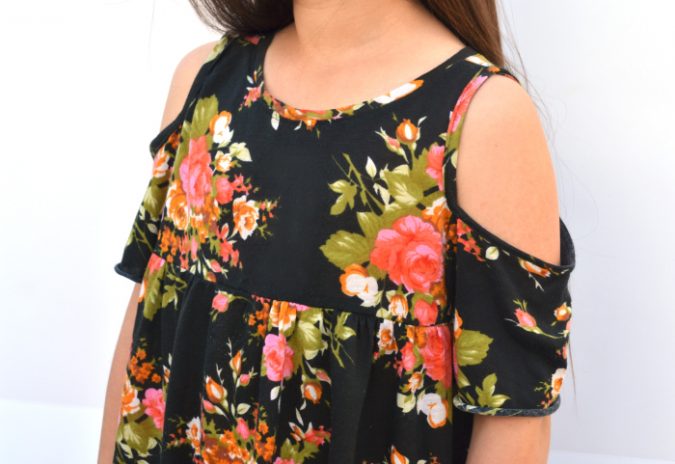
2. Now you’ll cut the cap of your sleeve off to create that cold shoulder hole in the shirt. The biggest things to remember here are that a little goes a long way and you want the sleeve to be cut at the same height on either side of the shoulder notch. I cut mine only 1.5″ and you can see how much it sagged and draped open due to the nature of the fabric.
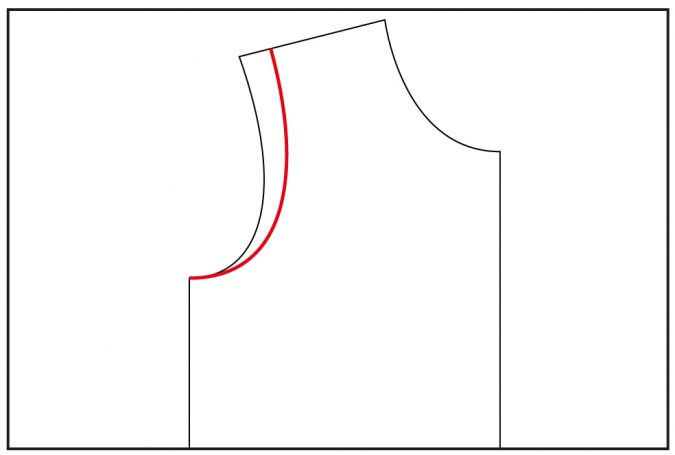
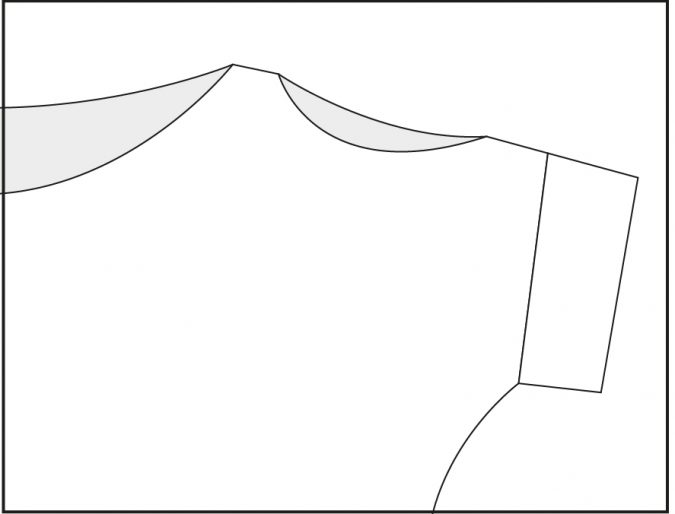
3. This step is also optional, but it really adds to the drama of the finished top if you remove some length from the shoulder seam. Start at the under arm point and draw in a new armscye meeting back up at the shoulder seam, removing about 1/2″. The Linville comes with a sleeveless option, so I just used that bodice for mine. If your pattern has a sleeveless option you can omit this step as well.
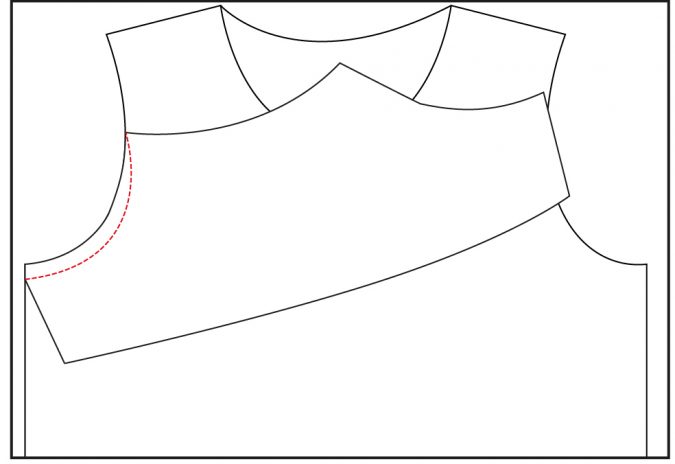
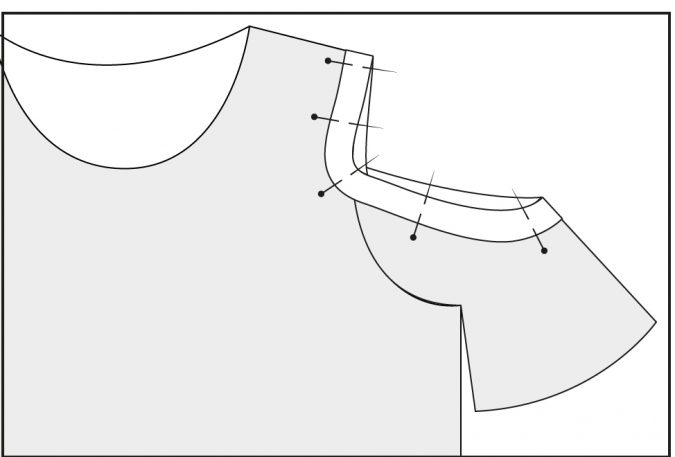
4. Now you will sew the sleeve to the shirt in the same way as indicated in the pattern directions. As you approach the cut-out portion of the sleeve you will have to angle your stitches so they go all the way to the edge of the armscye, as pictured. This is only necessary on a sewing machine. A serger will already achieve this step for you. Repeat this to attach the back of the sleeve to the back of the shirt.
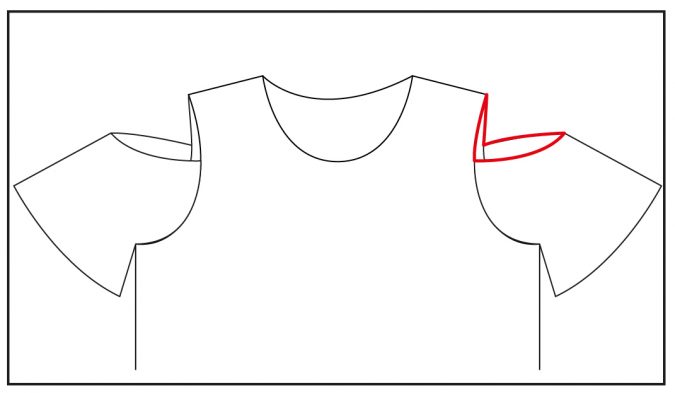
5. Sew the sleeve and side seam of the shirt together in one long seam. Most knit patterns and casual wovens will be written this way, so you can just follow the directions. For wovens, clip the underarm point before pressing and turning! Now measure the entire circular opening of your cold shoulder, as indicated by the red line.
6. Cut binding to finish the cold shoulder opening. For knits, cut with the grain so the stretch runs horizontally and make the band 1.75″ by 90% of the total cold shoulder opening, plus 1″ for seam allowances (ie: if the opening is 14, cut your band to be 12.6 + 1″.) Sew the band right sides together at the short ends with a 1/2″ seam allowance. For woven fabrics, cut the binding on the fabric bias and repeat the previous steps. Press the binding in half lengthwise, wrong sides together.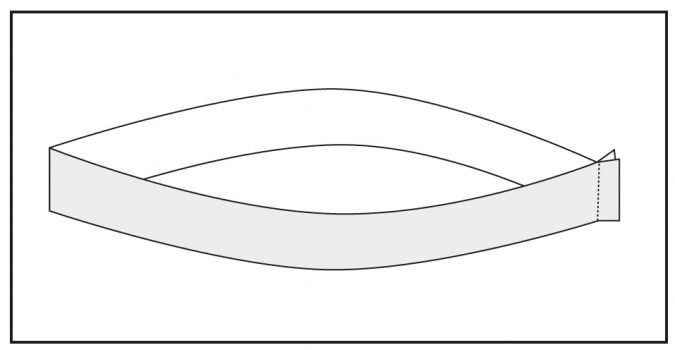
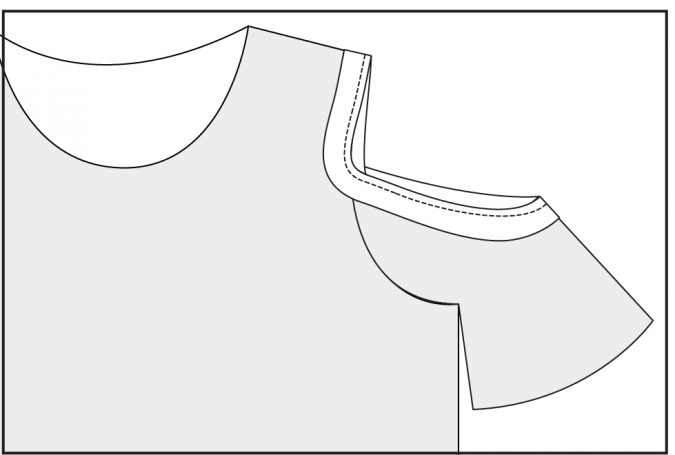
8. Sew the binding to the shirt using a 1/4″ seam allowance. Trim the seam allowances to 1/8″.
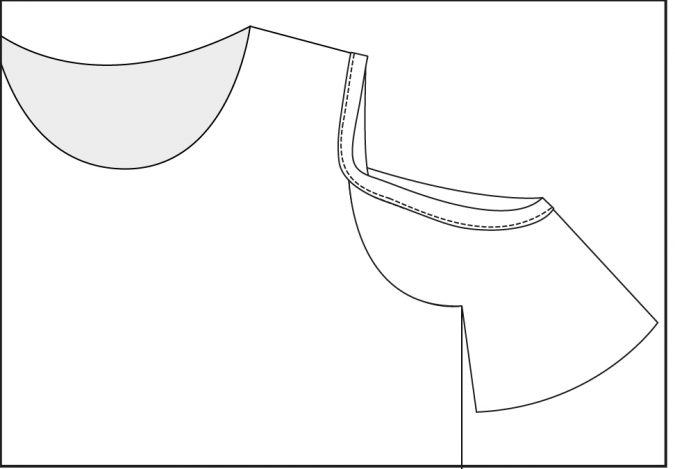
9. Turn the shirt right side out and bring the binding to the right side. Press it down against the shirt so it sandwiches the seam allowances from the previous steps between the shirt and binding. Pin in place well and then edgestitch the binding to the shirt.
And that’s it! Wasn’t that easy? There are a few other ways that you could construct a cold shoulder top. You could use facings, or you could hem the top of the sleeve and the top of the shirt armscye before sewing them together. You could also reverse steps 8 and 9 so the binding is on the inside of the shirt and not visible. You could also apply storebought bias binding in the traditional manner instead of using this method.
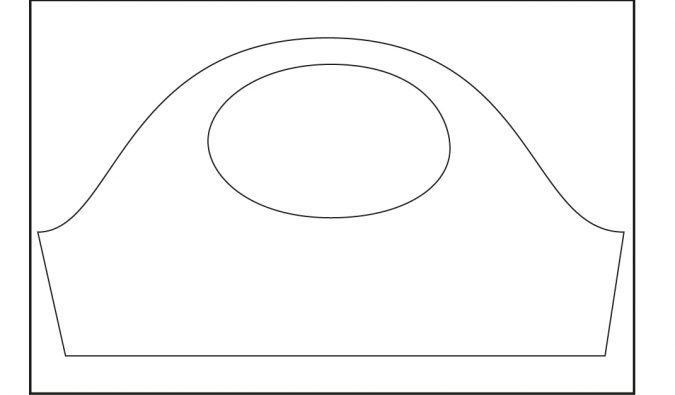
There are also other ways to cut a cold shoulder. For a regular set-in sleeve like the Union or City Park, you could simply cut a wide oval in the sleeve cap. This gives a much different look but works well for really fitted knit tops and sleeves.
Cold shoulders in knit raglans like the Camden and Lane are best constructed in the same way.
And dolmans like the Morrison and Aurora might just be the easiest to hack into cold shoulder tops! All you have to do is leave a big gap in your seam when you’re sewing the front and back together at the shoulder seam. When you’re pressing your seam allowances open, press the raw edges toward the inside the same amount as the seam allowance. You can then finish the opening by top stitching along each side and catching the folded seam allowances on the inside. So easy and so cute!
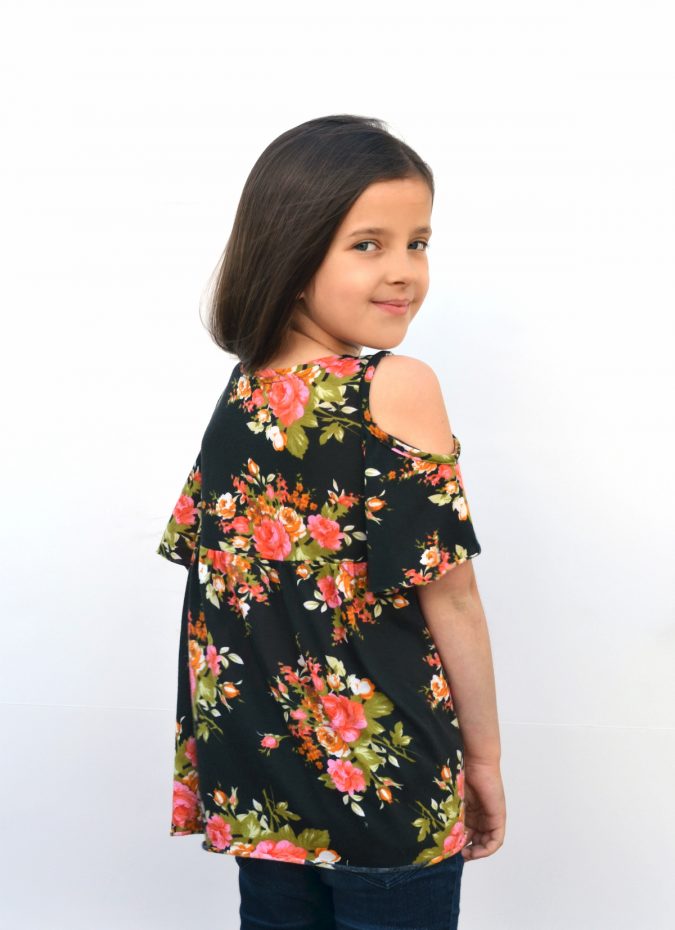
And there you have it! Several ways to create a cold shoulder top with a pattern you may already own! I made this cute floral knit top even more boho by slicing across the bodice and then attaching a gathered skirt at the empire waist.
Now she finally has her own cold shoulder top, and because the fabric came from who knows when and has been languishing in the stash for years it was basically free! Plus, mom-made beats Target-made any day of the week 😉
Happy sewing!


Thank you! this is a MEGA tutorial! one of the best enlightenment I have read in the entire blogosphere!
This is so awesome. Thank you for doing the work! Pictures make it so much easier for me. I really want to do a raglan and have nice slouchy sleeves, I’ll have to figure out how big to make the cut outs for that.
I try to write in english: are the seam allowances included or not included in the patterns? I have the patterns Linville and Monkey Bar skirt and Racerback dress.
Yes, they are always included! The specific seam allowance will be listed in the instructions.
Thank you thank you!!! I knew about the flutter but this is the best explanation for the cold shoulder I have seen!!
Do you have a tank top hack????? For men???
This is a fantastic tutorial!! Concise and how I would like mine to look too.
Thankyou! The instructions are very clear and I can’t wait to give this a try.
Thank you best tutorial out there
Thank you, perfect article that i was looking for.
I am trying to remove or undo a cold shoulder /cutout type. where the sleeve starts at the neck. Love the rest of the top I bought but really hate cut out sleeves. if I can’t fix them, will have to wear cardigans or such over- I hate these sleeves that much.
Could I split/slit the sleeve all the way down from the cut out?
Thank you for this amazing tutorial!
Nice one. Thanks