
Happy Monday friends! Normally I say that with sarcastic font, but today it really is happy because I have an awesome tutorial for you from Melissa! I’m so excited that she agreed to put this together for us. Are those tassels not to die for? Take it away Melissa!
~~~~~~~~~~~
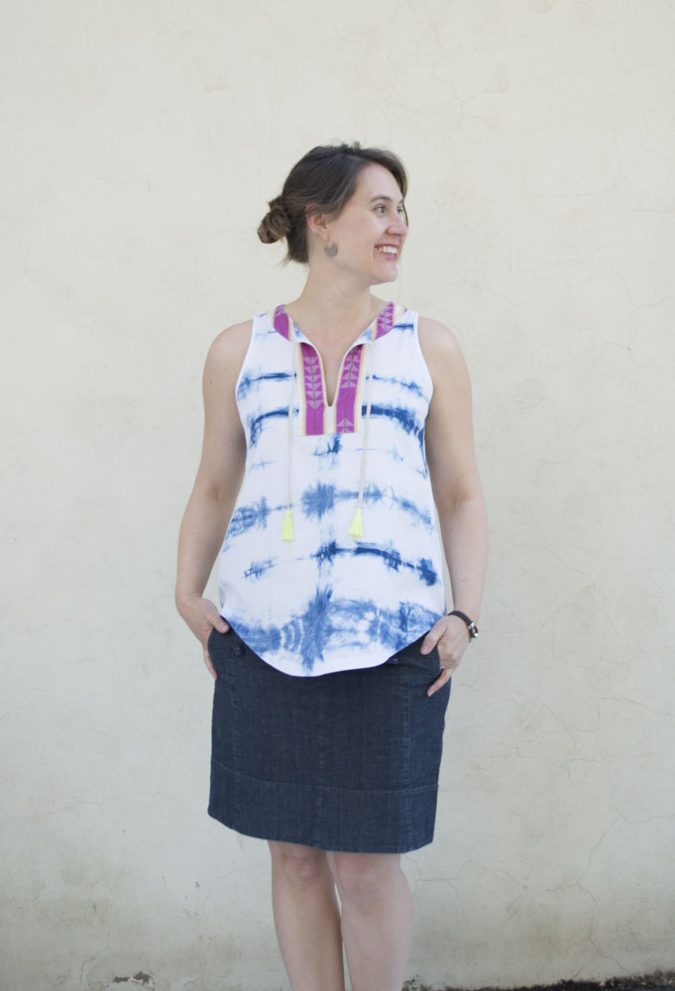
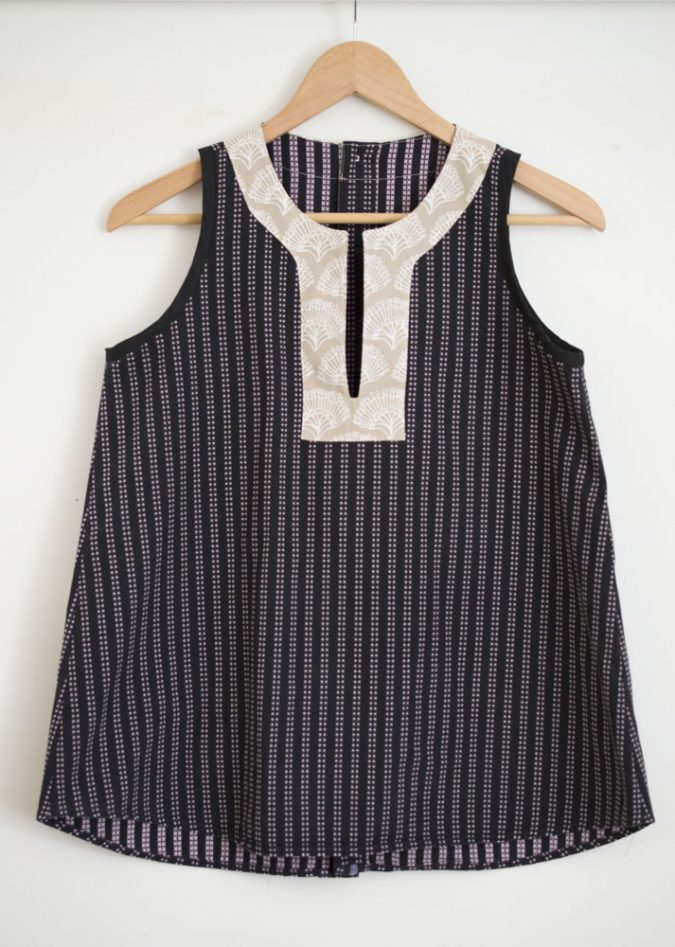
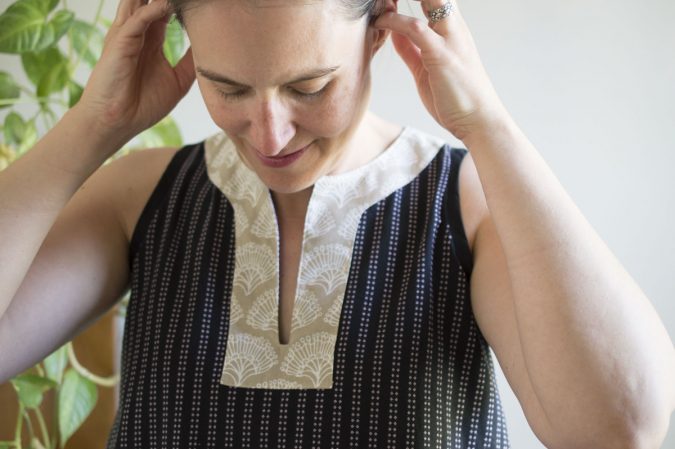
Hi Hey June friends! I’m Melissa Q. from a happy stitch and I’m so excited to share with you how I adapted my Trevi Top by adding a contrasting yoke. I think we can all admit that the Trevi Top is yet another everyday classic garment pattern from Adrianna. The woman is unstoppable! And for that I’m super thankful because for the past few years I’ve been avoiding the world of fast fashion, I’m either thrifting or making all my clothes. When it comes to making my own, it’s incredibly helpful to find patterns that can be hacked into something new. Hey June patterns are consistently good for this and I knew right away that the Trevi top was going to be yet another gem from our beloved Adrianna.
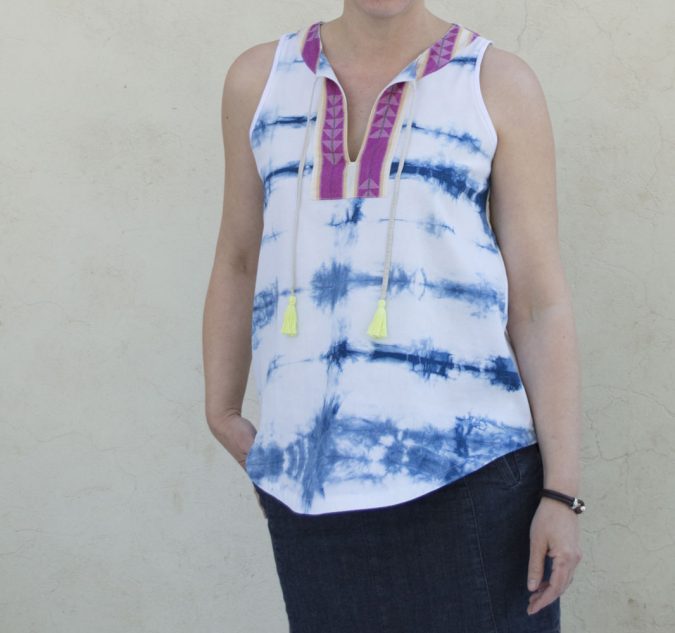
On this top, I also added a tie and a tassel, which I will discuss very briefly in this tutorial, too. It’s not hard at all and adds such great detail.
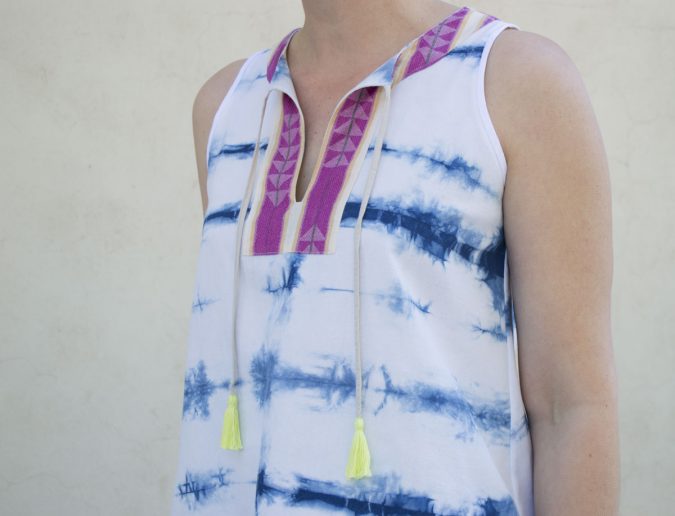
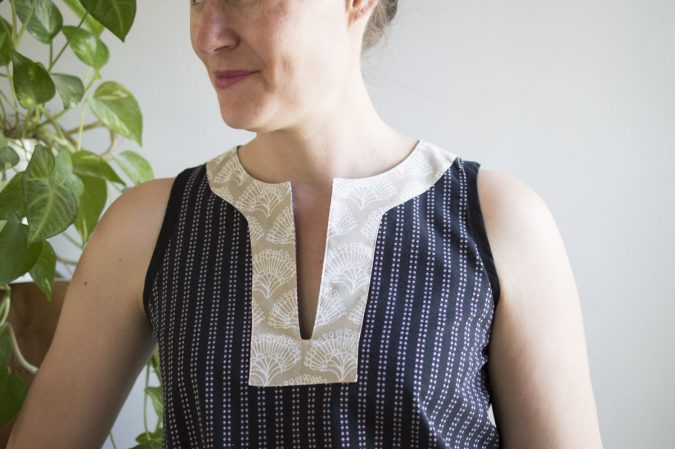
But, for the purposes of the tutorial I made a top without those details and it’s lovely as is. A contrasting yoke is just a stupendous way to use only a wee bit of fancy fabric while adding gobs of awesome to a top. This would also be incredible on the dress version of the Trevi, too! Once again…so many options!
Ok! Let’s hack the Trevi!
To start, let’s create the front and back yoke pattern pieces:
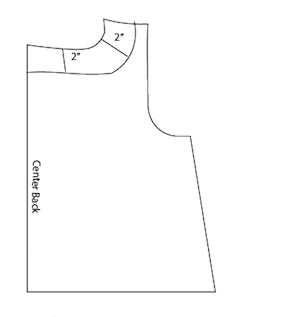
+ Draw the front yoke pattern pieces using the existing pattern piece, front and back.
- Trace the back neckline at the top.
- Measure out 2″ from the line you just drew to create a parallel line. Draw a straight line 2″ long from each end. This will be your back neck yoke piece. Set your new pattern piece aside. It should look something like the top bit of this admittedly horrible picture (your real-life pattern piece will look much better, for reals):
- Trace the front neckline at the top and again measure out 2″ to create a parallel line. This time, when you reach the center fold you will measure down 8″. Measure out 2″ from the center fold. This will be your front yoke piece. It should look something like the top portion on this pic:
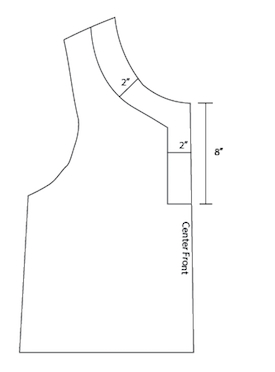
- Cut out of contrast fabric: 2 of your back yoke pieces and 1 of the front yoke, cut with the long portion on the fold.
Before we construct the yoke, we need to make a small adjustment to how the back button placket is constructed. At step 10 of the instructions, you will not be creating an accordion fold. Instead, you will simply fold the first 1″ and then fold again 1″, all folds toward the wrong side. Baste stitch at the neckline and hem, just to hold the fold in place.
Steps 13-15 stay exactly the same but skip steps 16-20 as you will not want to attach bias tape to the neck, of course.
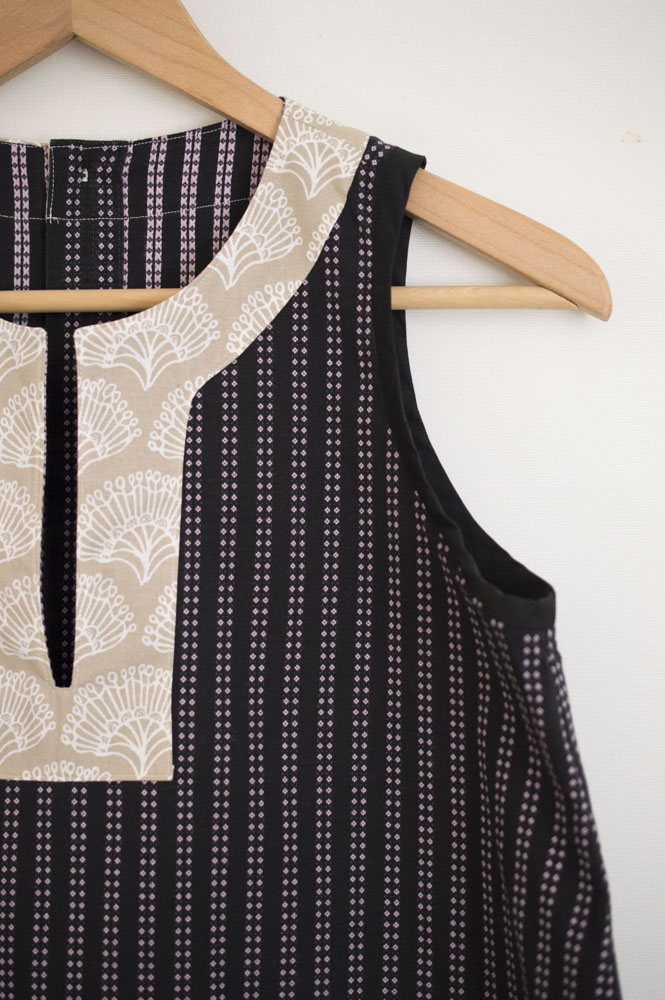
Now we are ready to construct and attach our beautiful contrasting yoke. Think of the yoke as a facing, except it sits on the outside of the garment. This can be a helpful way to visualize the whole yoke thing.
+ Stitch the two back pieces of the yoke to the front yoke at the shoulder with a 5/8″ seam allowance, right sides together. Press the seams open. If you want to, you can create a notch at the top of the center fold to mark it for later, as I did.
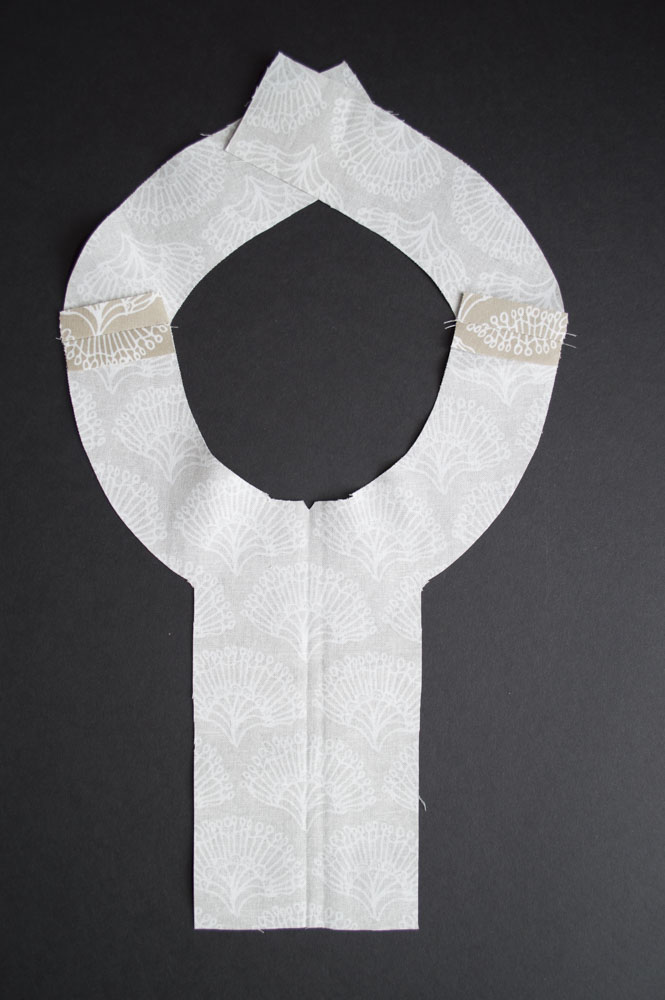
+ Press a 1/4″ fold along the entire outer edge of your facing.
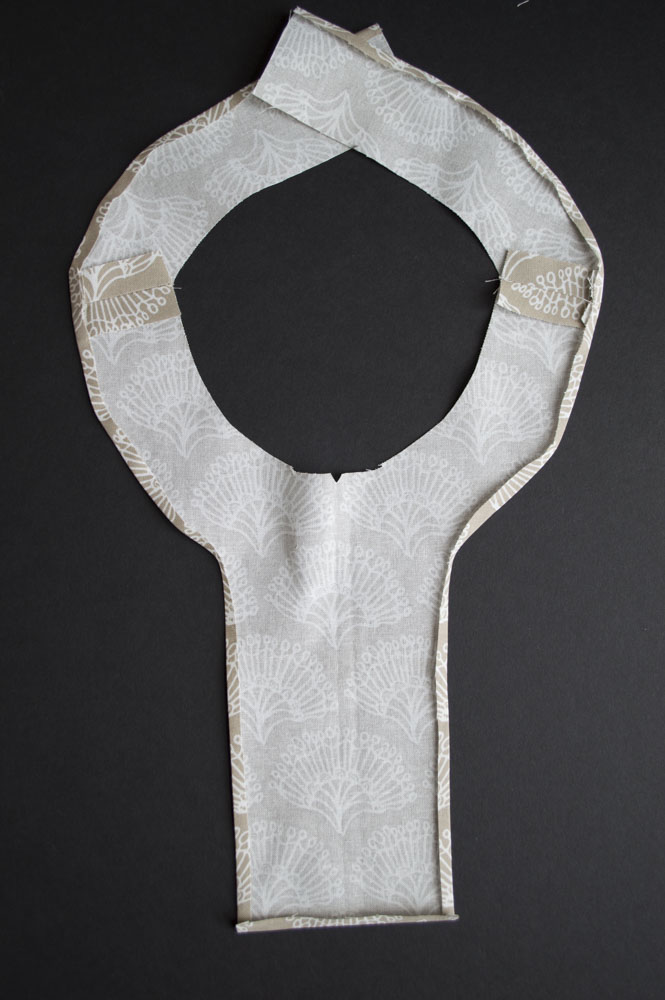
+ Attach the yoke along the entire neckline with the RIGHT SIDE of the yoke facing the WRONG SIDE of the top. Be sure to match up the shoulder seams. There will be extra fabric at the center back.
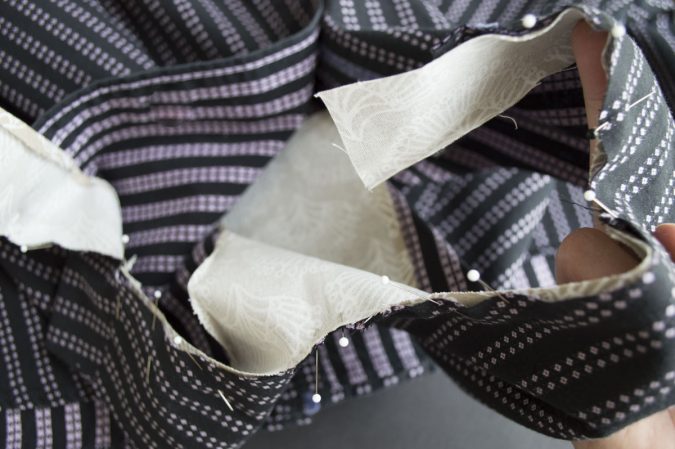
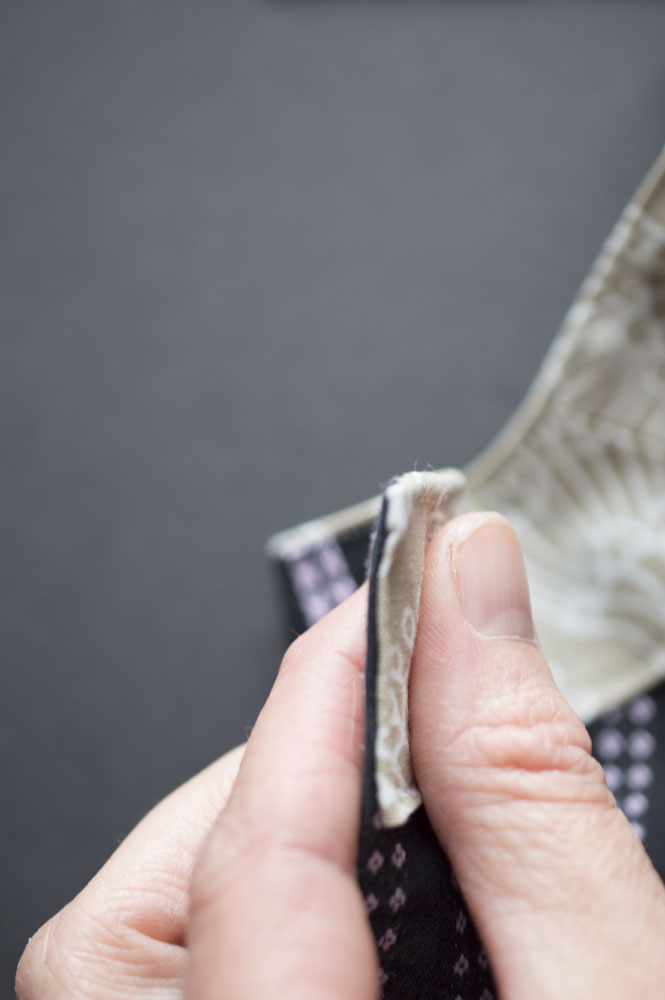
+ Leave about 1/2″ of excess fabric at the center back button placket but cut off the rest.

+ Fold the extra 1/2″ around to the right side of the top and pin in place.
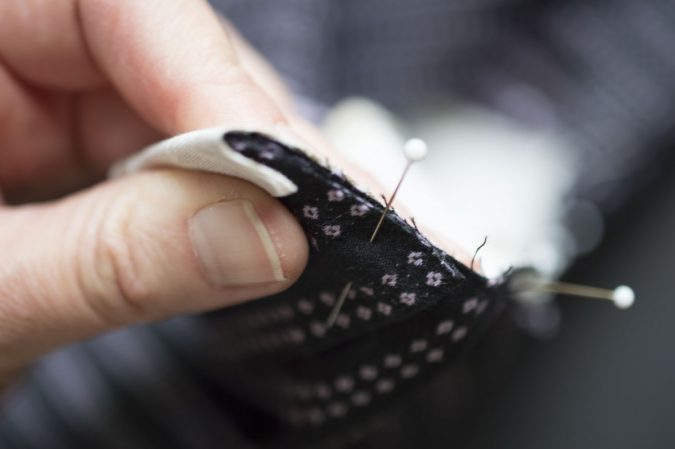
+ Sew, using a 3/8″ seam allowance along the entire neckline, including over the center back which will have yoke fabric on the right and wrong sides. Cut the seam allowance down to about 1/4″.
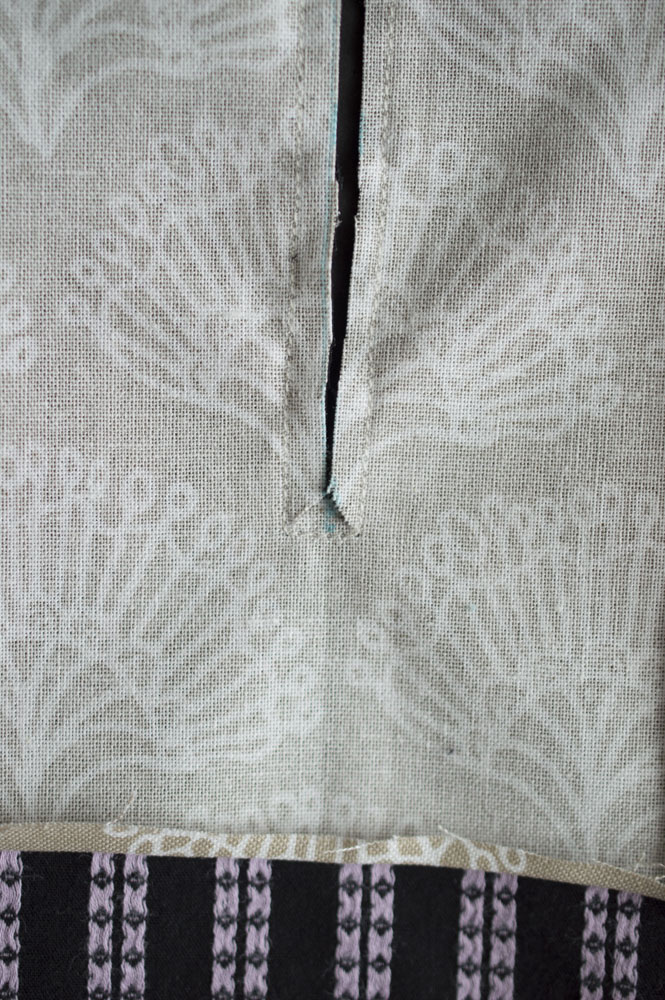
+ Pin the center front of the yoke straight down the center of the top and draw a line down 6″. If you want to add a fabric tie, as I did in my original shirt, ADD IT NOW BY PLACING THE MIDDLE POINT OF ONE LONG DRAWSTRING ALONG THE LINE AT THE TOP OF THE NECKLINE. This isn’t pictured but it’s very simple. You just want to be sure you sew over it, which you will in the next step.
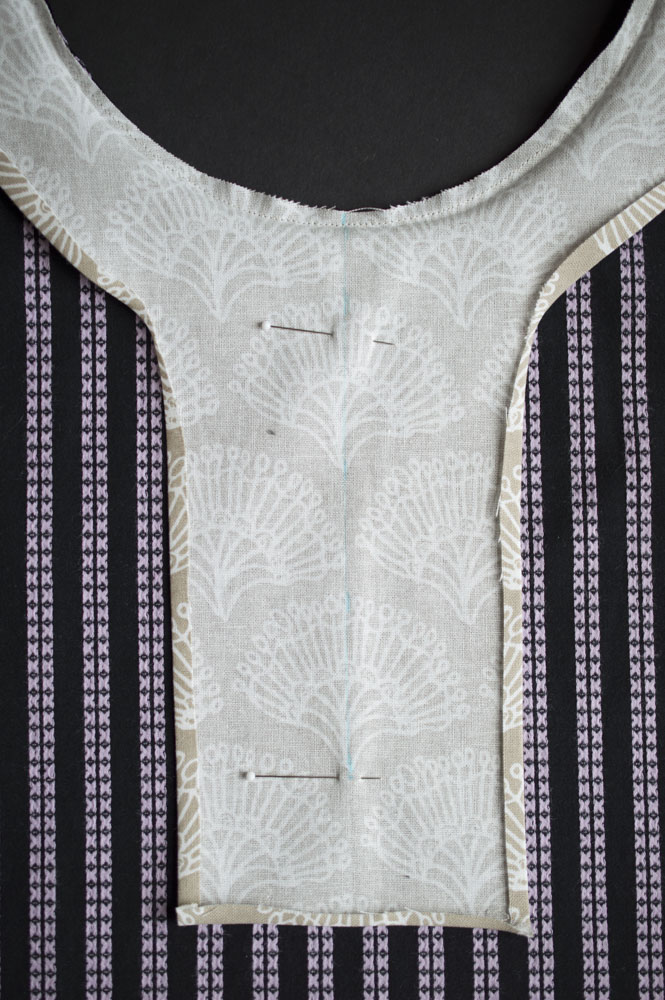
+ Sew along both sides of your drawn line and across the bottom creating a rectangle. Then cut right down the middle until you are about 1/2″ from the bottom stitch. If you pinned a drawstring in place, you will be cutting through it to create two separate ties.
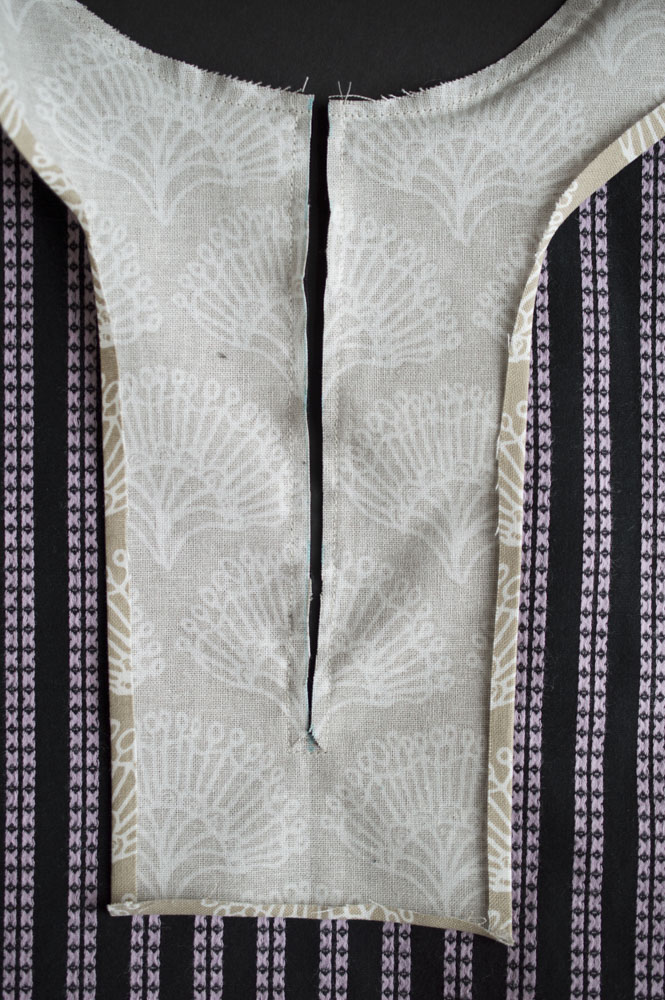
+ Cut a V at the bottom from the center line to the corners. Be careful not to cut through the stitches but don’t be afraid to get really close; a close cut will eliminate the chance of puckers.
+ Turn the yoke piece to right side, pressing it in place. If you added in ties, they can actually be used to help you pull the fabric taut at the neckline. The center back will have a naturally-formed fold, right at the end, that will line up perfectly with the back placket when the time comes to sew it in place.
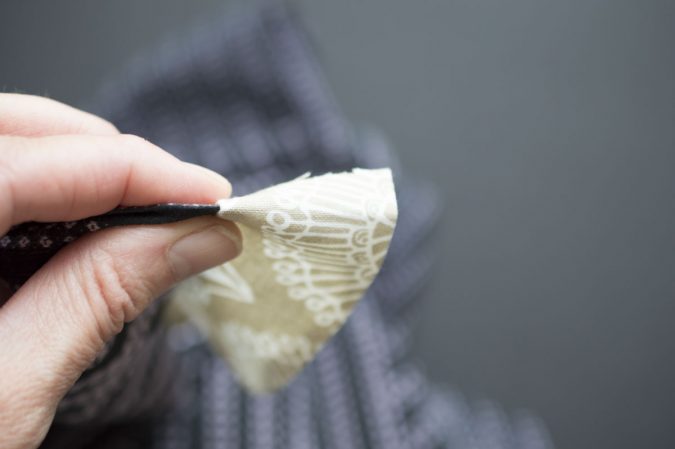
+ Sew a topstitch along the outside folded edge, the full neckline and down the center back. Basically, stitch along the entire periphery of the yoke.
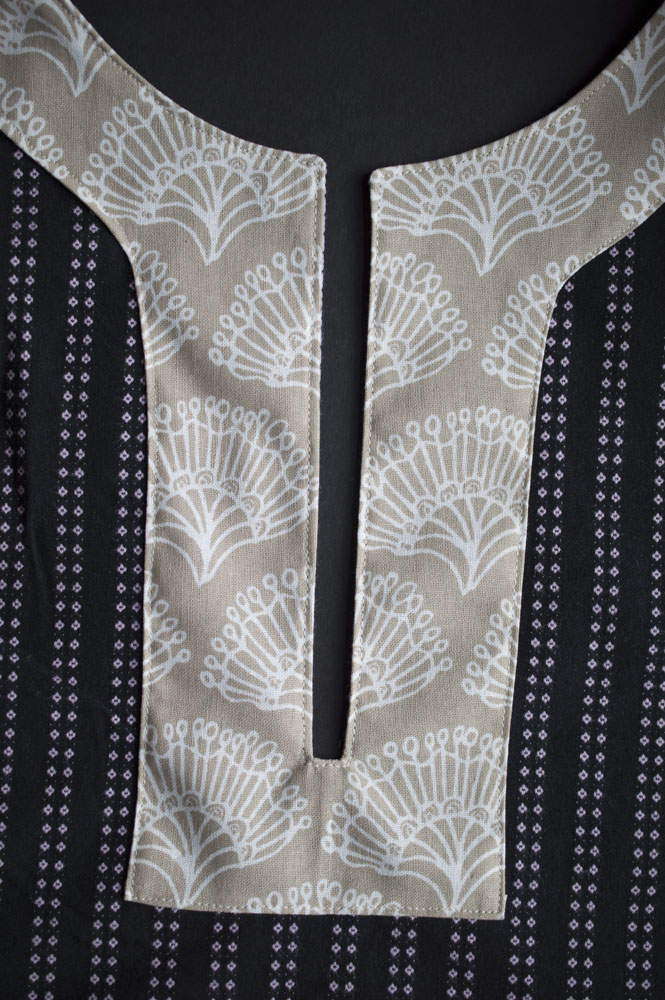
The rest of the Trevi Top construction is the same as the pattern except the hem. Because we constructed the back placket differently, the hem is also little different. Simply use single fold bias tape to finish the entire hem including the button placket. You are done! Don that gorgeous Trevi Top!
Note: You could probably skip the back button placket if you wanted to since the front opening provides more space for your head to fit in when you put the top on. I didn’t do that simply because I love how the back button placket looks.
If you want to add a tassel, I used this Martha Stewart tutorial to make mine and stitched it into the end of my drawstring/tie. I highly recommend it, tassels are probably the second most fun thing next to contrasting yokes.
Good luck with your hacks, everyone!
~~~~~~~~~~~~
Thank you SO much for this great tutorial Melissa! I want to see all of your Trevi hacks in the HJ FB group and using #TreviTop on social media!